
Staring at a stock motorcycle can feel like looking at a blank canvas. It's functional, sure, but it doesn't have your personality stamped on it. For riders who want a bike that’s truly their own, vinyl decals are the modern answer—a far cry from the permanence and high cost of a custom paint job.
Think of it like this: a paint job is a permanent tattoo. It’s a huge commitment, expensive, and you’d better love it forever. Vinyl graphics are more like a high-quality temporary design; they let your style evolve right along with you.
Why Vinyl Decals Define Modern Motorcycle Customization
The days of being locked into one expensive, time-consuming look are over. Modern vinyl has completely changed the game for motorcycle customization. You can rock a set of racing stripes one season and swap them for a custom text design the next.
This flexibility is exactly why vinyl motorcycle decals have become the go-to choice for riders today. They offer a perfect blend of style, durability, and freedom.
Affordability Meets High-Impact Style
Let's talk cost. A professional paint job can easily run into thousands of dollars, putting it out of reach for a lot of riders. In contrast, you can completely transform your bike’s look with a set of high-quality vinyl decals for a fraction of that price. You don't have to break the bank to make your bike stand out.
On top of that, the quality of modern vinyl is incredible. We use materials from top brands like Oracal, engineered to take a beating from sun, rain, and whatever the road throws at you. When applied correctly, they give you a clean, "painted-on" look that rivals traditional methods.
Vinyl decals give you the freedom to experiment. You can test new looks, rep your club or passions, and stand out from the pack without a permanent, wallet-draining commitment. It’s all about making the bike truly yours.
Expressing Your Identity Mile After Mile
Ultimately, customizing your bike is about showing who you are. Vinyl decals give you an endless palette to work with.
- Subtle Accents: Add small pinstripes or logos to your tank and fenders for a clean, classic touch.
- Bold Statements: Go big with large graphics that create a head-turning look that’s impossible to ignore.
- Personal Tributes: Honor loved ones or showcase your service with designs that carry deep meaning. You can see how powerful this can be with options like our In Memory decals.
Here at Custom Sticker Shop, we live for turning those visions into reality with American-made quality. We give every rider the tools to create a machine that reflects their own story and style, one durable, professional-grade decal at a time.
The Evolution of Biker Identity Through Vinyl
Motorcycle customization has always been about identity. For generations, riders have been finding ways to make their machines a true reflection of themselves, and vinyl motorcycle decals are a massive part of that story. Before modern vinyl, personalizing a bike was a serious, often permanent, commitment.
If you wanted to stand out, you were looking at hand-painted pinstripes or crude, unreliable stickers that couldn't handle the road. This was slow, expensive work. A painter’s hand could slip, and those old paper-based stickers would crack, fade, and peel away after a few runs in the rain or a blast of highway wind. The desire to be unique was there, but the tools just weren’t.
Everything changed with a single material innovation. The introduction of pressure-sensitive vinyl film in the 1950s was a complete game-changer, handing riders a durable, versatile, and affordable way to express themselves.
From Paint Guns to Peel-and-Stick Freedom
Imagine you’re a rider in the 1960s. All of a sudden, you can lay down crisp, perfect racing stripes or your club's intricate logo without needing an airbrush or an artist's steady hand. This wasn't just a small convenience; it was a revolution that put the power of customization directly into the hands of the biker.
This new tech democratized the custom scene. What was once reserved for guys with deep pockets or a friend at a paint shop was now open to anyone with a passion for their machine. The barrier to creating a one-of-a-kind motorcycle practically vanished overnight.
This shift was huge. Back in the mid-20th century, pressure-sensitive vinyl film, which hit the market in 1956, truly kickstarted the modern customization we know today. Before that, you were stuck with clunky silkscreened paper decals with weak glue. This new vinyl slashed replacement rates by a staggering 70% compared to 1940s-era paper stickers, letting bikes look sharp for years. As the number of registered motorcycles in the U.S. ballooned from 4 million in 1990 to over 8.8 million by 2014, more riders than ever turned to vinyl to get that custom edge. You can explore more about vinyl's fascinating journey and its impact on a deeper level.
A Canvas for Every Rider's Story
With the rise of high-quality vinyl, a motorcycle was no longer just a vehicle—it became a rolling canvas for a rider's life and passions.
Vinyl became the go-to medium for everything from patriotic symbols and military pride to pop-culture tributes. It fueled a global movement, allowing riders everywhere to wear their stories on their steel.
This evolution is still happening. Every time you see a bike decked out with a specific graphic, you're seeing a piece of this history in action. The technology has gotten better, but the core drive is the same: to build something that is uniquely yours.
- Club Affiliation: Riders could finally display their club colors with pride and precision. Clean, professional-looking die-cut logos became the standard.
- Patriotic Expression: Flags and military emblems were easier than ever to apply, giving veterans and patriots a powerful way to honor their service and country on two wheels.
- Personal Tributes: Memorial decals for fallen friends or family members became a common and powerful way to keep memories alive on the road.
This journey through history connects directly to your own desire for a custom ride. The vinyl motorcycle decals you see today are the direct descendants of this movement. They carry a legacy of freedom, creativity, and identity that has defined biker culture for decades. Choosing a decal is more than just a cosmetic upgrade—it's taking part in a rich tradition of personal storytelling.
Choosing the Right Vinyl Material for Your Ride
When you're ready to put custom graphics on your motorcycle, you'll find out fast that not all vinyl is created equal. Getting into the details can feel a bit technical, but trust me, understanding the basics is the key to an investment that lasts.
Think of it like choosing oil for your engine. You could go for the cheap, generic stuff, and it might work for a bit. But for real performance and engine longevity, you grab a premium synthetic built for the job. Vinyl is the exact same way—a cheap, no-name material might look fine at first, but it won't survive the sun, rain, and highway speeds your bike lives through.
Cast vs. Calendered: The Two Main Players
At the heart of it all, you've got two main types of material: cast vinyl and calendered vinyl. Knowing the difference will help you pick a decal that lasts for years, not just a few months.
It helps to think about making pizza dough. You can either run it through a machine that presses and rolls it flat, or you can carefully stretch it by hand. Calendered vinyl is like the machine-pressed dough—a heated vinyl mix is forced through rollers to flatten it into a sheet. It's an efficient process that creates a tough, affordable material.
Cast vinyl, on the other hand, is like the hand-stretched dough. It starts as a liquid that’s poured onto a casting sheet and then baked. This creates a much thinner, more flexible film that has no "memory" or tension built into it.
Why the Manufacturing Method Matters
That difference in how they're made directly affects how the vinyl behaves on your bike. Because it was stretched into shape, calendered vinyl always has a slight tendency to shrink back over time. It's a fantastic, durable choice for flat surfaces or simple curves, like you'd find on a truck tailgate or a flat part of a fairing.
A perfect example of a top-tier calendered vinyl is Oracal 651. It’s a professional-grade material known for its 7-year outdoor durability, making it a reliable workhorse for thousands of applications.
But when you need to wrap a decal around the complex curves of a fuel tank or a contoured fairing, cast vinyl is the undisputed champion. Its flexibility lets it conform to those intricate shapes perfectly without shrinking, peeling, or cracking under the stress.
This chart shows just how much modern vinyl has transformed motorcycle customization compared to the old-school methods.
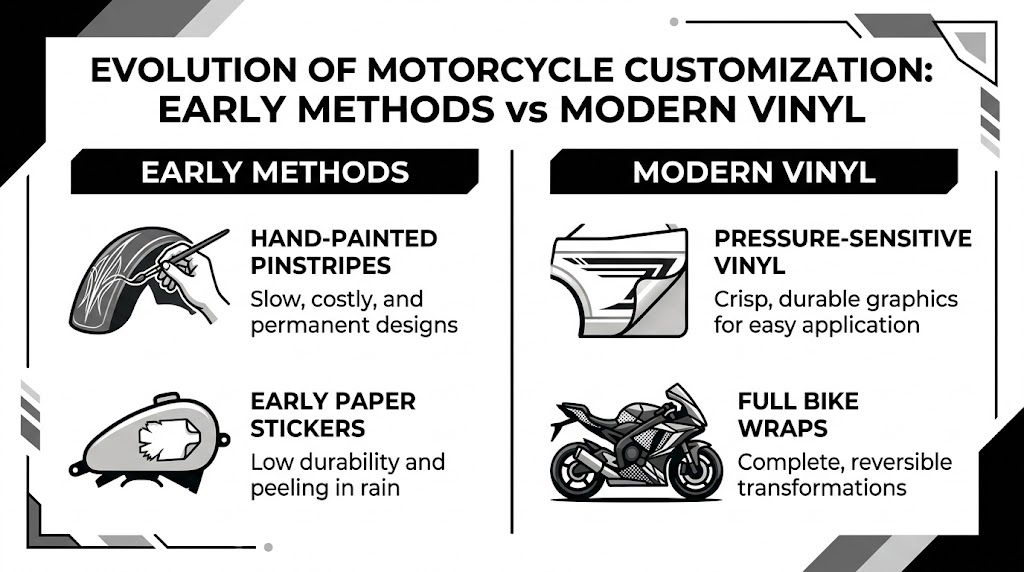
As you can see, today’s vinyl offers durability, versatility, and ease of use that just wasn't possible with the permanent and fragile methods of the past.
Comparing Vinyl Decal Materials
To help you decide, here’s a quick breakdown of how these different vinyl types stack up. It’s a good guide for matching the right material to your bike and your budget.
| Feature | Cast Vinyl (Premium) | Calendered Vinyl (Intermediate – e.g., Oracal 651) | Cheap/Import Vinyl |
|---|---|---|---|
| Durability | 8-10+ years | 5-7 years | 1-2 years |
| Conformability | Excellent; ideal for complex curves (tanks, helmets) | Good; best for flat surfaces and simple curves | Poor; prone to bubbles and wrinkles on curves |
| Shrinkage | Extremely low to none | Low, but can shrink slightly over years | High; prone to shrinking, cracking, and peeling |
| Thickness | Thinner (2-mil) | Thicker (2.5-3-mil) | Varies, but often thick and stiff |
| Color Stability | Excellent; colors stay true and vibrant | Very good; minimal fading | Poor; colors fade quickly in sunlight |
| Best For | Full wraps, complex logos, high-end graphics | General vehicle lettering, flat panel graphics | Temporary decorations, indoor use only |
Ultimately, choosing between a premium cast vinyl and a workhorse calendered vinyl like Oracal 651 depends on where the decal is going and how long you need it to look perfect.
Don't Forget the Finish and Adhesive
Beyond the vinyl itself, you also have to think about the finish and the adhesive. These two components have a huge impact on the final look and toughness of your decal.
- Finish: The two main choices here are gloss and matte. A gloss finish gives you that shiny, "wet paint" look that reflects light and makes colors pop. A matte finish, on the other hand, is flat and non-reflective for a more subtle, modern vibe.
- Adhesive: The glue is the unsung hero. High-quality, permanent adhesive is engineered to bond tight to your bike's paint but still be removable down the road without causing damage. It's built to resist water, UV rays, and temperature swings, ensuring your decal stays put at highway speeds.
Knowing these material differences means you can ask the right questions and pick a product that not only looks awesome but is built for the road. Whether you're making a bold statement with patriotic designs like our We the People vinyl decals or creating something more personal, an informed choice means you’re getting a decal that’s as tough as your ride.
Getting the Design and Size Just Right
Alright, we’ve covered the nuts and bolts of vinyl materials. Now for the fun part—designing a decal that makes your bike truly yours. This is where your vision comes to life, but it’s more than just slapping on a cool graphic. The goal is to make it look like it belongs there, flowing with the bike's natural lines.
Think of it like getting a suit tailored. The fit is everything. A decal that’s too big can look clumsy and overwhelm the bike’s design, while one that’s too small just gets lost. Your motorcycle is a canvas of unique curves and angles, from the sweep of the fuel tank to the sharp edges of a tail fairing. A great decal works with those features, not against them.
Personalizing bikes isn't a new trend, but it has exploded. U.S. motorcycle registrations shot up from 4.5 million in 1990 to a high of 9.3 million by 2019. That boom created a massive demand for aftermarket graphics, with vinyl motorcycle decals capturing 78% of that market because they're so versatile. In fact, surveys show that 92% of riders apply decals to key spots like tanks and fenders to show off their identity. You can discover more stats about motorcycle ownership trends and see just how big this culture has become.
Finding Your Design Concept
Before you grab a tape measure, you need an idea. Are you going for a subtle brand accent, a memorial tribute, or a full-on custom graphic that screams personality?
Pre-Made Designs: This is the easiest way to get started. With over 1,200 professionally made designs at Custom Sticker Shop, you can browse everything from military tributes to racing graphics and find something that’s ready to go.
Custom Text: Sometimes, a few words say it all. A meaningful quote, a memorial for a loved one, or your club’s motto can be one of the most powerful additions to your ride.
Full Custom Graphics: For a look that’s 100% unique, you can bring your own artwork or logo to the table. The journey from a rough idea to a finished piece is a creative process, much like a tattoo design process, where collaboration and refinement are key.
The Art of Sizing and Placement
Once you have your design in mind, it's time for the most important step: getting the size right. This is where a tape measure and some masking tape become your two best friends.
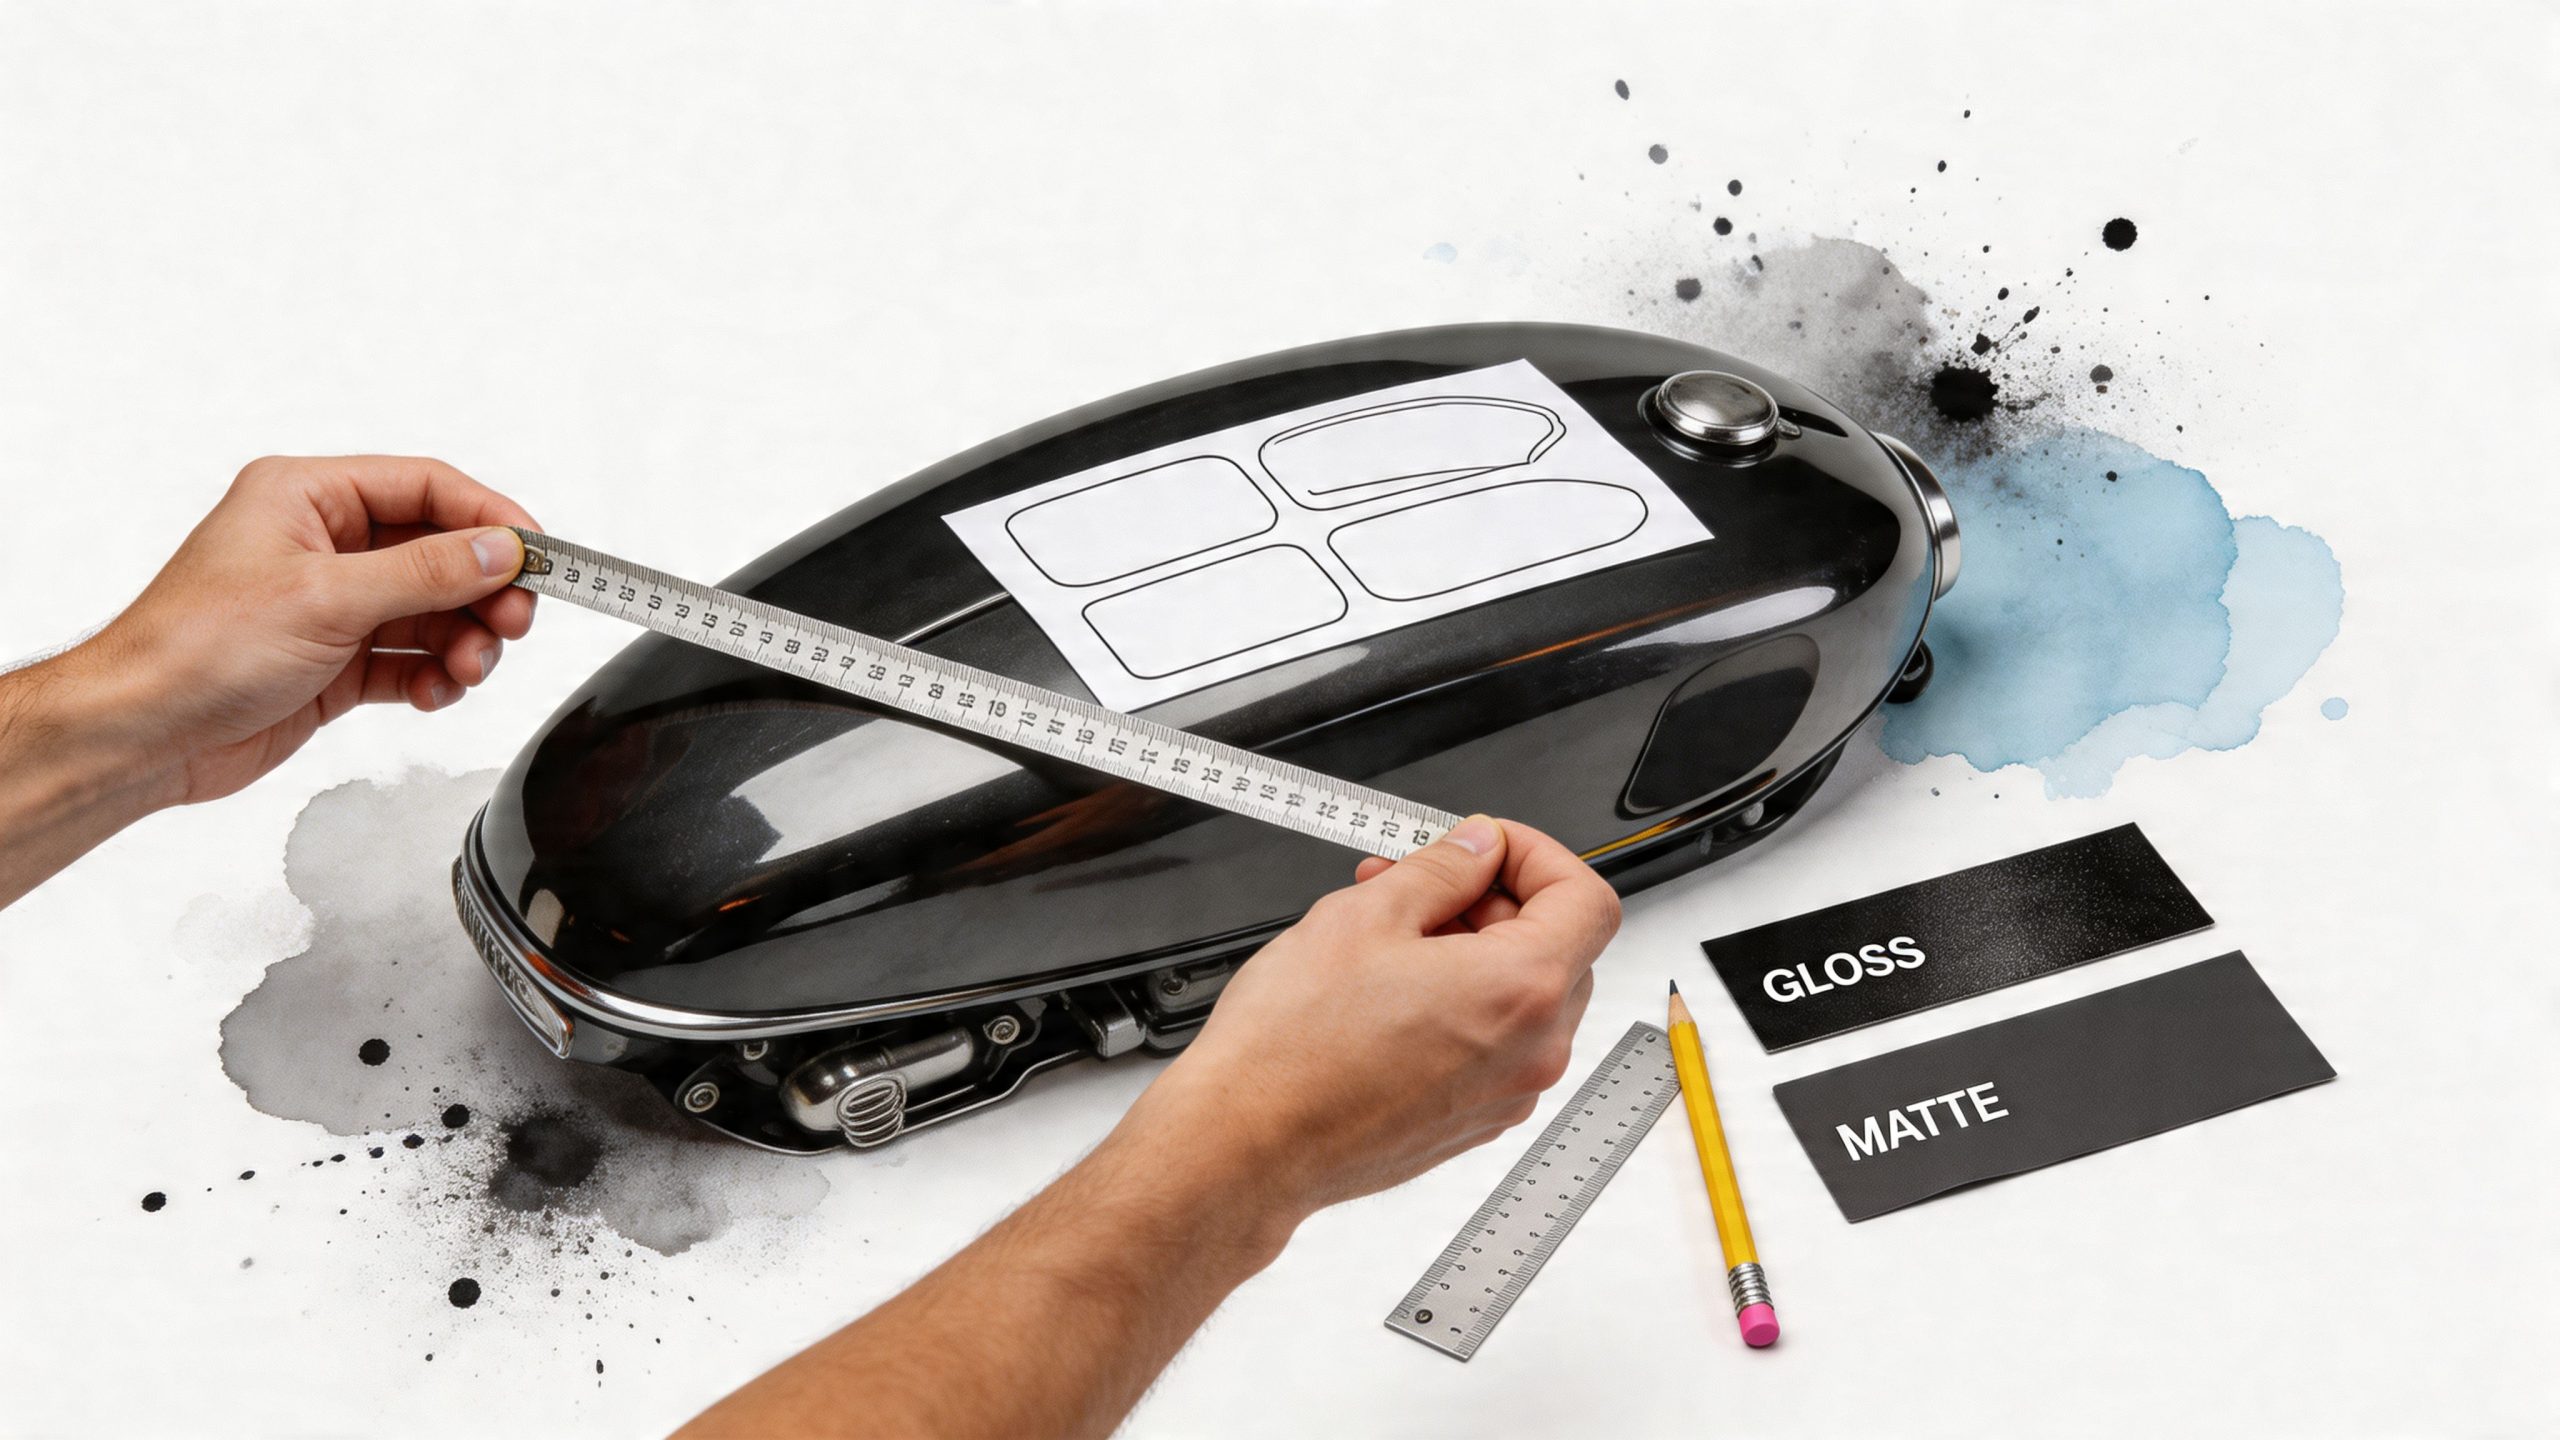
First, figure out where the decal will live. The gas tank, fenders, side fairings, and even your helmet are all popular canvases. Each spot has its own space limitations and contours.
Next, use a flexible tape measure to find the available space. Measure the flattest part of the area, noting the maximum height and width you can work with. Be sure to avoid measuring across really complex curves or sharp body lines where the vinyl could crease or bubble.
Here's a pro tip that has saved countless riders from ordering the wrong size: make a paper template. Cut a piece of paper to the exact dimensions of the decal you’re thinking about ordering. Then, use a little masking tape to stick it right on your bike.
This simple trick lets you see exactly how the decal will look before you spend a dime. Step back. Look at it from across the garage. Does it feel balanced? Is it too big, too small, or just right? Keep trimming the paper until it looks perfect—then you know exactly what size to order.
A Quick Word on Safety
Personalizing your ride is a blast, but safety always comes first. Your new look should never create a hazard for you or anyone else on the road.
Always follow these common-sense rules for placement:
- Don't cover lights or reflectors: Headlights, taillights, turn signals, and factory reflectors must be completely clear for visibility.
- Keep your vision clear: Never put decals on your helmet visor or in your direct line of sight through a windscreen.
- Don't impersonate emergency vehicles: Avoid any designs or color schemes that could make your bike look like a police or emergency vehicle.
By mixing your creativity with some careful measuring and a little safety awareness, you’ll end up with a custom look that’s not just cool, but smart and road-ready.
Your Step-by-Step Guide to a Flawless Application
Putting on your new vinyl motorcycle decals is something you can absolutely nail yourself. The secret isn't magic—it's just patience and good old-fashioned prep work. A lot of riders get intimidated, but getting a pro-level finish is all about following a few simple, proven steps.
This guide is going to walk you through the whole process. We’ll focus on the three things that separate a perfect install from a frustrating one: a squeaky-clean surface, locking in your placement with the "hinge method," and using smooth, even pressure. Follow along, and you'll have a finish that looks like it came straight from a custom shop.
Step 1: Prep Your Surface and Tools
Before you even think about peeling a single piece of backing paper, your bike’s surface needs to be cleaner than clean. We're talking surgically clean. Even a tiny speck of dust, wax, or an oily fingerprint will stop the adhesive from getting a good grip, which leads to bubbles and peeling down the road.
Start with a good wash using a mix of mild soap and water. After it's completely dry, give the area one final wipe-down with isopropyl (rubbing) alcohol on a clean, lint-free cloth. This final pass zaps any leftover oils and creates the perfect canvas for your vinyl.
The sweet spot for applying vinyl is between 50°F and 90°F (10°C and 32°C). Too cold, and the vinyl gets stiff and the adhesive won't activate properly. Too hot, and the adhesive gets overly grabby, making it a nightmare to position.
Get your tools in order before you start. You don't need a lot, but having this stuff ready makes all the difference:
- A squeegee or a hard plastic card (a credit card works in a pinch)
- Masking tape
- A spray bottle with a "wet application" solution (optional, but helpful for big decals)
- A pin or the tip of a craft knife for any stubborn bubbles
- A soft, lint-free cloth
Step 2: Master the Hinge Method for Perfect Placement
Proper alignment is what separates an amateur job from a pro one. The hinge method is a dead-simple technique that guarantees your decal goes on straight and exactly where you planned.
First, hold the decal—backing paper and all—up against your bike. Stand back, look at it from a few angles, and get the positioning just right.
Once you’re happy with it, run a strip of masking tape horizontally across the middle of the decal, anchoring it to the bike. This is your hinge. Now, you can lift one half of the decal up, peel the backing paper off that side, and snip it away with scissors.
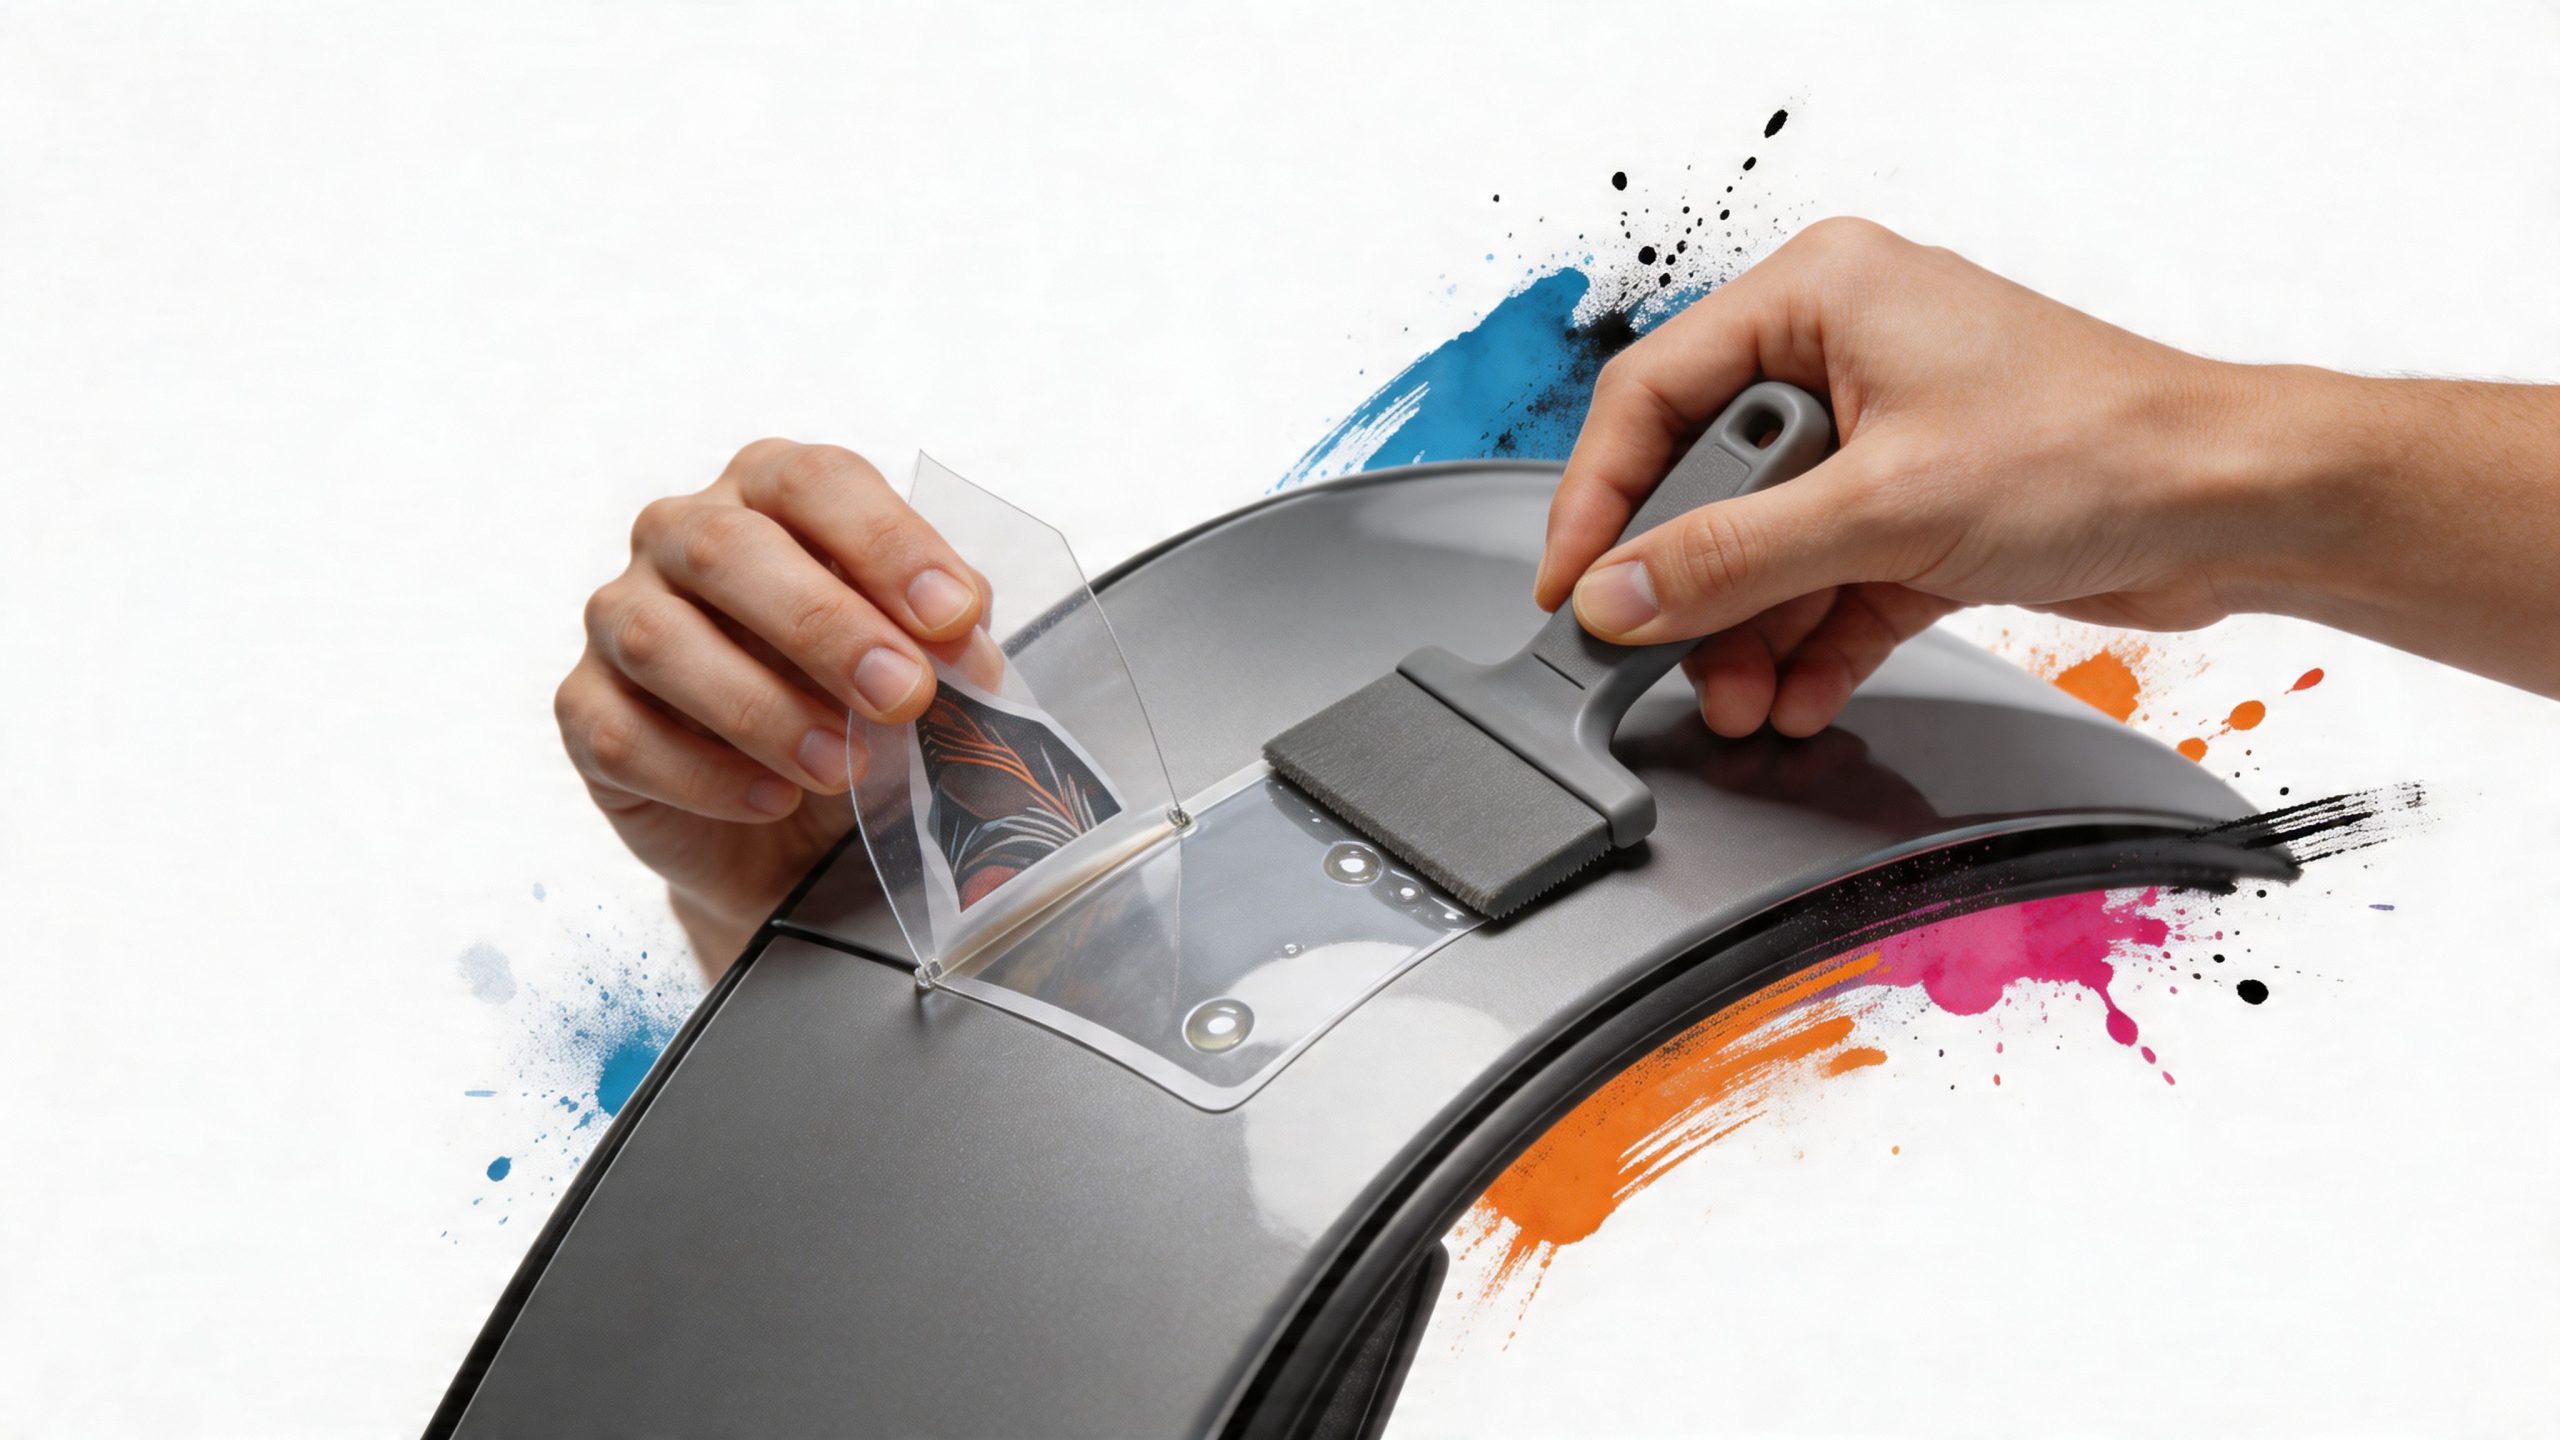
Keeping the exposed vinyl taut and off the surface, grab your squeegee. Start applying the decal from the center (right next to your tape hinge) and work your way out with firm, overlapping strokes. This forces all the air out toward the edges.
With the first half down, carefully peel off your masking tape hinge. Now, just repeat the process for the other side: flip it over, peel the rest of the backing paper, and squeegee it down from the center out. For more ideas on how to position graphics on different bike parts, check out how we do it on our custom text windshield banners.
Step 3: Finish the Job and Handle Any Issues
With the vinyl on, the final move is removing the transfer tape. That’s the clear or paper-like top layer that holds all the pieces of your design together.
Peel the transfer tape back on itself at a sharp, 180-degree angle. If you pull it straight up, you risk pulling the vinyl off with it. If you see any part of the decal starting to lift, just lay the tape back down, hit that spot with the squeegee again, and then continue peeling.
Once the transfer tape is off, give your work a final once-over.
- For small air bubbles: Don't try to force them out. Just take a pin or the very tip of a craft knife and poke a tiny hole in the center of the bubble. Use your finger to gently push the air out. The hole will be so small you'll never see it.
- For tricky curves: A little bit of heat is your best friend. Use a hairdryer on its lowest setting to gently warm the vinyl. This makes it more pliable, letting you smooth it over contours and into crevices with ease.
Finally, give the decal time to set. Don’t wash the bike or ride in the rain for at least 24-48 hours. This lets the adhesive fully cure and form a permanent bond with the surface, ensuring your new look is good for years and thousands of miles to come.
Making Your Decals Last for the Long Haul
You've spent the time getting your bike's new vinyl decals just right, and it looks incredible. Now, let's make sure that look sticks around for the long haul, not just for a season or two. Keeping them sharp is simple, but it takes a little bit of intention.
Think of your decal's edges as the most vulnerable part of the whole setup. The biggest threat is getting too aggressive with a pressure washer. Blasting water directly at the edges can force its way underneath the vinyl, causing it to lift and peel way before its time. Gentle is the name of the game here.
Washing and Waxing Your Decals
Keeping your decals clean is straightforward. A good old-fashioned hand wash using a soft microfiber cloth and some mild, non-abrasive soap is all it takes. This keeps road grime from grinding away at the decal's protective layer. A pro tip is to always wash from the center of the decal outward, so you’re not catching and lifting an edge.
And what about waxing? Absolutely. You can—and should—wax right over your decals. A quality automotive paste or liquid wax (as long as it's vinyl-safe) provides a couple of key benefits:
- It adds another layer of UV protection, which is your best defense against colors fading under the sun.
- It gives the decal a slick, hydrophobic surface, making it harder for dirt and water to stick around.
Quality Materials Give You a Head Start
Of course, all the care in the world won't save a cheap, flimsy decal. Starting with high-quality material is more than half the battle. Professional-grade calendered or cast vinyl decals are built to last, typically anywhere from 3 to 7 years on a bike that sees regular use.
For instance, at Custom Sticker Shop, we use Oracal 651 vinyl, which is independently tested to hold up for 7 years outdoors. In fade resistance tests, it outperforms cheap imported vinyls by a staggering 300%. This is why proper surface prep is also so important—a perfectly clean surface boosts initial adhesion by up to 40%, giving the decal the best possible foundation. You can see for yourself how the pros ensure durability from the start.
Remember, even the toughest decal needs care. A premium material gives you a massive advantage in longevity, but how you treat it determines whether it meets—or exceeds—its expected lifespan.
Following these simple routines protects your investment and keeps your bike's custom look crisp. It’s a small effort that pays off every time you step back and admire your ride, knowing it looks as good as the day you put the decals on.
Common Questions About Vinyl Motorcycle Decals
Even after going through all the options, you probably still have a couple of questions rolling around in your head before you're ready to start customizing. It's totally normal. We've been doing this for a long time, and we hear the same great questions from riders just like you.
Let's tackle the big ones right now so you can get your bike looking exactly how you want, with zero stress.
Can Vinyl Decals Damage My Motorcycle's Paint?
This is always the first question, and for good reason. The short answer is no—as long as you’re using high-quality vinyl from a reputable source. Professional-grade vinyl motorcycle decals, like the Oracal vinyl we trust for all our designs, are made specifically to be safe on factory paint.
Think of it as a temporary, protective skin for your bike. The adhesive is designed to hold strong for years but release cleanly when you want it to.
The secret to keeping your paint perfect is all in the removal process. When it’s time for a new look, just gently warm the decal with a hairdryer to soften the glue. Then, peel it back slowly and at a low angle. Never, ever use a razor blade or a metal scraper. For a complete walkthrough, this guide to vinyl decal removal is an excellent resource.
What Is the Difference Between a Decal and a Sticker?
People use these terms interchangeably all the time, but there's a technical difference that really matters when you're going for that clean, professional look on a bike.
A "sticker" is usually a single piece of printed material. The design, text, and background are all on one layer, often a white or clear rectangle.
A "decal," on the other hand, is what we specialize in. The design is die-cut from a solid sheet of colored vinyl. When you apply it, only the individual letters and graphic elements stick to the surface. There's no background at all, which gives you that sharp, "painted-on" finish that looks like it came from the factory.
Are Motorcycle Decals Street Legal?
For the most part, yes, they absolutely are. Customizing your bike is your right. The law only steps in when decals start interfering with safety and visibility.
You should never place decals where they might:
- Obstruct your view through the windscreen.
- Cover up headlights, taillights, reflectors, or turn signals.
- Hide any part of your license plate.
It’s also smart to stay away from any designs that mimic police or emergency vehicle markings. As long as your decals are purely for looks and don't mess with your bike’s safety gear, you're good to go. If you're planning something really wild, a quick check of your local state regulations is never a bad idea.
Ready to transform your ride with confidence? At Custom Sticker Shop, we offer over 1,200 American-made designs and full custom text options to help you create a bike that's truly yours. Start designing your custom look today