
You’re probably staring at your Ranger right now thinking the same thing a lot of owners do. The truck is solid, the stance is right, and it does what you need. It just doesn’t look like yours yet.
That’s where decals come in. A good set of graphics can sharpen body lines, break up a plain paint color, restore a factory-style look on an older truck, or give a newer build some personality without locking you into permanent paint. I’ve spent enough time around truck decals to know the difference between something that looks right for a week and something that still looks clean months down the road.
Ford Ranger owners are a practical bunch. Some want a subtle windshield banner. Some want bedside graphics that fit the truck’s lines. Some want veteran tribute decals that look respectful instead of gimmicky. Others just want to replace old faded stripes with something that matches the truck correctly. The details matter on all of them.
Your Ranger Your Rules Why Decals Are the Ultimate Upgrade
A stock Ranger can look good. It can also look unfinished.
That’s usually the moment people start searching for decals for ford ranger trucks. They don’t always want a full custom build. They want a truck that feels personal when they walk up to it in the driveway, at the jobsite, or at the trailhead. Maybe it’s a clean hood stripe. Maybe it’s retro bedside lettering. Maybe it’s a military tribute graphic that means something to the owner and not just to the internet.
The Ranger has earned that kind of following over time. Its place in truck culture isn’t random. The Ford Ranger was the best-selling compact truck in the United States for an 18-year run from 1987 to 2004, which created a huge owner base for aftermarket parts and personalization, including decals and graphics, as noted in the Ford Ranger history overview).
That long run matters because it means there isn’t one “Ranger style.” There are old-school restoration builds, work trucks, daily drivers, lifted weekend rigs, and newer trucks that just need a little edge. Decals work across all of them because they let you change the look without committing to custom paint.
What works: A decal that fits the truck’s body lines and the owner’s actual use.
What fails: Buying a generic stripe because it looked decent on a screen.
The practical advantage is simple. Vinyl gives you flexibility. You can keep it subtle, go aggressive, restore a vintage look, or build around a theme like overland, hunting, family, or service pride. If your tastes change later, you’re not sanding paint off the truck to start over.
Choosing Your Decal Material Not All Vinyl Is Created Equal
Material choice decides whether your decal feels like an upgrade or a chore.
Most buyers start with design, but the smarter move is to start with the vinyl. The easiest way to explain it is this. Cast vinyl is like form-fitting workwear engineered to move with the truck. Calendered vinyl is more like an off-the-rack piece that works fine in the right place, but doesn’t handle every surface or every condition the same way.
What cast vinyl does better
If you’re applying graphics to a Ranger hood, fender flare, bedside curve, or tailgate contour, cast vinyl is usually the right call. Premium cast vinyl decals feature a caliper thickness of 80 to 100 microns and micro-embossed air-release channels that can reduce trapped air by up to 95% during installation on curved surfaces, with zero conformability failure reported on compound curves used on Ranger beds and hoods according to this Ford Ranger vinyl material reference.
That’s a big reason experienced installers reach for cast film on trucks. It stretches more predictably, lays down cleaner on curves, and resists the kind of edge tension that can show up later as lifting.
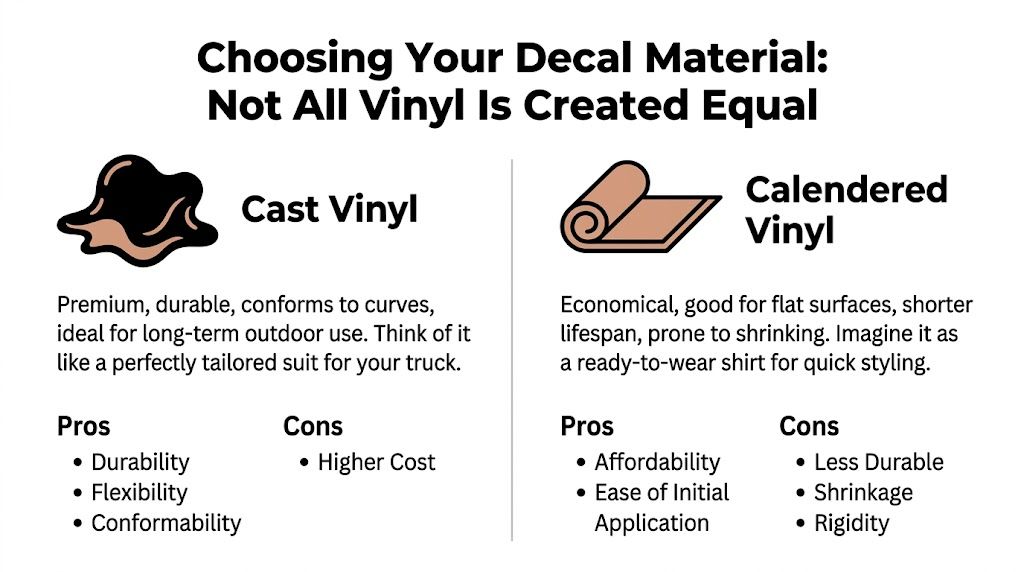
Practical rule: If the decal has to cross a curve, recess, flare, or sculpted panel, pay for cast vinyl once instead of replacing cheaper material later.
Where calendered vinyl still makes sense
Calendered vinyl has its place. It’s usually the more budget-friendly option, and it can do fine on flatter surfaces where the film doesn’t need to work hard. Think simple window decals, straightforward lettering on a relatively flat panel, or short-term style changes where ultimate conformability isn’t the top priority.
The trade-off is that it tends to be less forgiving over complex shapes. On a Ranger, that matters more than people expect. Modern truck panels aren’t as flat as they look from ten feet away. Even older trucks have subtle shape changes that expose weak material choices.
Cast vs calendered vinyl showdown
| Feature | Cast Vinyl (Premium) | Calendered Vinyl (Intermediate) |
|---|---|---|
| Best use | Curves, hoods, flares, tailgates, long-term exterior use | Flatter panels, simpler graphics, lower-cost installs |
| Flexibility | High | Moderate |
| Air release | Often includes micro air-release features | Varies by product |
| Long-term shape stability | Better | More prone to shrinking over time |
| Install difficulty | Easier on complex shapes | Easier on simple flat surfaces |
| Cost | Higher | Lower |
| Who should choose it | Owners who want a cleaner, longer-lasting result | Owners prioritizing budget on simpler applications |
How I’d choose by use case
If the Ranger is a daily driver that sees weather, wash cycles, parking lots, and highway miles, go premium if the decal sits on exposed paintwork. If it’s an off-road truck, don’t even debate it for high-stress areas. Use cast.
If you’re doing a small custom text project or testing a look before committing, intermediate material can still be reasonable. The key is matching the material to the location instead of pretending one roll of vinyl is right for every job.
For owners who want text, names, or one-off sizing, a make your own custom sticker option for vehicle graphics is useful because it lets you choose around the panel and purpose instead of forcing a generic template.
Perfect Fit Sizing Decals by Ranger Model Year
Fitment is where a lot of Ranger decal projects go wrong.
People assume “Ford Ranger” is enough information to order graphics. It isn’t. Body lines change. Tailgates change. Hood contours change. International variants can differ from North American trucks. A decal that looks close on a screen can be off once it meets the actual sheet metal.
Newer Rangers need real measuring
For late-model trucks, especially newer body styles, I always tell owners to measure the exact panel they’re decorating and not rely on a generic listing name. This matters even more if you own a trim with flares, graphics packages, or market-specific sheet metal.
The gap in model-year-specific fitment is real. Owners of newer trucks and international variants often struggle to find guides that clearly separate year and trim differences, as noted in this Ford Ranger stripe fitment gap overview. That’s why careful measuring beats assumptions every time.
Use masking tape to mark the outer visual boundaries first. Then stand back and confirm the graphic sits with the truck’s body line instead of floating above or below it. A decal can be perfectly cut and still look wrong if the placement ignores the panel shape.
How to measure by placement area
A practical measuring routine works better than chasing a one-size-fits-all chart.
- For hood decals, measure the usable width between contour breaks, not the full hood width. Then check how the hood line narrows toward the windshield.
- For tailgate graphics, measure the flat face and note any stamped features, handles, or backup camera housings.
- For bedside decals, measure the visible space with the door and bed aligned, because the eye reads both together.
- For windshield banners, check local visibility rules first, then measure only the area you can legally and comfortably use.
- For lower door graphics, open and close the doors while dry-fitting tape guides so the graphic doesn’t fight a seam or edge.
A Ranger decal should look intentional from twenty feet away. That usually comes from measuring to the truck’s visual lines, not just to raw dimensions.
Classic Rangers and factory matching
Owners of older trucks have one advantage newer owners don’t always think about. Ford gave you decoding info right on the truck.
For 1983 to 2011 Ford Rangers, the Ford Safety Compliance Sticker on the driver’s door jamb includes paint and tape codes that help match replacement decals for restoration or custom graphics, including codes such as P for Platinum and B for Blue/Dark Blue, according to this guide to the Ford Safety Compliance Sticker.
That’s gold if you’re trying to bring back an original look without guessing at color. It also helps if you want a custom graphic that respects the factory palette instead of clashing with it.
A quick fitment checklist
Before ordering, confirm these points:
- Model year first: Don’t stop at “Ranger.” Get the exact year range right.
- Trim and body style: Flares, bed style, and appearance packages can change usable space.
- Market version: Imported or global variants can differ from domestic trucks.
- Panel condition: Old paint, chips, and previous stripe ghosting can affect both look and adhesion.
- Graphic intent: A restoration stripe should fit differently than a modern oversized statement decal.
That little bit of discipline saves a lot of frustration later.
Style and Placement Inspiration for Your Ranger
Some Rangers want one quiet detail. Others want a full identity.
The trick is picking a theme that fits how the truck is used. A daily driver with factory wheels usually looks better with cleaner graphics and tighter placement. A lifted trail truck can carry bolder shapes, more contrast, and graphics that lean into the build.

Three Ranger personalities that always work
The first is the off-road and overland Ranger. This truck wears topographic lines, mountain silhouettes, distressed side graphics, and tailgate lettering well. Those styles belong on a truck with all-terrain tires, bed gear, and a little dust on it. There’s a growing demand in the Ranger off-road community for veteran and military tribute decals designed for that adventure-build look, and many vendors still focus more on generic stripes than purpose-built themes, as reflected in this Ford Ranger themed decal category.
The second is the patriotic or service tribute build. With this type of build, restraint matters. A branch emblem, flag treatment, unit-inspired text, or memorial layout can look strong if the spacing is clean and the scale is right. It goes sideways fast when the truck ends up covered in unrelated symbols that compete with each other.
The third is the family or daily-use truck. These owners usually do better with windshield corners, rear glass graphics, subtle bedside accents, or small custom text that gives the truck identity without overwhelming it.
Placement changes the whole mood
A hood decal is aggressive. It pulls the eye immediately.
A bedside graphic feels longer and lower, which can make the truck look more planted. Tailgate lettering adds punch without taking over the whole truck. Window decals are the lightest touch and work well if you want personality without changing the truck’s core look.
If you want a rougher off-road style, a ripped torn bedside Ranger decal design shows how a graphic can add attitude without requiring a full-body treatment.
Good placement follows the body line the designer should’ve highlighted in the first place.
Color choices that usually look right
Color contrast matters more than complexity. Black on silver, white on dark paint, and muted tones on earth-color trucks tend to age better than trendy combinations. If the Ranger already has loud wheels, bright accessories, or multiple finishes, the decal should usually calm things down instead of competing.
A simple way to decide is to ask what the decal is supposed to do:
- Add edge with a stripe or torn graphic
- Honor something personal with a tribute layout
- Restore a vintage look with era-correct color matching
- Make the truck easier to spot with distinctive but clean panel graphics
The best-looking Ranger builds rarely use decals everywhere. They choose one or two zones and do them well.
A Guide to Flawless DIY Decal Installation
A quality decal can still look amateur if the install is rushed.
Most problems show up before the backing paper ever comes off. Dust, wax, silicone, old ceramic residue, and sloppy alignment create more failures than the vinyl itself. If you want a clean result, the install has to start with surface prep and a plan.
Surface prep decides whether it stays on
On newer trucks, especially freshly detailed ones, the biggest mistake is assuming shiny paint is ready for vinyl. It often isn’t.
On new Ford Rangers with fresh ceramic coatings, improper prep can cause decal adhesion failure rates of up to 40% within six months, and the recommended fix is a 30-day cure period followed by a final wipe-down with isopropyl alcohol, based on Ford’s custom graphics installation guidance.
That’s not a small issue. If the surface is fighting the adhesive, no amount of squeegee pressure will save the job.
The tools that actually matter
You don’t need a giant install kit, but you do need the right basics:
- A felt-edge squeegee for pressing the film without scuffing it
- Masking tape for alignment and hinge setup
- Isopropyl alcohol and clean microfiber towels for prep
- A tape measure so placement is repeatable from side to side
- Patience because crooked installs happen fast
If you like seeing how transfer films behave on different surfaces, broader guides on mastering decals can help you understand handling, positioning, and pressure technique even outside automotive use.
Why the hinge method works
For most Ranger decals, I prefer the hinge method because it gives you control. Tape the decal in place while it’s still on the backing, check spacing from multiple angles, then run a strip of masking tape along the top or center to create a hinge. Peel one side, cut the backing away, and squeegee from the center outward. Then repeat on the other side.
This method keeps long graphics from drifting during application. It also helps on windshield banners and bedside pieces where visual alignment matters more than people think.
Don’t trust your eyes from one angle. Check alignment from the front, from the side, and from several feet back before committing.
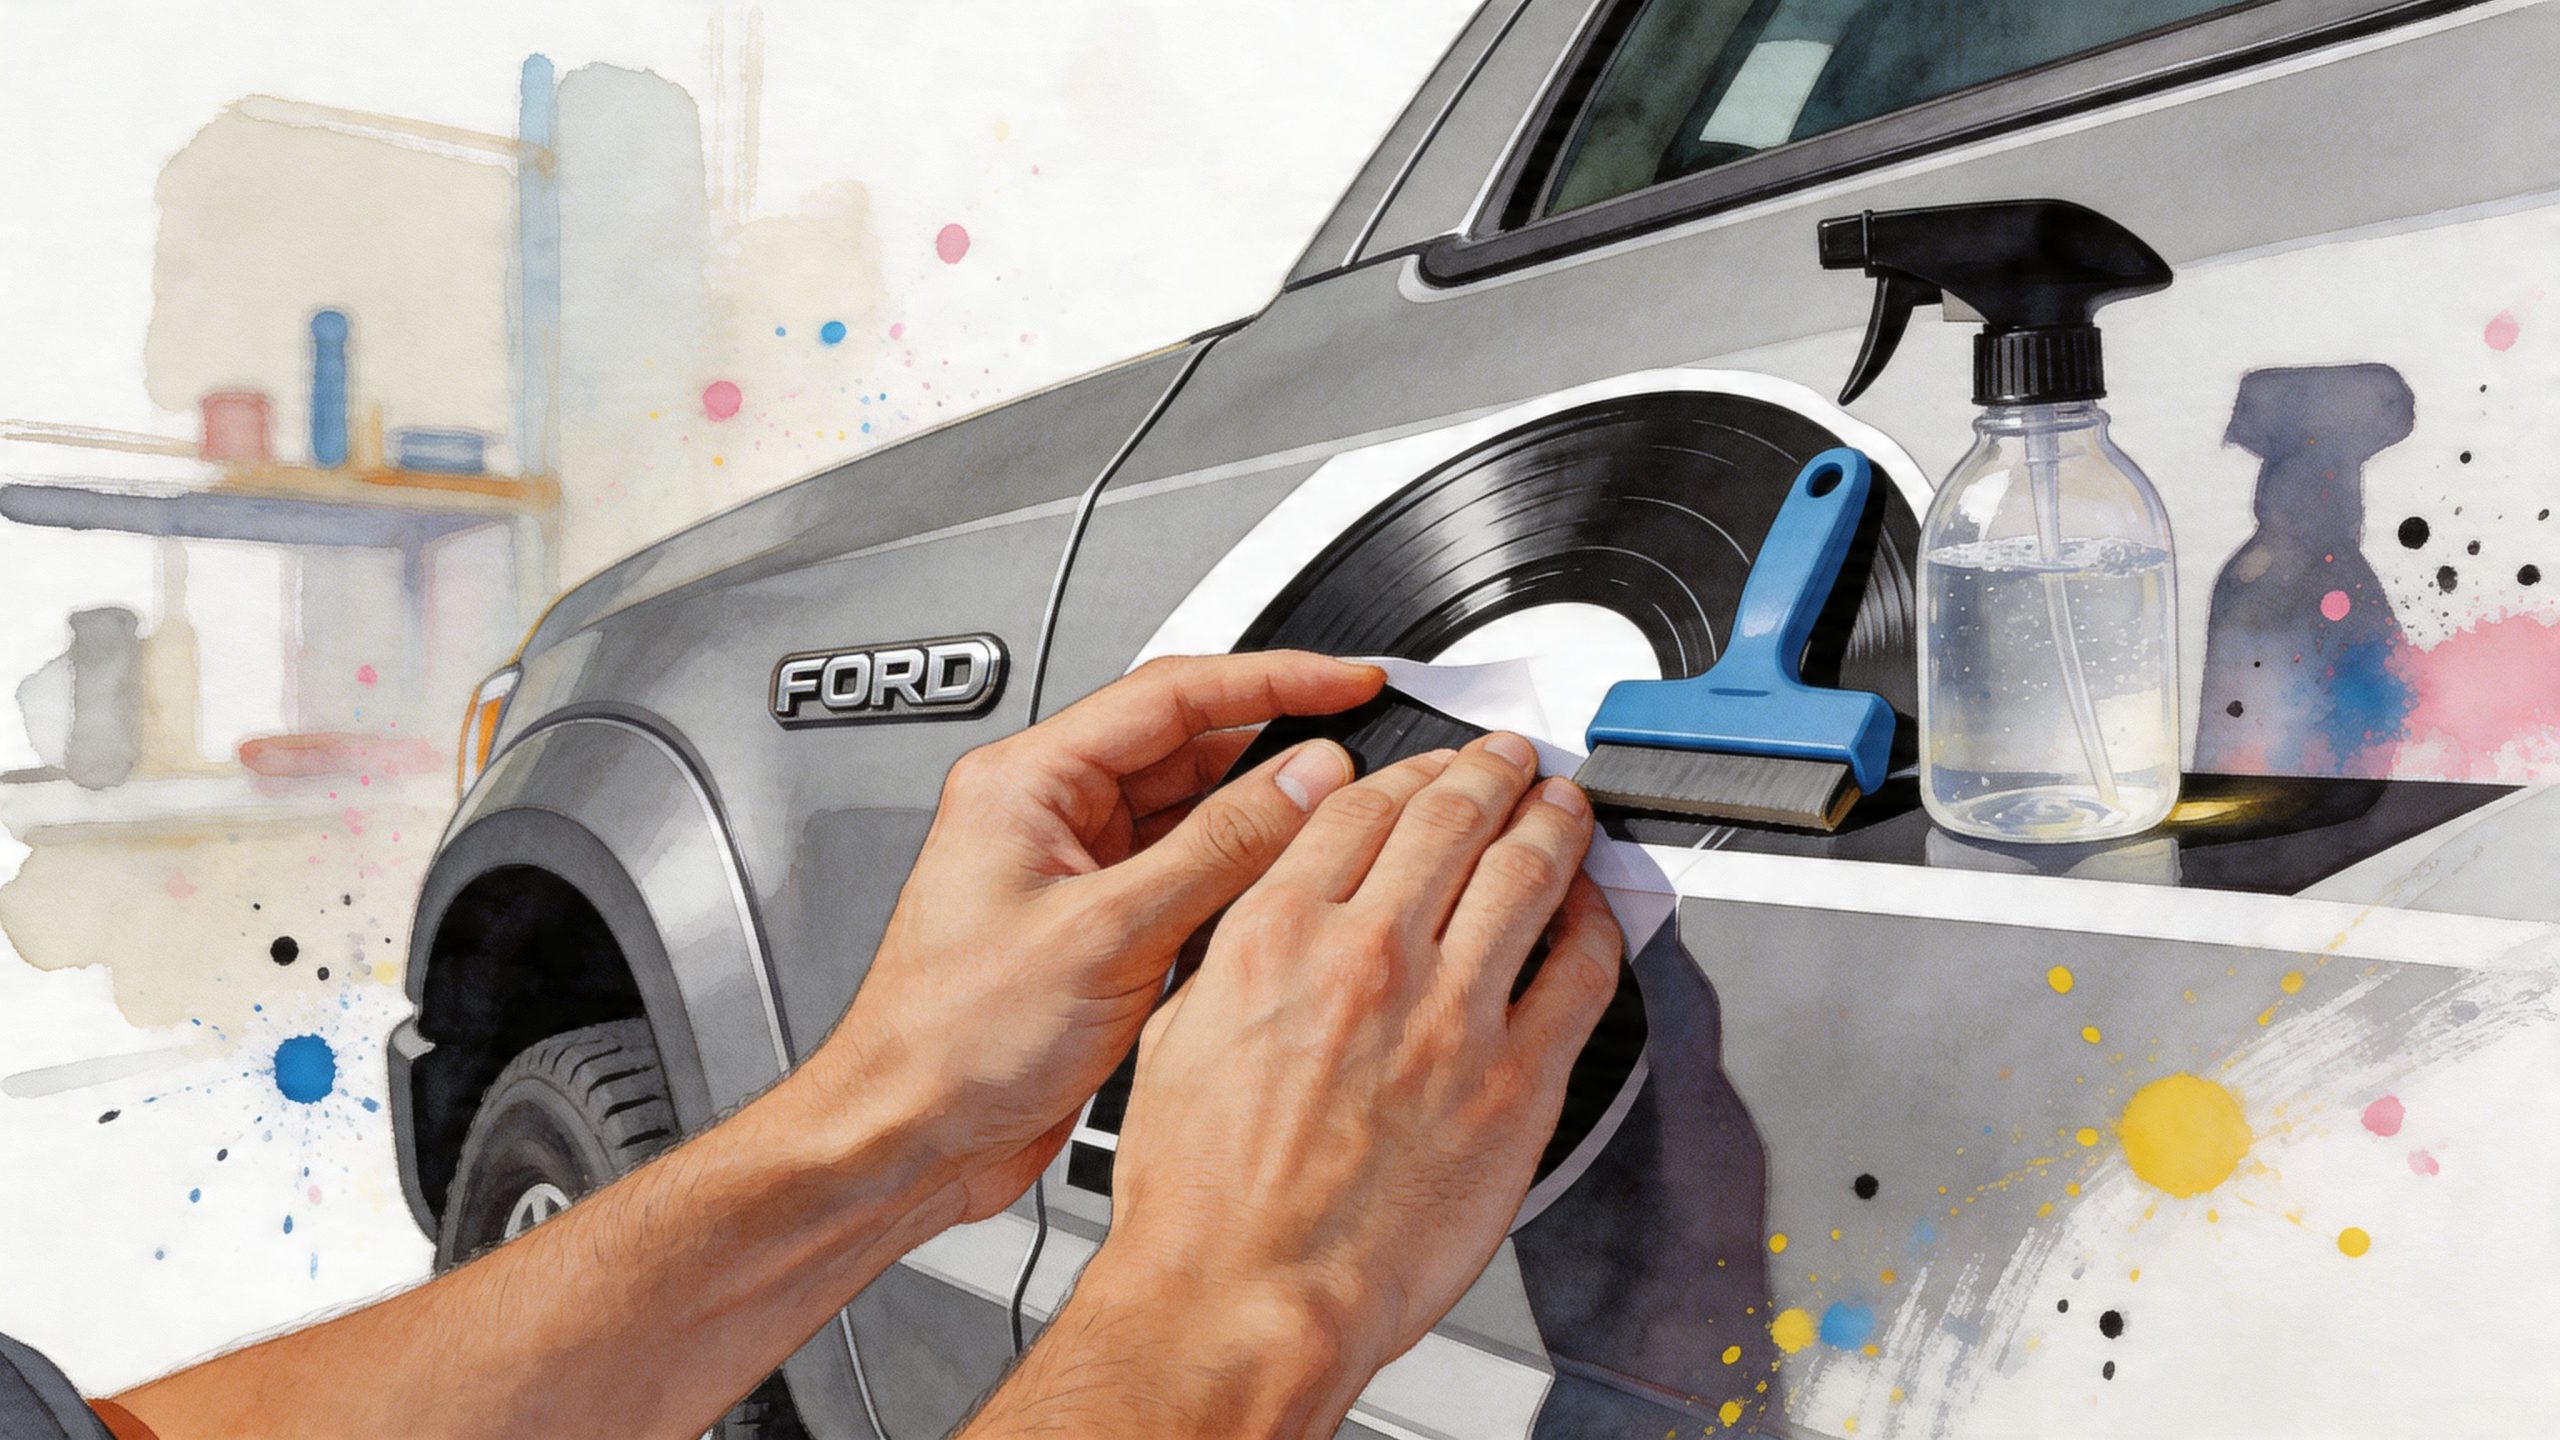
Here’s a useful visual reference for installation technique:
Wet method versus dry method
There isn’t one right answer for every decal.
Dry application gives stronger immediate tack and is often preferred for smaller graphics or installers who are confident with placement. The downside is that once the decal grabs, repositioning gets harder.
Wet application gives a little working time and can help on larger graphics where precision matters. It can reduce stress on the install, especially for people doing their first big bedside or hood piece. The caution is simple. Don’t flood the surface. Too much fluid slows bonding and makes transfer paper removal trickier.
What separates a clean install from a messy one
A clean install usually comes down to a few habits:
- Test fit first: Tape it on the truck and live with the placement for a minute.
- Work in the right environment: Avoid direct sun, wind, and dirty shop air.
- Squeegee with intent: Overlap your strokes and push air outward.
- Pull transfer tape carefully: Go back over stubborn sections instead of yanking.
- Leave edges alone afterward: Let the adhesive settle before washing or picking at it.
If you’re ordering pre-masked decals from a shop, one option in that category is Custom Sticker Shop, which supplies pre-spaced, transfer-taped vinyl graphics for vehicle application. That style of prep makes alignment easier than handling loose individual letters.
Maintaining Your Decals and Staying Street Legal
Once the decal is on, the job shifts from installation to protection.
Good vinyl doesn’t need babying, but it does reward basic care. Most of the ugly failures people blame on “bad decals” start with washing habits, pressure nozzles, or a corner that got lifted and ignored.
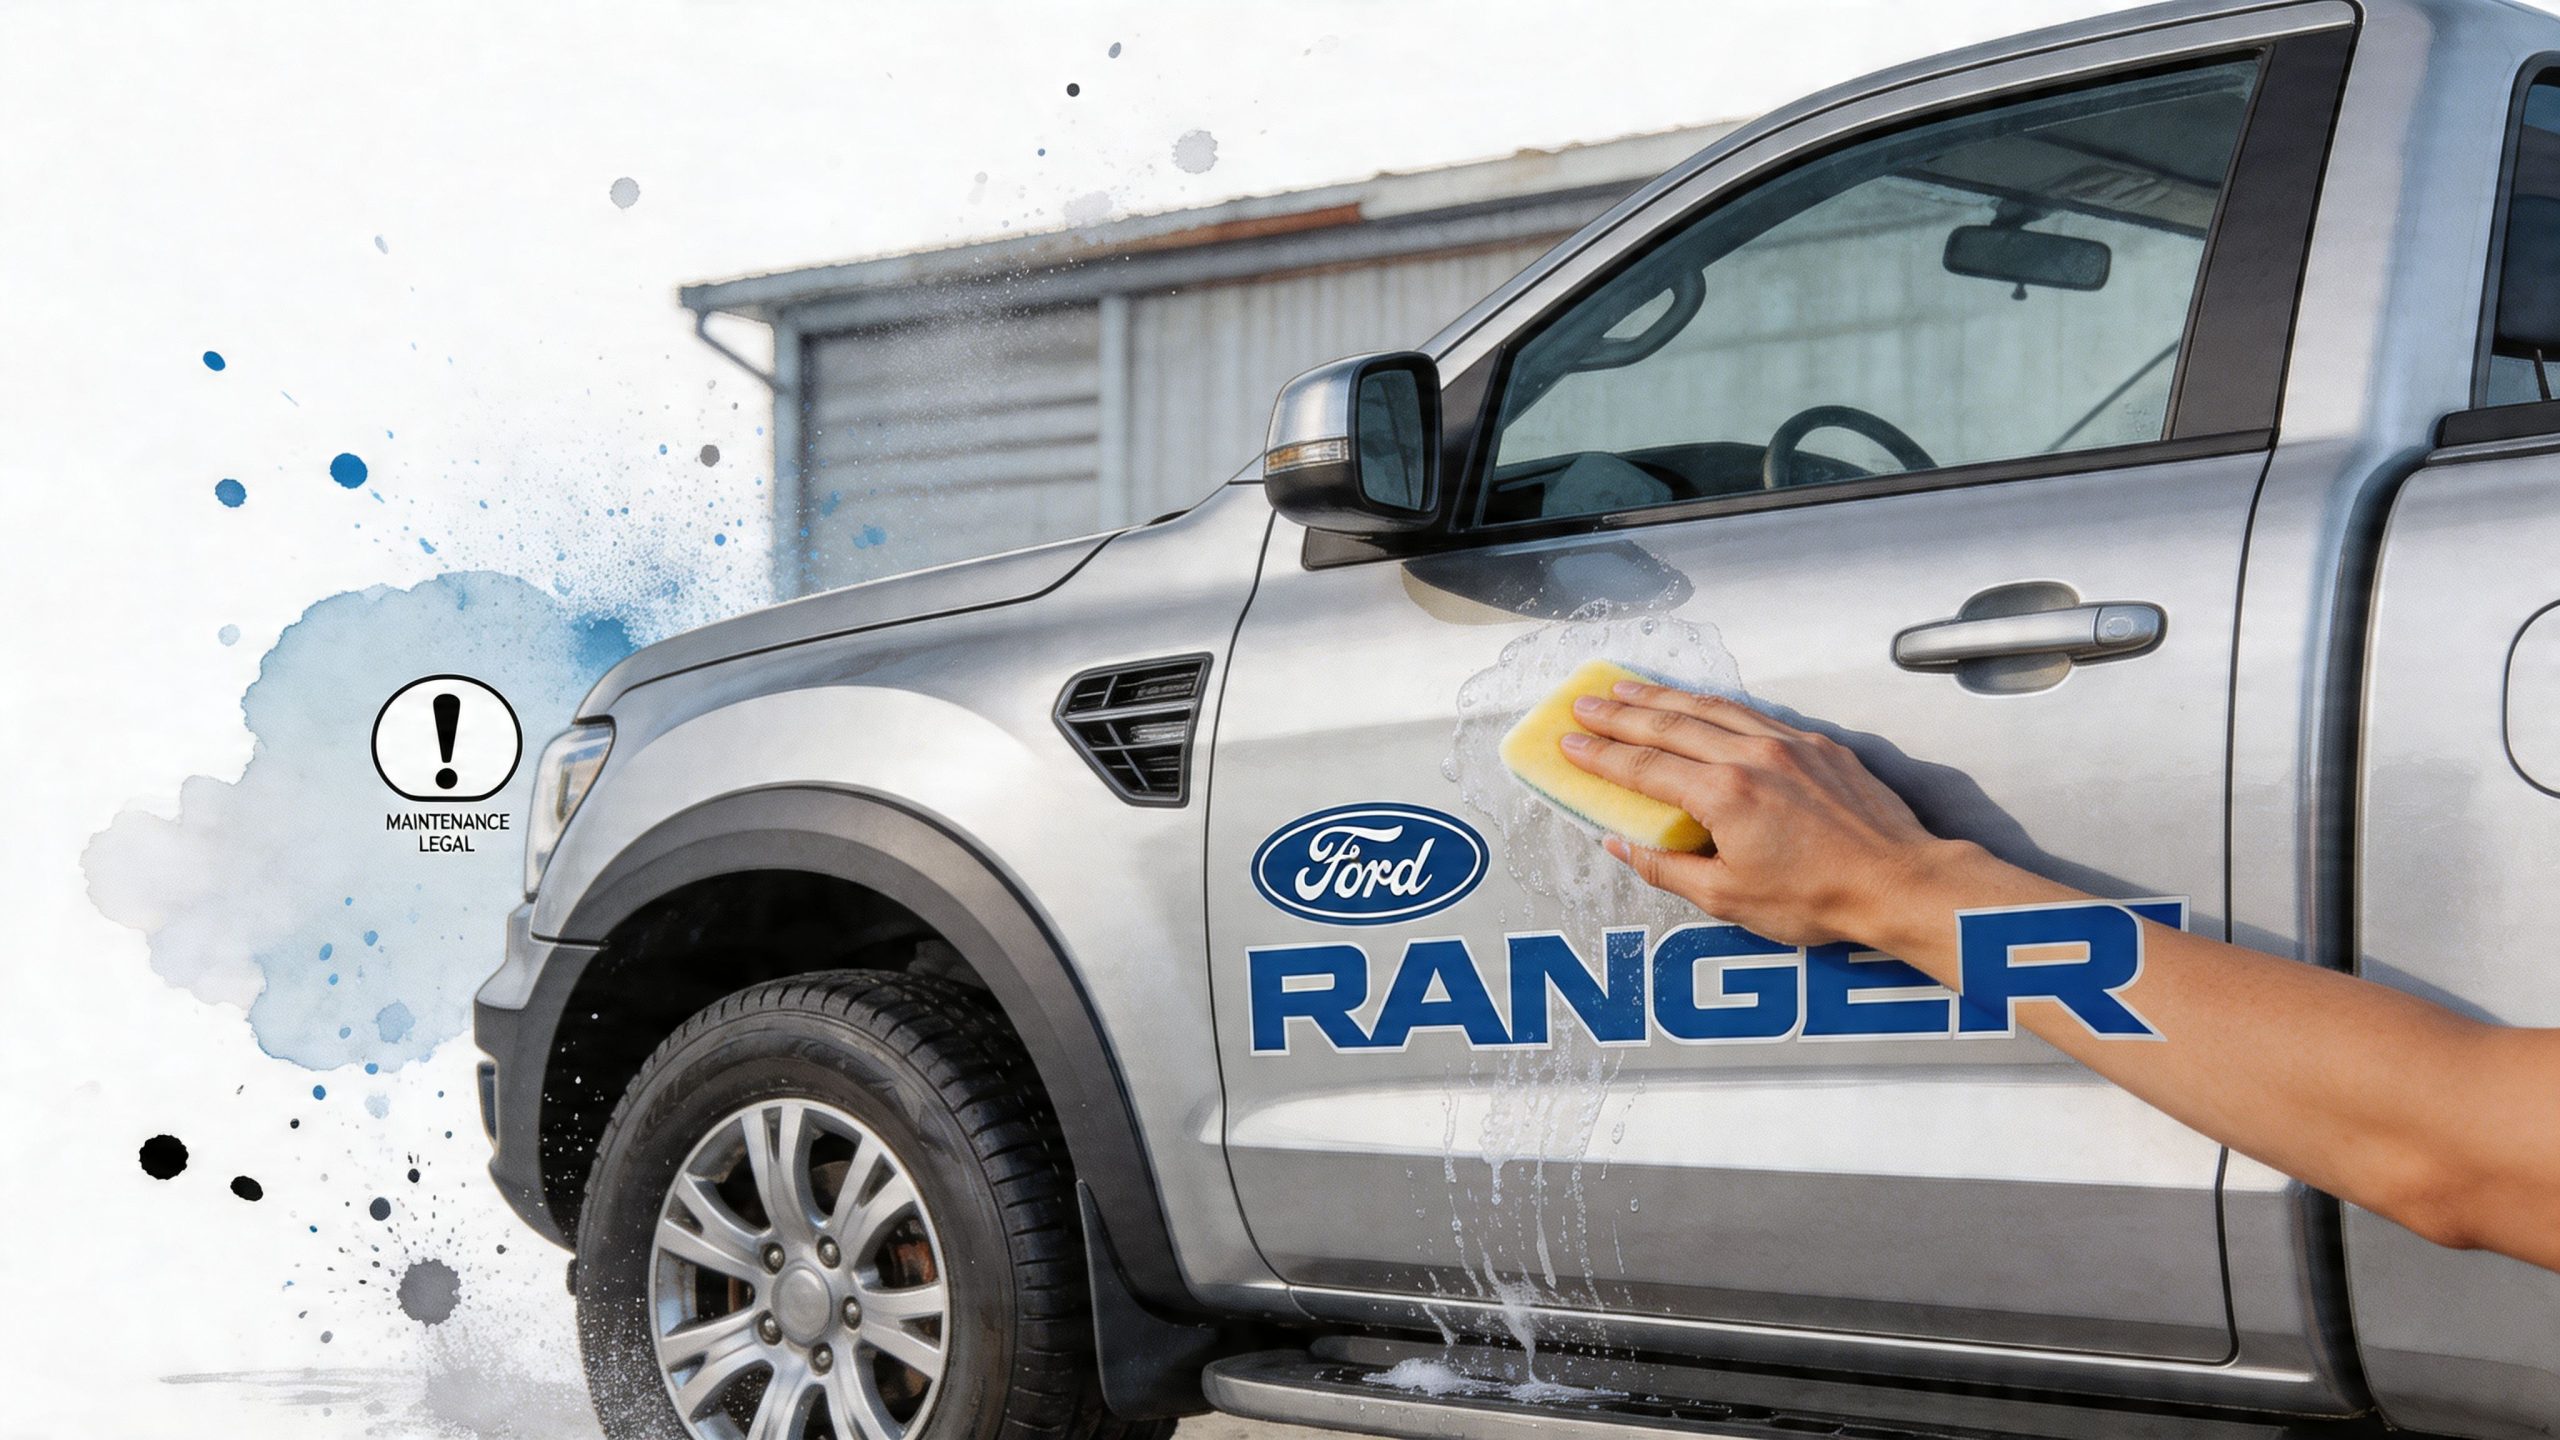
Washing without wrecking the edges
Hand washing is the safe baseline. Use mild soap, clean water, and a soft sponge or microfiber mitt. Rinse grit off before scrubbing so you’re not grinding dirt across the film edge.
A few habits keep decals looking cleaner longer:
- Wash from the center outward on large graphics so you’re not repeatedly catching an edge.
- Avoid aiming high-pressure water at the edge of the decal, especially at close range.
- Dry gently instead of whipping a towel across corners and tips.
- Remove bird droppings and sap early because contamination sitting on vinyl never helps.
If you use an automatic wash, touchless is usually less risky than one with aggressive brushes. Even then, check edges occasionally instead of assuming everything is fine.
What street-legal usually means in practice
Decals are personal. Visibility laws aren’t.
Windshield and window placement rules vary by state and locality, so the safe approach is to check your local requirements before installing a banner or side-window graphic. The broad principle is straightforward. Don’t obstruct the driver’s view, don’t cover required lighting or reflectors, and don’t place graphics where they interfere with mirrors, plate visibility, or safety equipment.
If a decal makes you lean, duck, or guess at what you can see, it’s in the wrong spot even before the law gets involved.
For rear windows, think about how the truck is used. If you tow, reverse in tight spaces, or rely heavily on mirror and rear-glass visibility, a giant dark graphic may not be worth the trade.
A simple maintenance routine
Every month or so, inspect the edges with clean hands. Look for dirt lines, lifting corners, or spots where trail debris has nicked the film. Small issues are easier to press back down or address early than after water and grime work underneath.
The long-term goal isn’t perfection. It’s keeping a sharp install looking intentional instead of weathered and neglected.
Ordering Your Perfect Ford Ranger Decal
By the time you order, you should know three things. The exact truck, the exact placement, and the exact material quality you’re willing to live with.
That sounds basic, but it’s what separates a smart order from a return headache. If you’ve measured carefully, picked a style that fits the truck’s use, and chosen material that matches the panel, the rest is straightforward. This is also where custom text, factory-style replacements, and veteran tribute layouts become easier to get right because you’re ordering with a plan instead of browsing blindly.
If you want a clean example of a fit-specific product type, a Ford Ranger windshield banner decal listing shows the kind of category that helps owners narrow placement and vehicle match before buying.
For owners comparing production methods and finish options, it also helps to understand how shops approach custom stickers printing more broadly. Even if your final choice is cut vinyl rather than a printed sticker, knowing the difference helps you ask better questions about material, masking, and outdoor durability.
A family-run, veteran-friendly shop is often a better fit for Ranger owners than a generic marketplace seller because the order details tend to matter more. You want someone who understands that “Ford Ranger” isn’t specific enough, and that a tribute decal should be handled differently than a novelty graphic. Clear communication, model-year awareness, and pre-masked application-ready decals matter as much as the artwork.
Frequently Asked Questions About Ford Ranger Decals
Can I remove old Ranger decals without damaging the paint
Usually, yes, if the paint is sound. Warm the decal gently, lift a corner carefully, and peel slowly instead of ripping it off. Any leftover adhesive should be removed with a surface-safe adhesive remover and a soft cloth, then followed by a proper cleaning before new vinyl goes on.
Can I order custom text for my truck
Yes, and that’s often the best route if you want a windshield banner, a tailgate name, unit-style wording, or something personal that doesn’t exist in a standard catalog. The important part is giving the shop usable details such as the model year, placement area, width you want, and color.
What if my Ranger is an older restoration project
Check the driver’s door jamb first for the Ford Safety Compliance Sticker. On older trucks, that label can help you identify paint and tape codes so you can match the truck more accurately rather than guessing.
Should I install decals myself or pay a shop
If the decal is small or moderately sized and comes pre-masked, many owners can install it themselves with patience and decent prep. If the graphic is large, crosses multiple contours, or sits in a high-visibility area like the hood, paying an experienced installer can be worth it.
How long should I wait before washing the truck after install
Give the adhesive time to settle. A little patience right after installation helps more than people realize, especially around edges and tight curves.
What’s the biggest mistake first-time buyers make
They buy by style alone. Good Ranger decals need the right fit, the right vinyl, and the right placement. The design is only one piece of the job.
If you’re ready to put your own stamp on the truck, Custom Sticker Shop is a practical place to start. They offer Ford Ranger decals in a wide range of styles, including military tributes, windshield graphics, family themes, and custom text, with pre-spaced vinyl that’s made for straightforward installation.