
You’re probably looking at the back window of your SUV, minivan, or truck right now and thinking the same thing a lot of families do. The vehicle does the school runs, road trips, grocery hauls, and weekend errands, but it still doesn’t feel like yours.
That’s where family car window stickers earn their place. A good decal adds personality fast. It can be simple, playful, faith-based, pet-focused, or built around hobbies that match your household. When it’s done well, it feels less like decoration and more like a small badge of who rides in that vehicle every day.
People have connected with that idea for a long time. The trend took off hard in the early 2010s, and Australian creators sold more than 2 million “My Family” decals in just two years, while the North American version of the trend had already been pioneered in 2006 and spread into major retailers across the country, according to this reporting on the rise of family stick-figure decals. That kind of growth doesn’t happen unless a product taps into something personal.
What many buyers miss is that the right family sticker isn’t only about the artwork. Design matters, but so do sizing, placement, privacy, local visibility rules, and the quality of the vinyl itself. Those details decide whether your decal looks clean for years or starts peeling, bubbling, or causing regret a month later.
More Than a Sticker A Symbol of Your Family Story
A family decal usually starts with a small moment. A parent sees another vehicle in the pickup line. A kid points and says, “We need one of those.” A couple wants something on the rear glass that feels more personal than a dealership logo.

That’s why family car window stickers have lasted beyond novelty. They let a vehicle tell a small story at a glance. Some families want classic stick figures. Others want fishing rods, baseball bats, paw prints, cross symbols, or a baby-themed design. The decal becomes a shorthand for daily life.
Why families connect with them
The appeal is simple, but not shallow.
- Identity: A decal can reflect a household better than a generic accessory ever will.
- Pride: Parents like showing the people and pets they love.
- Memory: A sticker often marks a stage of life, like a new baby, a marriage, or a blended household coming together.
Family decals work when they feel honest. The best ones aren’t overloaded. They just look like the people inside the car.
Earlier vehicle trends leaned in a different direction. Drivers had “NO FEAR” decals, “Baby on Board” signs, and team-pride bumper stickers. Family stickers became the next version of that same instinct. They took a public surface and made it personal.
What separates a good decal from a forgettable one
The difference usually comes down to restraint and fit.
A decal looks right when the figures are balanced, the scale suits the glass, and the layout leaves breathing room around the edges. It looks wrong when buyers try to cram in every hobby, every pet, every nickname, and a block of text all at once.
There’s also a quality issue. A clean-cut vinyl decal has sharper edges, installs flatter, and ages better than cheap material with weak adhesive. Most problems people blame on “stickers” are really problems with poor sizing, poor vinyl, or poor placement.
That’s why it pays to think like a decal shop before you order. Pick the right figures. Measure the glass. Keep the story clear. Then install it with patience.
Finding the Perfect Design to Represent Your Crew
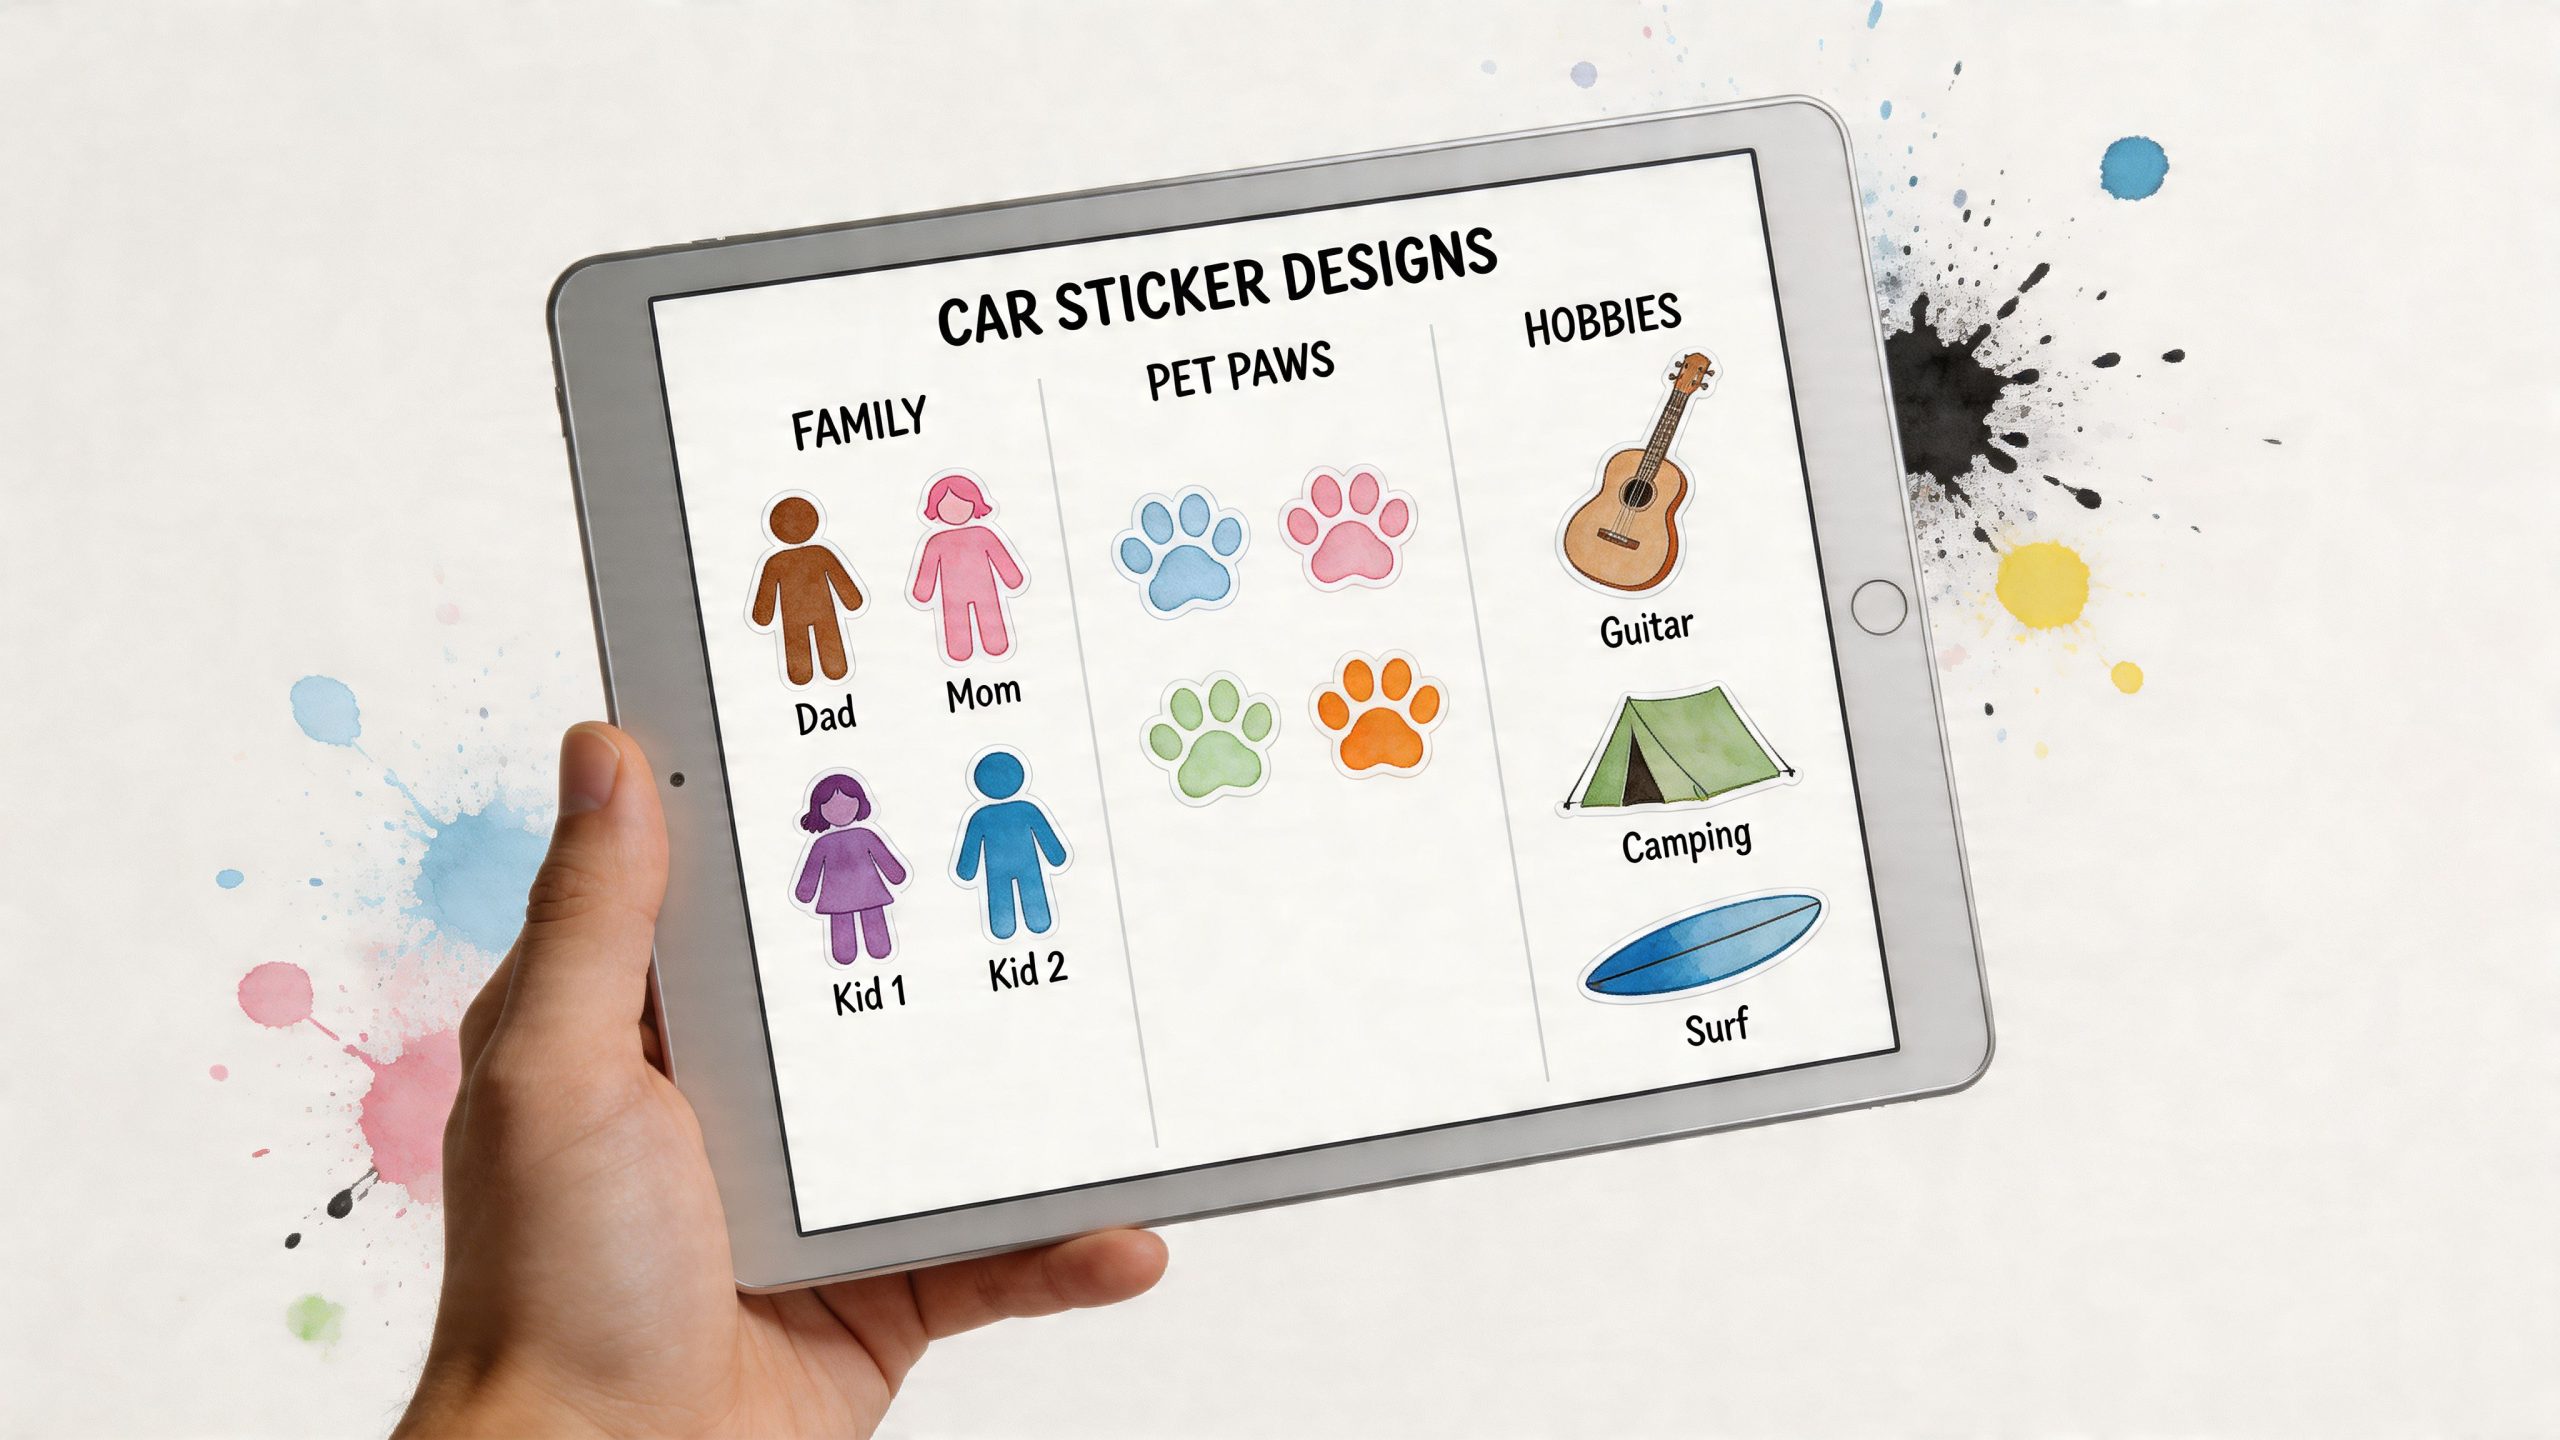
The design phase is where one either creates something that feels natural or something they’ll want to redo later. Start with the household as it is, not as a generic template says it should be.
Start with the core group
Build the design in layers.
First, choose the people. Then add pets. After that, decide whether hobbies or symbols add meaning or just clutter. A fishing pole beside one figure might work. Four hobbies, three sports items, and six small icons usually won’t.
A practical sequence looks like this:
Count the main figures
Parents, kids, stepkids, or whoever belongs in the design.Add animals last
Pets are fun, but they can throw off spacing fast if you place them too early.Use accessories selectively
One strong visual cue usually reads better than several tiny ones.
Inclusive designs matter now
A lot of family sticker catalogs still assume every household looks the same. That’s outdated. Demand for more representative designs has grown, with 1 in 5 US families being blended and 1 in 36 children identified as neurodiverse, according to this overview of the gap in inclusive family decal options.
That matters in real orders. Families want step-parents included. They want adopted children represented naturally. They want wheelchair users, service dogs, sensory-aware symbols, and figures that don’t force everyone into the same mold.
Practical rule: If a design leaves out a real part of your household, it isn’t finished yet.
That’s one reason buyers often skip prebuilt packs and use a tool that lets them mix elements more freely, such as a make-your-own custom car decal builder. The point isn’t to make the sticker more complicated. It’s to make it more accurate.
Choose a style that fits the vehicle
Not every art style suits every vehicle.
| Vehicle type | Design style that usually works | What to avoid |
|---|---|---|
| SUV or minivan | Full family layout with pets | Tiny details that disappear on tinted glass |
| Sedan | Compact horizontal arrangement | Tall stacks that feel squeezed |
| Truck rear window | Bold simple figures | Fine-line artwork near defroster lines |
Classic stick figures still work because they read quickly. More detailed silhouettes can look great too, but only if the scale is large enough to stay legible from a few car lengths back.
Pick colors for contrast, not novelty
White is popular for a reason. It stands out on dark tinted windows.
Black or dark gray can work on lighter glass or painted body panels. Bright colors can be fun, but contrast matters more than creativity here. If the decal disappears at dusk or gets lost against reflections, the design choice failed.
A quick check helps. Hold a sheet of paper or colored sample against the window from several angles. Morning light, open shade, and parking-lot glare will tell you more than a product thumbnail ever will.
Keep the message clear
The strongest family car window stickers usually have one clear idea. “This is our crew.”
That can include humor, hobbies, or faith. It just shouldn’t read like a scrapbook exploded on the back glass. If you’re debating between adding one more figure or one more line of text, skip the extra text first.
Customizing and Measuring for a Flawless Fit
Bad fit ruins good artwork. Most ordering mistakes happen before the decal is even cut.
Customize with restraint
Text can personalize a design, but it needs a job. A family name, a short phrase, or a small title can work. Long names, multiple fonts, and extra wording usually fight with the figures.
If you want wording on the vehicle, keep it separate from the family layout when possible. A dedicated custom text window decal often looks cleaner than forcing text into the main family graphic.
Three things usually work well:
- Family surname: Best for a clean traditional look.
- Short phrase: Faith-based or simple family wording can work if it stays brief.
- Separate placement: Put text above or below the figures instead of weaving it through them.
Measure the actual usable glass
Don’t measure the entire window opening from trim to trim and assume all of that space is usable. Curves, defroster lines, wiper paths, hinges, and edge taper all matter.
Use a soft tape measure and check the part of the glass where the decal will really sit.
For SUVs and hatchbacks
Rear glass often narrows toward the top. If you’re placing the decal on the lower corner, measure that specific rectangle, not the full height of the window.
Watch for rear wipers. A sticker placed in the sweep zone wears harder and looks busier.
For minivans
Rear side windows are often better than people expect because they give you a flatter section of glass. Sliding-door windows can work well, but check the shape closely. Many have deeper curves than they appear from a distance.
For sedans
Sedan rear windows can be tricky. The slope is steeper, and the inside view matters more. Side rear glass often gives a cleaner result than the center rear windshield.
Use a simple sizing method
This shop-floor method prevents most mistakes:
- Mark your boundaries: Use painter’s tape to outline the maximum width and height.
- Step back: Look at it from several feet away. A decal that technically fits can still look too crowded.
- Leave margin: Keep space between the decal and the window edge so it doesn’t look jammed into the corner.
- Account for curve: If the glass bends sharply, reduce your expected width.
A family decal should look placed, not stuffed.
Paper templates help too. Cut a rectangle from kraft paper or newspaper in the same size as your intended order and tape it to the glass. That quick mockup shows whether the scale feels right before you spend money.
Where to Place Your Sticker for Safety and Style
Placement decides more than appearance. It affects privacy, visibility, cleaning, and in some areas, whether the decal creates legal trouble.
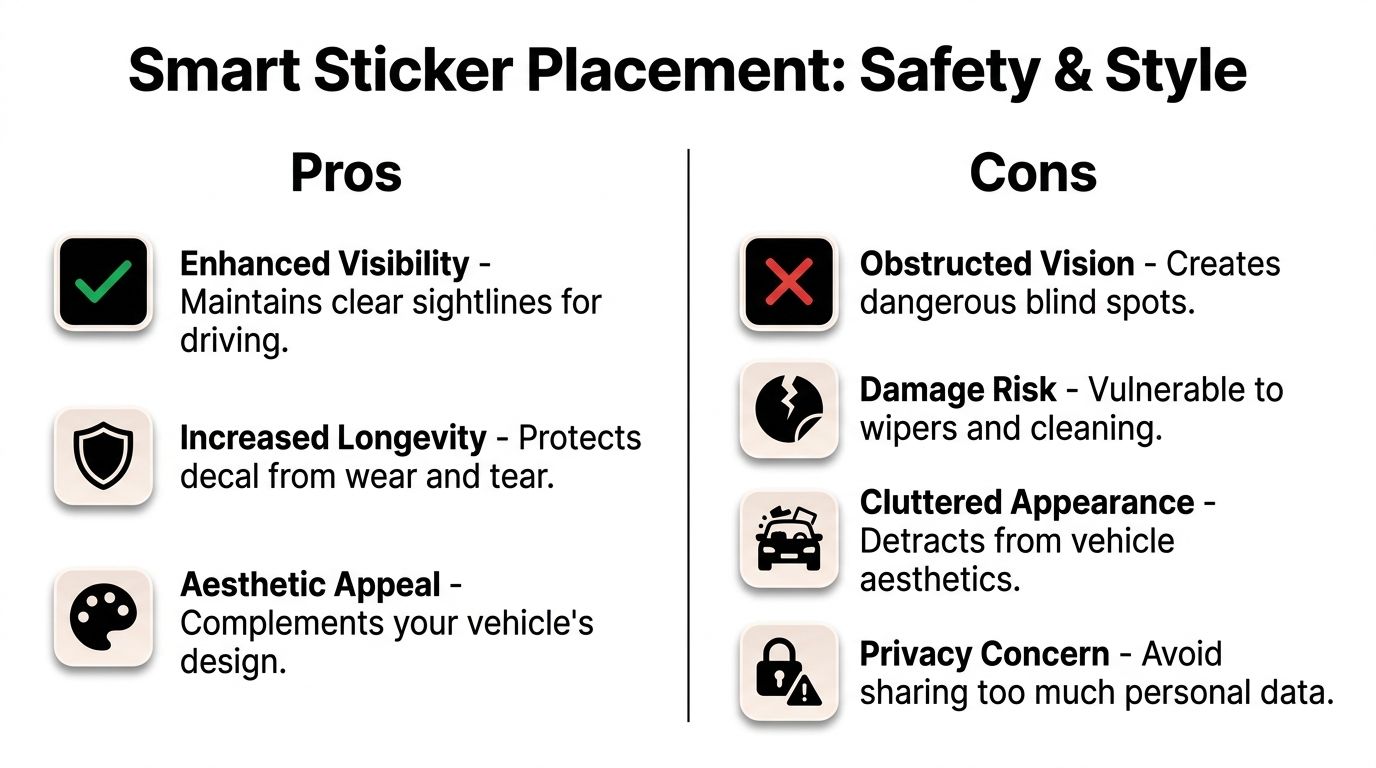
Rear side glass usually beats the liftgate
Many buyers default to the center rear window because that’s the most visible spot. It’s also often the least thoughtful choice.
Police warnings and FBI-linked data have highlighted that visible family decals can increase burglary targeting in some areas by 15 to 20 percent, and security guidance advises skipping specific names and using rear side windows rather than the main liftgate to reduce visibility to passersby, as summarized in this safety discussion about family stickers and privacy risks.
That tracks with what works in practice. The rear side window gives the decal presence without turning it into a billboard for everyone behind you at a stoplight.
A quick comparison
| Placement area | Looks | Privacy | Daily use |
|---|---|---|---|
| Rear side window | Clean and balanced | Better than center rear glass | Usually easier to live with |
| Main rear window | Most visible | Weakest privacy choice | Can interfere with rear visual clutter |
| Body panel or bumper | Bold | Better for personal info concerns | Takes more abuse from road grime |
Don’t include too much personal detail
A family sticker should suggest, not announce.
Skip names. Skip school references. Skip anything that gives strangers a clearer read on who your kids are or where they spend time. Generic figures are enough.
A small themed add-on can still work. For example, a separate Baby on Board farmer sticker communicates a message without turning your entire back window into a data sheet.
The best family decal is recognizable to friends and unremarkable to strangers.
Think about the driver first
Drivers sometimes place decals based only on how they look in photos. That’s backwards.
You need clear sightlines when backing up, checking mirrors, and dealing with rain or nighttime glare. If the vehicle already has dark tint, cargo, headrests, or a rear camera screen competing for attention, keep the decal smaller and further outboard.
This matters even more if you travel with kids. Families who care about a comfortable cabin often also look into practical visibility helpers and sun management, like the best window shades for car windows. The same mindset applies to decals. Add comfort and personality without making the vehicle harder to use.
Local rules aren’t always obvious
Sticker laws vary, and that’s where buyers get caught off guard. The main issue is obstruction. If a decal blocks too much glass or sits in a spot that affects the driver’s view, it can create problems during inspection, a traffic stop, or after a crash review.
A safe working rule is simple:
- Keep decals off primary viewing zones
- Avoid stacking multiple stickers on one pane
- Stay away from wiper sweep areas
- Don’t crowd the lower center of the rear windshield
Some states and regions are stricter than others, but no driver regrets leaving more visibility than less.
Style still matters
Smart placement doesn’t mean dull placement.
A family decal usually looks best when it aligns with the shape of the vehicle. On a boxier SUV, a lower rear side corner often looks intentional. On a sedan, a smaller side-glass layout can feel more refined than a big rear-window spread. On a truck, one compact grouping often beats a giant center-glass arrangement.
Placement should look like part of the vehicle, not an afterthought.
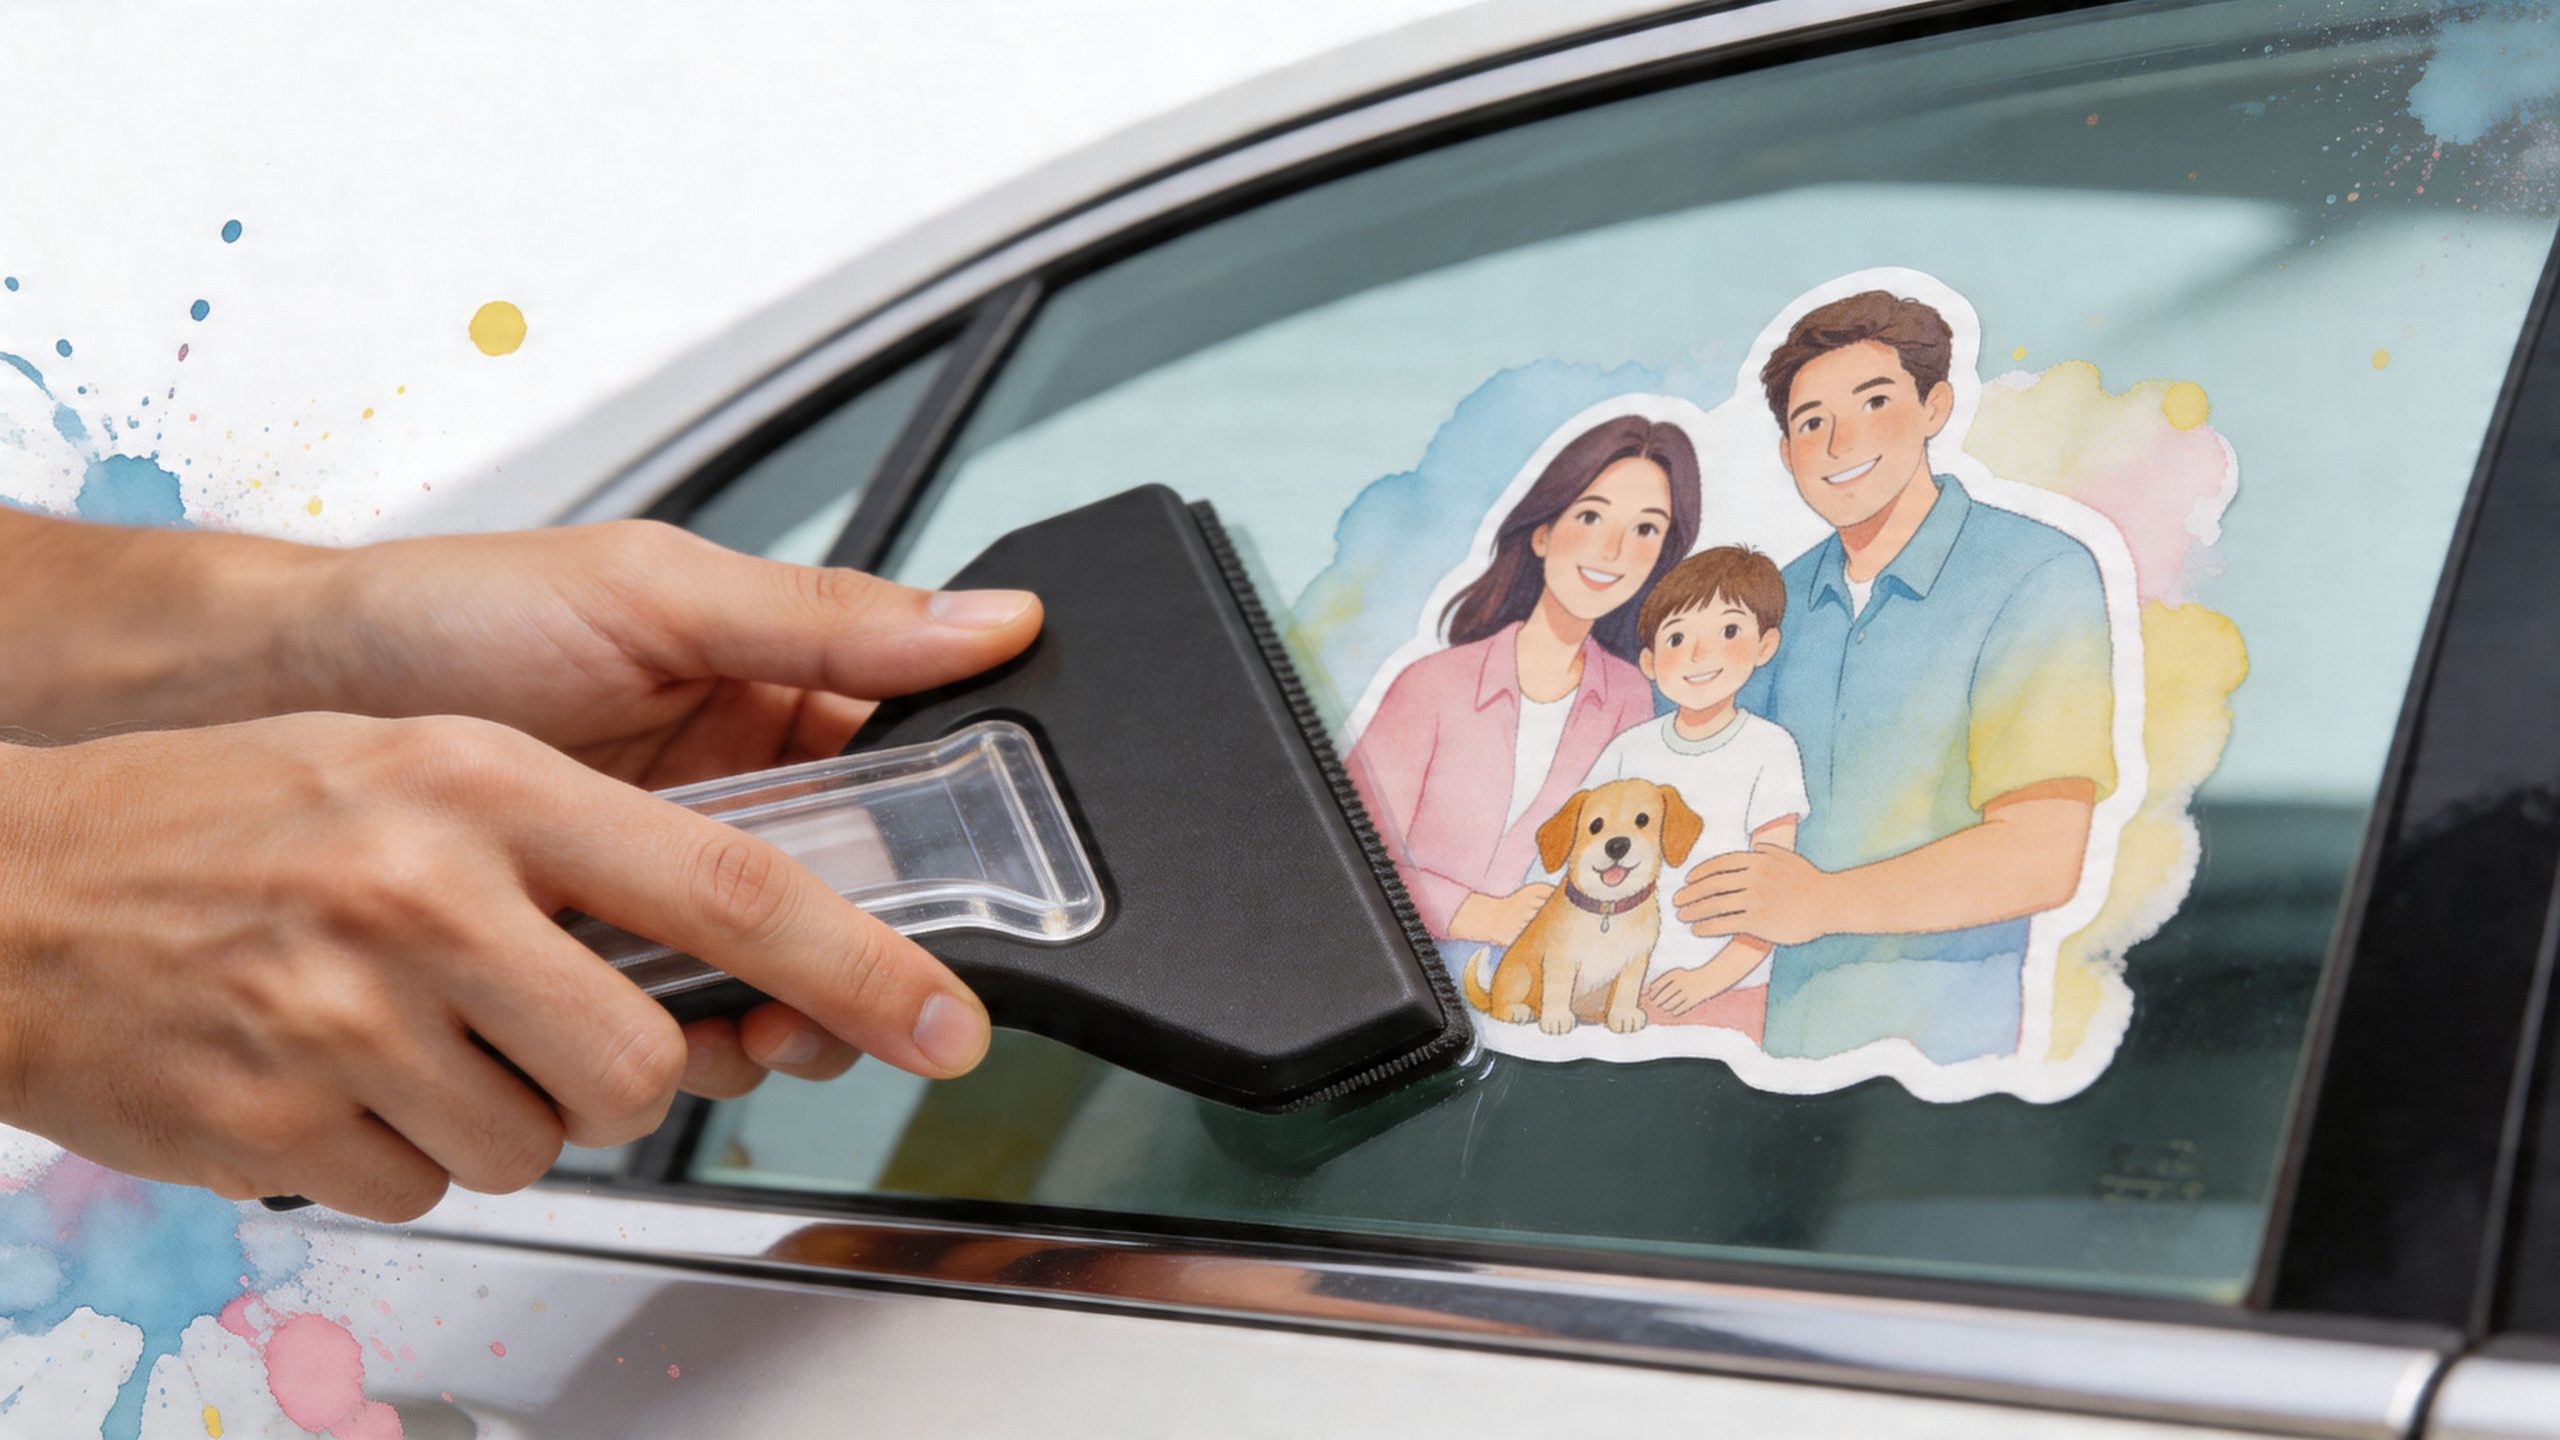
How to Install Your Family Decal Without Bubbles
A careful install makes average vinyl look better and premium vinyl last the way it should. Rushed installs create silvering, trapped bubbles, crooked alignment, and peeling corners.
Prep the glass correctly
Clean glass is not the same as ready glass. Many windows look clean but still carry wax, silicone, fingerprint oils, or old cleaner residue.
For long outdoor life, proper installation starts with isopropyl alcohol cleaning, then a wet application method, followed by squeegee pressure in the 40 to 60 psi range. Premium materials such as Oracal 651 vinyl and transfer tape help deliver over 99 percent bubble-free success and support a 7-year outdoor lifespan when installed correctly, based on the installation guidance summarized in this source discussing the decal process and durability.
Use this prep routine:
- Wash off dust and road film.
- Dry the area fully.
- Wipe the glass with isopropyl alcohol using a lint-free cloth.
- Let it flash off completely before you touch the surface again.
Use the wet method on window glass
The wet method gives you a little forgiveness. That matters with multi-figure family decals because spacing and level alignment are easy to get wrong when you rush.
A light spray of soapy water on the glass lets you position the decal before it locks down. You still need to work carefully, but you won’t be fighting instant grab from the adhesive.
Basic install sequence
- Tape the decal in place and step back to confirm level.
- Peel the liner away carefully.
- Mist the glass lightly.
- Set the decal onto the window.
- Squeegee from the center outward with steady overlapping passes.
- Wait before removing the transfer tape so the vinyl can settle.
Slow pressure beats hard pressure. Pressing too aggressively can distort the film or create edge problems.
Pre-spaced, transfer-taped decals save a lot of frustration here because the figures stay aligned during install instead of forcing you to place each piece by hand.
Watch the small details
Temperature matters. Shade helps. Wind does not.
If the glass is hot from direct sun, the application fluid flashes too fast and the adhesive grabs unevenly. If the day is cold, the vinyl feels stiffer and less cooperative. A mild, shaded environment is easiest.
This visual walkthrough helps if you prefer to see the motion and hand placement before you install:
Common install mistakes
Most failures come from a short list:
- Dirty edges: Contamination at the perimeter leads to lift later.
- Too much fluid: The decal can drift or take too long to set.
- Fast transfer-tape removal: Pulling too soon can lift part of the design.
- Skipping the final pass: Light bubbles at install often become obvious once the glass dries.
If you see a small bubble after the first pass, don’t panic. Many tiny moisture pockets disappear as the application fluid evaporates. The ones that matter are the larger trapped pockets caused by poor squeegee coverage.
Keeping Your Sticker Looking Great and Easy Removal
A good family decal doesn’t need much maintenance, but the little things matter.
Wash around it, not at it
Normal washing is fine. What shortens decal life is repeated abuse at the edges.
Keep these habits:
- Use a soft wash mitt: Grit and stiff brushes wear edges faster.
- Avoid direct high-pressure spray on corners: That’s where lifting usually starts.
- Dry with a microfiber towel: It reduces snagging compared with rough shop towels.
If your vehicle sits outside year-round, inspect the edges every so often. A decal can stay looking sharp for a long time when the corners stay sealed and clean.
What to do if an edge starts lifting
Don’t pick at it. That turns a small issue into a ruined design.
Clean the area gently first. If dirt has built up at the edge, leaving it alone is often smarter than trying a home fix that traps more contamination underneath. Once vinyl has stretched or folded, it rarely goes back to a clean factory-cut look.
Removal years later
Window glass is one of the easiest surfaces for decal removal if you go slowly.
A safe method is straightforward:
- Warm the decal with a hair dryer.
- Lift one corner with a fingernail or a plastic card.
- Peel it back at a low angle.
- Remove leftover adhesive with a gentle automotive-safe product.
- Clean the glass afterward.
If the decal is old and brittle, use more patience and less force.
Trouble arises from scraping too hard or overheating one spot. Glass is forgiving, but there’s no prize for finishing fast. Slow removal protects the surface and leaves less residue behind.
A final wipe with glass cleaner or alcohol brings the window back to a clean finish. If you plan to replace the old sticker with a new one, clean the area thoroughly and let it dry before the next install.
If you’re ready to create family car window stickers that fit your vehicle, reflect your household accurately, and install cleanly, take a look at Custom Sticker Shop. As a family-run decal maker in Topeka, Kansas, the shop offers American-made vinyl decals, pre-spaced transfer-taped designs, and a wide range of family, pet, faith, military, and custom-text options for cars and trucks.