
Your Yamaha probably runs exactly the way you want, but it may not look the way you want. That’s where most owners get stuck. The bike, ATV, boat, or tow rig is mechanically theirs, but visually it still feels factory.
Decals fix that faster than almost any other upgrade. A good set can sharpen tired bodywork, restore an older machine, mark out your own style, or bring a clean OEM look back to a Yamaha that’s been through hard use. They’re also one of the few changes that work across the whole Yamaha world, from sportbikes and Grizzly ATVs to outboards and windshield banners on the truck pulling the trailer.
That matters because Yamaha owners don’t just buy and ride. A lot of them rebuild, refresh, and personalize. EpicVIN reports that about 28% of used Yamaha motorcycles have at least one damage record, and about 16% of Yamaha motorcycles listed on Copart salvage auctions sell with rebuilt or salvage titles, which points to a large restoration market where appearance upgrades make sense alongside mechanical work (EpicVIN Yamaha data).
Your Yamaha Your Style
A stock Yamaha always has potential. You see it in the garage after a wash, or strapped down on the trailer, and the machine looks solid, but it still blends in. Same colorway. Same factory lines. Same appearance as the next one in the parking lot.
That’s why decals for yamaha matter. They let you change the personality of the machine without changing the machine itself. A small fork logo, tank script, cowling label set, windshield banner, side panel name, or retro stripe package can shift the whole look in an afternoon.
Why decals work better than most cosmetic mods
Paint is expensive. Hard parts can clutter the design if you choose the wrong finish. Cheap sticker kits peel early and make the vehicle look worse, not better.
A well-made decal does the opposite:
- It respects the original shape of the Yamaha instead of fighting it.
- It adds identity fast without putting the vehicle down for days.
- It works for restoration or customization, which is why both collectors and casual owners use them.
- It can be subtle or loud, depending on whether you want a factory-style refresh or something unmistakably personal.
Good decals don’t look like an add-on. They look like they belonged there from the start.
Yamaha has earned that kind of attention over decades. Owners care about getting the look right because the brand carries history, and because many machines stay in service long enough to deserve a second visual life.
You’re not the only owner refreshing one
A lot of Yamaha owners are in one of three spots right now. They’re restoring an older machine, covering cosmetic wear, or personalizing a clean one that feels too generic. That’s not a niche impulse. It’s part of the culture around the brand.
If your Yamaha project leans off-road, a good companion read is this ultimate dirt bike guide, especially if you’re thinking about where graphics fit into the larger setup of riding, transport, and gear decisions.
For many owners, decals are the first upgrade because they give immediate visual payoff. For others, they’re the finishing move after mechanical work is done. Either way, the appeal is the same. You want the Yamaha to feel like yours when you walk up to it.
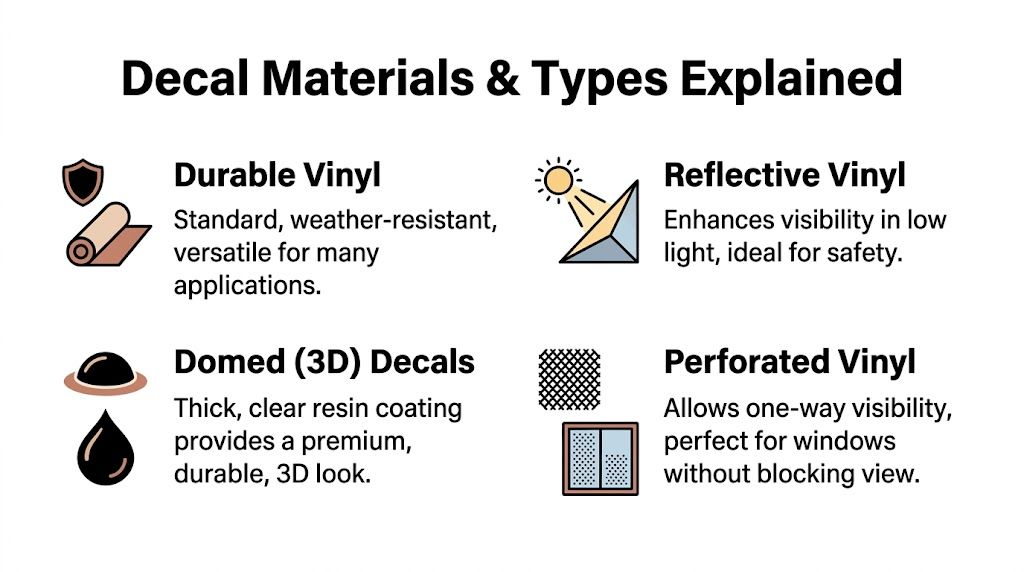
Understanding Decal Materials and Types
The material decides whether your decal looks sharp for years or starts curling after a season. Most buying mistakes happen before installation. Owners choose the wrong vinyl for the surface, the wrong adhesive for the conditions, or the wrong decal style for the job.
The fast way to think about it is simple. Some decals are built for logos and clean lettering. Others are built for full graphics coverage. Some conform well to curves. Others belong on flatter panels and short-term projects.
Die-cut decals versus printed kits
A die-cut decal is cut to the shape of the design. No extra background. That’s what you want for tuning fork logos, text banners, side-window graphics, military tributes, registration-style identifiers, and clean single-color or layered work.
A printed graphic kit is better when you want gradients, camouflage, complex art, or model-specific wraps that cover larger areas.
The trade-off is straightforward:
| Yamaha Decal Material Comparison | Best For | Durability | Cost | Flexibility |
|---|---|---|---|---|
| Die-cut vinyl | Logos, text, windshield banners, body-panel accents | High when made with premium outdoor vinyl | Lower to moderate | Good on mild curves |
| Printed PVC vinyl | Full graphics, multi-color art, restoration label sets | High when professionally made | Moderate to higher | Good, depends on thickness and panel shape |
| Reflective vinyl | Safety accents, trailer markings, visibility-focused decals | Varies by product | Moderate | Best on flatter surfaces |
| Perforated vinyl | Rear glass and window graphics | Surface-specific | Moderate | Designed for glass, not body contours |
| Domed decals | Premium emblems and badge-style applications | Good for niche uses | Higher | Limited on tight compound curves |
What premium material actually looks like
One verified benchmark matters here. Professional-grade Yamaha decals often use 15mil sub-surface printed PVC vinyl with hi-tack adhesive, UV-resistant properties, and resistance to chemicals like fuel and detergents. Premium versions are rated for 5 to 7 years of outdoor use (Throttle Syndicate Yamaha decal sheet).
That spec tells you a lot.
- 15mil construction gives the decal body. It doesn’t feel flimsy in your hand.
- Sub-surface printing helps protect the printed image.
- Hi-tack adhesive matters on powersports plastics and painted panels where weak glue fails early.
- UV resistance matters if the Yamaha lives outdoors, rides often, or spends time on a trailer.
- Chemical resistance matters more than most buyers think. Fuel drips, detergents, and cleaning sprays ruin cheap prints fast.
Cast versus calendered vinyl
This is the trade-off most buyers never get explained clearly.
Think of cast vinyl like a custom fit. It’s thinner, more stable, and better at laying down on curves and staying there without shrinking as much over time. It’s the better choice for long-term exterior use, especially on body lines, fairings, and panels that see heat and weather.
Calendered vinyl is more like an off-the-rack option. It can look fine on simple surfaces and it costs less, but it’s usually the wrong choice for demanding installs or long service life.
Use cast when:
- The panel curves hard
- The vehicle stays outside
- You care about long-term edge stability
- The decal sits near heat or frequent washing
Use calendered when:
- The surface is flat
- The job is short-term
- Budget matters more than lifespan
Material rule: If the surface is curved and exposed, buy for durability first and design second.
Adhesive and finish matter as much as the artwork
Owners often focus on color and skip the adhesive conversation. That’s backward. Weak adhesive ruins a great design. Strong adhesive with a poor install still causes trouble, but at least the material had a chance.
A few practical checks help:
- Look for outdoor-rated vinyl, not generic craft vinyl.
- Ask whether it’s meant for vehicle use, not laptop use.
- Check if the decal is pre-masked with transfer tape for clean placement.
- Match the finish to the vehicle. Gloss works well on painted bodywork. Matte can work on stealth builds, but it shows design choices more aggressively.
- Avoid thick novelty material on complex fairing edges unless it was made for that purpose.
The best decals for yamaha aren’t the loudest. They’re the ones built from the right material for the way that machine gets used.
Choosing the Right Decal for Your Yamaha Model
One Yamaha isn’t another. The shape, heat, surface texture, and exposure are different enough that a decal choice that works on a sportbike can be wrong for an ATV, and a perfect-looking motorcycle logo can be completely wrong for an outboard cowling.
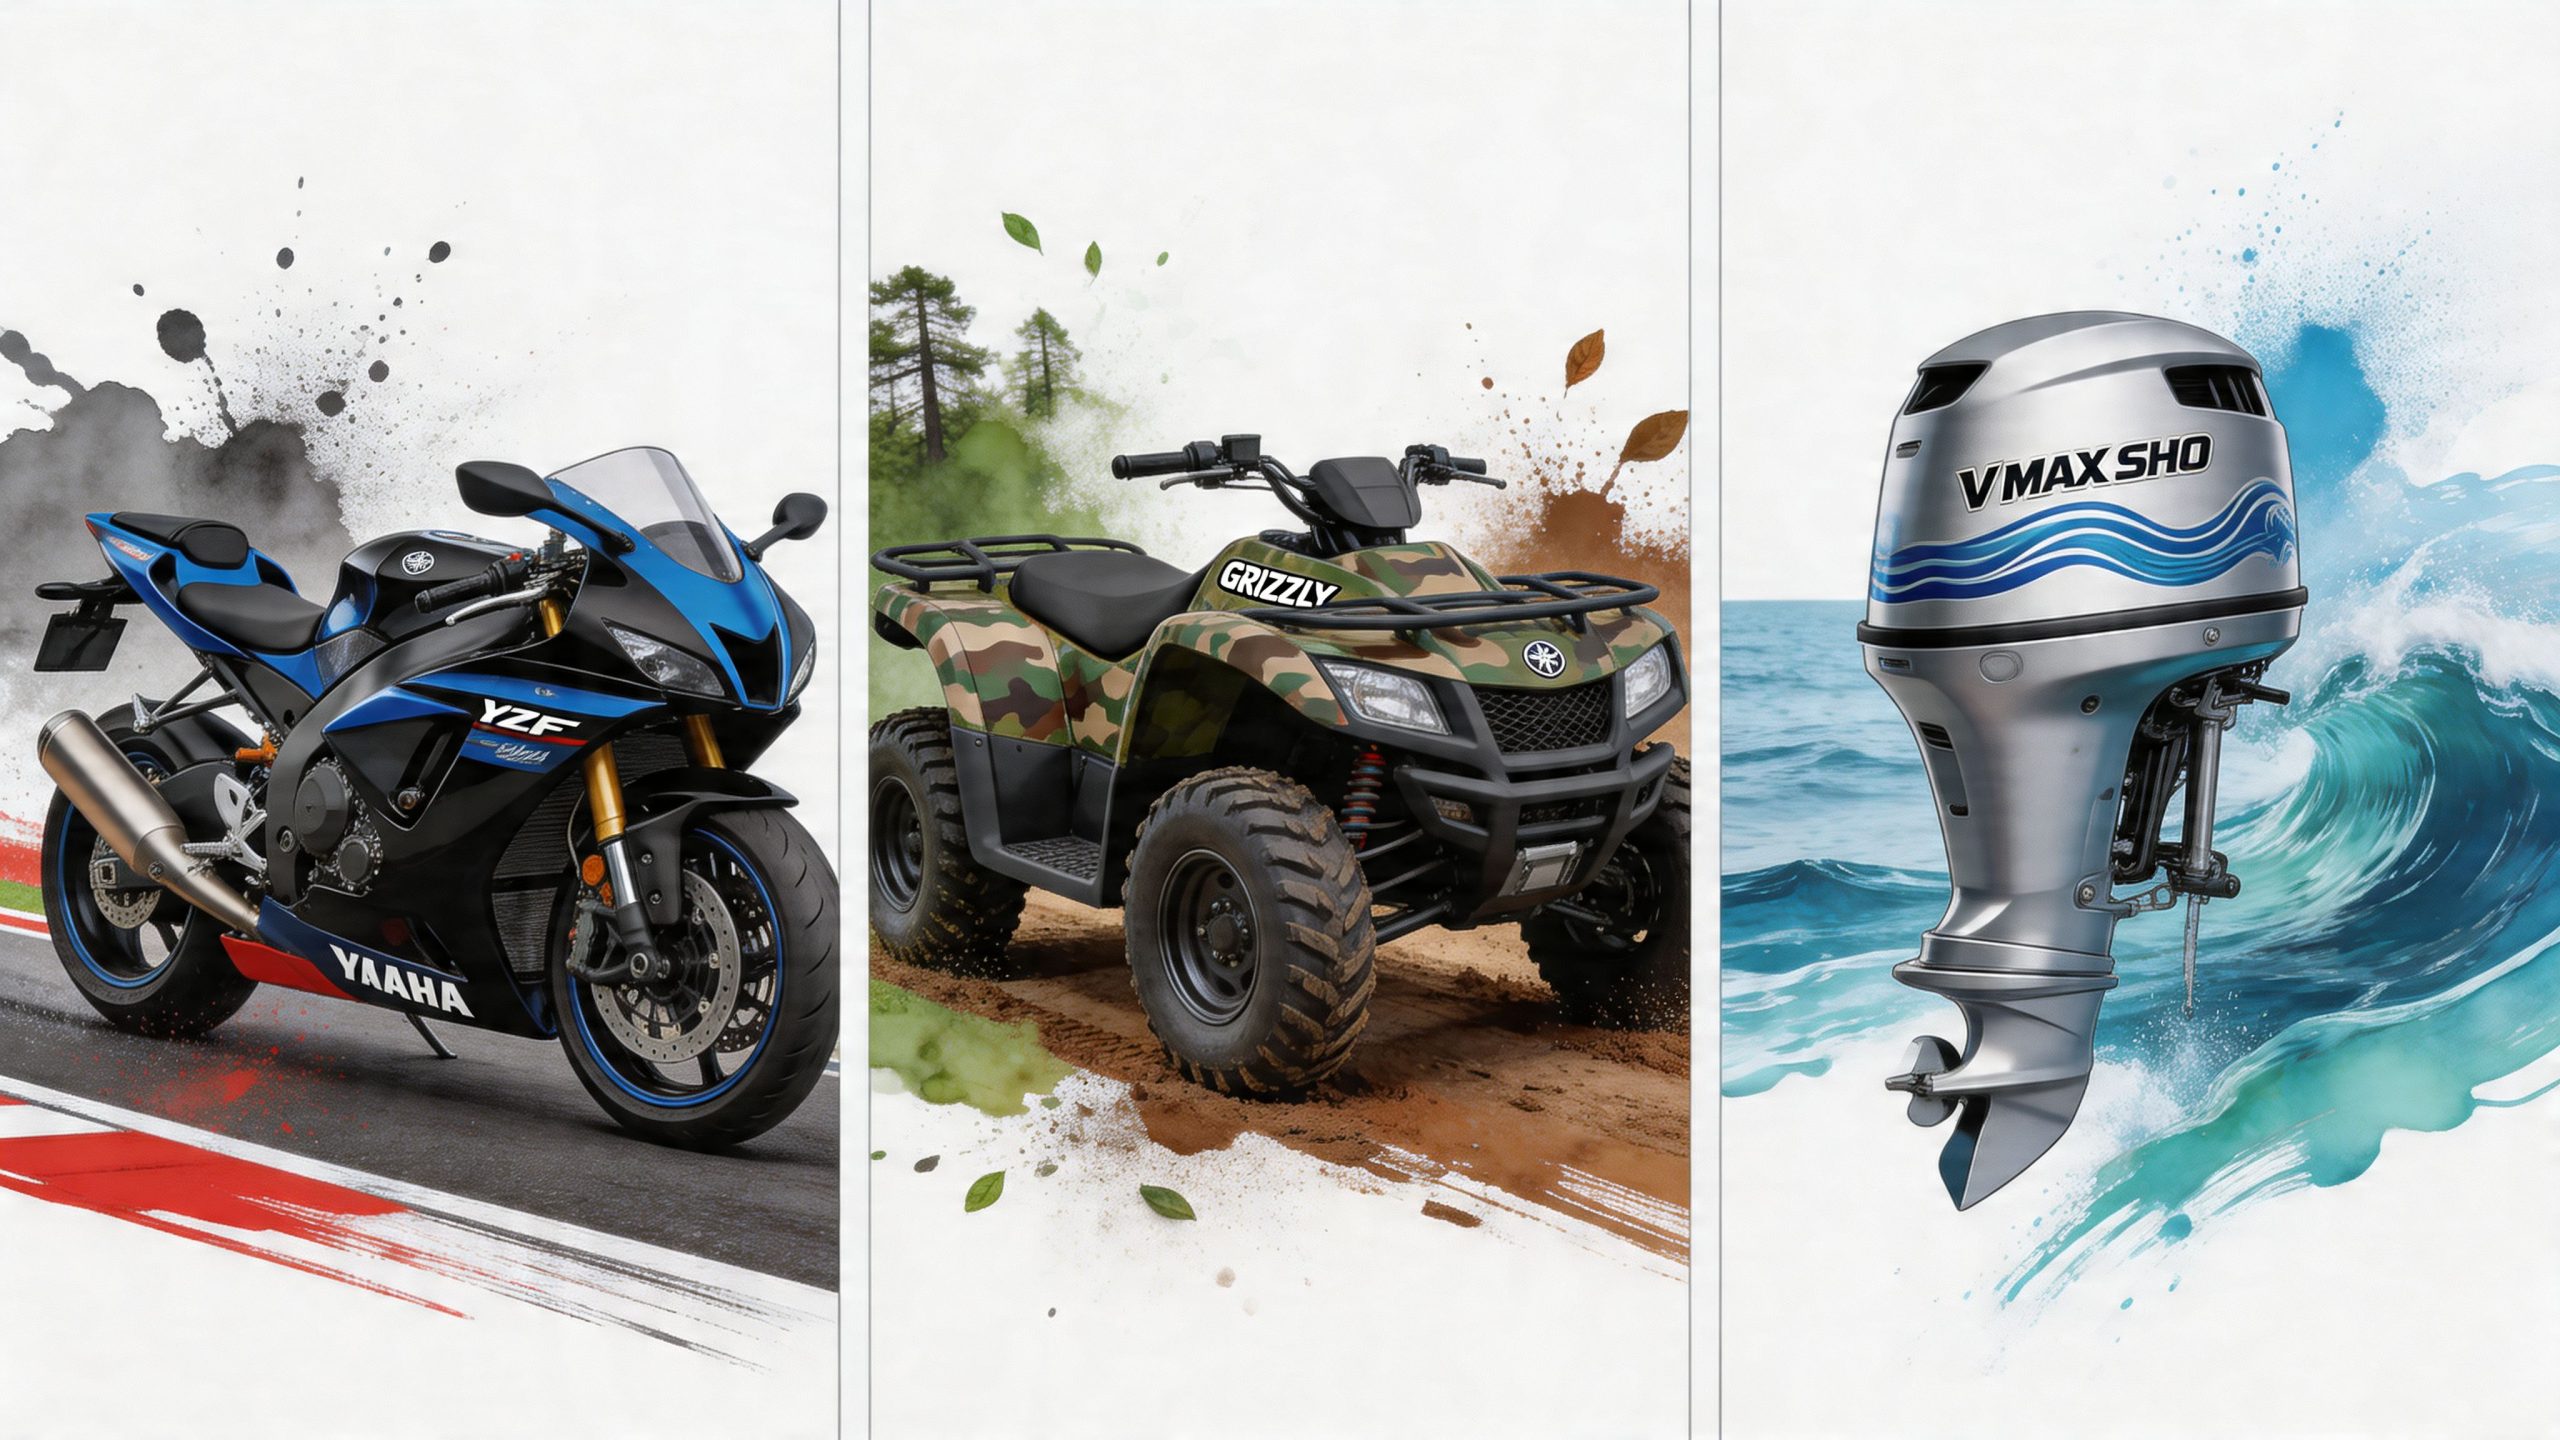
Sportbikes and street motorcycles
Sportbikes need restraint. Their bodywork already carries motion in the shape, so oversized graphics can clutter the design fast. On fairings, use decals that follow the existing line breaks and vent geometry. On tanks and tails, keep spacing balanced from left to right.
Heat matters too. Panels near the engine and exhaust need stable adhesive and careful placement. If you run track-oriented bodywork, favor clean die-cut branding or race-number style elements over thick layered art unless the kit was designed for that exact panel set.
Cruisers and standards are different. They usually look better with simpler typography, heritage-inspired striping, or understated logo placement that works with chrome, black trim, or classic paint.
ATVs and side-by-sides
ATVs, UTVs, and utility-focused Yamaha machines live a harder cosmetic life. Mud, brush, boots, washing, and cargo all attack the edges first.
What works best:
- Smaller high-contact graphics instead of giant edge-heavy kits
- Placement away from constant boot scrape zones
- Bold contrast colors that still read after dirt builds up
- Aggressive adhesive on textured or abuse-prone plastics
A decorative door graphic on a side-by-side can hold up well if the panel is flat and cleaned properly. Lower fender corners and sharp transitions are less forgiving.
Outboards demand exact matching
Marine decals are the least forgiving category because appearance and function overlap. Yamaha outboard decals are model and year-specific, and they also carry functional information such as horsepower and safety data. Proper application calls for surface temperatures between 60–80°F and precise alignment techniques for long life in harsh marine conditions (Yamaha outboard cowling graphics and labels).
That means you don’t “eyeball” an outboard set. You match the engine generation, verify the layout, and install in the right environment.
Trucks, tow rigs, and Yamaha-adjacent builds
Most decal guides fall short by focusing exclusively on bikes. Real owners often want decals for yamaha on the truck hauling the ATV, on the rear glass of the trailer rig, or on a support vehicle that ties the whole setup together.
For hood decals, windshield banners, and bedside graphics:
- Measure the usable flat width, not the full panel width.
- Stand back and check the body crease lines before ordering.
- Leave room around badges, washer nozzles, hinges, and trim.
- Choose color for contrast at distance, not just close-up appeal.
Memorial, tribute, or family decals also fit naturally on support vehicles. For riders who want a remembrance design with motorsports character, this style of in loving memory dirt bike decal sticker shows how a tribute can stay respectful without looking generic.
A simple fit check before you buy
Before ordering any decal, answer these four questions:
| Question | Why it matters |
|---|---|
| What exact Yamaha model and year do I have? | Fitment and style compatibility depend on it |
| Is the surface painted metal, plastic, glass, or marine cowling? | Adhesion and material choice change by surface |
| Will this area see heat, road grime, salt, fuel, or heavy washing? | Durability requirements change fast in those conditions |
| Do I want OEM-style, custom, or tribute graphics? | The visual direction should match the machine’s purpose |
A clean fit always beats a flashy mismatch. The right decal doesn’t just look good by itself. It looks right on that Yamaha.
Creating a Truly Custom Yamaha Statement
Custom work gets interesting when it says something specific. Not loud for the sake of being loud. Specific. A rider name on a side panel. A unit tribute on a tow vehicle. A memorial decal on rear glass. Retro tuning forks on a restored bike. A JDM-style windshield strip that ties the whole build together.
That kind of customization works best when you balance personal identity with brand heritage.
Yamaha history gives custom work a strong base
Yamaha’s tuning fork logo dates back to 1898, when the original trademark design featured a phoenix holding a tuning fork. The company’s visual identity was refined over more than 70 years, which is part of why authentic reproduction and heritage-inspired Yamaha decals still carry weight with owners today (Yamaha logo history).
That history matters because it gives you a design language to borrow from. If you’re building a vintage-inspired motorcycle or restoring an older machine, a retro look often ages better than trendy effects. Clean stripes, period-correct shapes, and restrained logo placement usually hold up longer than overdesigned layouts.
Heritage graphics work when they respect proportion. The logo should support the machine, not overpower it.
Good custom ideas start with the vehicle’s job
A trail bike, a bass-boat outboard, and a full-size tow rig shouldn’t all wear the same design language.
A few combinations that tend to work:
- Retro motorcycle build with old-school striping and classic tuning fork placement
- ATV or side-by-side with practical ID text, camo-compatible accents, and easy-to-clean placement
- Tow vehicle with windshield text, tailgate script, or family and service tributes
- Memorial setup that uses names, dates, or silhouettes without crowding the glass
If you want full control over wording and layout, a make-your-own option like this custom sticker format gives you room to build around your exact use instead of forcing your idea into a premade template.
What to ask before ordering custom work
Not every shop handles custom requests well. Some can print artwork. Fewer can translate an idea into something that will look right on a vehicle.
Ask practical questions:
- Is the decal scaled for my exact panel or glass area?
- Will the line thickness survive distance viewing?
- Is the material rated for exterior use?
- Will it come pre-spaced or layered for easier install?
- Can the design be simplified if the panel is busy?
That last point matters more than people expect. The strongest custom decals for yamaha often come from removing extra elements, not adding them.
If your style crosses into newer commuter or electric-adjacent gear culture, this roundup of best electric motorcycle and moped accessories is useful for seeing how riders build a cohesive look around the machine rather than treating decals as a standalone decision.
A custom Yamaha statement should feel intentional. If it looks like it belongs on your machine, you got it right.
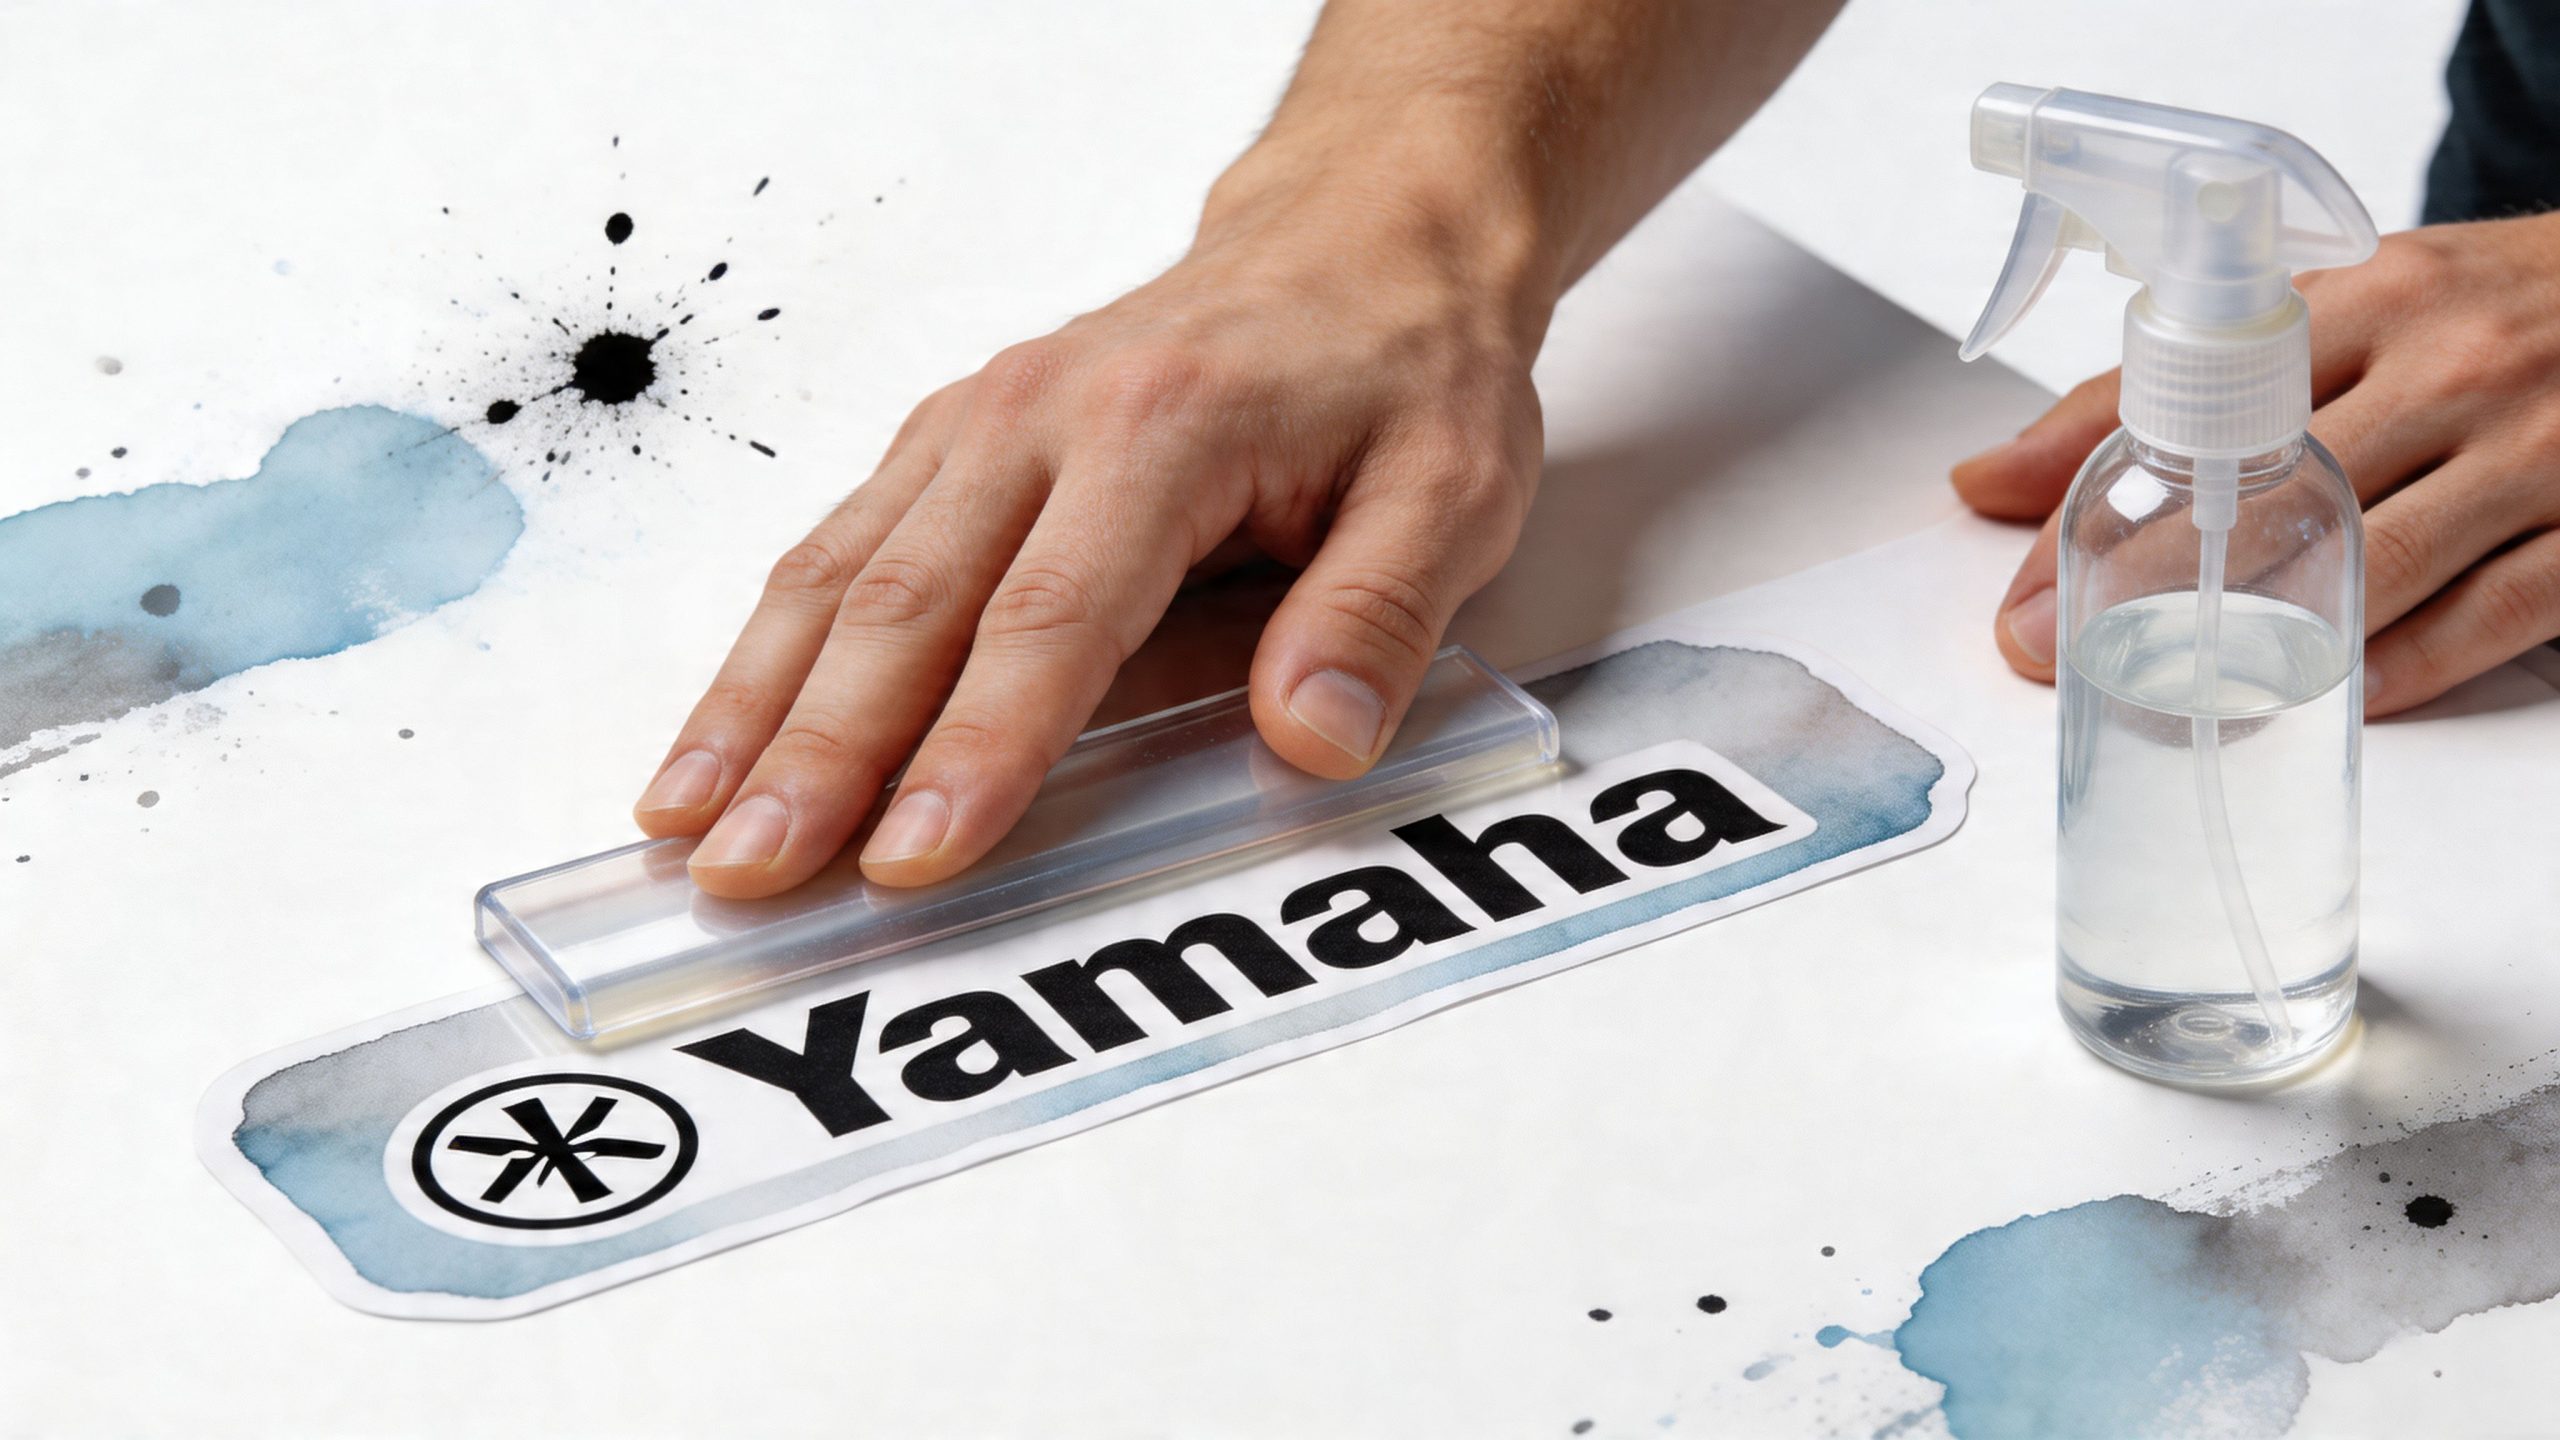
How to Install Decals for a Bubble-Free Finish
Installation decides whether a premium decal looks factory or amateur. Most failures blamed on vinyl are prep problems, alignment mistakes, or rushing the first contact point.
Get the surface ready first
Do the boring part well. That’s the job.
Wash the area. Dry it fully. Remove wax, road film, and any oily residue. If you’re replacing an old decal, get every bit of leftover adhesive off before the new one goes on. Even a small ridge can telegraph through thin vinyl or push a bubble into the final install.
For outboard work, stay inside the recommended application window already noted earlier. For bikes, ATVs, trucks, and glass, avoid direct sun and overheated panels. You want the surface cool enough to work accurately and warm enough for the adhesive to behave.
The tools that actually help
You don’t need a shop full of equipment. You do need the right basics.
- Squeegee with a soft edge or wrap-safe edge
- Masking tape for positioning and hinge setup
- Clean microfiber towels
- Gentle heat source for removal or for helping vinyl settle on curves
- Patience, which solves more decal problems than gadgets do
If you’re applying a long windshield graphic, a pre-masked product like a custom text windshield banner decal sticker is much easier to align than loose individual letters.
Use the hinge method for clean alignment
For medium and large decals, the hinge method is the safest approach.
- Tape the decal in place without removing the backing.
- Step back and confirm level, spacing, and relation to body lines.
- Run a strip of masking tape along the top edge to create a hinge.
- Flip the decal upward on that tape hinge.
- Peel the backing away carefully.
- Lower the decal back down slowly.
- Squeegee from the center outward with overlapping strokes.
This avoids the most common mistake. Once vinyl touches the panel crooked, people try to drag it into place. That usually stretches the design or creates trapped air.
Shop habit: If you’re unsure about placement, spend more time taping and less time peeling.
Dry method versus wet method
For most die-cut exterior vehicle decals, the dry method gives the cleanest result. It grabs faster and avoids trapped moisture under transfer tape.
The wet method can help on some larger flat installs, especially glass, but it can also create trouble if the adhesive or transfer system wasn’t meant for it. Don’t default to wet just because it sounds easier.
Use dry when:
- the decal is die-cut
- transfer tape is already applied
- the surface is painted metal, plastic, or prepared glass
- the size is manageable with the hinge method
Watch the process once before you start
A visual walkthrough helps if you haven’t applied a larger transfer-tape decal before.
Finishing the job without lifting edges
After the decal is down, burnish it again with the squeegee. Then remove the transfer tape slowly, pulling it back over itself rather than straight upward.
If a corner lifts with the tape, stop. Press it back down. Squeegee again. Then continue.
A few final habits make a difference:
- Don’t wash immediately after install.
- Don’t attack bubbles with a knife unless you know exactly what you’re doing.
- Don’t stretch cold vinyl around a compound curve and expect it to stay put.
- Do inspect the edges after a few hours and press any problem spots early.
Most clean installs come from restraint. Line it up carefully, make the first pass count, and let the material do the work.
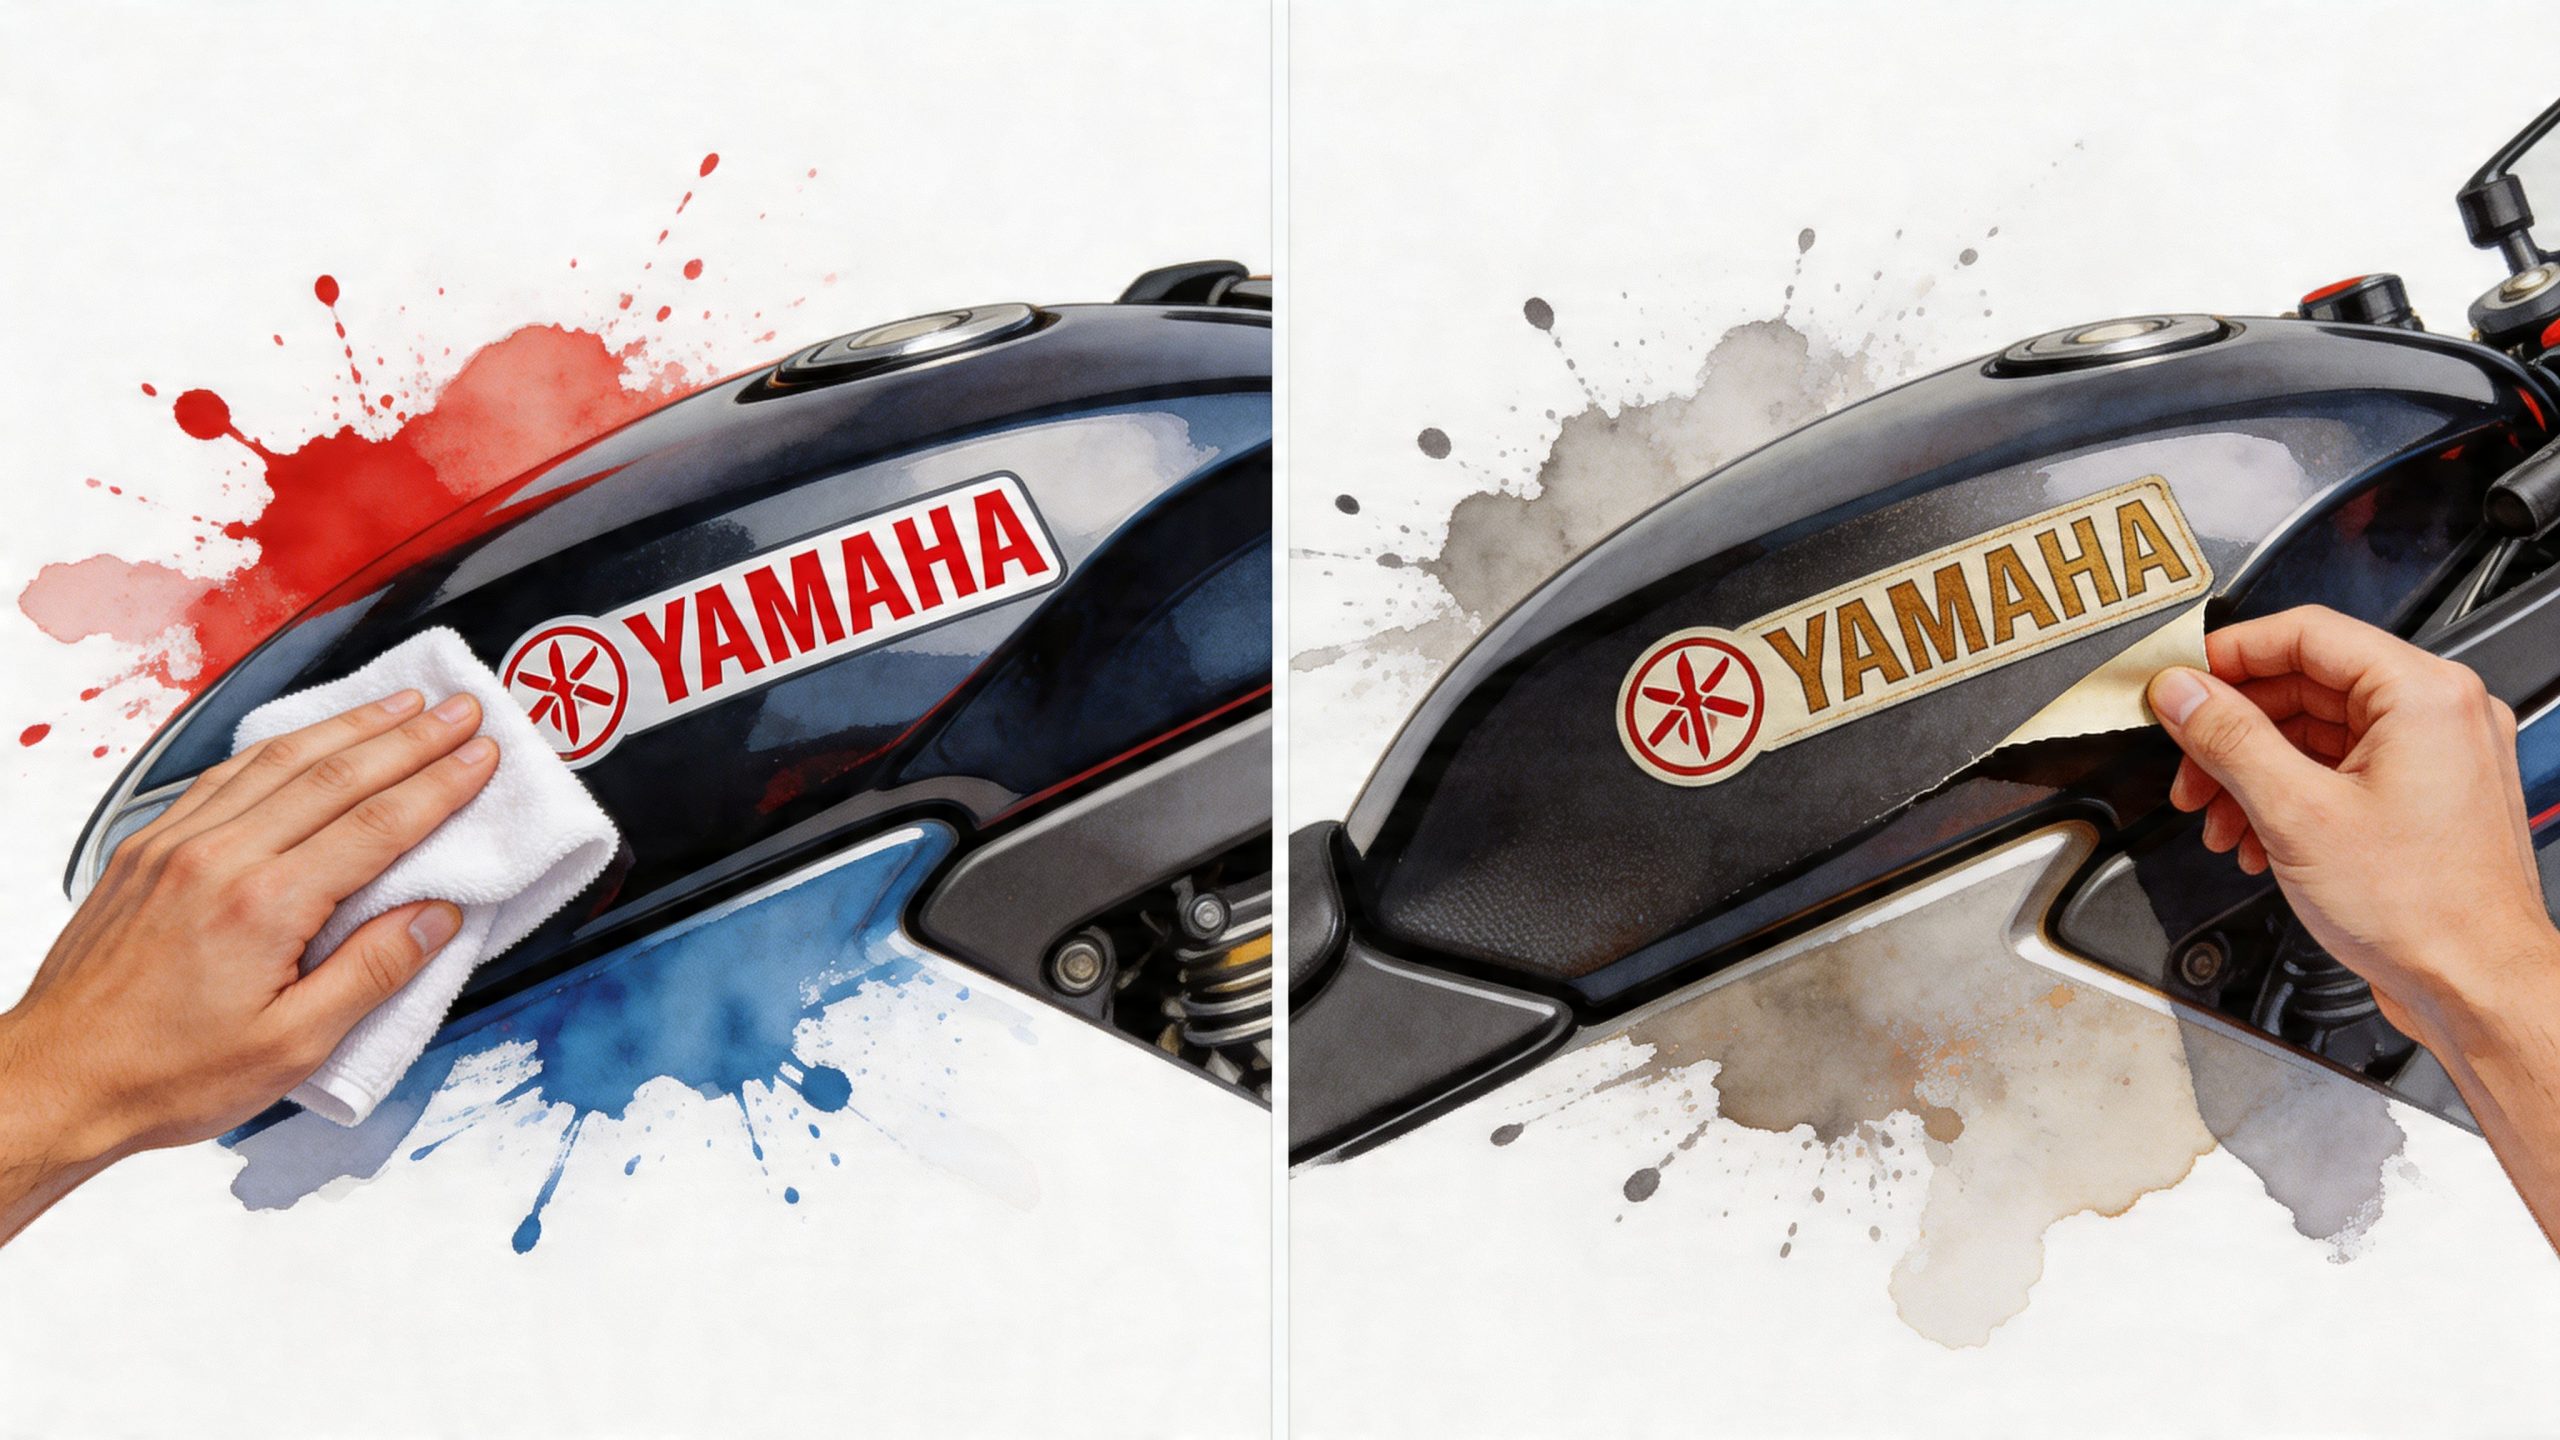
Maintaining and Removing Your Yamaha Decals
A quality decal earns its keep over time, not on day one. Owners who treat decals like painted trim usually get better life from them. Owners who hit them with harsh brushes, aggressive pressure, or random solvents shorten that life fast.
That matters even more on multi-use machines. A Yamaha-branded truck may face road salt and winter grime. An outboard sits under hard sun. An ATV gets mud packed into edges. Maintenance is what separates a decal that stays crisp from one that starts looking tired early.
How to make them last
There’s a real gap in guidance for trucks and 4×4-style applications, especially around winter exposure and fading. Verified market-gap data notes that premium 7-year outdoor vinyl can show 20 to 30% better adhesion on painted panels than generic kits, which is exactly why painted hoods, windshields, and body panels deserve better material choices than bargain decals (Rival Ink Yamaha graphics page).
That doesn’t mean “install and forget.”
Do this instead:
- Wash by hand when possible. A soft mitt or microfiber towel is safer than stiff brushes.
- Rinse salt and grime off early. Don’t let winter residue sit on edges.
- Use mild cleaners. If the product feels harsh on trim, it’s a bad bet on vinyl.
- Be careful with pressure washers. Water forced into an edge can start the failure.
- Store under cover when you can. UV is relentless, especially on horizontal surfaces.
Vinyl usually fails at the edge first. Most maintenance should focus on protecting edge adhesion.
What not to do
A short no-list saves a lot of decals:
| Avoid this | Why it causes trouble |
|---|---|
| Pressure blasting an edge | Water can get under the vinyl |
| Scrubbing with abrasive pads | You can haze the finish or lift corners |
| Strong untested solvents | They can attack print, laminate, or adhesive |
| Picking at a small lift by hand | You usually turn a tiny issue into a large one |
Removing old decals without damaging the finish
Removal should be slow and controlled. Start with gentle heat, not brute force. Warm the decal enough to soften the adhesive, then peel it back at a low angle. If residue stays behind, work it off carefully with a paint-safe adhesive remover or a suitable cleaner for the surface.
Glass gives you more margin for error. Painted panels and plastics don’t.
A few removal rules matter:
- Test heat first on a small area.
- Peel slowly, keeping tension even.
- Don’t gouge with metal tools.
- Clean the panel fully before applying anything new.
If the decal has been on for years, expect the surrounding paint to have weathered differently. That isn’t necessarily damage from the decal. It’s often the contrast between protected and exposed paint.
Good maintenance keeps decals looking sharp. Careful removal keeps the next install from starting at a disadvantage.
The Final Word on Quality and American Pride
The best decals for yamaha don’t win on artwork alone. They win on three things. Material quality, proper fit, and disciplined installation.
That’s why the cheap route usually costs more in frustration. Weak vinyl fades, poor adhesive lifts, and generic sizing forces you to compromise on placement. A better decal sits flatter, lasts longer, and keeps the vehicle looking intentional instead of patched together.
American-made production still matters here. It usually means better control over vinyl choice, cleaner cutting, more consistent masking, and support from people who understand that a truck hood, a bike fairing, and an outboard cowling don’t all need the same approach. It also matters to a lot of Yamaha owners who value skilled work and want to buy from shops that stand behind what they make.
If you care about results, buy from a supplier that treats decals as vehicle graphics, not novelty stickers. Look for outdoor-rated vinyl, clean transfer-taped presentation, and clear guidance on where the product works best. If the company also takes pride in veteran-friendly service and American-made standards, that’s a strong sign you’re dealing with people who understand both the work and the customer.
Your Yamaha doesn’t need more clutter. It needs the right graphic, made well, installed right, and built to hold up when the weather, fuel, mud, sun, and road grime show up.
Frequently Asked Questions About Yamaha Decals
Can I put Yamaha decals on more than just a motorcycle
Yes. Owners use decals for yamaha on motorcycles, ATVs, UTVs, outboards, trailers, and the trucks that haul them. The key is matching the material and adhesive to the actual surface and exposure.
Are outboard decals just cosmetic
No. On Yamaha outboards, decals can also carry model, horsepower, and safety identification. That’s why exact model and year matching matters, especially on restoration work.
Is installation hard for a beginner
Not usually, if the decal is sized correctly and comes with transfer tape. Most beginners get into trouble by rushing alignment or applying to a dirty surface.
Should I choose a wet install or dry install
For many die-cut vehicle decals, dry install is the safer default. Wet application can help in some situations, especially on glass, but it isn’t automatically better.
How long do quality decals last outdoors
Premium professional-grade Yamaha decals can be rated for 5 to 7 years outdoors, as noted earlier from the verified material reference. Lifespan still depends on sun, washing habits, chemicals, and where the decal sits.
Can I remove decals without hurting paint
Usually yes, if you use gentle heat and remove them slowly. Problems usually come from force, sharp tools, or using the wrong solvent on the wrong surface.
What’s the most common buying mistake
Buying by design alone. Fit, surface type, and material matter more than commonly realized. A simple, well-made decal that matches the panel will outperform a flashy one that doesn’t belong there.
If you want decals that are made for real vehicle use, not throwaway novelty use, take a look at Custom Sticker Shop. They’re a veteran-friendly, family-run shop in Topeka, Kansas producing American-made vinyl decals since 2001, with outdoor-rated Oracal material, pre-spaced transfer-taped installs, and a huge catalog for trucks, Jeeps, windshield banners, memorial designs, military tributes, and custom text. It’s a strong option if you want a Yamaha-related support-vehicle decal, a banner for your tow rig, or a personalized design that’s built to last.