
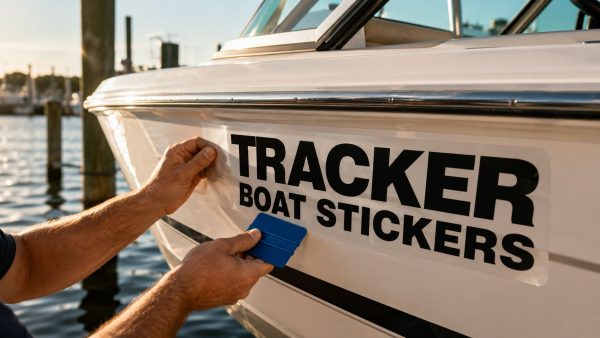
You're usually not buying one sticker for a Tracker. You're sorting out a hull number label, maybe fresh brand graphics, maybe a decal for the console, and sometimes a Bluetooth tag for gear that keeps disappearing into the wrong compartment. The hard part isn't finding a design that looks good in a listing photo. It's picking something that still reads cleanly after sun, spray, trailer miles, and a few seasons of hands touching the same edge.
What to Know Before You Buy Tracker Boat Stickers
A Tracker parked on a calm Saturday morning looks simple until you start measuring it. Tape measure in one hand, coffee in the other, and suddenly the question becomes whether you need identification, branding, decoration, or tracking. Those are different jobs, and they usually live on different surfaces with different levels of abuse.
The first bucket is the one many can't skip. In the U.S., boat hull identification is standardized as the Hull Identification Number, or HIN, and that hull number system is what most Tracker boat stickers purchases are ultimately tied to in practice (Hull number overview). That means the sticker isn't just cosmetic. It has to match the vessel identity used in records, stay readable, and hold up as part of the boat's paperwork trail.
A second bucket covers factory-style brand graphics and trim decals. These are the pieces that make a boat look finished after a repair, a resale, or a refresh after the old graphics have faded. A third bucket is the fun one, fishing-themed or lifestyle decals that sit on consoles, windows, or gear boxes where the abuse is lighter. A fourth bucket is different again, the Bluetooth tracker sticker, which is really a retrieval aid for gear, not a decorative vinyl piece.
Practical rule: Buy for the surface that gets the worst treatment, not the easiest one. A decal that's fine on a dry tackle box can fail early on a hull that gets sun, spray, and frequent washing.
That's why the “cheap sticker” route backfires. On a boat, one purchase often means solving for more than one material and more than one placement. If you want a custom decal made to fit your specific boat, a good starting point is a custom design option, especially when you're matching an old layout or replacing damaged lettering.
Matching Sticker Material to the Surface It Lives On
Material choice decides whether a decal looks crisp for a season or becomes a peeling edge you notice every time you launch. The same graphic can behave very differently on gelcoat, painted metal, glass, and plastic, so the right answer depends on where it lands. On a Tracker, that usually means thinking in terms of hull, trailer, console, and windshield separately.
The short version of the material decision
Calendared vinyl is the budget-friendly option and works best on smooth, less demanding spots. Premium cast vinyl, including the kind many installers reach for in the Oracal 651 or 751 family, is the safer choice when the decal needs to conform better and survive longer outdoors. Reflective vinyl helps with visibility, and printed UV-laminated graphics make sense when the design has color detail that can't be done cleanly in cut vinyl.
| Sticker Material vs. Tracker Surface | Best Material | Why It Works | Watch Out For |
|---|---|---|---|
| Gelcoat hull | Premium cast vinyl | Conforms better and handles outdoor exposure more predictably | Cheap vinyl can lift early at edges |
| Aluminum trailer tongue | Reflective or cast vinyl | Sticks well to a flatter, rigid surface | Road grime and edge abrasion |
| Painted console | Cast vinyl or printed UV-laminated graphic | Clean finish and better outdoor durability | Surface contamination causes failures |
| Lexan windshield | Lighter decorative vinyl or specialty windshield decal | Works on a smoother visual accent area | Visibility and glare matter |
| Gear tracker sticker | Small Bluetooth tracker sticker | Retrieval use, not just decoration | Range is environment-dependent |
That Bluetooth tracker sticker deserves its own mental category. For practical deployment, a 30 to 50 m effective range in open, unobstructed environments is the benchmark when the device uses Bluetooth 5.0 or higher (Bluetooth tracker stickers range). On a boat or in a trailer yard, metal and obstructions shrink that quickly, so placement testing matters more than brochure distance.
The main trade-off is simple. Outdoor-rated cast vinyl plus clean gelcoat is the combination that usually makes sense for a hull. Anything cheaper can still be useful, but only if you're honest about the job it's doing and where it's being used. If you're shopping a windshield banner or a similar accessory-style piece, a vinyl windshield banner decal gives you a good sense of how transfer-taped graphics are built for flat, visible panels rather than harsh hull duty.
On boats, material choice isn't about what looks best on a screen. It's about what survives salt, sunlight, washing, and the occasional bad dock angle.
Measuring and Choosing the Right Sticker Size
Size problems show up fast on a boat. A decal that looked balanced in a product photo can look tiny on the hull, or huge once it's on a curved panel with real depth and reflection. The safest way to avoid that mistake is the low-tech one, lay out the footprint before you commit.
Start with painter's tape and make a border where the sticker might go. That gives you a visual mockup without risking adhesive on the wrong spot. Once the outline is down, step back from the dock, the driveway, and the ramp angle if possible, because the boat won't always be viewed straight on.
For hull identification numbers, legibility matters more than artistic flair. For console accents, the outline should follow panel lines instead of fighting them. Trailer-tongue graphics need to stay readable while the trailer moves, so a shape that looks good parked should still make sense when viewed from a distance.

Four quick checks before you order
- Measure Hull Width: Use a tape measure on the actual panel, not the listing title.
- Scale to Boat Size: Compare the decal footprint against the full side of the boat, not just a close-up.
- Compare to Listing Photo: Photos flatten perspective, so use them only as a rough reference.
- Account for Curvature: A slightly smaller decal often lays flatter than one stretched to the edge.
Curved hulls punish oversized lettering. If the decal has to bend too hard, the edges become the first problem area. Smaller often looks cleaner because it follows the panel instead of forcing the panel to follow the vinyl.
Prepping the Hull and Applying Pre-Spaced Decals
The cleanest installs start with boring prep. Wash the surface first, wipe it with isopropyl alcohol, then let it dry completely before the decal ever touches the hull. If you rush that part, the vinyl may still stick, but it won't stick with the same confidence around edges and seams.
Pre-spaced, transfer-taped decals are worth the modest upcharge on a boat because alignment matters more than most first-time buyers expect. Hull numbers, brand marks, and spaced lettering can drift if you try to place each character by hand. On gelcoat, that drift shows immediately, especially when sunlight hits the side of the boat.
The practical install window is forgiving but not endless. Roughly 50°F to 90°F is the range where vinyl behaves predictably enough for a calm install, and the sweet spot is usually a mild morning without direct, hot-panel sun. Wait until the boat surface is dry, not just visually clean.
Practical rule: Squeegee from the center out, then make one hard final pass on every edge. That's where lift usually starts later.
Use the hinge method instead of trying to float the entire decal into place at once. Lay it out, tape one side as a hinge, peel the backing in sections, and press as you go. The transfer tape keeps the spacing intact while the squeegee pushes air out before it becomes trapped.
After installation, leave the boat alone long enough for the adhesive to settle before water exposure. The exact cure time depends on the product, but the safe habit is not to rush the first launch after install. Heat, water pressure, and scrubbing are rough on a fresh edge.

A clean install is mostly about restraint. Don't chase bubbles with hard pressure so early that you stretch the vinyl, and don't peel transfer tape upward too aggressively. If the decal is laid down straight and the surface was clean, you'll spend less time fixing mistakes and more time keeping the finish intact.
Removing Old Tracker Boat Stickers Without Damaging Gelcoat
Boat owners often discover the second half of the decal job when the first one has aged badly. Sun bakes the vinyl, salt and wash water work into the edges, and what looked like a simple peel turns into a residue hunt. That's where the surface-sensitive part starts, because gelcoat shows every rushed decision.
A boat owner documenting decal removal on a 2022 Bass Tracker described repeated vinegar soaking and then rubbing compound to finish the job, which says a lot about the real-world messiness of removal (decal removal example). That isn't a polished showroom process, but it does reflect the main truth. Removal usually needs more than pulling with your fingers.
How the four common methods compare
- Hair dryer or low heat gun: Gentle and controllable, but slow. Best when you want to reduce the chance of pulling at the gelcoat.
- Warm vinegar soak: Useful when adhesive has softened or started to fail unevenly, but it can be uneven on larger graphics.
- Dedicated marine adhesive remover: Fastest on stubborn residue, though you need to rinse carefully and avoid flooding surrounding trim.
- Rubbing compound aftercare: Good for shadows and finish cleanup after adhesive is off, but it's a finishing step, not a first move.

A low-heat pass with a plastic scraper is the safest default for most owners. Peel only when the vinyl clearly softens, then work slowly so the adhesive releases instead of tearing. If you hear a sharp ripping sound, you're usually moving too fast or too cold.
After the sticker comes off, residue is the primary job. Adhesive remover handles that better than brute force, and rubbing compound can clean the visual shadow that remains on white hulls. The main mistake is rushing to scrub with a rough pad. Gelcoat can handle care, but it won't forgive impatience.
Care and Maintenance That Actually Extends Decal Life
A decal doesn't usually fail all at once. It fades, the edges start to dry out, and the finish turns chalky before the whole graphic lets go. That means maintenance is about catching the early stages, not waiting for a full peel.
Salt and grime are the fastest way to shorten a decal's useful life, so a freshwater rinse after every salt run is the first habit worth keeping. Use a gentle boat wash instead of aggressive degreasers, because harsh cleaners can dull the face of the vinyl and weaken the finish around the edges. A soft cloth or brush is fine if you keep the pressure modest.
Wax deserves a careful approach. Put wax around the decal instead of grinding paste wax aggressively into the graphic itself, especially on printed pieces. If you want a protective layer, a light spray sealant is usually the safer friend to vinyl than old-school heavy wax buildup.
Seasonal habits that pay off
- Inspect edges: Look for early lift before dirt gets under the vinyl.
- Check after storage: Covers can trap moisture and grime against the decal.
- Rinse after every salt trip: Even a short rinse helps keep residue from drying in place.
- Watch abrasion points: Dock lines, coolers, and elbows all wear the same small areas first.
Practical rule: If you can feel an edge with a fingernail, it needs attention before water and dirt work under it.
The same basic care rhythm helps whether the decal is a hull number, a brand mark, or a decorative graphic. For a lighter lifestyle-style example, a lake life pontoon decal follows the same logic, because the vinyl still lives outdoors and still needs clean washing and smart waxing habits. Care is boring, but boring keeps the boat looking intentional instead of tired.
Your Tracker Boat Sticker Game Plan
Start with the surface, not the artwork. If it's a hull number or registration piece, make sure it's readable and matched to the boat's identity. If it's a cosmetic graphic, choose outdoor-rated vinyl for the area that takes the most sun and wash exposure.
For most Tracker owners, the safest default is premium cast vinyl for hull and console, pre-spaced transfer tape for lettering, a freshwater rinse after every trip, and low-heat removal plus adhesive remover when it's time to change graphics. If you're dealing with a curved panel, jump back to the sizing section and shrink the footprint before you order. If you're replacing old decals, go back to the removal section and start with heat before chemistry.
Keep the process simple enough that you'll follow through. Measure, match the material to the surface, install on a cool dry panel, and maintain the edges before they fail. That's the whole game.
If you want durable, made-to-fit vinyl for hull numbers, branding, and custom boat graphics, Custom Sticker Shop has the kind of pre-spaced, transfer-taped decals that make installation cleaner and replacement easier later. Browse their options when you're ready to match your Tracker's size, surface, and style, then order with the next install, refresh, or re-letter in mind.