
Most Honda owners see the same problem fast. The bike is either clean but too stock, or it carries graphics that do not match the model, the era, or the panel shape.
Bad decal jobs usually start with the wrong size, not the wrong color. A kit that looks fine in a product photo can sit awkwardly on a CBR fairing crease, wrinkle across a CRF shroud, or look undersized on a Grom tank cover. Helmet decals add another layer because compound curves and different clear coat finishes change how vinyl settles and how long it stays down.
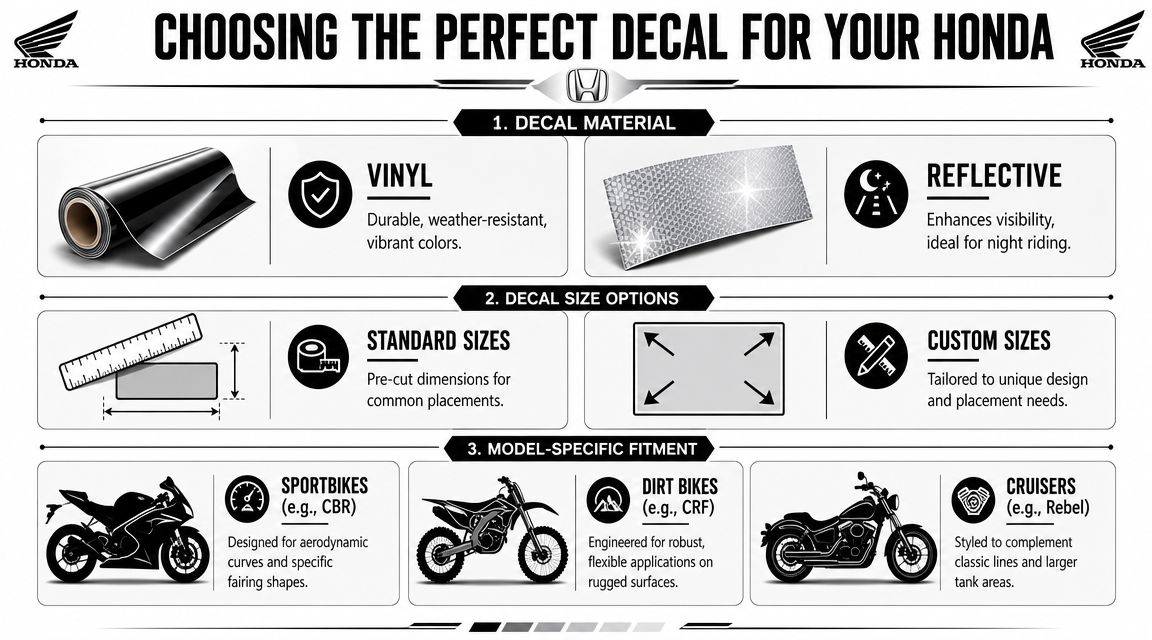
Model-specific fitment matters more than riders expect. Honda motorcycle stickers decals need to match the exact bike and the exact surface. Fairings, tanks, side panels, swingarms, and helmets all ask for different dimensions, vinyl thickness, and adhesive behavior. Skip that step and even good material can end up looking cheap.
That matters even more on older Hondas. A retro wing logo or period-style tank script only works if the proportions suit the tank width, the body line, and the year you are trying to match. Generic “fits Honda” listings miss that detail all the time, which is why so many restorations look almost right instead of right.
Some riders stop at graphics. Others also enhance your motorcycle with LED lights to finish the look after dark. If you want a small accent before committing to a full kit, a Love Honda heartbeat decal sticker is a clean place to start.
Giving Your Honda a New Identity
A Honda never stays anonymous for long. A CBR owner usually wants sharper lines and cleaner branding. A CRF rider wants plastics that still look deliberate after hard use. A Grom owner wants something with personality because that bike invites it. Even on older builds, the goal is the same. Make the bike look like it belongs to you, not just to the production line.
That's why decals work so well when they're chosen properly. You can restore period-correct identity on a classic machine, add small model-specific branding to a tank or tail, or change the whole visual balance of a modern bike without committing to paint. Done well, decals look intentional. Done badly, they look like a rushed afterthought.
Restoration and customization are different jobs
Restoration riders usually care about accuracy. They want the logo size, placement, and era to feel right for the machine. That means looking closely at dimensions, shape, and where the decal sits relative to body lines.
Customization riders care more about flow. A modern graphic has to match the panel shape, rider position, and visual weight of the bike. A fairing-heavy CBR can carry a different style than a compact Grom or a slim dual-sport side panel.
Practical rule: Decide whether you're restoring, personalizing, or adding protection before you buy anything. One decal can't do all three jobs equally well.
The best result feels OEM, even when it isn't
The most convincing decal work doesn't scream for attention. It follows the edges Honda already gave you. It respects vents, panel breaks, and knee-contact areas. That's why the same design can look excellent on one model and awkward on another.
Riders often think the hard part is application. It usually isn't. The hard part is choosing something that belongs on your exact bike and exact surface in the first place.
Choosing the Right Decal for Your Honda Model
A rider orders a "Honda" decal kit online, holds it up to the bike, and finds out too late that the curve is wrong, the logo runs into a vent, or the piece is sized for a different generation of fairing. That happens all the time. The primary buying decision is not brand first. It is model, year, panel, and material.
A decal that fits a 2018 CBR650R fairing will not automatically fit a 2021 CBR650R side panel, let alone a CRF shroud or a Grom tail. Honda changes panel lines, vent shapes, and bodywork width more often than riders expect. Sellers also use broad labels like "fits Honda CBR" that are useless unless they show the exact generation and placement area. One market review of Honda decal listings points out that many pages still focus on style selection instead of clear year-and-model fitment details, which is the first thing buyers need to confirm (Honda fitment gap in the market).
Buy for the exact panel
Start with the surface you want to cover.
A CBR fairing asks for a long graphic that follows a fast body line without crossing a vent or folding over a sharp shoulder. A CRF radiator shroud needs a tougher piece that can deal with flex, boot contact, mud, and pressure washing. A Grom side panel is small, so oversized graphics look clumsy fast. Tank decals bring another problem. Knee rub and fuel drips punish weak adhesive and poor edge placement.
Helmet decals are their own category. The curve is tighter, the contact area is smaller, and a decal that lays flat on a side cover can wrinkle on a helmet shell even when the dimensions look close on paper.
This is why generic kits disappoint. Good decal work starts with the exact Honda model and the exact zone on the bike.
| Application area | What to check first | Common fitment mistake |
|---|---|---|
| Fairing | Body line direction, vents, edge clearance | Forcing a flat decal over compound curves |
| Tank | Symmetry, fuel exposure, knee contact | Placing too close to an edge that gets rubbed |
| Side shroud | Flex, roost impact, heat | Using thin cosmetic vinyl on abuse-prone plastic |
| Tail section | Narrow usable space, taper | Choosing a decal that looks level off the bike but crooked on the panel |
| Helmet | Shell curve, decal size, finish compatibility | Using a large rigid decal that bridges and lifts |
Measure the bike, not the listing photo
Product photos lie by accident all the time. Lens angle, edited mockups, and missing dimensions make a decal look more universal than it is.
Use a tape measure or calipers and record the usable width and height of the panel. Then check where the panel narrows, where a crease starts, and how much flat area you have before the vinyl has to bend hard. Manufacturers that publish cut-to-fit graphics for specific bikes, such as SKDA's Honda graphics range, are useful here because they show how seriously fitment and panel shape affect the final result.
For small text decals or accent pieces, sizing still matters. A listing like this I-VTEC SOHC Honda decal set makes the point clearly. Exact dimensions tell you whether the graphic will sit inside the panel with a clean border or end up crowded against an edge.
A simple check prevents a lot of waste:
- Confirm the exact Honda model, year, and generation.
- Measure the usable panel area, not the full plastic part.
- Mark vents, ridges, bolt heads, badges, and edge breaks.
- Compare those measurements to the decal size before ordering.
If a seller cannot tell you the dimensions or the intended placement area, treat that as a warning.
Match the vinyl to the job
Material choice matters as much as artwork.
Thin decorative stickers are fine for flatter, low-contact areas on a street bike. They are a poor choice for off-road shrouds, fork guards, or any panel that flexes. Thicker motocross-style laminates hold up better against roost, washing, and boot contact, but they can fight you on tight curves if the cut pattern is not made for that panel. Cast vinyl generally handles curves better than cheap calendared film, while laminated kits give better abrasion resistance at the cost of a little extra stiffness.
That trade-off matters. A CRF ridden in dirt needs durability first. A garage-kept CB or Rebel used for light cosmetic personalization can get away with a thinner film if the panel is fairly flat and clean.
Choose the right type of decal
There are two very different buying paths, and mixing them up causes disappointment.
OEM-style replacements suit restorations and riders who want the bike to look factory-correct for its era. Custom and semi-custom kits suit riders who want race numbers, names, altered logos, or a more aggressive visual style. Both have their place. The mistake is ordering a personalized motocross-style kit for a vintage restoration, or buying a reproduction logo set and expecting it to survive on a heavily abused off-road shroud.
Good prep habits also start here, before installation. The same discipline used in a car detailing checklist for selling applies to decal selection too. Inspect the surface, understand what the finish will be asked to handle, and choose materials that suit the actual use case instead of the showroom photo.
Perfect Placement and Surface Preparation
Most failed installs are decided before the backing paper moves. A dirty panel, a rushed alignment, or a bad mounting location will ruin even a good decal.
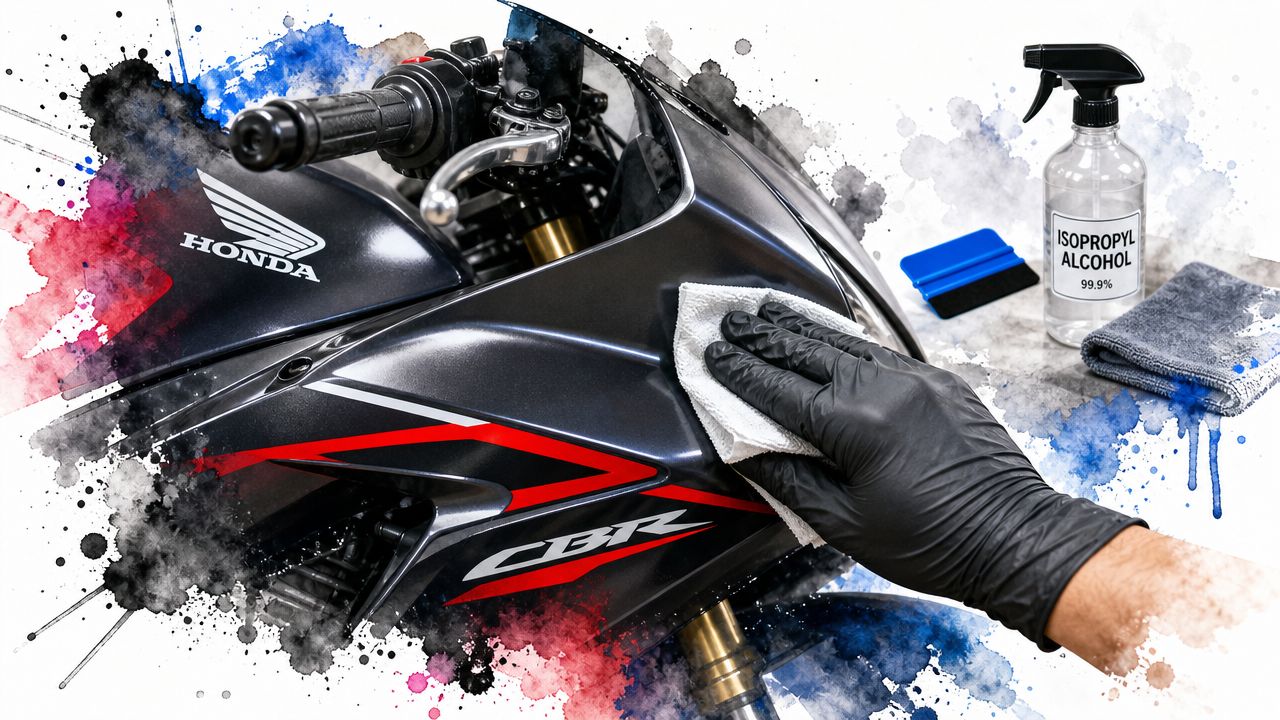
Honda fairings and shrouds are especially unforgiving because they combine curves, vents, tight edges, and textured transitions. A known problem on fairings is contaminated plastic. Road film, wax, and silicone residue can weaken adhesion and cause corner lift, especially around vent edges and tight-radius panels, which is exactly where a mediocre prep job gets exposed first.
Clean like you mean it
Use the right tools and keep them separate. One dirty rag can put the contamination right back on the panel.
You want:
- Isopropyl alcohol for the final wipe
- Clean microfiber cloths that don't leave lint
- Low-tack masking tape for layout marks and hinge points
- A squeegee with a soft edge or felt edge
- A hairdryer or heat gun on low for shaping on curves if needed
If you're removing old adhesive first, make sure any remover residue is fully gone before the alcohol wipe. A glossy-looking panel isn't necessarily a clean panel.
Dry-fit before you commit
Set the decal in place with the backing still on. Tape it lightly. Step back and look at the bike from both sides and from rider height.
Check three things:
- Distance from panel edges. Uneven border spacing makes a decal look crooked even when it isn't.
- Relationship to body lines. Follow the fairing line, not the floor.
- Interaction with vents and curves. If part of the decal spans a shape change, know where tension will build.
A lot of the same discipline shows up in paint correction and sale prep. If you've ever worked through a proper car detailing checklist for selling, you already know the result comes from prep, not shortcuts.
Clean plastic holds decals. Contaminated plastic only pretends to.
Choose placement that the decal can survive
Not every open spot is a smart spot. A decal on a knee-contact tank area will wear differently than one on a tail section. A lower fairing sees more road grime than an upper cowl. A helmet adds tighter curves than many riders expect.
Small changes in placement make a big difference. If moving the decal slightly avoids a sharp radius or a high-contact edge, that's usually the better choice than forcing the graphic into a hostile area just because the photo mockup looked good.
Achieving a Bubble-Free Application
A decal usually traps air in the first few seconds, not at the end. The mistake happens when too much adhesive touches the panel before you have control of the laydown. On Honda bodywork, that matters even more because a CBR fairing, CRF shroud, Grom side panel, and helmet shell all present different curves and edge shapes. A method that works on a flat side cover can fail fast on a tank corner or upper cowl.
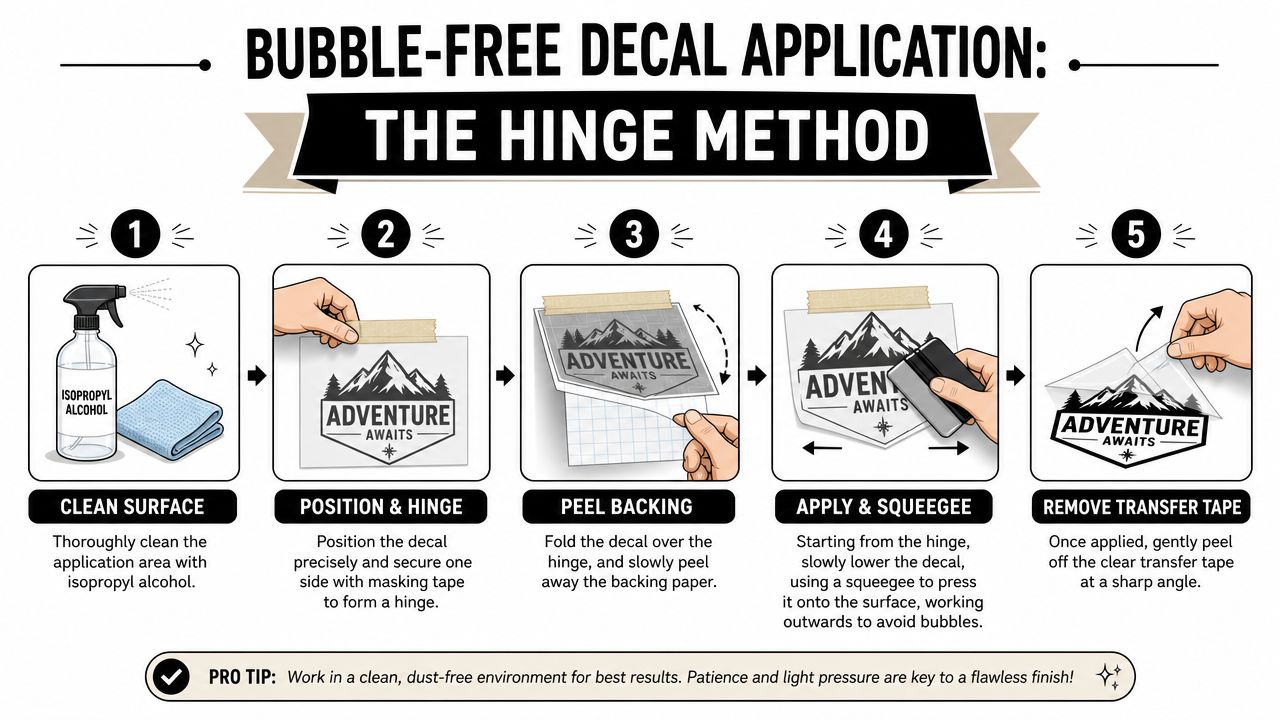
If the decal is the right size for the exact panel, the hinge method gives the cleanest result with the least drama. If the decal is oversized for the application area, no technique will fully save it. You will fight wrinkles, trapped air, or edge lift from the start.
The hinge method that actually works
This is the workflow I use on fairings, tank panels, side covers, and many helmet graphics.
Lock the position first
Hold the decal in place with low-tack masking tape while the backing is still on. Check it from normal viewing angles, not from six inches away. On a CBR fairing, follow the body line. On a CRF shroud, check how the graphic lands near the radius change. On a Grom, small panels make even slight misalignment obvious.Build a real hinge
Use one strip of tape along a straight edge, or a center hinge for longer graphics. Press the tape down firmly enough that the decal cannot drift when you fold it back.Peel the liner in stages
Fold one side back on the hinge and peel away only part of the backing paper. For medium decals, trimming away the loose backing helps keep it from flopping into the adhesive.Squeegee with overlap
Start at the hinge side and work outward with short, overlapping strokes. A felt-edge squeegee is safer on printed decals and softer films. A hard plastic squeegee works better on thicker laminate, but wrap it in a clean microfiber if the transfer tape feels thin.Remove transfer tape at a low angle
Pull it back slowly and keep the angle sharp. If the vinyl starts lifting, lay the tape back down and squeegee that spot again with more pressure.
This video gives a useful visual reference for decal handling and pacing during installation.
Pressure and pace matter more than force
Good installs come from controlled contact. The goal is to decide exactly where the adhesive grabs first, then push air toward an open edge before it gets trapped.
A few habits make the difference:
- Keep each pass overlapping so no narrow air channels remain under the film.
- Change your stroke length on curves. Long sweeps work on flatter panels. Tight curves need shorter passes.
- Use mild heat sparingly on compound shapes like helmet sides or sharply crowned fairings. Too much heat softens the vinyl and makes it easier to stretch out of shape.
- Watch the transfer tape tension. If you pull the tape upward instead of back across itself, you can lift corners you just set.
One practical rule. If the free section of decal is large enough to sag under its own weight, you are exposing too much at once.
Dry versus wet application
For most Honda decals, dry application is the safer choice. It bonds faster, shows problems sooner, and works better around edges, vents, and curved plastics.
Wet application has a place on larger graphics over flatter areas, but riders often use it on the wrong jobs. A light mist can buy repositioning time on a broad side panel. It also delays final bond and makes edge work less predictable, especially on textured plastics or tighter curves. On tank decals, helmet graphics, and smaller model-specific pieces, dry usually gives better control.
Match the method to the part. A flat panel can forgive a little fluid. A curved fairing or helmet usually will not.
Troubleshooting Common Installation Issues
You line up a decal for your CBR fairing, step back, and one corner is off by a few millimeters. On a small logo or model badge, that tiny miss looks huge once the bike is outside in full light. Trouble shows up fastest when the decal was never matched properly to the panel in the first place. A tank curve, helmet shell, and side fairing all ask the film to behave differently.
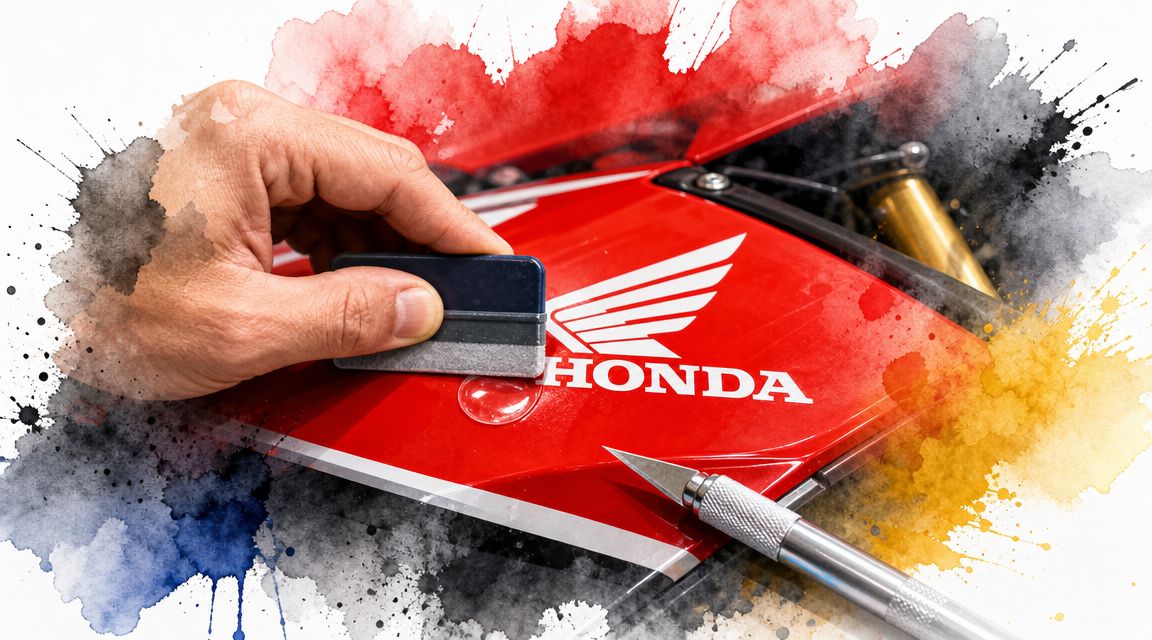
That is why I check fitment before I blame technique. A decal sized for a flatter panel can fight you on a CRF shroud or a Grom headlight cowl, even if the dimensions looked close on paper. The same goes for custom text. If you are adding a visor or screen graphic, order a custom text windshield banner decal sized for that exact windshield shape, not a generic strip you plan to trim later.
When the problem is trapped air
Small bubbles are common. Leave them for a few hours first, especially on cast vinyl over a smooth painted panel. Some settle as the adhesive wets out.
If a bubble stays put, fix it with control:
- Use a fine pin, not a knife
- Pierce near the bubble edge where the air has a path out
- Press outward with a thumb or a squeegee wrapped in microfiber
A blade cut leaves a line that catches light. On gloss fairings, you will see it every time you wash the bike.
When the decal goes crooked
A fresh decal can usually be lifted once or twice. After that, the risk changes. Repositioning too many times weakens tack, picks up dust, and can stretch narrow lettering out of shape.
Use the panel to judge whether a save is realistic:
| Problem | Best move |
|---|---|
| Slight angle error on a fresh install | Lift and reset immediately |
| One edge drifting on a mild curve | Warm lightly, relax the film, then reset |
| Decal fighting a sharp compound curve | Stop and confirm the piece is correct for that model and panel |
| Fully bonded but visibly crooked decal | Remove and replace |
That third case gets overlooked all the time. If a decal keeps walking off line on one area of the bike, the issue may be fitment, not your hands.
When corners or edges start lifting
Lifting edges usually come from contamination, excess tension, or poor panel choice. A long straight decal may hold fine on a flat section of a CB side cover and fail early on a tighter helmet radius. Edge failure also shows up when the graphic lands too close to a body line, vent opening, or textured plastic.
Pressing it back down is only a short-term fix.
Warm the area lightly, lift the failing section, and inspect it. If you find dust, polish residue, or compound trapped under the adhesive, that piece is done. If the vinyl has been stretched to make it reach around a curve, it will keep trying to shrink back. Replace it with a version cut for that exact area or reduce the coverage so the edge lands on a calmer surface.
Wrinkles follow the same logic. They form because the material has more surface area than the panel can accept in that spot. Add mild heat, lift the section, and lay it again with less tension. If the wrinkle sits on a deep curve or crowned tank edge, reconsider the decal choice. Some jobs need a smaller graphic, a different laminate, or a model-specific cut instead of one universal shape forced into place.
Care, Removal, and Ordering Your Perfect Decal
Six months after install is when a decal job tells the truth. If the edges still sit flat after washing, sun, fuel splash, and regular riding, the material choice and panel match were probably right from the start. If they start curling, fading, or collecting grime at the corners, the problem usually traces back to poor fitment, the wrong surface, or a decal that was asked to do a job it was not cut for.
Care starts with understanding where your Honda takes abuse. A CBR fairing gets wind and wash pressure. A CRF side panel sees boot rub, mud, and repeated scrubbing. A Grom tank or shroud may look simple, but tight contours and frequent hand contact wear graphics faster than riders expect. Helmet decals are their own category because the curve, shell finish, and heat exposure differ from painted bodywork.
Wash in a way that protects the edges
Decal edges fail first, so wash with that in mind.
Use a strong rinse before touching the graphic. Dirt trapped in a mitt or towel will haze the laminate and chew at the edge line. Keep pressure washer spray back from the perimeter, especially on older decals or pieces installed near fairing seams. Wash with normal pH-safe bike soap, then dry with a clean microfiber instead of a shop rag that has picked up grit or solvent.
Off-road bikes need closer inspection. Mud packs into edges, and aggressive cleaning exposes weak adhesion fast.
Remove decals without damaging the panel
Removal is simple if you slow down. Warm the vinyl with a heat gun on low or a hair dryer until it feels pliable, then peel it back at a shallow angle. Pulling straight up is what lifts paint on older panels and leaves heavy adhesive behind.
After the vinyl is off, clean the residue with an adhesive remover that is safe for painted plastics, then wipe the area with isopropyl alcohol. Let the panel dry fully before applying anything new. If you are replacing a stock wordmark or adding a rider name strip, a custom text windshield banner decal made to your size is easier to fit cleanly than trimming a generic piece after it arrives.
One caution. Old Honda tanks and repainted fairings can be unpredictable. Test heat and cleaner on a hidden spot first.
Order by model, panel, and use case
Buying the right decal is half the install. Riders get into trouble when they order by style alone and ignore the bike, panel shape, and surface finish. A universal Honda graphic may look close enough on a product page, but close enough is how you end up fighting edge lift on a CRF radiator shroud or finding out a tank decal is too short for a CBR fairing panel.
Check these points before you buy:
- Confirm the exact Honda model, generation, and year range
- Match the decal to the actual surface, fairing, tank, side cover, helmet, or windshield
- Look for listed dimensions, not just product photos
- Check whether the panel is flat, crowned, vented, or sharply curved
- Make sure the vinyl and laminate suit street use, off-road abuse, or helmet application
- Decide whether you need an OEM-style replacement, a cut-to-fit custom piece, or a small accent graphic
Good decal work looks right because it fits right. The best Honda motorcycle stickers decals match the exact model, land on a surface the material can handle, and hold up to the way the bike is used.
If you're ready to order, Custom Sticker Shop is a strong place to start. They make American-made vinyl decals with professional-grade Oracal vinyl rated for up to 7 years outdoors, offer prices starting at $7.99, free US shipping on orders over $25, and a Buy 2 Get 1 Free deal that's useful when you're ordering matching graphics or backups. Their decals are pre-spaced and transfer-taped, which makes installation easier when you want a clean, professional finish.