
You're probably looking at your back window, quarter glass, or windshield strip area right now and thinking one of two things. Either you know exactly what you want and don't want to mess up the install, or you've got too many ideas and no clear sense of what will look good on glass.
That's a common stumbling block. The design matters, but on windows, material choice, sizing, placement, and installation method matter just as much. A decal that looks sharp in a mockup can become hard to read, distracting, or short-lived if it's the wrong vinyl or it's placed in the wrong part of the vehicle.
Personalized car stickers for windows also aren't some tiny side trend. The global personality car sticker market was valued at USD 150.59 billion in 2023 and is projected to reach USD 228.22 billion by 2030 according to Verified Market Research's personality car sticker market report. That tells you something simple. Drivers still want their vehicles to say something personal.
Choosing the Right Design and Material for Your Windows
You can spot a rushed window decal in a parking lot. The font is too thin for the tint, the size fights the shape of the glass, or the material never matched the job in the first place.
That usually starts with treating every window sticker like the same product. They are not. A memorial name on a rear side window has different demands than a full rear-glass hunting graphic, a Jeep club decal, or simple custom lettering across a back window. Glass adds glare, curvature, defroster lines, and visibility limits that paper mockups never show.
Start with three choices. Pick the job the decal needs to do, pick the material that fits that job, and size it to the usable glass instead of the full pane.
Start with the use case first
Theme matters, but function matters more. Ask a practical question first. Is this decal supposed to be read from 30 feet away, add a subtle personal touch, cover a large part of the rear window, or hold up for years in sun, weather, and car washes?
That answer narrows the design fast.
Bold block lettering usually reads better on truck rear windows and windshield strips. Cleaner script fits memorial decals better than ornate fonts with hairline strokes. Long phrases need more discipline than short ones because every extra letter reduces legibility, especially on tinted glass.
Modern vehicles add one more trade-off that gets overlooked. Some rear windows and windshields sit near cameras, sensors, antenna elements, rain sensors, and ADAS-related hardware. A decal placed in the wrong spot can interfere with visibility or sit too close to equipment you do not want obstructed. Check your owner's manual and identify sensor housings before you finalize placement.
Choose material based on the window, not just the artwork
Material is where a lot of buyers guess. That guess shows up six months later as fading, peeling edges, poor readability, or a decal that looked fine on a laptop screen and weak on actual glass.
Car Window Sticker Material Comparison
| Material Type | Best For | Visibility | Durability |
| | | | |
| Opaque vinyl | Bold text, logos, silhouettes, side windows, smaller rear-window graphics | High contrast from outside, blocks vision where applied | Strong choice for long-term outdoor use |
| Clear-background decal | Designs that need a lighter, less boxed-in look on clean glass | Depends heavily on tint, paint color, and design contrast | Can look clean, but visibility is less forgiving |
| Perforated vinyl | Rear windows where outward visibility matters | Graphic shows outside while preserving see-through function from inside | Practical for larger rear-window coverage when installed correctly |
Opaque vinyl is the safe pick for crisp lettering and strong contrast. It works well for names, callsigns, club decals, memorial text, and simple logos. If the design needs to read quickly, this is usually the material that gets the fewest complaints.
Clear-background decals can look cleaner on certain vehicles, especially when the goal is a lighter visual footprint. They are less forgiving. If the artwork does not have enough contrast against tint, sky reflection, or dark interior shadows, the decal can disappear at the exact angles where you want it noticed.
Perforated vinyl earns its place on large rear-window graphics. It lets the graphic face outward while preserving visibility from inside, but only when the print quality, laminate choice, and installation are done correctly. It also needs realistic expectations. Perforated film is practical, but it does not belong on every window and it can wear faster than solid cast or calendared lettering if it is exposed to heavy wiper use or neglected cleaning.
Size to the usable glass
Measure the flat area you have for use. Black frit borders, trim curves, third brake light housings, rear wiper sweep, and defroster lines all reduce your real working space.
Leave margin around the edges. A decal that nearly touches every side of the glass usually looks crowded, and crowded designs age poorly because every small alignment issue becomes obvious. On curved rear windows, a layout that looks balanced on a straight proof can appear arched or pinched once installed.
For simple names or short phrases, an 11-inch custom text window decal is a practical starting size when you want clean visibility without taking over the entire pane.
A final shop rule. If the design has tiny details, long sentences, or delicate strokes, either simplify it or increase the size. Good window decals are not just attractive. They stay readable on real glass, in real weather, on the vehicle you drive.
Customization Tips and Ordering Your Sticker
The details decide whether a decal looks custom or just homemade. Most bad-looking window stickers don't fail because the idea was bad. They fail because the font, color, and spacing were wrong for the vehicle.
Match the font to the message
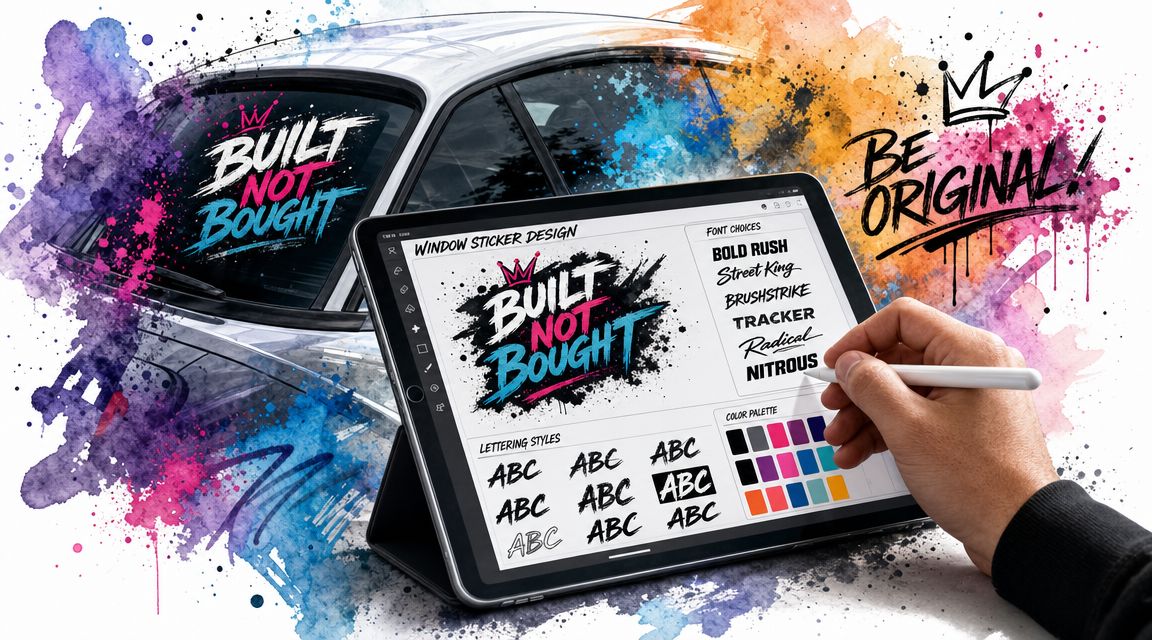
A truck decal with aggressive off-road styling usually needs a font with weight. Thin serif lettering tends to get lost. A memorial decal usually benefits from cleaner script, modest flourishes, and enough stroke width that the name stays readable through tint and reflections.
Use this quick filter when you're deciding:
- Block fonts work well for last names, callsigns, truck clubs, and windshield banners.
- Script fonts fit memorials, family names, and softer personal messages.
- Condensed fonts help when you need more letters in limited width, but they can become cramped fast.
- Distressed or highly stylized fonts look cool in small doses, but they're risky on glass because glare already reduces readability.
Pick color for contrast, not just preference
Window decals don't live in neutral lighting. They sit against tint, sky reflections, trees, parking lot lights, and whatever your paint color is doing around the edges. White often reads the cleanest on dark rear glass. Black can work on lighter untinted windows, but it may disappear on darker backgrounds. Bright colors can look great on side glass, but only if the surrounding tint and paint let them stand out.
A decal should still read at a glance when the glass is dusty, the sun is low, and the vehicle is moving. If it only looks good in a product preview, it's the wrong color choice.
Spacing matters too. Letters that touch too tightly create dark clumps. Overly stretched text looks cheap. Ask for a proof if your phrase is long, especially if you're mixing upper and lowercase letters.
What to check before you order
The category has staying power. The car decal market is projected to grow from USD 0.32 million in 2025 to USD 0.47 million by 2032, with a 5.50% CAGR, according to Report Prime's car decal market forecast. That steady growth tells buyers something useful. Good window decals aren't a fad purchase. They're a repeat-use product, so it's worth ordering from a shop that handles automotive vinyl routinely.
Before you click buy, check for these basics:
- Material clarity: The seller should state whether the product is opaque, clear, or perforated vinyl.
- Application format: Transfer-taped, pre-spaced lettering is easier to align than loose individual characters.
- Proofing options: Helpful for custom names, unit tributes, memorial text, and multi-line layouts.
- Shipping details: You want realistic fulfillment and delivery expectations, not vague promises.
- Multi-item value: If you're buying matching decals for both sides or multiple vehicles, bundle offers can matter.
If you're building your own layout from scratch, a make-your-own custom car decal tool is one practical route because it lets you test wording, format, and size before committing.
Preparing Your Vehicle for a Flawless Application
Most installation problems start before the decal touches the glass. Dust, wax residue, old cleaner film, and hard-water spotting all create weak points. Then the owner blames the vinyl when the underlying issue was prep.
A window has to be clean, dry, cool enough to work on, and free of contamination. If one of those conditions is off, the odds of bubbles, silvering, or edge lift go up fast.
Clean for adhesion, not just appearance
Start with mild soap and water on the glass. You're not trying to make it look shiny. You're trying to remove the invisible film that blocks adhesive contact. Dry it completely with a lint-free towel.
Pay close attention to the edges. Window trim traps grime, and that grime gets dragged back onto the glass when you squeegee. Run your towel into the border area and around the lower edge where dust tends to collect.
If your glass has stubborn mineral spotting or etched water marks, deal with that before installation. A decal won't hide surface defects on a window. It often makes them more obvious. If you're dealing with that issue, this guide to car window etching removal gives useful context on what etching is and why regular cleaning sometimes doesn't fix it.
Build the right setup before you peel anything
Have your tools ready and laid out within reach:
- A flat-edged squeegee or firm card for pressing the decal down evenly
- Masking tape for test placement and the hinge method
- A clean microfiber or lint-free cloth for final wipe-down
- A spray bottle only if your specific film supports wet application
- A pair of clean hands because lotion, grease, and dirt transfer fast to adhesive
The install should feel calm. If you're balancing the decal on your knee while hunting for tape, stop and reset.
Conditions that help and conditions that hurt
Apply the decal out of direct sunlight if possible. Hot glass grabs adhesive too fast and makes repositioning harder. Very cold glass can make vinyl stiff and less cooperative, especially on curved windows.
Wind is another problem. Even a small breeze can fold transfer tape back onto itself or blow grit onto the adhesive side during placement. A garage, carport, or shaded driveway is much easier to work in than an open parking lot.
One more thing people overlook is the inside of the vehicle. If you're applying from the interior on a clean untinted surface, the same prep rules still apply. Smudges, haze, and off-gassing residue on the inside of the glass can sabotage the bond just as easily as road film on the outside.
The Bubble-Free Window Sticker Installation Method
A bubble-free install usually comes down to control, not luck. The best results happen when the decal stays aligned from the first dry fit to the final squeegee pass. For custom window graphics, the hinge method is still the shop standard because it gives you that control without stretching the vinyl or chasing placement at the last second.
Early in the process, this visual helps people understand the sequence.
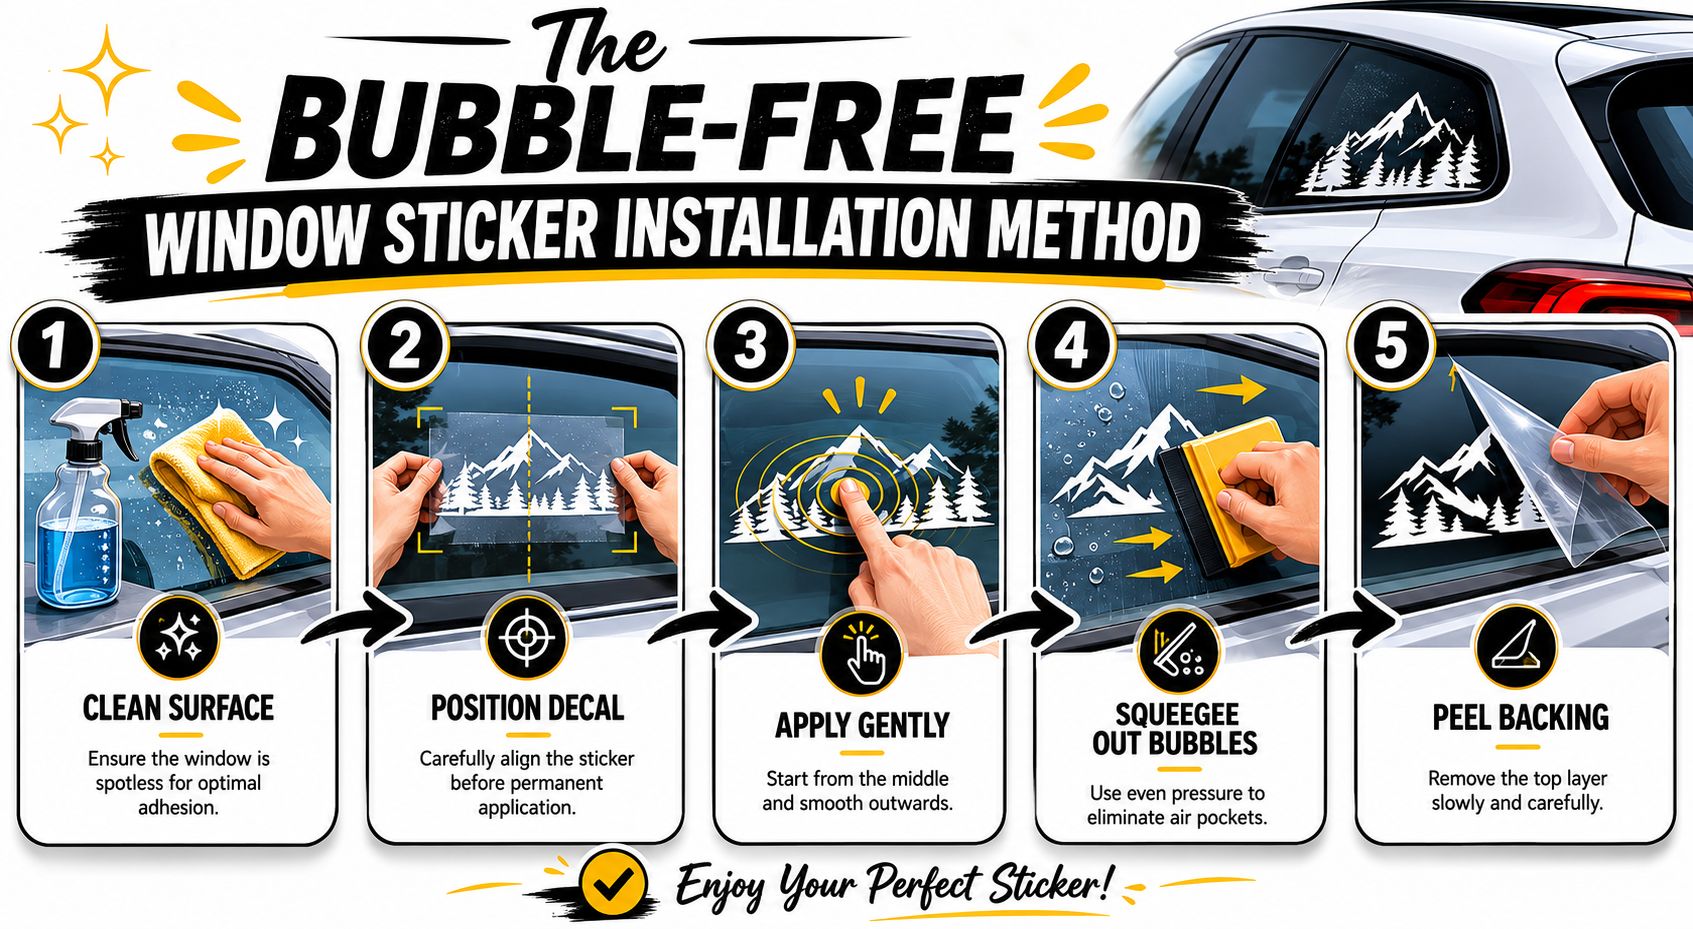
Set the decal before you commit
-
Dry-fit the decal on the glass
Hold it in place and step back several feet. Check level, distance from trim, and how the design sits against the shape of the window. On many rear windows, the visual center looks better than the exact measured center. -
Tape it in place with a hinge
Run masking tape across the top edge or down one side, depending on the layout. The tape becomes your pivot point, which keeps the graphic from drifting when you peel the liner. -
Test the transfer tape bond
Rub firmly across the front of the transfer tape before you separate anything. If small letters or thin strokes are not holding to the transfer layer, press them down now. That is much easier than fixing a distorted letter once adhesive is exposed.
Apply with pressure from the center out
The center-out squeegee method works because it gives trapped air a path to escape instead of sealing it under the middle of the decal. It also helps keep long graphics straight, which matters on back glass and windshield strips where even a small wave shows from across the parking lot.
Use this sequence:
-
Lift the decal on its hinge
Peel the backing paper away slowly and watch the vinyl. The design should stay on the transfer tape, not on the liner. -
Trim away loose backing on larger decals
Big sheets of release paper like to curl, catch dust, and slap back onto the adhesive. Cutting away the freed section keeps the work area cleaner and easier to manage. -
Lower the decal gradually
Start at the center contact point and guide it down in stages. Dropping one full side at once is how wrinkles start. -
Squeegee from the center outward
Use firm, overlapping strokes. Work to one side, return to center, then work to the other side. Keep steady pressure and a consistent angle. -
Make another pass
One quick swipe rarely seats the film evenly, especially on textured defroster lines or slightly curved glass. A second and third pass usually make the difference between an average install and a clean one.
Shop-floor advice. The first pass sets the tone. Fast hands trap air. Slow, even pressure pushes it out.
For larger text across a windshield strip, a pre-spaced layout makes alignment easier because the letter spacing is already fixed. That helps a lot with a custom windshield banner decal since a slight tilt or uneven gap is obvious right away. It is also smart to confirm the banner does not interfere with cameras, sensors, or shaded areas used by ADAS equipment near the top of the windshield.
A short installation video can also make the hand motion clearer before you start.
Peel the transfer tape without lifting the design
Once the decal is fully squeegeed, peel the transfer tape back low and slow at a sharp angle. Pulling straight away from the glass puts more stress on the vinyl and can lift corners, points, and narrow lettering.
If part of the design starts to come up, stop right there. Lay the transfer tape back down, press that area again, and retry. Fresh vinyl usually forgives patience. It does not forgive panic.
Fix minor issues on the spot
Small flaws are common, and most are fixable if you catch them early.
- Tiny air pockets: Push them toward the nearest edge with a squeegee or a firm card wrapped in a soft cloth.
- A small pin bubble: Give it a little time before you touch it. Some settle as the adhesive bonds to the glass.
- A wrinkle: Do not press harder and hope for the best. That usually stretches the film. If the vinyl is still in an early stage of application and can be lifted safely, reset that section carefully.
One final practical point from years in the shop. Rear windows with defroster lines and newer windshields with camera housings are less forgiving than flat side glass. Take more time on those areas, use shorter squeegee strokes, and do not force vinyl deep into gaps or over hardware. A clean install should look good on day one and stay put through heat, washing, and daily driving.
Sticker Maintenance Removal and Legal Rules
A window decal isn't a one-day project. You live with it through rain, summer heat, road grime, hand washing, and eventually removal. The owners who stay happy with their decals the longest are usually the ones who treat the graphic like part of the vehicle, not an afterthought.
Keep edges clean and avoid aggressive scrubbing
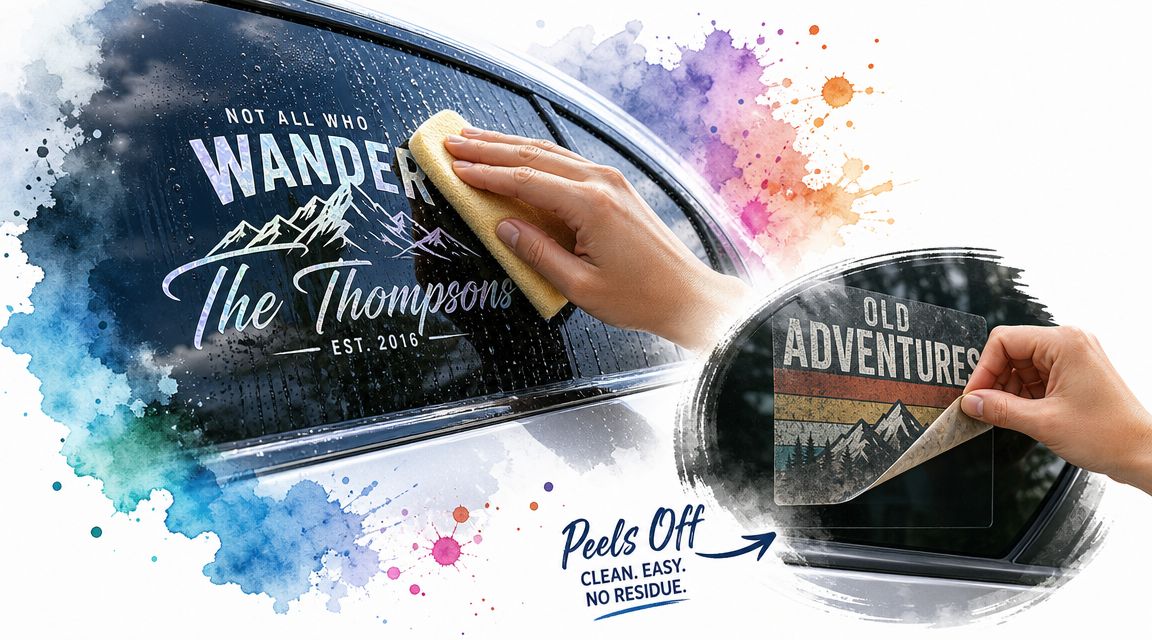
Wash the window with mild soap and water. Use a soft cloth or sponge. The weak point on most decals isn't the middle. It's the edge, where repeated abrasion can start lifting.
Avoid picking at corners, scraping with metal blades, or blasting the edge at close range with high-pressure water. If you use a pressure washer, keep your distance and don't aim directly into the edge of the vinyl.
UV exposure matters too. The U.S. Environmental Protection Agency notes that UV exposure accelerates polymer degradation, which is one reason decals age differently depending on climate and sun load. That's part of why a sticker on a garaged vehicle often stays cleaner-looking longer than one parked outdoors full-time.
Removal is easiest with heat and patience
When it's time to remove a decal, warm the vinyl first with a hairdryer or controlled heat source. The goal is to soften the adhesive, not cook the glass. Start at one corner and lift with a fingernail or plastic blade, then peel back slowly at a low angle.
3M's adhesive-removal guidance also notes that heat, dwell time, and surface type affect cleanup, which matches what installers see in real life. Freshly installed decals and very old sun-baked decals do not come off the same way.
Use this approach:
- Warm the graphic first so the adhesive releases more evenly
- Peel low and slow rather than jerking upward
- Use plastic, not metal near rear defroster lines
- Clean residue gently with a product appropriate for glass and adhesive cleanup
Rear defroster grids deserve caution. If the decal crosses those lines, removal should be more patient and more controlled than removal from plain side glass.
Legal placement and visibility deserve more attention than they get
Window laws vary by state and vehicle type, so the safe move is to verify your local rules before ordering a large graphic. In general, the more a decal interferes with the driver's field of view, the more likely it is to create a problem.
That matters on windshields, front side windows, and rear glass. Rear-window decals can also create practical issues even when they're legal on paper. If a graphic blocks visibility during backing, lane changes, or poor weather, it's in the wrong spot or it's the wrong material.
Good placement balances three things at once: appearance, driver visibility, and compliance. If you're torn between a larger opaque decal and a perforated rear-window graphic, choose the option that lets you keep clearer sightlines.
Frequently Asked Questions About Car Window Stickers
A lot of decal advice online stops at design and install. That's only half the job. Modern vehicles have cameras, sensors, defrosters, tint, and tighter visibility expectations than older vehicles did.
A major gap in many guides is the interaction between window decals and Advanced Driver-Assistance Systems. With rear visibility technology becoming standard, it's important to think about how a decal could interfere with a backup camera or related visibility systems, a concern highlighted in Vispronet's discussion of car window decals and practical use.
Can a rear-window decal interfere with ADAS or a backup camera
Yes, it can. The risk depends on where the camera is mounted and how much of the glass the decal covers. If your vehicle has a rear camera that looks through or near the rear glass area, avoid placing opaque graphics in its viewing path.
Perforated vinyl is often the safer direction for larger rear-window graphics because it preserves outward visibility better than solid coverage. Even then, you should keep camera zones, sensor views, and any critical lines of sight clear.
Is perforated vinyl always the right choice for rear windows
Not always. Perforated film makes sense when you want broad rear-window coverage without turning the whole pane into a blind spot. But it's not automatically the right answer for every vehicle.
If the design is small, text-based, or placed in a corner or lower section, standard cut vinyl may be cleaner and more durable-looking. Perforated graphics are most useful when the artwork itself is large enough to benefit from that see-through structure.
Can I put a decal over rear defroster lines
You can, but you should think ahead to removal. A decal installed across defroster lines may look fine in service, but later removal requires more care. The safest approach is slow peeling with heat and no metal scraping.
If you know you change graphics often, choose placement that avoids sensitive areas when possible.
Do inside-applied window stickers work on all windows
No. Visibility depends heavily on the glass. Inside-applied graphics viewed from outside tend to work best on clear, untinted windows. Tint and reflections can make them harder to see.
For many car owners, an exterior-rated window decal remains the more predictable option for readability.
What causes bubbles after a decal looked fine at first
Usually one of four things:
- Contamination on the glass such as dust, residue, or cleaner film
- Poor initial squeegee pressure that left an air channel behind
- Application in bad conditions like hot sun or wind
- A decal edge bridging over a curve instead of fully conforming
Small cosmetic bubbles may settle or be corrected. Widespread bubbling usually points back to prep or install technique.
Will a personalized window sticker damage my glass
Glass itself is usually the easiest automotive surface for decals. The bigger concern isn't damage to the glass. It's damage to surrounding features during removal, especially tint film, defroster grids, or trim if someone gets impatient with sharp tools.
Used properly, vinyl on glass is straightforward. Used carelessly, any adhesive product can become a cleanup headache.
What size decal works best
The best size is the one that fits the window's usable area and stays readable from the distance that matters. A decal for a side quarter window can be modest and still look sharp. A rear-window banner needs more breathing room and stronger letter thickness.
When in doubt, print the dimensions on paper, tape the paper to the glass, and stand back. That five-minute test prevents a lot of ordering mistakes.
Should I choose custom text or a graphic
If your goal is identification, tribute, humor, or a name, custom text usually does the job better. If your goal is style, hobby expression, or visual impact, a silhouette or graphic may work better. The strongest designs often combine a clean graphic with limited text instead of trying to say everything at once.
How do I know if a decal placement is too aggressive
Ask yourself two simple questions. Can you still see what you need to see from the driver's seat, and will the decal still make sense when the window is dusty or the light is bad?
If the answer to either one is no, scale it down, move it, or switch materials.
If you want a decal that fits the glass correctly, uses automotive-grade vinyl, and arrives in a format that's easier to install cleanly, take a look at Custom Sticker Shop. They offer personalized car stickers for windows, custom text decals, and vehicle graphics made for real-world use on trucks, cars, Jeeps, and rear glass, with application formats suited to straightforward install work.