

You hear the hit before you see the bird.
It's a sharp thud against the glass, the kind that makes you stop mid-step and look outside with a knot in your stomach. Sometimes the bird flies off. Sometimes it sits stunned under the window. Either way, the reaction is often the same. They want to fix it fast, and they want to know what works.
That's where a lot of advice online goes wrong. Many guides still make it sound like one decorative sticker in the middle of a big pane will solve the problem. It won't. Effective window decals to keep birds from hitting need to do one job well. They need to make the glass look like a barrier, not open sky or reflected habitat.
The Heartbreaking Thud Why Birds Hit Windows
A bird doesn't hit your window because it's careless. It hits because glass creates a visual trap.
On one home, the trouble window might be the big picture window that reflects a maple tree. On another, it's the corner glass by a bird feeder. In both cases, the bird sees something useful. A safe flight path, a patch of sky, a stand of greenery. What it doesn't see is the hard surface in front of it.
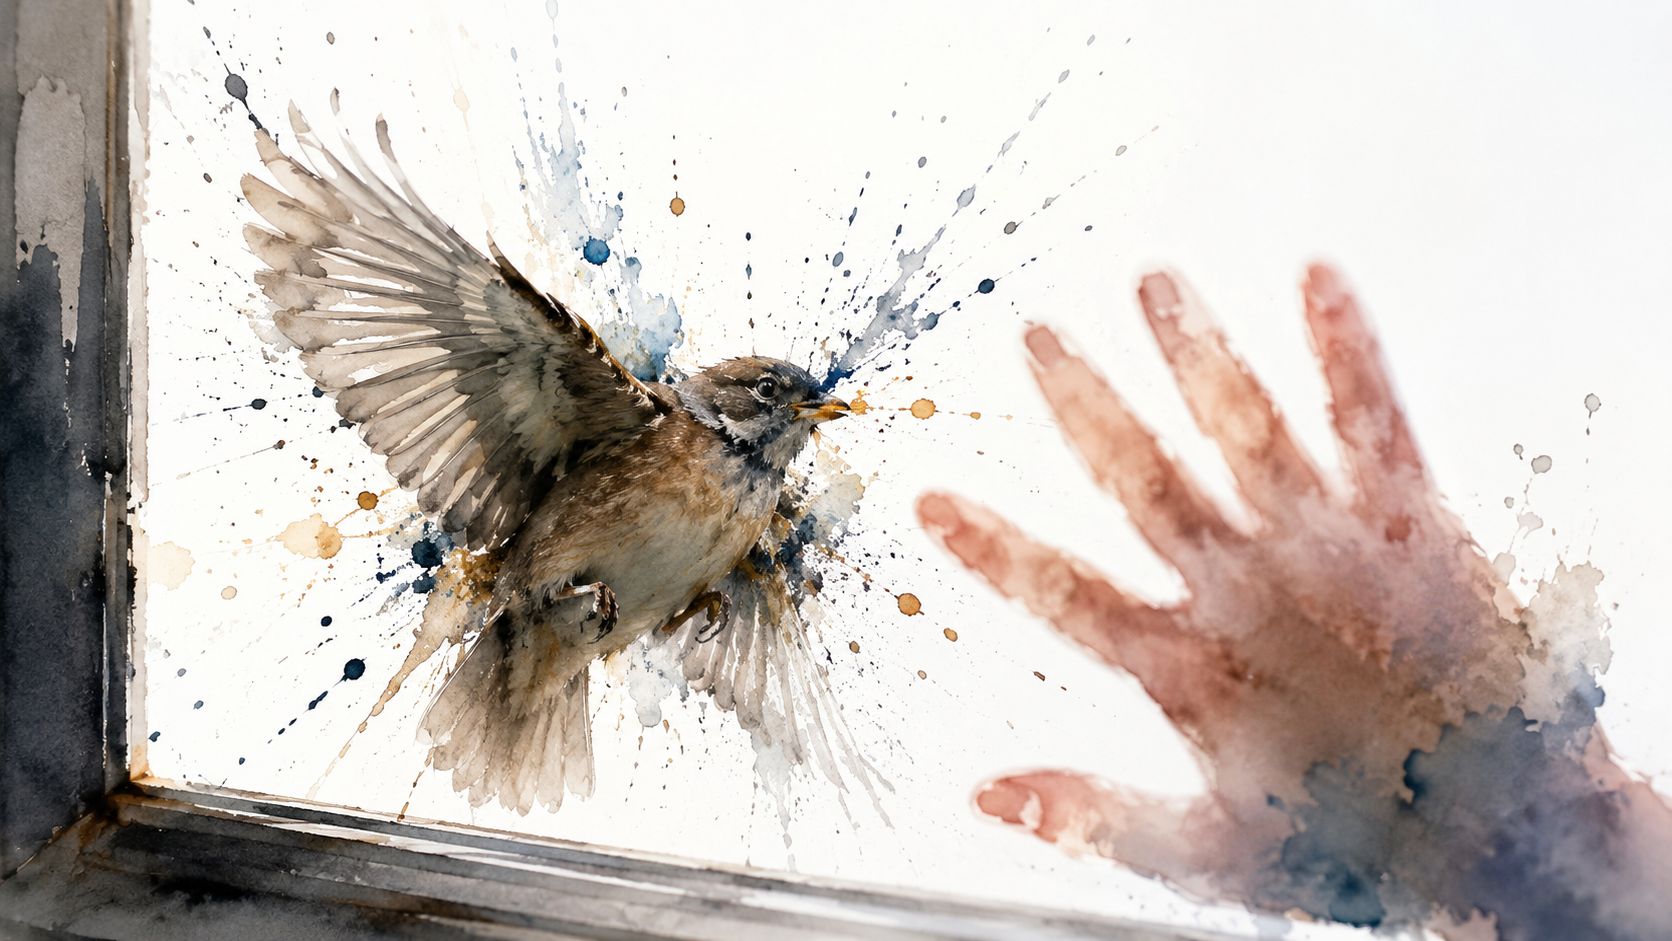
Reflection fools birds
Reflections are the main problem on many homes. When trees, shrubs, clouds, or bright sky mirror across the surface, the glass looks like more habitat. Birds commit to the flight line, then meet the pane at full speed.
Transparency causes the other common type of strike. That happens when a bird looks through one side of a home, porch, railing, or sunroom and thinks it can fly straight through to the space beyond. If you're planning a remodel with large glazed areas, it's smart to think about bird safety early alongside practical topics like glass enclosure costs and permits.
This is much bigger than one backyard
This isn't a rare household annoyance. It's a conservation problem at national scale. Researchers estimate that hundreds of millions of birds die each year in the U.S. from building collisions according to this public bird-collision research summary.
Most homeowners don't need a prettier sticker. They need a window treatment that changes what a bird sees before impact.
Once you understand that, the solution gets clearer. The goal isn't to scare birds with a predator shape. The goal is to break up the illusion that the glass is empty space.
How Decals Make Your Windows Bird-Safe
The best decals work by adding enough visible pattern to interrupt reflection and transparency. That's the whole mechanism.
A bird-safe decal isn't a warning sign in the human sense. It's more like visual noise spread across the pane. Dots, stripes, or repeating shapes make the surface readable as an object. When the spacing is tight enough, birds stop treating the opening like a route they can fly through.
Why one decal fails
This is the mistake people make most often. They apply one or two stickers near the center of a large window and expect the bird to generalize the rest of the pane as solid. Birds don't read it that way.
The Cornell Lab of Ornithology notes that one or two decals will not help, and that old-style falcon or owl silhouettes are ineffective, as summarized in the U.S. Fish & Wildlife Service bird-friendly home toolkit. That changed how professionals think about bird-safe design. The shape matters less than whether the full pane is interrupted often enough.
What decals are really doing
A useful way to think about decals is this:
- They break reflection so a mirrored tree line doesn't read as open habitat.
- They interrupt transparency so a bird doesn't aim for the visual gap beyond the glass.
- They create a repeat pattern that says “barrier” instead of “path.”
A decal system works when the bird notices the glass itself, not the artwork on the glass.
That's why simple patterns often outperform decorative single stickers. A neat cluster in one corner may look good from the street, but birds still see wide fly-through gaps across the rest of the pane. If you remember one principle, make it this one: coverage beats ornament.
Choosing Effective Bird-Saving Decals
If you're shopping for decals, ignore the package hype for a minute and judge the product by three things. Can you place it densely enough, can it live outdoors, and will it stay visible against changing light?
Those criteria matter more than whether the design is a hummingbird, leaf, geometric dot, or abstract stripe.
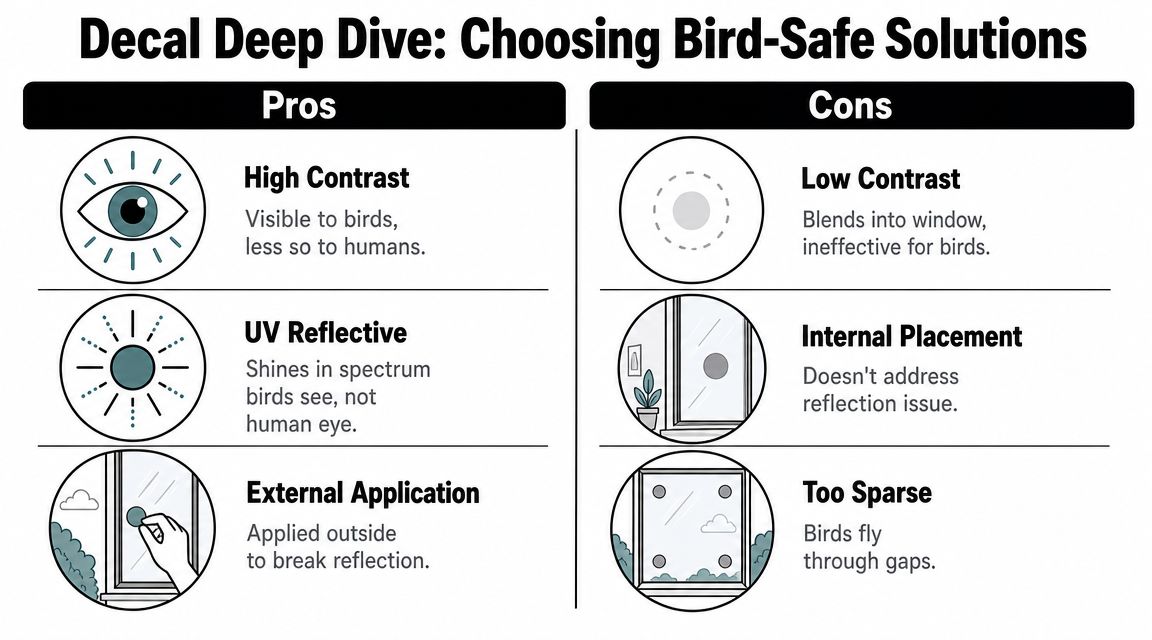
Buy for function first
Many product pages still sell decals as if any bird-themed sticker will do. The key issue is spacing. The Audubon Society recommends decals or tape no more than 4 inches apart, while the U.S. Fish & Wildlife Service suggests 2-inch by 2-inch spacing across the window surface, as explained in this All About Birds guide on stopping window strikes.
That means a product sold in a tiny pack may be fine for a small pane and nowhere near enough for a wide slider or picture window.
Here's the buying filter I'd use:
- Choose repeatable shapes: Dots, short lines, narrow bands, and small repeated icons are easier to space correctly than one large centerpiece.
- Choose outdoor-rated material: If the decal isn't meant for exterior exposure, sun and weather will shorten its useful life.
- Choose contrast you can live with: A treatment has to be noticeable enough to do the job. Invisible-looking products often turn out to be invisible to birds too.
- Choose enough quantity for the whole pane: Count the window area before you buy. The amount of coverage needed is often underestimated.
Decorative can still work, but only if repeated
A decorative design can be part of a bird-safe setup if you use enough of it. For example, a floral or bird-shaped decal repeated tightly across a pane can help, while a single centerpiece won't. That's the difference between art on glass and a collision-prevention pattern.
A product such as this hummingbird hibiscus flower decal sticker can fit the look some homeowners want, but the key question remains the same: can you use enough pieces, close enough together, to make the entire risky area visible?
Quick comparison
| Option | Good choice when | Weak point |
|---|---|---|
| Repeating dots or stripes | You want predictable coverage | Less decorative |
| Repeated themed decals | You want function with personality | Easy to under-space |
| Single large silhouette | Almost never the right choice alone | Leaves big unsafe gaps |
Shoppers usually focus on design first. For birds, layout is the product.
The Rules of Spacing and Placement for Maximum Effect
This is the part that decides whether decals work or fail.
Bird-safe markers need to be applied on the outside of the glass, not the inside. They also need to cover the risky area with tight, regular spacing. Environment and Climate Change Canada says effective markers must go on the outside, have no gaps larger than 5 cm (about 2 inches) in any direction, and each marker should be at least 5 mm wide in this official guidance on avoiding bird collisions with windows.
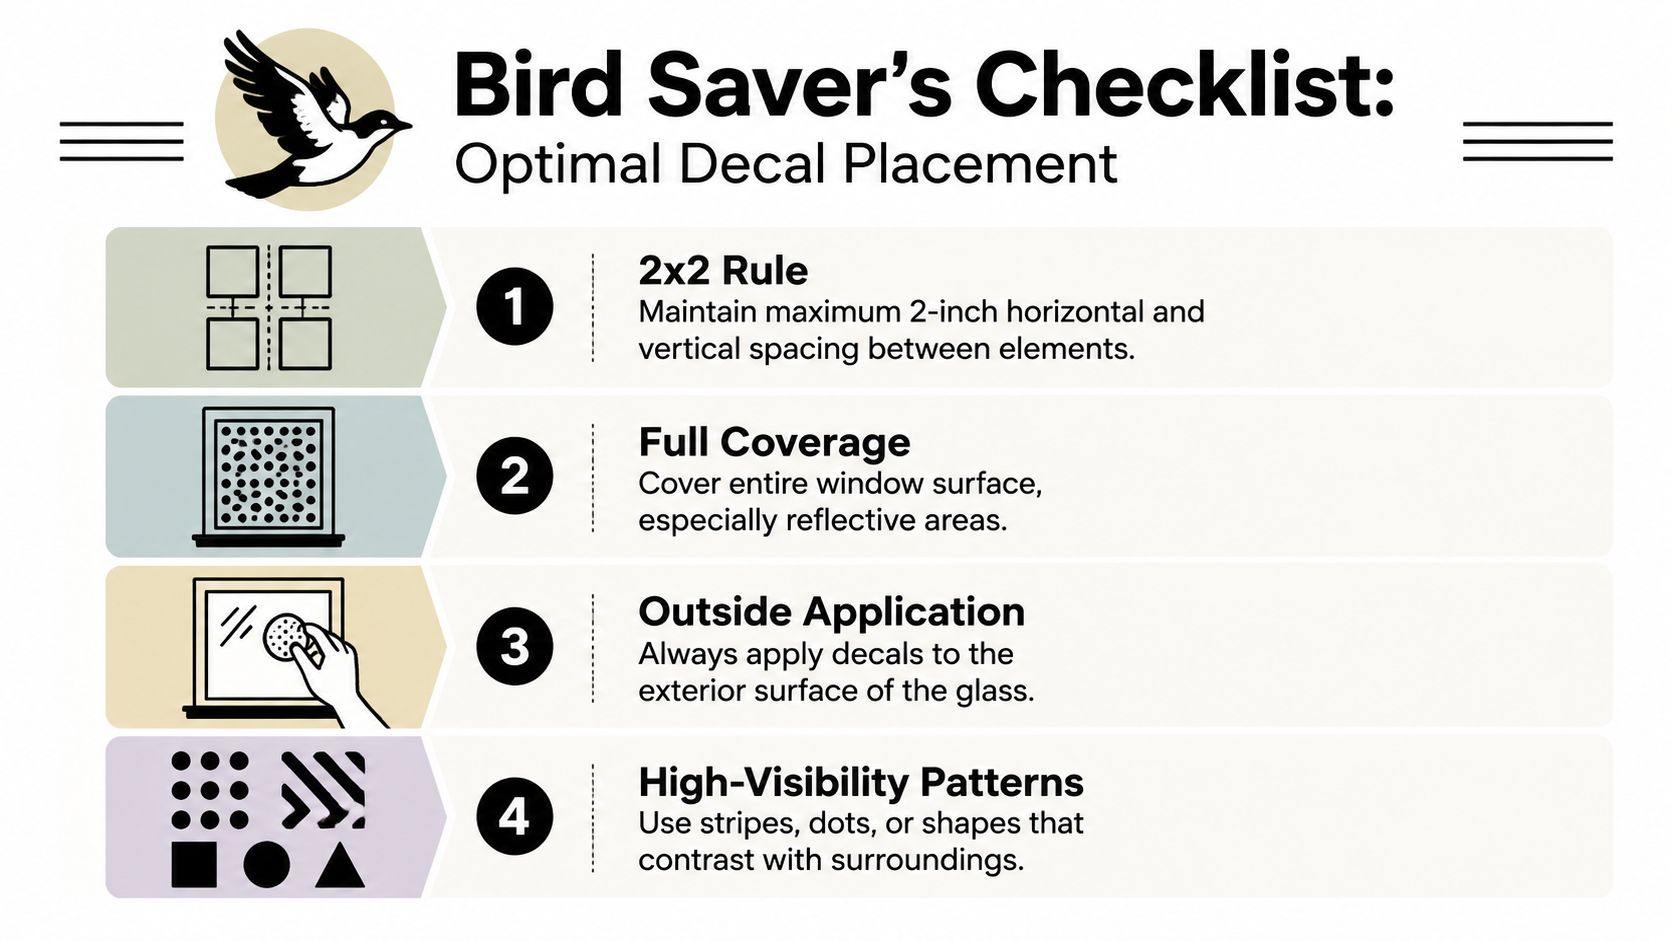
The non-negotiable rule
Spacing rule: Keep the pattern tight enough that there are no gaps larger than about 2 inches in any direction across the treated glass.
If that sounds dense, it is. That density is the point.
A few scattered decals on a wide pane don't create a barrier. They create obstacles with open flight lanes between them. Birds aim for the open lanes.
Outside placement matters
Interior application is one of the biggest sources of disappointment. From indoors, the decals may look fine. From outdoors, the glass can still behave like a mirror, especially in bright daylight.
Apply the treatment to the side where the bird approaches the reflection. On most homes, that means the exterior face of the glass.
Use this checklist while planning:
- Treat the full danger zone: Don't stop at the center of the pane. Cover the sections that reflect sky, trees, shrubs, or open space.
- Mind corner windows and glass railings: Birds often read these as pass-through routes.
- Use marker width that holds up visually: Tiny hairline elements can disappear against busy backgrounds.
- Watch the morning and late afternoon light: That's often when reflections become strongest on residential windows.
This walkthrough shows the concept in motion:
Patterns that are easy to install correctly
If you want the simplest path, use a layout that's easy to measure:
- Vertical stripes work well because you can check the gap with a tape measure as you go.
- Dot grids are clean and predictable on picture windows.
- Short dash marks can feel lighter visually while still forming a readable pattern.
- Small repeated custom text or symbols can work if you keep spacing disciplined.
For homeowners who want a cleaner custom look, a pre-spaced product like this 11-inch wide custom text window decal sticker can be adapted for glass graphics, but only if the final layout still follows the spacing rule above. Style never replaces coverage.
If you can still point to a wide clear patch and say, “A bird could try that gap,” the layout probably needs more coverage.
A Step-by-Step Installation and Care Guide
Good material helps, but installation decides whether the window ends up clean, aligned, and durable. The process isn't hard. It just rewards patience.
Prep the glass first
Clean the exterior glass thoroughly. Remove dust, pollen, sap film, and any oily residue, because vinyl adhesive grabs best on a dry, clean surface.
Then map the pattern before peeling anything.
A simple setup works well:
- Use painter's tape as guides: Mark top and side margins so your rows don't drift.
- Dry-fit the layout: Hold a few decals in place and step back outside to check visibility against reflections.
- Measure your spacing twice: Most DIY jobs go off course at this point.
Apply in small sections
Work from one side of the pane across, or from the top down. Don't jump around randomly. A consistent sequence keeps the pattern straight.
If the decals are transfer-taped, apply light pressure first, confirm position, then squeegee firmly. If you trap a bubble, lift and reset early. Small bubbles are much easier to fix before the adhesive fully settles.
A custom transfer-taped product such as this make you own custom text windshield banner decal sticker shows the kind of application format many people find easiest to place cleanly. The same installation habits apply on home glass. Straight guides, steady pressure, and no rushing.
Keep them effective over time
Exterior decals live with sun, rain, grit, and seasonal washing. They don't need much babysitting, but they do need sensible care.
- Wash with a soft cloth or sponge: Avoid scraping at edges with hard tools.
- Skip abrasive pads: They can scuff the vinyl and shorten its life.
- Check edges after storms or freezing weather: Re-press any lifting spots early.
- Replace worn or missing elements promptly: A pattern only works when it stays intact.
Neat installation matters for looks. Consistent spacing matters for bird safety.
Testing Your Windows and Exploring Alternatives
Once the decals are up, pay attention for a few weeks. Watch the windows in the same light conditions that caused trouble before. If the strikes stop, the treatment is doing its job. If you still see near-misses or impacts, the usual reason is incomplete coverage or gaps that are still too large.
Real-world field data supports this approach. A study of exterior markers on glass bus shelters in Stillwater, Oklahoma found a 64% reduction in total annual bird collisions relative to baseline, and 89% fewer interior collisions at treated versus untreated shelters in 2020, reported in this peer-reviewed study of bird collision prevention markers.

If decals aren't your preferred solution
Decals are only one tool. Depending on the window, another exterior treatment may fit better.
Here's a practical side-by-side view:
- Screens: Good when you want a physical break in reflection and some added impact buffering.
- Exterior films: Often a cleaner look on large expanses of glass.
- Paracord curtains or BirdSavers: Useful if you want a low-tech exterior barrier with minimal adhesive.
- Fritted or bird-safe glass: Best considered during new builds or major replacement projects.
Some homeowners also want better temperature control from the same windows. If that's part of your project, this guide to heat rejection options for Phoenix homes is a useful comparison of screens and tint, especially for large sun-exposed glass.
How to know you've solved it
Look for these signs:
- No fresh collision marks or feather smudges on the treated pane
- Birds changing course earlier instead of braking at the last second
- Problem windows becoming quiet during the times of day that used to produce strikes
You don't need a fancy setup to help birds. You need a treatment that respects how they see glass. Dense pattern. Exterior placement. Full enough coverage to remove the illusion.
If you want durable vinyl decals that arrive pre-spaced and transfer-taped for easier application, Custom Sticker Shop offers American-made options built from professional-grade outdoor vinyl. If you already know the layout you need, their custom decal formats can help you create a clean, practical window treatment without turning the project into a complicated install.