
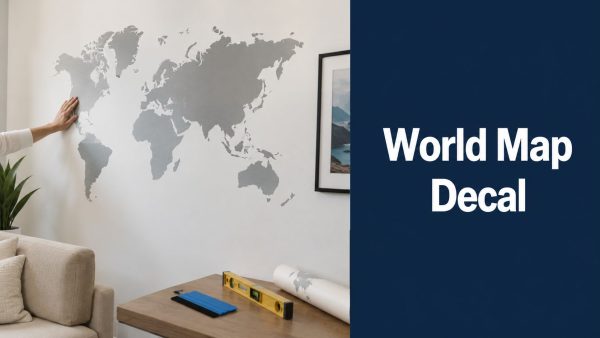
You're probably looking at a wall that feels unfinished. It might be above a desk, behind a couch, in a homeschool corner, or in that awkward stretch of drywall that never seems to suit framed art. A wall decal world map works well in exactly those spots because it adds scale, shape, and a sense of purpose without the commitment of paint or wallpaper.
It also asks a little more from you than a small quote decal or a simple stripe. Large maps need careful placement, a clean surface, and a clear decision about what you want the piece to do. Some people want a travel-inspired focal point. Others want a map their kids can learn from. Those are not always the same product.
From Blank Wall to Statement Piece
A world map decal can turn a flat wall into the thing people notice first when they enter the room. It fills space without making the room feel crowded, and it can lean modern, rustic, educational, or minimal depending on the linework and color. That flexibility helps explain why the wall decal category keeps growing. The global wall decal market was valued at $3.2 billion in 2025, and vinyl decals held 42.5% of the market, which reflects how widely people use vinyl for durable, versatile decor according to wall decal market research.
In a family shop, we see the same pattern over and over. People don't usually regret choosing a map. They regret choosing the wrong size, rushing the install, or buying a design that looked great online but didn't fit the room once it was on the wall.
What a world map does well
A wall decal world map earns its keep when you need more than decoration. It can:
- Anchor a room: A large map gives the eye a place to land.
- Start conversations: Guests almost always walk over and look closer.
- Add meaning: Travel memories, future trip pins, or learning goals give it purpose.
- Keep the wall light: Unlike framed sets, decals don't add visual bulk.
If you're decorating with a strong local style and want ideas for balancing a statement piece with the rest of the room, this guide for Brooklyn wall decor lovers is useful because it shows how wall art can support a room's character instead of fighting it.
For readers who like to compare visual approaches before buying, you can also glance at this animal decal example gallery. It's not a map product, but it's a good reminder that wall graphics read very differently depending on spacing, silhouette, and how much empty wall you leave around them.

Practical rule: The empty wall around the decal matters almost as much as the decal itself.
Choosing Your Perfect World Map Decal
The best wall decal world map is the one that suits the room, the wall surface, and the reason you're buying it. A map for a clean home office has different demands than one for a child's reading nook. Start there, not with color.

Material and finish
In day-to-day installation work, vinyl remains the default because it handles curves, corners, and broad flat areas well. Cheap vinyl often feels stiff, lifts at the points, or shows every squeegee mark under strong light. Better film lays down cleaner and forgives small handling mistakes.
A matte finish usually works best for large maps. Glossy decals can bounce glare from windows and overhead lighting, which makes country names or borders harder to read. Matte also tends to look more painted-in once it's on the wall.
Here's a quick installer's comparison:
| Feature | What usually works best | What often causes disappointment |
|---|---|---|
| Finish | Matte or low-sheen | High gloss in bright rooms |
| Film feel | Flexible, stable vinyl | Brittle or overly stretchy film |
| Detail level | Clean lines sized for viewing distance | Tiny labels on a far wall |
| Adhesive behavior | Predictable tack with careful placement | Aggressive tack on thin wall paint |
If you want to compare decal print character and color density, this full-print sample image is helpful for seeing how bold graphics behave visually on a wall.

Size and wall placement
Shoppers often buy too small when online and too large when purchasing emotionally. That sounds contradictory, but it happens all the time. On a product page, a modest map can seem safe. In person, it gets swallowed by the wall. On the other hand, a dramatic oversized map can look great in a loft photo and feel crowded in a room with standard furniture and low contrast paint.
A better approach is to measure the usable visual field, not just the wall. That means the area between furniture, lamps, switches, vents, shelves, and trim.
Use this checklist before you buy:
- Measure the full width first: Then subtract anything the decal shouldn't run into.
- Check the viewing angle: A map above a sofa reads differently than one opposite a desk.
- Mind ceiling height: Tall, narrow walls often suit maps with more negative space.
- Leave breathing room: The design needs margin around the outermost continents.
Style and purpose
A line-art world map feels very different from a political map with labels. Neither is better. The right choice depends on how you'll use it.
For example:
- A minimal outline map fits modern living rooms and calm offices.
- A country-labeled map suits study areas and homeschool setups.
- A vintage-toned map works well with wood furniture and warmer paint colors.
- A high-contrast black map can become the main focal point in a neutral room.
If the room needs quiet, choose a simple map. If the room needs function, choose legibility over trend.
The accuracy question most buyers miss
This is the part many product pages skip. If the map is for education, projection matters. A decorative world map can still look wonderful, but if your child is learning geography from it, the design should not present distorted country sizes.
A 2024 study found that 68% of parents buying world maps for home learning are unaware of projection differences, which can lead to misconceptions about relative country size, according to this world map education reference.
That matters because projections change how the world appears. The Mercator style is familiar, but it enlarges areas closer to the poles. Other projections aim for a more balanced visual representation.
When you shop, ask these questions:
- Is the projection named?
- Are country boundaries decorative or intended for learning?
- Are labels large enough to read from the actual viewing distance?
- Is this map meant to be accurate, stylized, or purely artistic?
If the seller can't answer those questions, assume the map was designed for appearance first.
Preparing Your Wall for a Flawless Finish
Most installation failures start before the backing paper comes off. The wall looks clean, the paint feels dry, and the decal seems simple enough. Then an edge lifts, bubbles keep coming back, or the adhesive never settles properly.

Clean the wall the right way
For optimal adhesion, clean the wall with mild soap and water, let it dry completely, and then wipe with isopropyl alcohol. Applying a decal to uncured paint or a glossy finish can reduce bond strength by 30 to 40%, based on this wall decal application guidance.
That sequence matters. Soap and water remove everyday grime. Drying prevents moisture from getting trapped. The alcohol wipe cuts leftover oils that hands, cleaners, and air residue leave behind.
Surfaces that usually cooperate
Walls with a smooth finish are usually the easiest. Fully cured eggshell or satin paint tends to behave better than slick, glossy coatings. Textured walls are where expectations need adjusting. Heavy orange peel, knockdown texture, and chalky old paint can all fight the adhesive.
Use a simple hand test before install:
- Run your palm over the wall: If it feels gritty, clean again.
- Look across the wall in side light: Texture shows up fast this way.
- Press painter's tape to the wall: If it barely grabs, your decal may struggle too.
- Check recent painting: Fresh paint is one of the most common hidden problems.
A decal doesn't bond to what the wall looks like. It bonds to what's actually on the surface.
Gather tools before you start
You don't need a workshop full of gear, but you do need the basics within reach. Walking away mid-install to find scissors or tape is when alignment problems begin.
Keep these nearby:
- Painter's tape for positioning and hinge lines
- Level for straight placement
- Squeegee with a soft edge or felt edge
- Lint-free cloths
- Measuring tape
- Small step stool if the top edge sits high
- Utility knife or scissors for trimming backing paper only, not the decal on the wall
The Step-by-Step Installation Process
A large map looks intimidating rolled up on the table. Once you break it into a sequence, it becomes manageable. The cleanest method for most large decals is the hinge method because it lets you lock in placement before adhesive touches the wall.
To help visualize the workflow, use this reference:

Dry-fit before anything sticks
Tape the map to the wall while the backing is still on. Step back. Sit down and view it from the angle where you'll live with it. This perspective helps you catch problems that no measurement alone will show, like a map looking too high above a desk or too tight against a floor lamp.
Stable demand for this style is one reason so many households keep coming back to it. Google Trends data shows that search interest for "world map wall art" has remained consistently stable, which points to lasting appeal rather than a passing decor spike, as summarized in these world map wall decor trend notes.
If you want a broader framing mindset for hanging statement-scale wall pieces, these professional art installation methods are worth reading. The principles around alignment, spacing, and sightlines apply even when the piece is a decal instead of framed art.
Make the hinge
Once the position looks right, run painter's tape across the middle horizontally, or vertically if the shape of the map makes that easier. This taped seam is your hinge. It keeps the decal from drifting while you work.
Then:
- Lift one side carefully.
- Peel back part of the liner.
- Cut away only the released backing paper.
- Lay the decal back down slowly.
Don't remove all the backing at once. Large flexible vinyl can fold onto itself, collect dust, or stretch slightly if you try to wrestle the whole sheet in one move.
Squeegee from the center outward
This is the part that decides whether the decal looks crisp or homemade. Start at the hinged center area and work outward with overlapping strokes. Use firm, even pressure.
A few habits make a big difference:
- Short passes beat big sweeps: They give you more control.
- Push air toward the nearest edge: Don't trap it by changing direction randomly.
- Watch the transfer tape: If you see tension or buckling, slow down.
- Keep one hand ahead of the squeegee: Guide the decal so it lays flat.
Handling multi-panel maps
Many wall decal world map sets come in sections. Continents may be separate pieces, or the full map may arrive as panels. Multi-piece jobs are easier to manage physically, but they require patience with spacing.
Use light pencil marks or tiny bits of painter's tape to mark key reference points like:
- top of North America
- bottom of South America
- center line through Africa
- alignment between Europe and Asia
Don't trust the wall, the ceiling, or the floor to be perfectly straight. Use your level and your own marks. In older homes, trim lines can fool your eye badly.
Here's a practical way to think about panel order:
| Panel type | Best approach |
|---|---|
| Center anchor panel | Install first and build from it |
| Left and right wings | Match to center, not to ceiling lines |
| Small island pieces | Save for last after all main landmasses are fixed |
| Label overlays | Apply only after base map is fully settled |
This is also a good point to pause and check for fatigue. Big decals punish rushed hands. If your squeegee angle gets lazy or you stop checking level, take a short break.
A quick video can help if you prefer to watch the flow before doing it yourself:
Removing the transfer tape
Once the decal is down, don't yank the transfer tape upward. Peel it back at a sharp angle and go slowly. If a piece of the decal lifts with it, stop, press that section down again with the squeegee, and try once more.
Slow hands beat strong hands. Most damage happens during peeling, not sticking.
When the tape is off, do one last perimeter pass with the squeegee or a soft cloth. Pay close attention to tips, narrow peninsulas, compass points, and any fine lettering.
Troubleshooting Common Installation Issues
If something goes wrong, don't assume the whole map is ruined. Most install problems look worse in the moment than they really are. Vinyl gives you more recovery options than people expect.
Air bubbles
Small bubbles are common. Most come from trapped air, not a bad decal.
Try this order:
- First, squeegee again: Push from the bubble toward the nearest edge.
- If it won't move, wait a bit: Some tiny bubbles settle as the adhesive relaxes.
- For a stubborn pinhead bubble: Use a very fine pin to make a tiny hole, then smooth the air out gently.
Don't stab at the middle repeatedly. One tiny opening is enough. The goal is to vent the air, not shred the surface.
Wrinkles and folds
Wrinkles usually happen when too much backing comes off at once or a section touches the wall before it's aligned. If the vinyl creases lightly, lift that section slowly and reapply with tension removed.
What usually works:
- Peel back only to the last smooth point.
- Let the vinyl relax for a moment.
- Reapply with shorter squeegee strokes.
- Keep the unsupported portion from hanging and pulling.
If the material has folded adhesive-to-adhesive, separate it gently. Don't yank. Stretching is harder to fix than a slow re-lay.
Edges that won't stay down
When a corner or fine point lifts, the cause is often surface contamination, wall texture, or not enough pressure during the final pass. Press it down with a cloth-wrapped finger or squeegee edge and hold briefly.
If the same spot keeps lifting, check the wall. A dusty patch or tiny texture peak may be the actual problem. Re-pressing over a bad surface won't magically solve it.
Most recurring edge lift is a wall issue wearing a decal disguise.
Alignment problems on multi-piece maps
A slight mismatch between panels is one of the most common frustrations. Don't chase perfection by forcing one panel to fit every edge at once. On maps, the center relationship matters more than a distant outer contour.
If you notice drift:
- Correct early: Small misalignment grows fast across a wide map.
- Use the major landmass as the guide: Not tiny islands or decorative border lines.
- Live with tiny gaps over stretch: Stretched vinyl often looks worse than a hairline mismatch.
A calm install always looks better than an aggressive correction.
Styling Care and Future Removal
Once the map is up, the room tends to organize itself around it. That's one reason these decals work so well. They don't just decorate a wall. They give the space a point of view.

Where a world map works best
In a home office, a map above the desk adds structure without the fuss of multiple frames. A simple monochrome style keeps the space focused. If the room already has a lot of shelves or equipment, thinner linework helps the wall stay readable.
In a family room, a larger map can sit above the sofa and carry the whole wall. Keep nearby accessories quieter. A busy gallery wall and a detailed map usually compete with each other.
For a child's room or learning area, choose readability over mood. Clear borders, easy labels, and a projection you feel good about are worth more than trendy colors. You can make it interactive with pins, travel markers, or a simple routine of pointing out places from books and news.
If you want to see how strong color and graphic coverage can change a surface, this full-color decal example gives a useful visual reference for how bold printed graphics command attention.

Cleaning and long-term care
Wall decals don't need much maintenance. The biggest threat is over-cleaning.
Use these habits:
- Dust lightly: A dry microfiber cloth is usually enough.
- Skip harsh cleaners: Strong chemicals can affect the print or edges.
- Avoid soaking the surface: Moisture around edges can weaken adhesion.
- Don't scrub labels or fine lines: Gentle wiping is better than pressure.
If the room gets a lot of direct sun, fading may happen over time depending on the material and ink. That's not unique to maps. It's just part of any wall graphic living in strong light.
Removing it without a mess
Removal is straightforward if you go slowly. Warm the decal gently with a hair dryer, then peel from one corner at a low angle. The heat softens the adhesive and helps the vinyl release more cleanly.
A few real-world examples help:
- For the frequent redecorator: Warm small sections and peel steadily. Don't rush just because the first corner lifts easily.
- For the renter testing the wall first: Start behind furniture or in a less visible edge area if you're nervous about paint behavior.
- For the family updating a learning space: Remove labels and fine details slowly. Thin pieces can snap if pulled cold.
If a little adhesive remains, a soft cloth and a wall-safe cleaner usually handle it. The key is patience. Fast removal causes most paint damage.
If you're ready for a decal that installs cleanly and lasts, take a look at Custom Sticker Shop. They're a family-run, veteran-friendly shop in Topeka, Kansas, producing American-made vinyl decals with professional-grade materials and clear transfer-ready prep that makes application much easier for DIY installers.