
Your truck is more than just a way to get from point A to B; it's a canvas waiting for you to make your mark. A simple vinyl decal is one of the best ways to transform it from a stock vehicle into a statement of who you are. Whether you want to show off your military pride, your love for off-roading, or create a unique family tribute, a decal gets it done.
Transform Your Ride with Custom Truck Decals
We get it. Your truck is an extension of your personality, and the drive to make it unique has never been stronger. Decals are leading the charge in vehicle personalization because they offer a powerful, affordable, and non-permanent way to make a truck truly your own.
This isn't just a niche hobby; it's a massive trend. The global market for car decals was valued at a whopping $2,589.4 million in 2021 and is on track to hit $3,345 million by 2025. Here in North America, we're at the heart of it, holding a huge 37.40% market share.
What This Guide Covers
This is your complete roadmap to choosing, applying, and caring for the perfect truck decals. We're going to walk you through everything you need to know to get a professional look you'll be proud of.
Here’s what we’ll get into:
- Material Matters: We’ll break down the different types of vinyl and explain why we trust durable materials like Oracal for decals that actually last out on the road.
- Design & Identity: Looking for ideas? We'll help you find inspiration that fits your style, from aggressive tribal graphics for a Dodge Ram to clean and simple text banners.
- Flawless Application: Our step-by-step instructions will help you get a smooth, bubble-free installation, even if you’ve never applied a decal in your life.
- Care & Removal: Learn the simple tricks to keep your decal looking sharp for years and how to safely take it off without a trace when you're ready for a change.
By the time you're done here, you’ll have the confidence to pick a high-quality, American-made decal that truly represents you. And if you're curious about other ways to make your vehicle stand out, exploring different forms of automotive customization can give you even more great ideas.
Understanding the Vinyl Behind a Durable Decal
Here’s the single most important thing to know about truck decals: not all vinyl is created equal. The material is everything. It's the difference between a decal that looks sharp for years and one that peels, cracks, and fades before the first oil change.
Think of it like buying outdoor gear. A cheap poncho might get you through a light drizzle, but you need professional-grade equipment to handle a real storm. When it comes to decals for a truck that lives outside, you need the right material for the job. That means understanding the two main players in the vinyl world: calendared vinyl and cast vinyl.
Calendared Vinyl: The Budget-Friendly Option
Calendared vinyl gets its name from how it's made. A big, heated lump of PVC plastic is squeezed and stretched through a series of high-pressure rollers, kind of like running dough through a pasta maker. This process is fast and cheap, which makes the vinyl more affordable.
But there’s a catch. That stretching process builds tension into the material. Over time, especially when baked by the sun on the side of a truck, calendared vinyl wants to shrink back to its original shape. This is what causes the cracking, peeling, and brittleness you see on low-quality stickers. It’s fine for temporary, indoor signs, but it’s just not built for the abuse a truck endures.
Cast Vinyl: The Professional Standard
Cast vinyl is the real deal, and it's what we trust for all our durable truck decals. The manufacturing process is completely different. Instead of being stretched, a liquid vinyl formula is poured onto a super-smooth casting sheet and then baked. This creates a thin, relaxed, and incredibly stable film with almost zero tension.
Because it isn't forced into shape, cast vinyl is far more durable and conforms beautifully to the curves, rivets, and contours of a truck body without shrinking or pulling back. This "dimensional stability" is why professional-grade materials like Oracal vinyl are rated for up to 7 years of outdoor use, holding up against brutal UV rays, temperature swings, and moisture.
For any decal that's going on a truck, cast vinyl is the only choice that makes sense. It’s the same commitment to quality you see in other high-end automotive products. For a deeper dive into long-term vehicle protection, understanding the differences between Paint Protection Film vs Ceramic Coating highlights why premium materials are always worth it.
To make things clearer, here’s a quick rundown of how these two materials stack up against each other for truck decal applications.
Vinyl Decal Material Comparison
| Feature | Calendared Vinyl (Economy Grade) | Cast Vinyl (Premium Grade – e.g., Oracal) |
|---|---|---|
| Manufacturing Process | Stretched through rollers under pressure | Poured as a liquid and baked, no tension |
| Durability | 1-3 years outdoors, prone to shrinking | Up to 7+ years outdoors, stable |
| Conformability | Stiff, struggles with curves and rivets | Thin and flexible, wraps complex surfaces |
| Best For | Short-term, flat, indoor applications | Trucks, Jeeps, 4x4s, long-term outdoor use |
| Common Issues | Cracking, peeling, brittleness, fading | Resists weather, UV damage, and shrinking |
Ultimately, choosing a premium cast vinyl means your decal will look just as good years from now as it did the day you put it on.
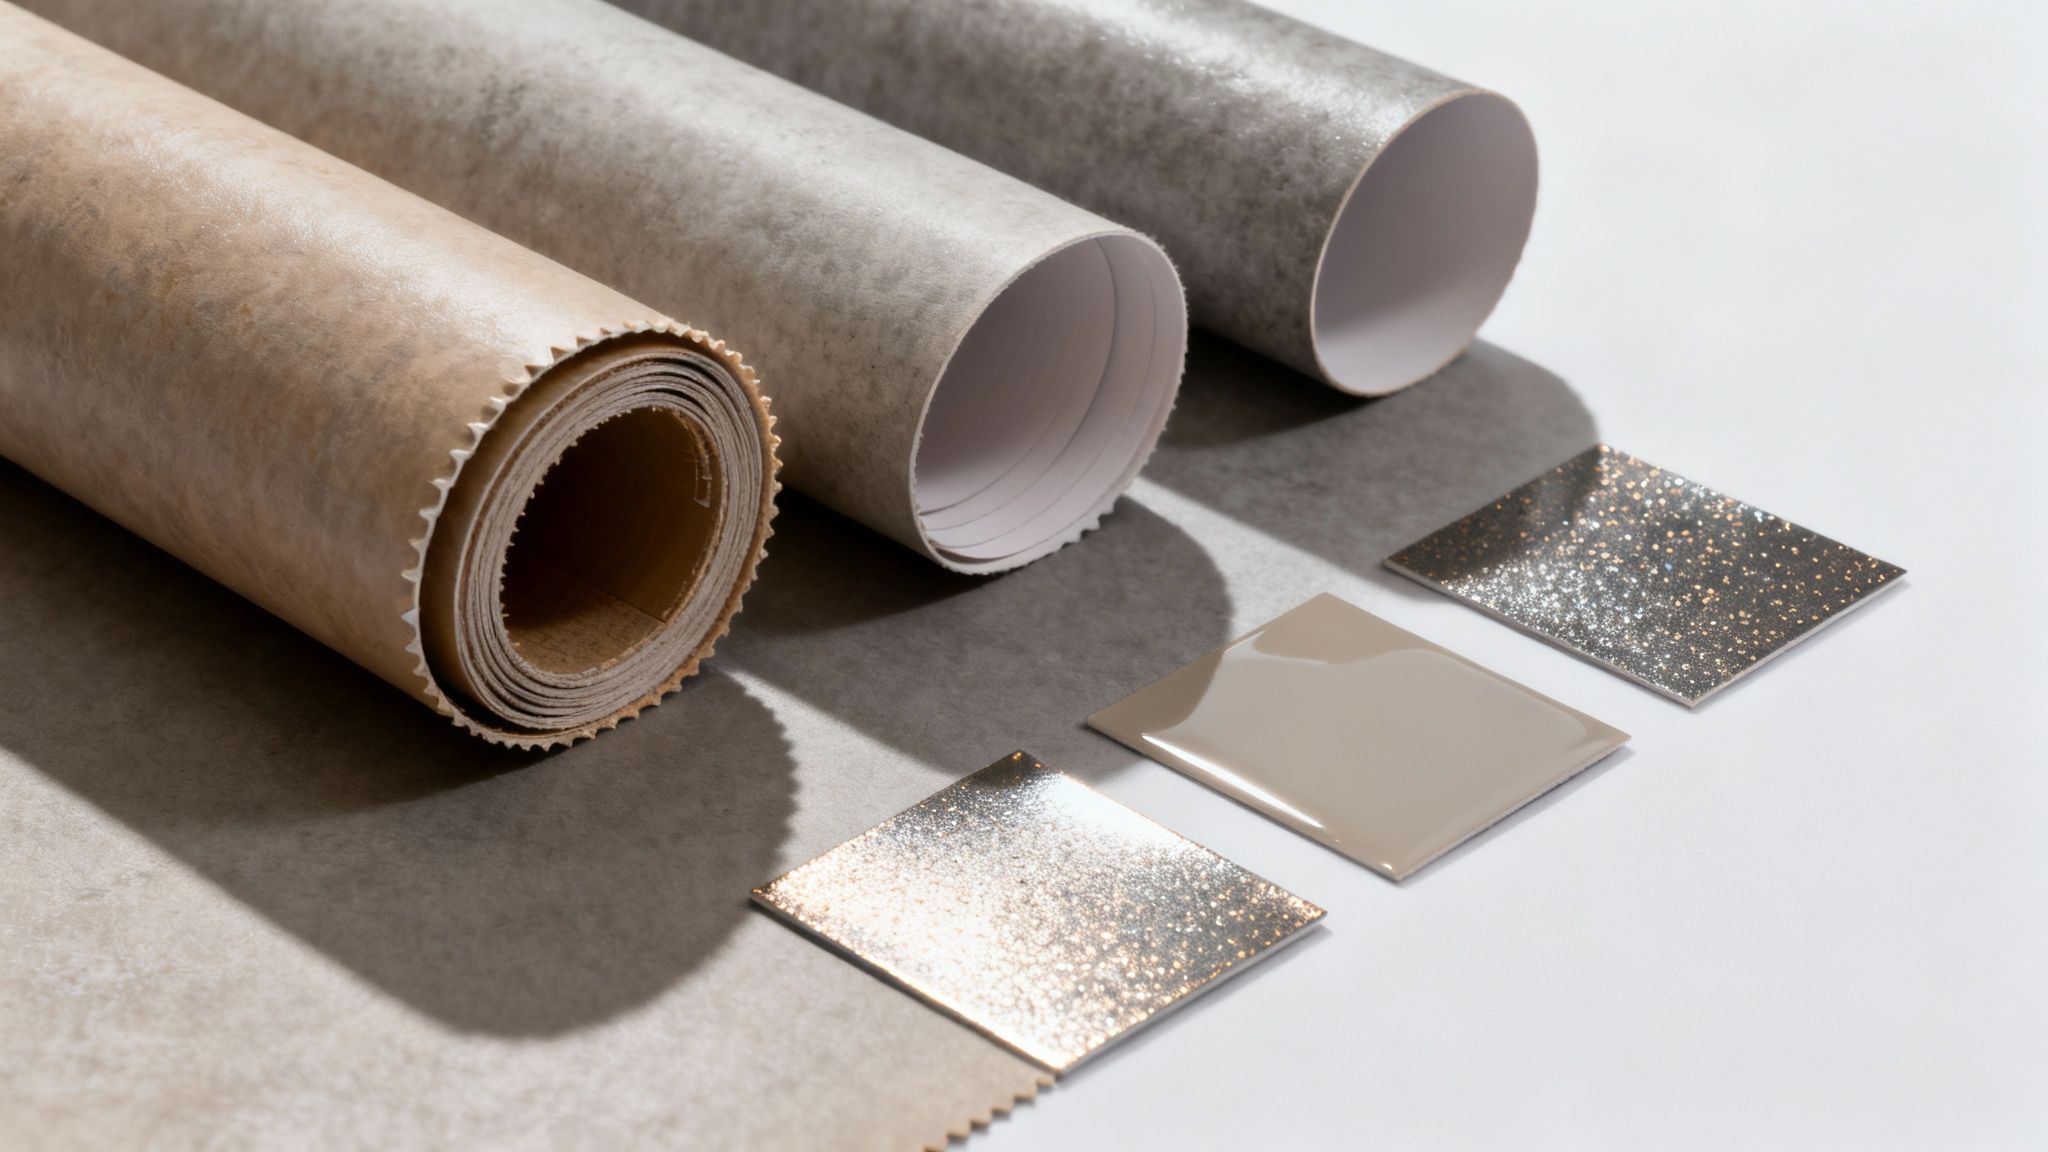
Choosing Your Finish: Gloss, Matte, or Metallic
Beyond the type of vinyl, the finish is what brings your design to life. It affects how the decal interacts with light and complements your truck’s paint job.
- Gloss Finish: This is the crowd favorite. It’s shiny, reflective, and gives a "painted-on" look that makes colors pop. A gloss finish delivers a classic, high-impact style that really stands out.
- Matte Finish: For a more modern and understated vibe, a matte finish is perfect. It absorbs light, creating a flat, non-reflective surface that minimizes glare and gives your truck a stealthy, custom look.
- Metallic & Specialty Finishes: If you want to turn heads, options like metallic, chrome, or carbon fiber add texture and a dynamic shimmer. These finishes catch the light in unique ways, elevating a simple design into a true statement piece.
At the end of the day, picking the right material and finish ensures your investment pays off. By starting with a premium cast vinyl, you’re not just buying a sticker—you’re getting a durable, long-lasting graphic that will represent your style for years to come.
Finding a Decal That Matches Your Identity
Choosing a decal is about way more than just picking something that looks cool. It’s about telling your story without saying a word. Your truck is a canvas, a reflection of your lifestyle and what you’re passionate about. The right decal is what turns it from just a truck into your truck.
The options out there are pretty much endless, which is both awesome and a little overwhelming. The trick is to start with what defines you. Are you a weekend warrior who lives for the trail? A proud veteran? A family person whose world revolves around their kids? Each one of those identities has a whole visual language just waiting to be explored.
And this isn't some tiny niche, either. Truck owners are driving a huge customization movement. The market is projected to grow at a 7% CAGR through 2033, on its way to hitting about $4.5 billion. Trucks and other light-duty vehicles already make up a massive 58% of the entire automotive wrap market, and digital printing has blown the doors wide open for incredible, high-resolution designs. You can dig into more of these trends and growth stats over at Market Report Analytics.
Honoring Service with Military and Veteran Designs
For service members and their families, a decal is a powerful thing. It's a symbol of pride, a nod to sacrifice, and an instant connection to a community that understands what that service means. It's how you find fellow vets on the highway and honor a commitment that most people will never fully grasp.
We see a huge demand for designs that go deep—representing specific branches, units, and even service eras. These aren't just stickers; they're badges of honor that are instantly recognized by those who've been there.
- Branch Pride: Show your allegiance with graphics for the Army, Navy, Air Force, Marines, or Coast Guard.
- Unit Insignias: Display the crest or symbol of your division, brigade, or squadron.
- Tributes: Honor our fallen heroes with POW/MIA graphics or memorial decals for a specific conflict.
These decals carry some serious weight. They’re statements of identity and remembrance packed with personal meaning.
Expressing Your Adventurous Side with Off-Road Themes
If your truck was built for mud, rocks, and roads that aren't on any map, your decals should match that rugged spirit. Off-road and 4×4 graphics are all about capturing the thrill of the adventure and the capability of your rig. It’s one of the most popular categories for both Jeep and truck owners for a good reason.
A well-chosen off-road decal doesn't just look cool—it’s an honest reflection of your vehicle’s purpose. It tells everyone that your truck is more than just a way to get to work; it's your tool for exploration.
Some of the most popular styles we see are:
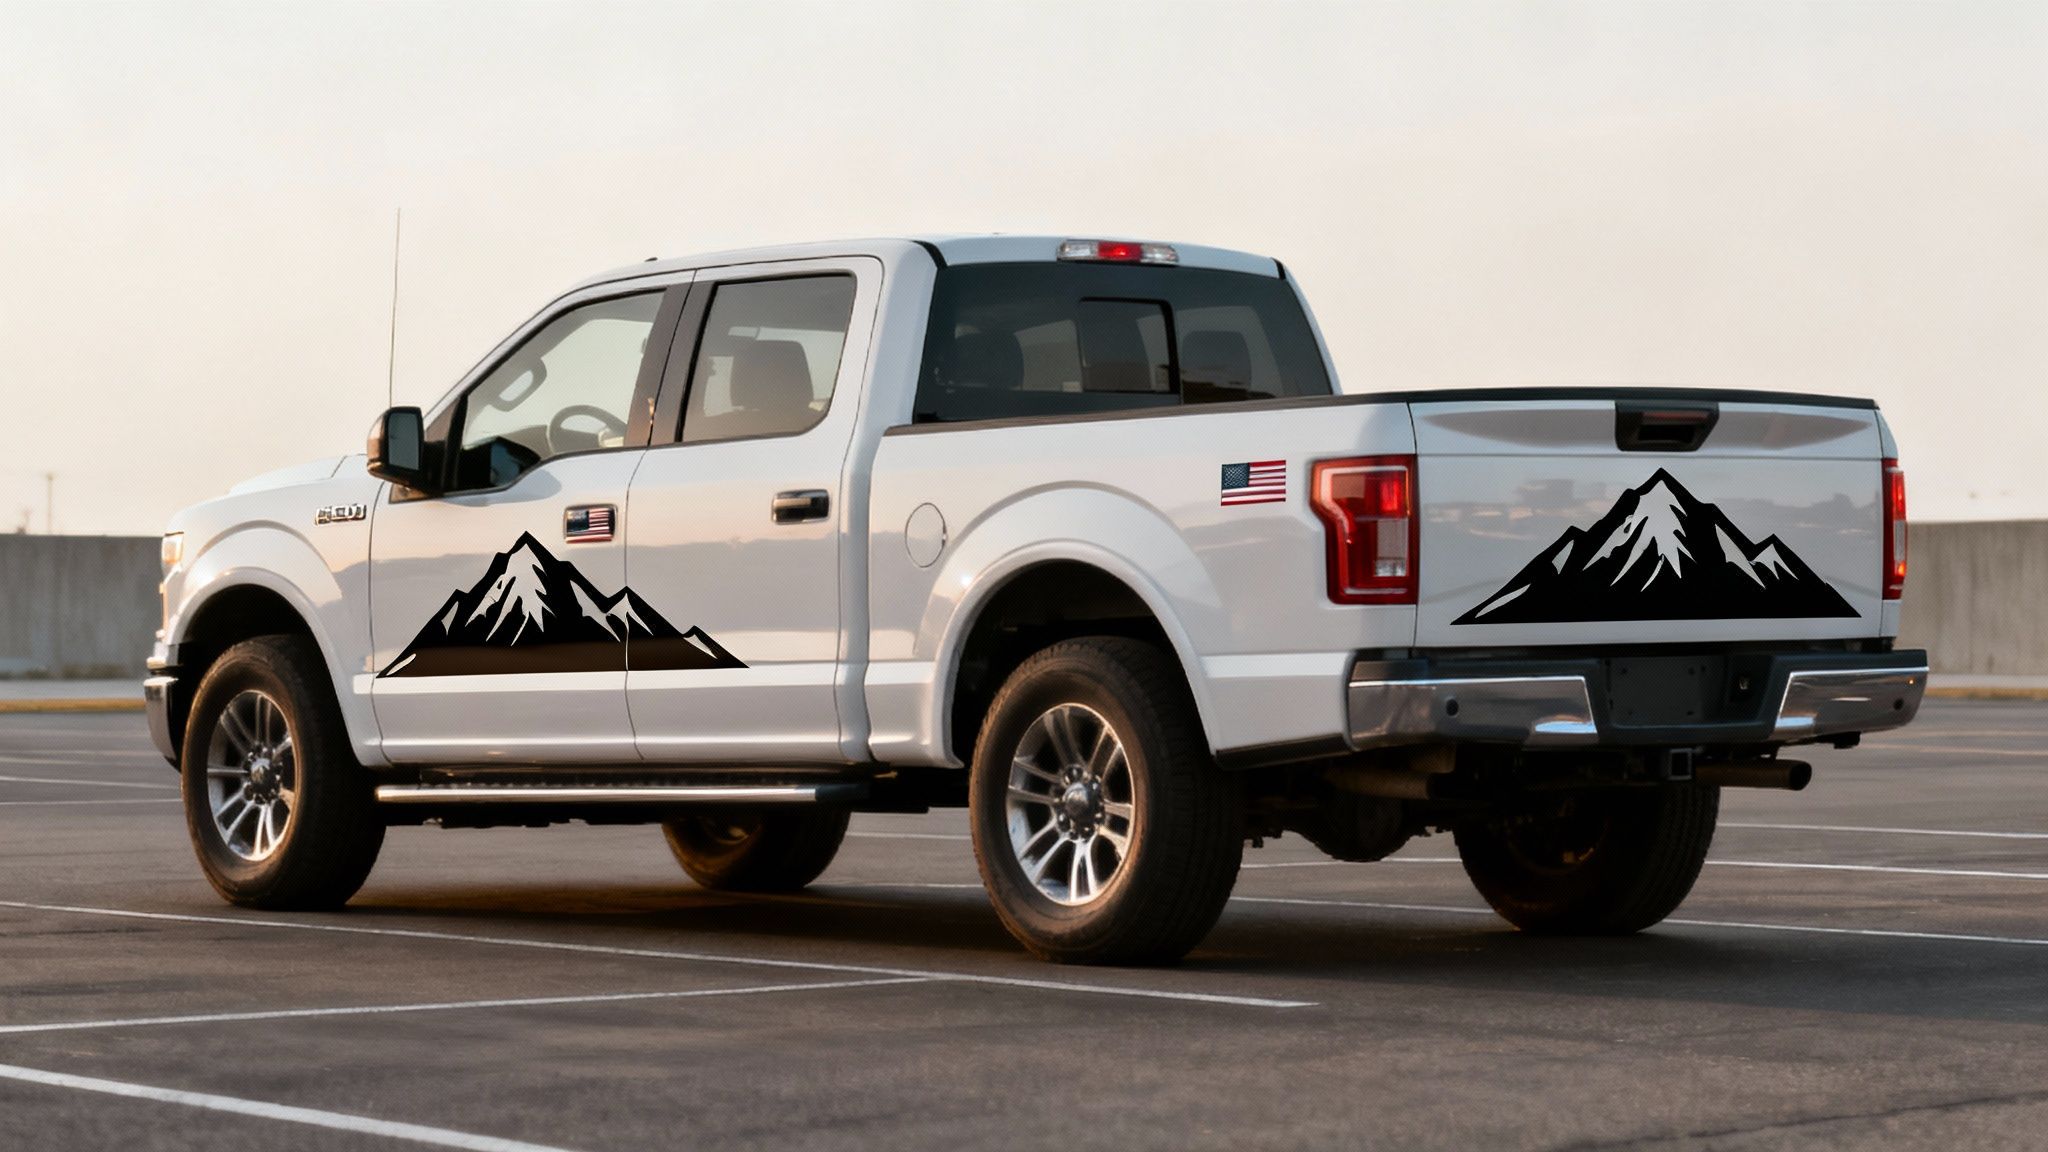
- Mountain and Forest Scenes: Awesome silhouettes of rugged landscapes that wrap around a side panel or fill up a rear window.
- Mud Splatter Graphics: A fun, aggressive look that makes it clear your truck isn't afraid to get dirty.
- Jeep and 4×4 Logos: Bold, classic branding that shows your pride in the off-road community.
Showcasing Your Unique Style and Passions
Your identity isn’t one-dimensional, and your truck's style doesn't have to be, either. Whether you're into the clean, performance-oriented look of JDM culture, want to celebrate your family, or just need to get a specific point across with custom text, there’s a design out there for you.
JDM (Japanese Domestic Market) styles, for example, often lean into minimalist logos and subtle brand tributes that hint at what's under the hood. On the flip side, family and pet decals are a great way to show off your crew, from the classic stick figures to custom names. And if you've got a favorite phrase or motto, a custom text windshield banner makes a bold, personal statement that's impossible to miss.
At the end of the day, the goal is simple: find a decal that feels like you and makes you smile every time you walk up to your truck.
Mastering Decal Placement and Sizing
A killer decal can lose all its punch if it's the wrong size or stuck in the wrong spot. Think about hanging a picture in your living room—a tiny photo gets swallowed by a huge wall, and a massive canvas just bullies a small space. The same eye for balance and scale applies when you're putting a decal on your truck.
The goal is to make your new graphic look like it was meant to be there, an integrated part of your truck’s personality, not just some random sticker you slapped on. This takes a little planning, but it’s what separates a rig that looks amateur from one that turns heads for all the right reasons.
And people are definitely customizing their rides. This whole scene has blown up. The market for automotive wraps and decals hit $8.47 billion globally, with the US chunk of that being $1,496.2 million. It’s driven by truck owners who see their rigs as an extension of who they are, and light-duty trucks dominate, making up 58% of the market. If you want to dive into the numbers, DataIntelo's report on the global car decal market breaks down how digital printing is fueling all this.
Finding the Sweet Spot: Common Placement Areas
Before you even think about peeling that backing paper, you need a game plan. Different parts of your truck offer unique canvases, and each has its own vibe.
- Rear Window: This is prime real estate. It’s a big, flat surface that everyone behind you sees. It’s perfect for large landscape scenes, bold text, or detailed logos. Just keep your rear wiper and any local visibility laws in mind.
- Tailgate: Another high-impact zone. The tailgate is begging for a centered logo, a brand name, or a wide graphic that stretches from one side to the other. It’s a great place to make a statement.
- Side Panels and Doors: These long, flowing areas are perfect for linear designs. Think stripes, tribal graphics, or mountain ranges that work with your truck’s body lines.
- Hood: A decal here gives off an aggressive, performance look. Symmetrical designs that follow the hood's contours work especially well.
The Painter's Tape Trick: A Pro Tip for Perfect Placement
Here’s the single best piece of advice I can give you to avoid placement regret: preview your decal with painter's tape. Before you commit, cut out your decal (leave the backing on!) and tape it up where you think you want it.
Live with it for a day. Seriously. Walk around your truck. Look at it from across the parking lot. See how it hits you. This simple step lets you nail the balance and alignment before it’s permanent. It’s the closest thing you’ll get to a "do-over" button.
Achieving Visual Balance and Scale
Sizing is just as critical as placement. A decal that’s too small looks timid and lost. One that’s too big can overwhelm your truck's lines and just look gaudy. The magic word here is proportion.
Your decal should complement the space it's in. A graphic on the tailgate of a massive Ford F-150 can be way bigger than one on the side panel of a mid-size truck. Measure the area you’re targeting and compare it to the decal’s dimensions. A good rule of thumb is to leave a healthy margin of empty space around the graphic so it doesn’t feel cramped. That visual breathing room makes the whole thing look intentional, clean, and professional.
Your Guide to a Flawless, Bubble-Free Installation
Putting a new decal on your truck can feel a little nerve-wracking, but trust me, it’s a totally doable and satisfying DIY project. The secret that all the pros use for a perfect finish is a technique called the wet application method. It’s the industry standard for a reason—it gives you a forgiving window to slide the decal into the perfect spot and squeegee out any bubbles with ease.
This method uses a simple solution of soap and water to temporarily neutralize the decal's adhesive, which gives you total control over the placement. Once you push the water out from underneath, the adhesive grabs on tight, leaving a smooth finish that looks like it came straight from a custom shop. All our decals are designed for this process and come pre-spaced on transfer tape, so every letter and design element stays perfectly lined up.
Preparing for a Perfect Application
Good prep is 90% of the job. A clean, smooth surface is absolutely critical for the decal's adhesive to form a strong, permanent bond. Rushing this step is the number one reason for installation problems like peeling edges or finding a piece of dirt trapped under your new vinyl.
Before you start, you'll need to grab a few simple tools:
- A spray bottle
- A couple of drops of mild dish soap (like Dawn)
- A squeegee (or a credit card with a soft cloth wrapped around the edge)
- Rubbing alcohol (isopropyl alcohol)
- Clean, lint-free microfiber towels
- A roll of painter's tape
- A tape measure
Once you've got your supplies, the first real step is to give the application area a deep clean. Even if your truck looks spotless, there are invisible oils, wax, and road grime that will absolutely interfere with the adhesive.
Start by washing the area with regular soap and water, then dry it completely. The most important part comes next: do a final wipe-down using rubbing alcohol on a clean microfiber towel. This last step strips away any leftover residue, creating the perfect canvas for your new decal for your truck.
Pro Tip: Try to apply your decal in a shaded spot, like a garage or carport, when the truck's surface temperature is between 50°F and 90°F (10°C and 32°C). If the surface is too hot, the soap solution will evaporate too fast. If it's too cold, the adhesive won't cure and bond correctly.
The Step-by-Step Wet Application Method
With your surface prepped and ready, it’s time to get the decal on. This simple three-stage process is the key to getting it right the first time.
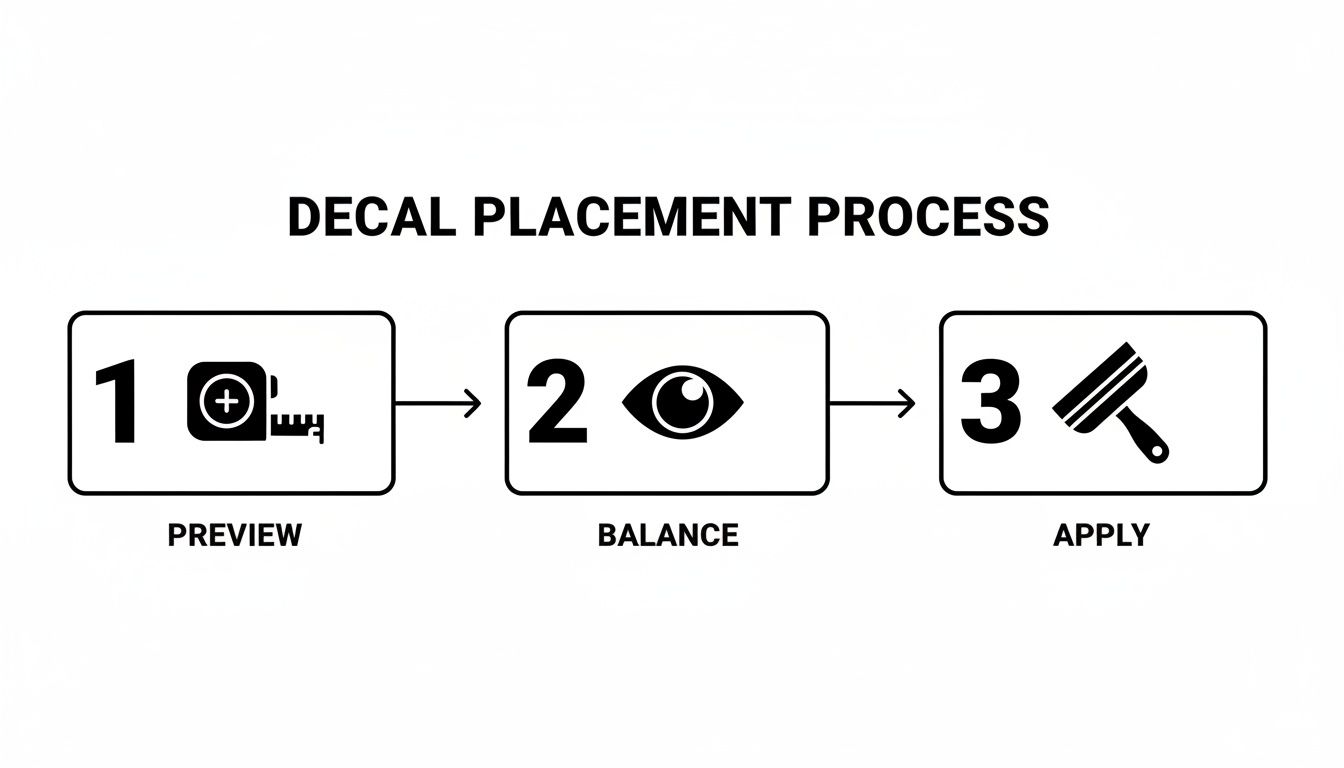
This workflow really just breaks down to previewing your placement, making sure it looks balanced, and then committing to the final application. Following these steps takes all the guesswork out of it and helps you get a centered, professional result every time.
Now, let's get into the details for each step.
Mix Your Solution: Fill your spray bottle with water and add just 2-3 drops of mild dish soap. Shake it up gently. Don't go overboard with the soap—too much can keep the adhesive from sticking properly. Less is definitely more here.
Position the Decal: Use your painter's tape to create a "hinge." Place the decal (with the paper backing still on) exactly where you want it. Run a long strip of tape along the top edge, securing it firmly to the truck. This hinge is your secret weapon for keeping it perfectly aligned.
Apply and Peel: Lift the decal up using your tape hinge. Give both the truck's surface and the sticky side of the decal a light misting with your soap solution. Now, carefully peel the paper backing away to expose the adhesive.
Lay It Down: Holding the bottom edge of the decal, slowly and gently lower it onto the wet surface. The water gives you a moment to slide it around for any tiny adjustments.
Squeegee the Water Out: This is the most important part. Starting from the center and working your way out, use your squeegee to push all the water and air bubbles out from under the decal. Use firm, overlapping strokes. Go from the middle out to the right, then from the middle out to the left.
Let It Set: Now, just let the decal sit for 30-60 minutes. This gives the adhesive a chance to start bonding with the surface as the water evaporates.
Remove the Transfer Tape: Slowly and carefully, peel the clear transfer tape off. The trick is to pull it back on itself at a sharp, 180-degree angle. If any part of the vinyl starts to lift up with the tape, just lay it back down, give it another firm press with the squeegee, and wait a little longer before trying again.
After you pull the tape off, you might see a few tiny water bubbles left behind. Don't panic! These will evaporate right through the vinyl over the next few days in the sun. With this simple method, anyone can get a flawless, bubble-free installation and give their truck that killer custom look.
How to Care for and Remove Your Truck Decals
Once you’ve got your decal perfectly placed, a little bit of care will keep it looking sharp for years. Think of it like a quality paint job—it’s tough, but not bulletproof. When you’re ready for a new look, knowing how to get the old one off cleanly is just as important.
Proper maintenance is easy and makes sure your investment holds up, season after season.
Long-Term Decal Maintenance and Care
The golden rule for washing a truck with vinyl decals is simple: be gentle. Our Oracal vinyl is built to handle brutal weather, but aggressive washing can lift the edges, which is where peeling almost always starts.
Hand washing is your best bet, no question. Use a soft microfiber cloth or sponge with a mild automotive soap to clean the surface without putting any stress on the decal. If you prefer automated car washes, stick to the touchless kind. They use high-pressure water and soap, but no abrasive brushes will be grinding against your vinyl.
Heads up: Never aim a high-pressure washer directly at the edges of your decal. That concentrated blast of water can get underneath the vinyl, forcing it to lift and eventually causing the adhesive to fail. Also, stay away from abrasive waxes or polishing compounds on the graphic itself—they can dull the finish or even scratch the surface.
How to Safely Remove Old Decals
When it’s time to swap out a design, the process is straightforward and won't damage your truck's paint or glass if you do it right. The trick is to soften the adhesive, not to fight it. All you need is a little patience and a hairdryer.
Here’s the damage-free way to remove old decals for truck graphics:
Apply Gentle Heat: Grab a standard hairdryer and set it to medium or high heat. Hold it a few inches from the decal, moving it back and forth to warm the area evenly. This softens up the vinyl and, more importantly, the adhesive underneath.
Lift an Edge: After a minute or two of heat, the vinyl will be warm to the touch. Use your fingernail or a plastic scraper (never use metal!) to gently pry up a corner.
Peel Slowly: Once you have a good grip, pull the decal back on itself at a low, sharp angle. Keep applying a little heat as you peel to keep the adhesive nice and soft. If you’re looking for a simple, cheerful design for your next project, you might find inspiration in something like this smiling emoticon decal.
Clean Up Residue: After the vinyl is gone, you might be left with some sticky residue. No problem. Just use a bit of rubbing alcohol or a dedicated adhesive remover on a soft cloth to wipe the surface clean.
Got Questions? We’ve Got Answers.
Jumping into the world of truck decals, you’re bound to have a few questions. That’s a good thing—it means you care about getting it right. We get these questions all the time, so let’s clear them up so you can order with total confidence.
How Long Will a Vinyl Decal Really Last on My Truck?
This is the big one, and the answer comes down to one thing: the quality of the vinyl.
We exclusively use premium Oracal vinyl, which is the same stuff the pros use for commercial vehicle wraps. It's specifically engineered for the abuse of being outdoors and is rated to last up to 7 years. That means it’s built to take a beating from the sun, rain, and snow without fading, cracking, or peeling off.
You can definitely find cheaper decals out there, but they’ll start looking rough after just a year or two. Stick with quality material, follow our care tips (like keeping high-pressure washers away from the edges), and you’ll get years of service out of your graphic.
Can I Actually Install a Truck Decal Myself?
Absolutely. We design every decal for a simple, do-it-yourself installation, even if you’ve never touched one before. They show up ready to go—perfectly aligned and held in place with transfer tape.
The secret is the "wet application" method. All you need is a spray bottle with a few drops of dish soap and water. This little trick lets you slide the decal around and position it perfectly before you squeegee it down. It makes getting a bubble-free, professional-looking finish surprisingly easy. We include step-by-step instructions that walk you through the whole thing.
Are Decals Safe for My Truck's Paint and Windows?
Yes, 100%. As long as you’re using high-quality vinyl, it’s completely safe for your truck’s paint and glass. The adhesive is formulated to bond strong for years but won’t mess with your truck’s clear coat when it’s time for a change.
When you're ready to remove it, the process is just as safe. A little heat from a hairdryer is all it takes to soften the adhesive, letting you peel the vinyl right off without leaving a sticky mess or damaging the surface underneath.
Your truck's finish is a big deal. A quality decal is designed to enhance its look, not hurt its value. Think of it as a temporary customization that can be removed without a trace, keeping that original paintwork pristine.
What Makes a Family-Run Decal Shop Different?
Ordering from a family-run, veteran-friendly shop means you're getting more than just a sticker in an envelope. You're getting a product that’s backed by people who genuinely care about quality and service. Since 2001, we've shipped over one million decals, and every single one is made right here in the USA from premium Oracal vinyl.
We can offer value that the big, faceless companies just can't. Our unlimited 'Buy 2, Get 1 Free' deal and free shipping on orders over $25 are our way of helping you get more for your money. When you order from us, you’re not just a number—you're supporting a small American business that’s built on customer satisfaction.
Ready to find the perfect decal that tells your story? At Custom Sticker Shop, we combine premium materials with unmatched value to help you create a look that's truly your own. Browse our huge collection of American-made decals and take advantage of our Buy 2, Get 1 Free offer today at https://customstickershop.us.
Generated with Outrank tool