
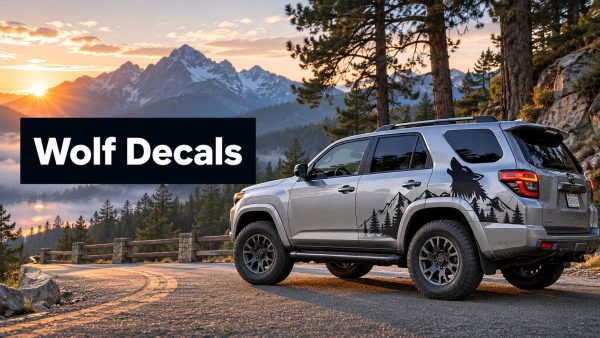
You're probably staring at a truck, SUV, or daily driver that feels a little too plain, and you want one clean graphic that changes the whole attitude without committing to paint or a full wrap. That's exactly where wolf decals for cars make sense, because they give you a strong visual identity, they're removable, and the right one can look intentional instead of cheap. The catch is simple, the decal only lasts if the material, adhesive, placement, and install match the vehicle and the way it's driven.
Why Wolf Decals Remain a Popular Choice for Vehicle Personalization
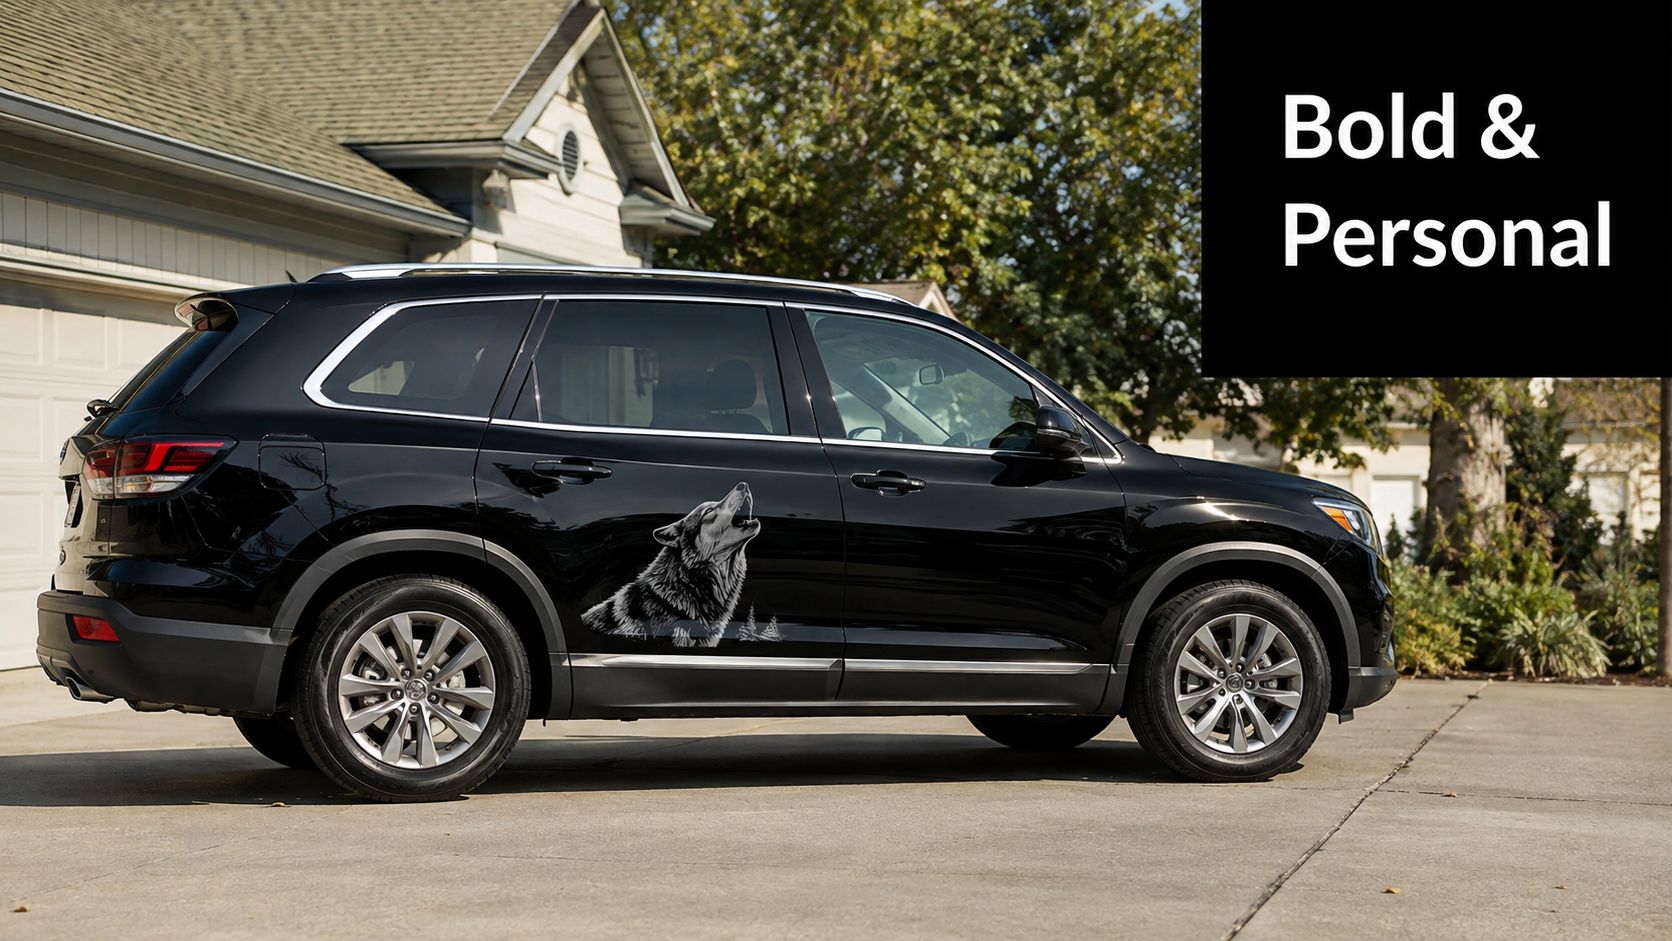
A customer walks into the shop wanting a little more edge on a black pickup, not a repaint, not a full wrap, just something that looks like it belongs on the truck. That's the normal use case for a wolf graphic. The subject has staying power because it carries a clear set of cues, strength, independence, and a connection to nature, while still working as a removable surface treatment on a vehicle that gets washed, parked outside, and driven every day.
The market side backs that up. Amazon shows over 1,000 results for “wolf car decal,” and both Walmart and Etsy keep dedicated wolf-decal categories live, which points to sustained demand across major retail platforms (Amazon wolf car decal results). That breadth matters because the motif isn't locked to one segment. It shows up on windshields, windows, hoods, and body panels, so the same theme can be scaled for compact cars, SUVs, pickups, and off-road rigs.
Why the motif works on so many vehicles
The appeal isn't just visual. Wolf graphics are flexible enough to read as aggressive, clean, outdoorsy, or minimalist depending on how they're drawn and where they're installed. A big side-panel wolf feels different from a small rear-window accent, even if the theme is identical.
Practical rule: the simpler the placement zone, the more the decal can focus on shape and silhouette instead of visual noise.
That's why buyers end up comparing size, cut style, and adhesive type before they ever look at color. A good wolf decal should match the vehicle's body lines, not fight them.
If you want a quick jump-off point, a product like the Wolf Howling Decal shows how one theme can be packaged for a clean exterior install without turning the vehicle into a billboard.
Popular Wolf Decal Styles and Design Themes
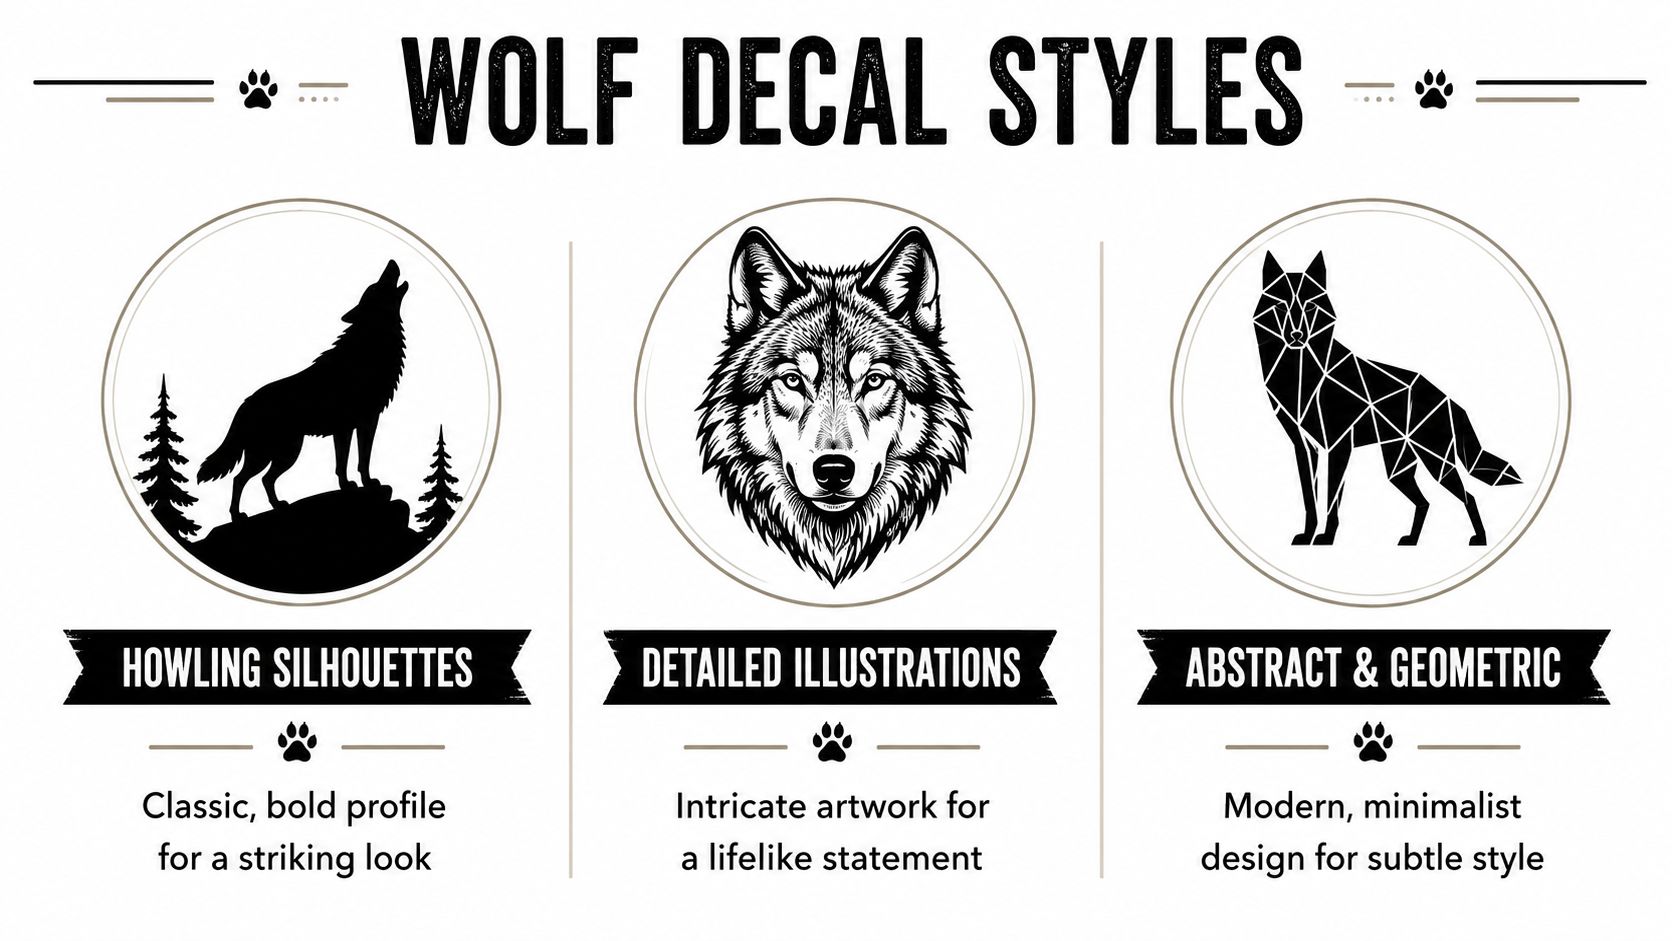
A wolf decal can look aggressive, clean, or highly detailed depending on the cut style and where it lands on the vehicle. In the shop, the first thing I ask is simple, do you want the graphic to read from across a parking lot, or hold up when someone stands next to the truck and inspects the linework.
A howling silhouette is the easiest to read at a distance. A detailed illustration carries more shading and texture, so it feels closer to artwork. A geometric or abstract wolf sits between those two, with sharper lines and a more modern structure.
Matching style to vehicle and placement
A full-profile howling wolf usually belongs on a tailgate, rear quarter panel, or larger side area where the shape has room to breathe. On darker paint, that style tends to give the strongest contrast and often becomes the visual anchor of the vehicle without needing extra color.
Detailed wolf portraits fit better when the owner wants the graphic to feel like a printed piece rather than a simple badge. They show well on larger windows, hood panels, and flatter body areas that can handle more linework without looking crowded. If the goal is a darker, more artistic look, the wolf tattoo designs reference point is useful because it shows how artists build wolf imagery with shading, angles, and symbolic elements that translate well to vinyl.
Geometric wolves and tribal-style cuts are cleaner and easier to place in tighter spaces. They suit tuner cars, JDM builds, and smaller accent zones because they do not need a huge footprint to stay readable. A mirrored pair also makes sense when the design is meant to run on both sides of the vehicle, especially if the body lines already create natural symmetry.
Common design decisions that matter
- Silhouette first: best when you want immediate recognition from a distance.
- Detailed art first: better when the decal is the main visual feature instead of a small accent.
- Minimal line work: smart for windows, mirror corners, and smaller doors.
- Text integration: works when the text stays short and secondary, not in competition with the wolf.
- Layered color builds: useful for show-style projects, but they raise installation complexity and demand cleaner panel prep.
A lot of buyers make the choice harder than it needs to be. If the vehicle already has sharp angles, a geometric wolf usually sits better. If the vehicle is tall and flat, a bold silhouette often reads cleaner. For a direct product example, the Wolf Howling Decal from Custom Sticker Shop shows how artwork and placement have to work together on a large panel.
Understanding Vinyl Materials and Outdoor Durability
The graphic gets the attention, but the vinyl grade decides whether the decal still looks sharp after a summer of heat, washing, and road grime. A wolf decal that sits on a daily-driven truck needs more than a good design file. It needs film that can handle sun, movement, and repeated cleaning without shrinking at the edges or losing bite. The broad category exists because vehicle vinyl grew out of commercial sign material, which made durable graphics practical for consumer vehicles. For wolf decals, that maturity shows up in the durability ranges buyers use as shorthand, about 5 to 7 years for die-cut vinyl and 7 to 10 years under optimal conditions for higher-grade material (wolf decal durability guidance).
Vinyl grade and thickness
A premium exterior decal typically uses 2.5 mil vinyl with a solvent-based adhesive for exterior durability (StickyLife wolf decal specs). That thickness is thin enough to conform without looking bulky, but substantial enough to handle outdoor use. On curved areas, that balance matters more than buyers expect. A film that is too stiff will bridge surface texture and invite lifting at the edges.
The practical split is straightforward. Standard calendared vinyl works on flat or gently curved panels. Cast vinyl is more forgiving on complex surfaces, hood contours, and wrap-style installs because it moves with the body instead of resisting it. That is why installers use cast material on panels that twist, curve, or catch more airflow, while calendared film stays a better fit for simpler placement zones. Oracal vinyl is commonly treated as a benchmark in automotive decal work because installers know what to expect from its consistency and outdoor behavior.
Installer's rule of thumb: the decal should fit the surface, not force the surface to accept the decal.
Adhesive systems and real-world use
Adhesive choice matters just as much as the film itself. Some wolf graphics use air-release and repositionable acrylic adhesive, which helps push trapped air out during application and gives you more control on flat areas, simple curves, rivets, and more complex curves. Other listings use 3M 300LSE adhesive with temperature tolerance from -40°F to 400°F, which signals a much more industrial bond for harsh outdoor exposure.
That is why lifespan is not just a number on a listing. Thin film plus the right adhesive improves wet-out on the panel, while lamination can add UV and abrasion resistance but can also change how long the material lasts compared with unprinted film. A cut vinyl wolf on glass is a different job from a hood graphic on a curved steel panel. Panel shape, wash frequency, and sun exposure all change the result, so a decal that survives on a rear window may age faster on a hood or leading edge.
For a useful product comparison point, this vinyl windshield banner decal shows the kind of exterior-use construction buyers should be looking for when the decal has to survive heat, cleaning, and daily exposure.
Sizing Your Wolf Decal and Choosing the Right Placement
The most common sizing mistake is ordering for the art mockup, not the vehicle. A wolf that looks balanced on a product page can overwhelm a compact car or vanish on a full-size truck. Measure the actual placement zone first, then judge the art against that space, not against the listing photo.
Measure the panel before you buy
Use painter's tape or a strip of newspaper to block out the footprint on the vehicle. That gives you a real-world outline you can step back from and judge in daylight. If the shape looks too tall, too wide, or too close to an edge, you'll know before the decal ever ships.
The best zones are usually the ones with enough uninterrupted space to let the silhouette read clearly. Rear windows, side windows, hoods, tailgates, and quarter panels all work, but each one changes the visual weight. A howling wolf often feels strongest on a tailgate because the panel can support a horizontal composition. Smaller tribal or line-art wolves tend to work better in a window corner, where the graphic can stay subtle.
Placement and visibility concerns
Windshield and window installs need extra attention because visibility matters. Keep the decal out of the driver's line of sight unless local rules clearly allow that placement. Side windows and rear glass are often safer choices for larger art, while hood graphics demand better alignment because your eye catches every crooked edge at a stoplight.
Vehicle color matters too. Black paint makes white or silver cuts feel sharper. Light paint softens dark graphics and can make thin linework look more delicate than intended. If you want the image to feel bold, give it enough negative space around it so the wolf doesn't blend into trim lines or door handles.
For matching size to text or secondary elements, a simple reference like this 22-inch wide custom text window decal helps show how width changes the visual presence of a decal without needing a full panel design.
Installing Your Wolf Decal Without Bubbles or Misalignment
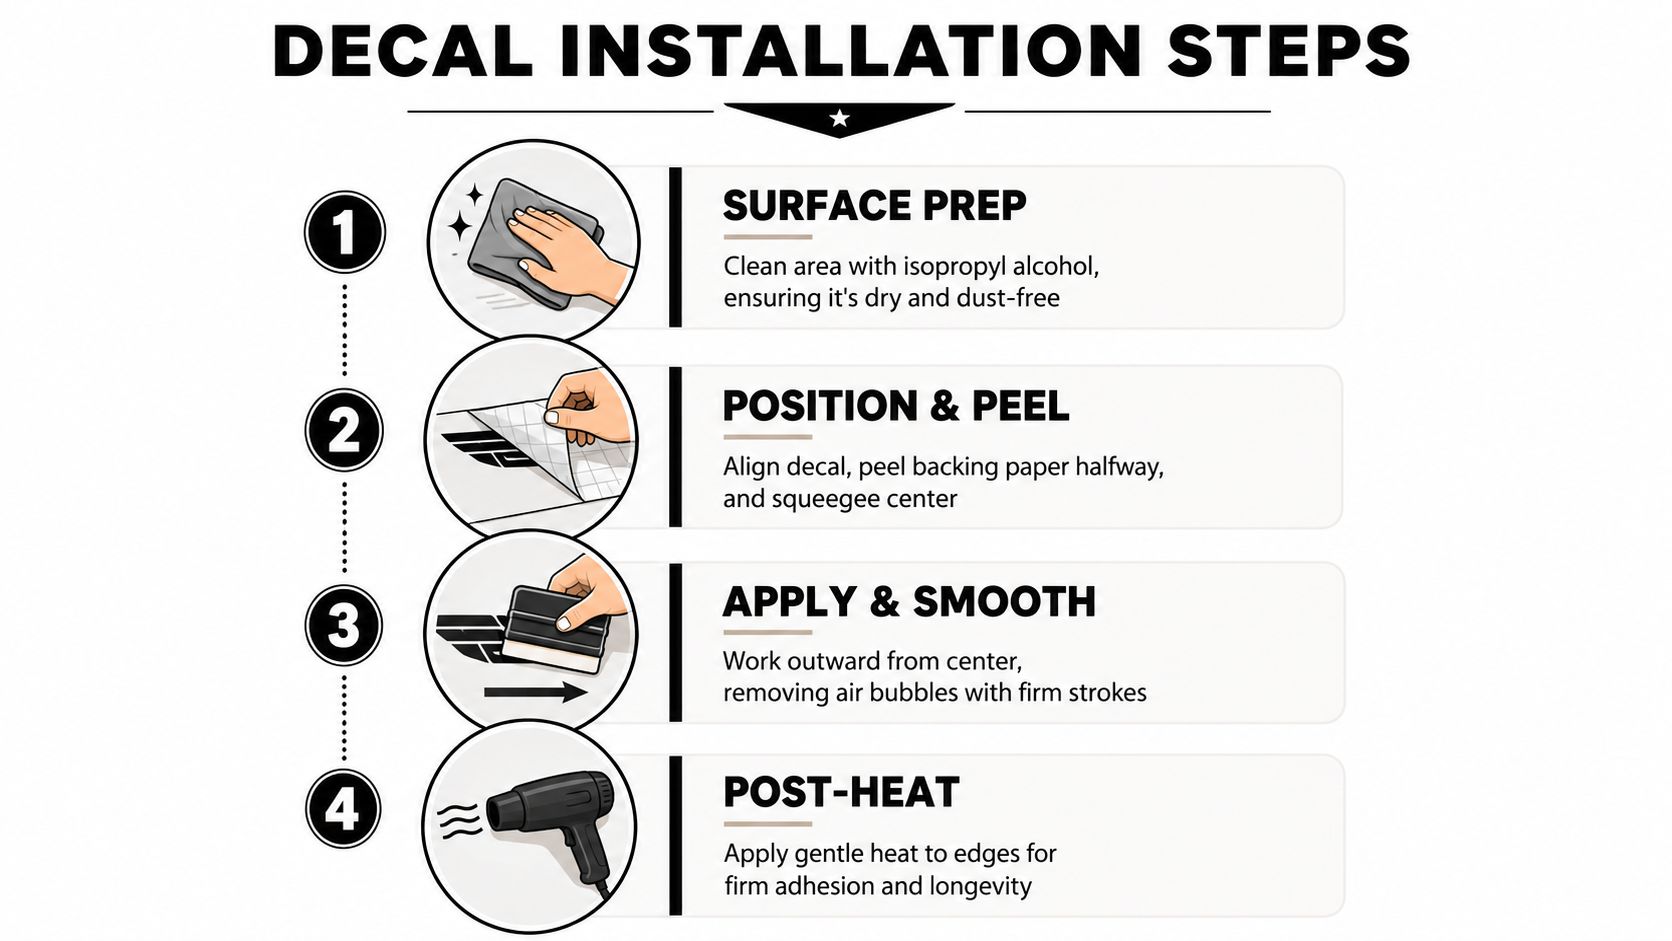
The cleanest installs start with surface prep, not with the squeegee. Clean the area with isopropyl alcohol, then make sure the panel is dry and free of wax, ceramic coating residue, and road film. If you apply over contamination, the adhesive bonds to the contamination instead of the panel, and that's where edge lift starts.
Dry fit, then commit
Lay the decal in position before you peel anything. Tape one edge, step back, and check that the wolf sits level with the body line, window edge, or hood crease you want to reference. Once the alignment looks right, peel the backing and work slowly.
Wet application can help on some smooth surfaces, but dry application gives better control on many exterior graphics, especially when the transfer tape is already holding the image together. Use a squeegee from the center outward, overlapping strokes so you push air away instead of trapping it under the vinyl. On curved surfaces, a little heat helps the film relax, but too much heat will stretch the graphic and distort the wolf's outline.
Practical rule: if the panel is hot enough to feel uncomfortable to your hand, wait for a cooler part of the day.
Finish the install the right way
Once the decal is down, remove the transfer tape slowly at about a 45-degree angle. That angle helps the vinyl stay on the vehicle instead of lifting with the tape. If a corner starts to pull back, stop, press it down again, and continue more slowly.
For installer technique beyond decals, the Titan Coatings PPF tutorial is a useful reference because it reinforces the same basics, clean panel prep, controlled alignment, and patience during edge work. The materials are different, but the discipline is the same.
If bubbles remain after install, work them toward an edge with firm pressure. Tiny trapped pockets often disappear on their own after the adhesive settles, but larger ones need to be chased out before they become permanent blemishes.
Caring for Your Decal and Removing It Cleanly
A good wolf decal should survive routine washing, but the decal only looks good if you treat the edges like the weak point they are. Don't blast them with a pressure washer up close. Use a pH-neutral car wash soap, a soft mitt, and hand pressure around corners and cut lines. Abrasive brushes are the fastest way to dull the graphic and shorten the life of the adhesive edge.
Sun, wash cycles, and vinyl aging
UV exposure slowly changes any exterior vinyl, even quality material. Covered paint and exposed paint can age differently over time, so removing a decal years later may reveal a cleaner patch underneath where the graphic protected the finish. That doesn't mean the decal failed, it means the exposed sections of the vehicle have been living in a different environment.
If the vehicle sits in strong sun, a UV-protectant spray can help preserve appearance on some installs. It won't turn a short-life vinyl into a long-life one, but it can support the material if you're already using decent film and keeping the surface clean.
Removal without paint damage
Heat is the first tool. Warm the decal enough to soften the adhesive, then lift slowly from one corner and pull back on itself, not straight up. That reduces stress on the paint and lowers the chance of leaving small adhesive islands behind. If residue remains, use an adhesive remover that's safe for automotive finishes and work it gently, not aggressively.
Quality vinyl is meant to be removable. The job is to take it off cleanly, not to scrape it off like a sticker from a lunchbox. If the panel had good prep on install and the decal wasn't cooked by years of extreme heat, removal should be manageable.
When a decal has been on a truck for several seasons, expect a cleaner paint tone under the covered area than on the surrounding exposed paint. That's normal. The point is to remove the graphic without creating a second problem, and careful heat plus patient peeling is what protects the finish.
Pricing, Shipping, and Getting the Best Value on Your Order
A low sticker price can look attractive until the decal starts fading, shrinking, or lifting after a few hot weeks on a daily-driven vehicle. That usually comes down to material grade and adhesive quality. If the vinyl is thin, poorly cast, or matched with weak adhesive, the graphic may look fine at first and then fail once sun, heat, wash cycles, and road grime start working on it. A better value is an American-made decal using Oracal vinyl rated for up to 7 years outdoors, because you are paying for how the material holds up, not just for the artwork.
Custom Sticker Shop fits into that value conversation with decals starting at $7.99, free US shipping on orders over $25, and an unlimited Buy 2 Get 1 Free promotion, which is useful if you are covering multiple windows or ordering a matching set. Orders typically ship via USPS or UPS and arrive in 5 to 8 days from order to door, with checkout available through PayPal, Venmo, Apple Pay, and cards. For a broader look at how to enhance your vehicle's appearance cheaply, the main lesson is simple, low upfront cost only works if the finish lasts.
For a wolf decal, value is not measured by the sticker price alone. It comes down to whether the material can handle the placement zone you picked, whether the adhesive suits that surface, and whether the install goes on clean the first time. A cheap decal on the wrong panel costs more in the end if it peels early or leaves residue behind.
If you want a wolf graphic that matches how your car or truck is used, Custom Sticker Shop has vehicle decals built for windows, hoods, and body panels, with the material and transfer-tape setup that makes installation easier. Visit Custom Sticker Shop to compare wolf designs, choose the right size, and order a decal built for real road use.