
You've got the car. The stance is right, the wheels are sorted, and the exhaust note does its job. Then you park next to three nearly identical builds and realize your car still looks a little too anonymous.
That's where performance car graphics earn their keep. They change the personality of a car faster than almost any visual mod, and they do it without locking you into permanent paint. A stripe package can sharpen factory body lines. A hood blackout can make the front end look lower and meaner. A side graphic can turn a plain profile into something that looks intentional, not unfinished.
The mistake most owners make is treating graphics like a sticker purchase instead of a full lifecycle decision. Style matters, but so do film type, panel shape, install order, and maintenance. If you skip those details, even a strong design can end up lifting at the edges, fading early, or fighting the car's proportions.
From Showroom Stock to Track-Ready Style
A stock performance car often has the hard parts already handled. Good factory lines, decent proportions, enough power to back up the look. What it usually lacks is a clear visual signature.
That's why graphics work so well. They're high impact, reversible, and scalable. You can add a subtle fender accent, blackout a hood section, run full-length side stripes, or build a complete race-inspired look without repainting the car. If you get the design right, the car looks more focused, not more cluttered.
Start with the role the graphic needs to play
Before picking colors or shapes, decide what job the graphic is doing.
- Identity: You want the car to stop looking like every other trim level in the parking lot.
- Shape correction: You want to visually lengthen the body, lower the hood, or break up a tall slab-sided profile.
- Heritage: You're chasing muscle-car, road-race, tuner, or endurance-livery cues.
- Practical use: You need number panels, windshield banners, or track-day markings.
A lot of bad graphic choices come from skipping this step. Owners see a stripe they like on one car and force it onto a completely different body style. The result looks borrowed instead of integrated.
Practical rule: If the graphic doesn't make the car's natural lines look stronger, it probably doesn't belong there.
Think in layers, not all at once
The cleanest builds usually start with one anchor graphic. That might be center stripes, fender hash marks, or a hood treatment. Once that's in place, you can decide whether the car needs a second layer.
For example, a modern muscle car often responds well to a compact side accent rather than a busy full-body scheme. Something like Dodge Challenger fender hash decals works because it adds attitude without overwhelming the front quarter panel.
That's the right mindset for performance car graphics. Don't ask how much vinyl you can add. Ask how little you need to make the car look finished.
Decoding Graphic Styles and Types
Most owners can picture the look they want before they know the name for it. Getting the vocabulary right helps because it makes shopping, mockups, and installation planning much easier.
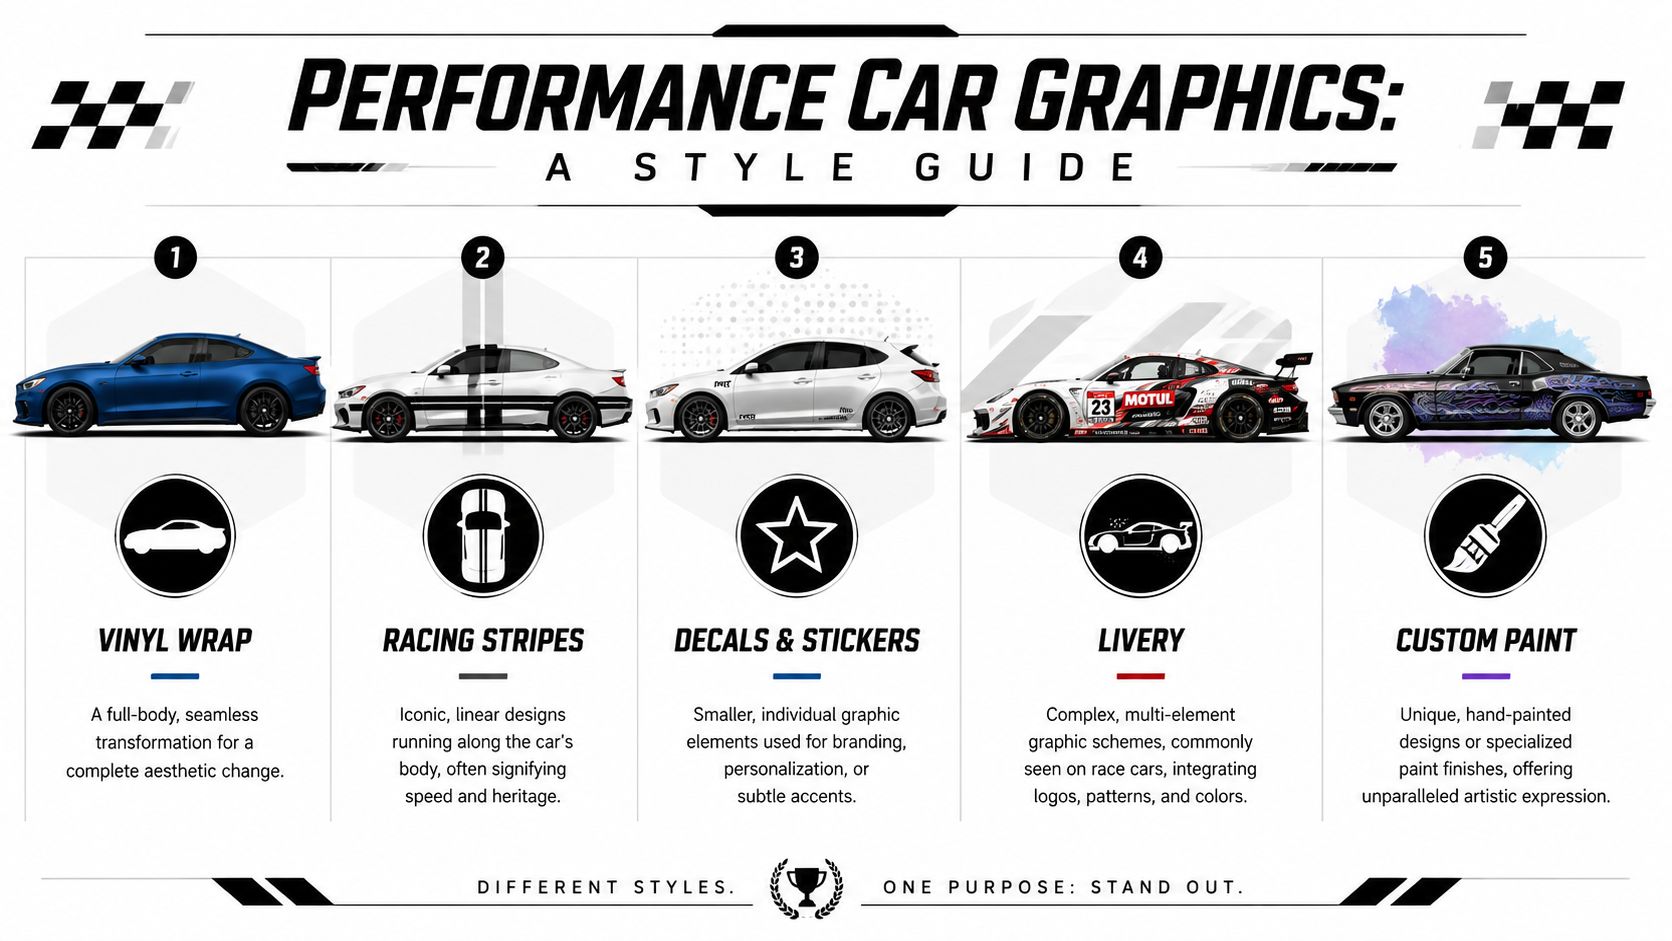
Racing stripes
This is the classic entry point. Racing stripes can run down the center, offset to one side, or sit on the fenders as shorter accent pieces. They work because they add direction. The eye follows the stripe, which makes the car feel longer and faster even when parked.
Center stripes suit coupes, pony cars, and some track-focused sedans. Offset stripes feel more contemporary and slightly less formal. Fender stripes or hash marks fit cars with muscular front quarters and strong wheel arches.
A stripe package also gives you control over aggression. Narrow stripes can look factory-inspired. Wider stripes with tight spacing push the car toward a dedicated motorsport vibe.
Hood graphics
Hood graphics do more than decorate a large flat panel. They change how the front half of the car reads from standing height. A blackout section can reduce glare visually and make a tall hood feel flatter. Vent accents can frame functional openings and fake openings alike. Power-bulge outlines can exaggerate the center mass of the hood and make the engine bay feel more serious.
These work best when they align with actual sculpting. If the hood has creases, heat extractors, or raised center sections, the graphic should follow them. If it cuts across them randomly, it looks like an afterthought.
Side graphics
Side graphics are where proportion gets fixed or ruined. Rocker stripes, lower-door accents, and splash graphics can visually lower a car and stretch the wheelbase. They're useful on cars that look a little tall through the doors or a little plain through the midsection.
On trucks and adventure-oriented builds, side graphics can also pull in environment or terrain themes without turning the whole vehicle into a mural. A set like mountains and trees body side graphics fits that lane because it adds character along the body side without swallowing the paint.
Motorsport and livery-inspired graphics
This category includes number panels, windshield banners, sponsor-style layouts, endurance-race themes, JDM tuner motifs, and full visual systems that combine multiple elements. A proper livery isn't just a pile of decals. It's a coordinated design language across the car.
If you want a better definition of what separates a livery from simple decals, the Trackside Careers livery guide is useful because it frames livery as a complete identity system rather than a few stickers on doors and fenders.
A good livery looks composed from ten feet away and detailed from two feet away.
Full wrap versus decals versus paint
Not every visual change belongs under the same label. Here's the practical split:
- Vinyl wraps change the overall body color or finish.
- Decals and graphics add specific shapes, lines, logos, and accent zones.
- Livery combines multiple graphic elements into one planned scheme.
- Custom paint does what vinyl can't, but it isn't reversible and usually asks for a bigger commitment.
For most street-driven builds, performance car graphics hit the sweet spot. They let you shape the visual character of the car without turning a simple design experiment into a body-shop project.
Choosing the Right Material for Durability
A graphic can look perfect on install day and still be the wrong material for the job. I see that most often on hoods, roof sections, and bumper corners, where a cheap film looks fine in the box and starts shrinking, lifting, or hardening once it sees heat, wash cycles, and sun. Durability starts long before the squeegee touches the panel. It starts with choosing film that matches the shape of the car, the way the car is stored, and what sits under the vinyl.
The first decision is cast vinyl versus calendered vinyl. On performance cars, that choice affects how the graphic settles into body lines, how well it holds registration over time, and how clean the edges stay after a summer of real use.
Why cast vinyl usually earns its price
Cast film is the safer choice for body-side stripes, hood graphics, roof accents, and any kit that crosses curves or recesses. It is thinner, more stable, and less likely to pull back at the edges after installation. Calendered film still has a place. It works on flatter glass, simple shop decals, and low-stress pieces where long-term shape retention matters less.
Here is the practical split:
| Feature | Cast Vinyl (e.g., Oracal 751/951) | Calendered Vinyl (e.g., Oracal 651) |
|---|---|---|
| Conformability | Better on curves, crowns, and recessed areas | Better on flatter panels |
| Dimensional stability | Holds shape better over time | More likely to shrink on demanding shapes |
| Edge retention | Better for long stripes and tight transitions | More likely to lift on stressed edges |
| Typical use | Automotive graphics, restoration markings, long-term installs | Flat decals, short-term graphics, simpler surfaces |
That table matters because performance graphics rarely live on easy panels. Fender tops, bumper shoulders, hood extractors, and rocker contours put constant stress into the film.
Panel orientation changes lifespan
The same vinyl does not wear the same way everywhere on the car. According to the 3M graphics warranties brochure, expected coverage can vary sharply between vertical and horizontal applications. That lines up with shop experience. Door and quarter-panel graphics usually outlast hood and roof graphics because they see less direct UV, less heat soak, and less standing water.
Set expectations by panel, not by brand name alone.
A hood blackout or roof stripe should be treated like a wear item compared with a door stripe. If the car lives outside, the gap gets even wider.
Material choice also affects the rest of the finish
This is the part many guides skip. Graphics do not live in isolation from paint correction and ceramic coatings.
If the paint needs correction, do that before the vinyl goes on. Polishing after installation can catch edges, stain matte films, or leave a visible contrast between corrected paint and the protected area under the graphic. Ceramic coating changes the equation too. Coating under a decal can reduce adhesion if the installer is not working with a film and prep process that tolerate it. Coating over some graphics can help with washing and UV resistance, but it can also change gloss level and make future removal less predictable. The cleanest process is usually correction first, graphics second, then a coating plan based on the film finish and adhesive system.
Branding matters here as well. Shops that understand the discipline behind designing an electric vehicle logo usually understand that materials have to serve the finish, the surface, and the long-term visual identity together, not as separate decisions.
What to check before you order
Use a simple buying filter:
- Choose cast film for compound curves. Hoods, scoops, bumper contours, and sculpted quarter panels need it.
- Ask where the graphic is going. Glass, painted metal, PPF, and freshly coated surfaces all change prep and adhesion.
- Ask how long you want it to last. Weekend track car, garage-kept toy, and daily driver do not need the same material strategy.
- Ask whether the kit is pre-spaced on transfer tape. Long stripes and multi-piece kits install straighter and cleaner that way.
- Ask about removal later. A good-looking install should still come off without turning into an adhesive cleanup job.
A windshield banner is a good example. A long strip of vinyl across glass looks simple, but poor material choice shows up fast as edge curl, distortion, or uneven shrink. A custom Corvette windshield banner decal benefits from stable film, accurate transfer setup, and proper surface prep because the graphic is narrow, highly visible, and easy to judge from a distance.
Good material costs more up front. It usually costs less than replacing a failed kit, re-correcting paint around old adhesive, or living with graphics that age badly before the car does.
Design and Placement for Maximum Impact
You see it all the time at meets. The car has good paint, good wheels, decent ride height, then the graphics throw the whole thing off because the layout ignores the body. A stripe that cuts across a character line or dies in the middle of a vent looks aftermarket in the wrong way. Good placement fixes that before the backing paper ever comes off.
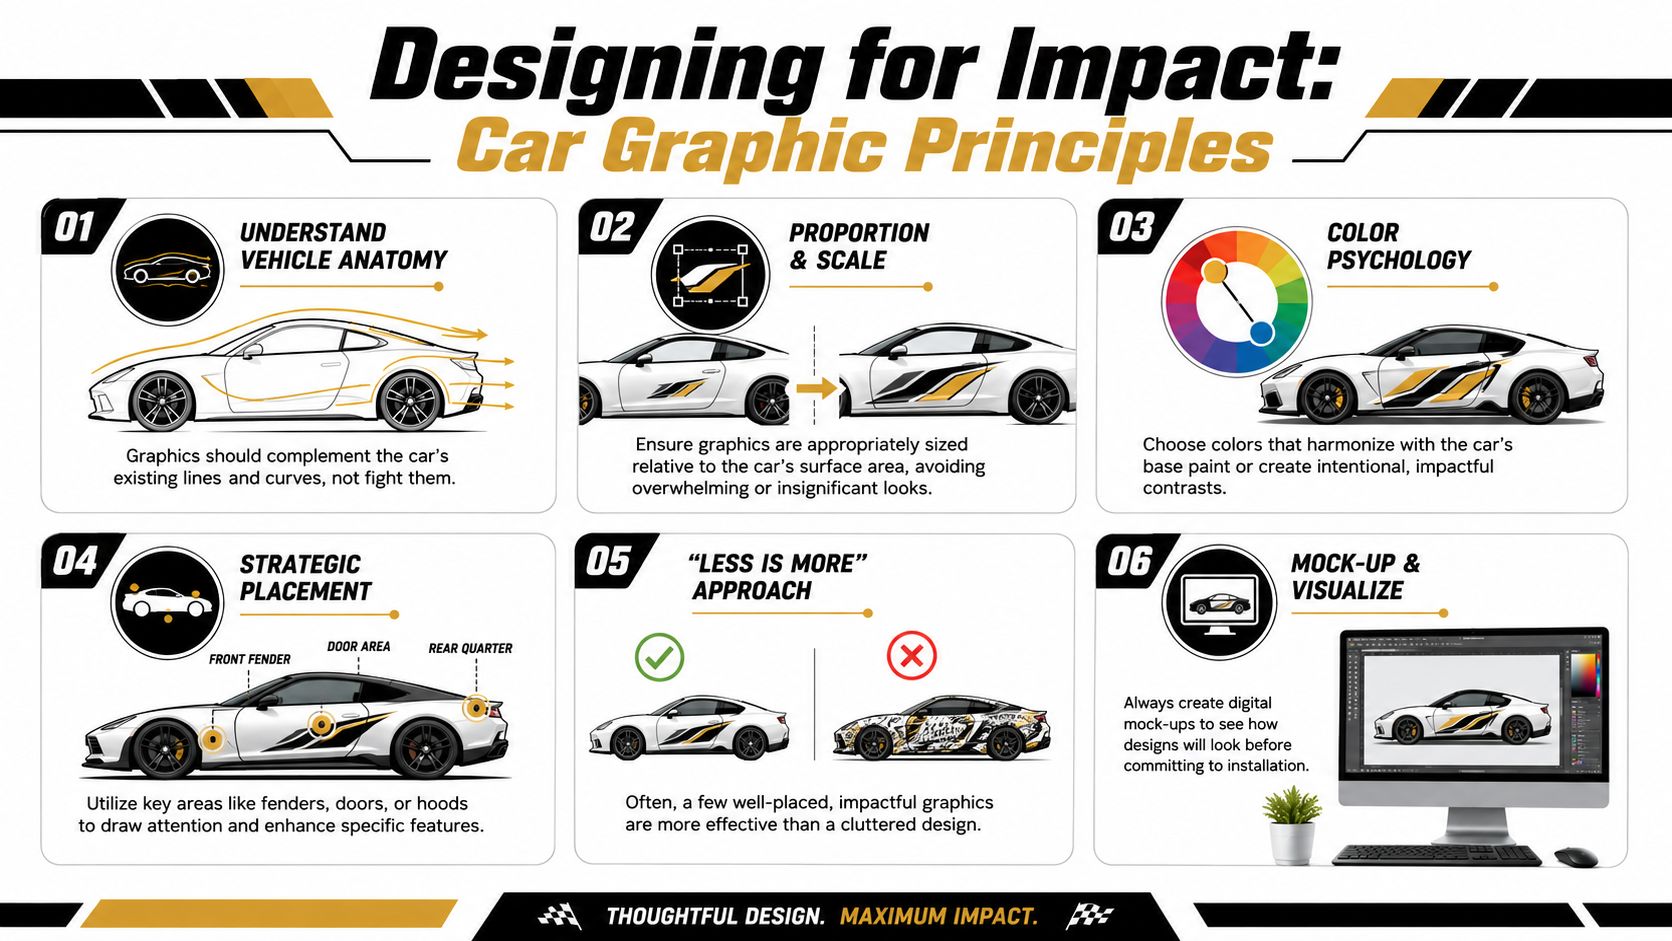
Follow the body, don't cross-examine it
Every car already has a visual path built into it. Door gaps, shoulder lines, hood bulges, fender crowns, rocker shapes, and extractor openings tell your eye where to go. The graphic should support that path.
On modern bodywork, side graphics usually work best when they commit to one reference line. Track the upper crease or the lower contour. Trying to split the difference often makes the stripe look like it drifted during install, even when it is perfectly straight. On hoods, center the design on the visual mass of the panel. That is not always the same as the emblem, washer nozzles, or latch line.
This matters later, too. If the owner plans paint correction before install, the corrected panel will show cleaner reflections and sharper edges around the vinyl. If ceramic coating is part of the plan, the placement has to be settled first so the graphic sits on properly prepped paint instead of on top of a coating that can weaken adhesion.
Get the scale right before you cut vinyl
A clean design can still look wrong if the proportions are off. I mock up more kits with tape than many owners expect, because a stripe that looks aggressive on a product photo can look undersized on a broad hood or oversized on a short door.
Mask the shape on the car and walk around it. Check it standing up, crouched low, and from a front three-quarter angle. That is where bad proportions show themselves. A side stripe may look balanced in profile, then climb too high once you view the car from the nose.
A few sizing rules hold up across platforms:
- Low coupes: Longer, lower graphics usually suit the car better than tall graphics with a lot of vertical mass.
- Tall trucks and SUVs: Restraint helps. Large graphics can overwhelm the side view fast.
- Wide hoods: They need enough width or enough negative space to read from a distance.
- Short panels: Compact shapes usually look sharper than stretched designs that fight door cuts and gaps.
One shop rule saves a lot of bad decisions. If you are undecided between two sizes, the slightly smaller one is usually cleaner.
Use contrast on purpose
Color gets attention, but finish controls mood. Matte on gloss paint reads technical and understated. Satin black can sharpen a hood graphic without the hard edge of full gloss. White, silver, and off-white stripes still work well on dark paint because they tie into period racing cues without making the car look busy.
The best designs read quickly. That is why looking outside the vinyl world helps. A good article on designing an electric vehicle logo is relevant here because the same rules apply: clean linework, clear hierarchy, and shapes that stay recognizable at speed and at distance.
Keep the full lifecycle in mind. Dark matte films can highlight polishing residue left near an edge. Gloss black graphics can show swirl marks if someone aggressively corrects over them later. If the car will be coated after install, choose a finish that still looks right once the surrounding paint gains more gloss and slickness.
Placement zones that usually work
Placement is easier to judge by zone than by product type. Some areas naturally carry graphics better than others because they already have visual structure.
| Zone | What it does visually | Common mistake |
|---|---|---|
| Hood center | Pulls focus to the front of the car and sharpens the nose | Making the graphic wider than the hood's sculpted center section |
| Fender top or rear edge | Adds a motorsport cue without dominating the panel | Setting it too high so it looks disconnected from the wheel arch |
| Rocker and lower doors | Lowers the car visually and stretches the side profile | Letting the stripe crash into door gaps or flare upward at the rear |
| Windshield top band | Adds track-day character and useful branding space | Using lettering too tall for the glass, which crowds visibility |
The cleanest installs look planned from the start. The design fits the body, the material suits the surface, the paint is corrected before the vinyl goes on, and any coating happens in the right order. That is how graphics keep looking intentional after the first wash, after a season in the sun, and after the next round of detailing.
A Step-by-Step Installation and Maintenance Guide
Most install failures start before the vinyl ever touches the paint. Dirt, wax residue, polishing oils, rushed alignment, and bad edge pressure cause more trouble than the graphic itself.
Here's the install graphic in one view:
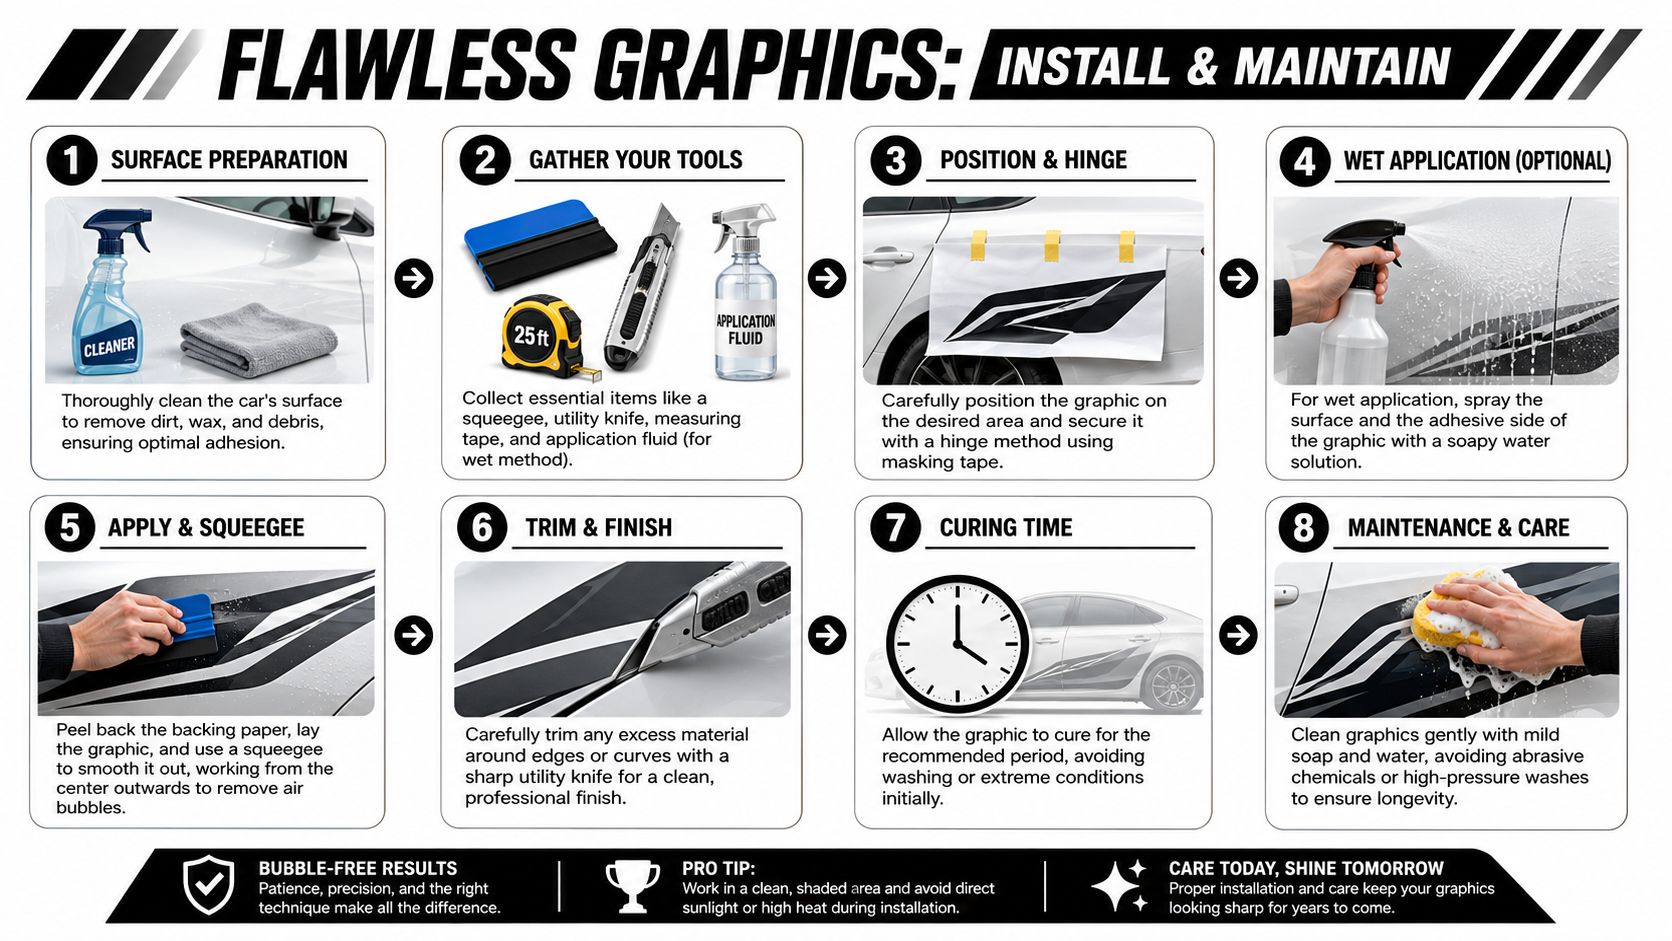
Prep the surface like adhesion actually matters
It does. Vinyl needs a bare, properly prepped paint surface. A common question is whether graphics should go on before or after ceramic coating. Detailing experts and vinyl manufacturers agree that applying vinyl over ceramic can lead to adhesion failure because ceramic is hydrophobic and non-stick, as discussed in this vinyl and ceramic coating explainer.
That means the order is simple:
- Wash the panel thoroughly.
- Decontaminate if needed.
- Correct the paint if you're polishing it.
- Remove residue completely.
- Install the graphic.
- Protect around it or over it later, based on product compatibility.
If the car has fresh wax, sealant, or ceramic where the vinyl needs to sit, remove it first. Skipping that step is asking the adhesive to bond to a sacrificial layer instead of the paint.
Use the hinge method for control
For most stripe kits, lettering, and side graphics, the hinge method is the cleanest approach in a home garage.
- Tape the graphic in place: Use masking tape to hold the piece exactly where you want it.
- Create a hinge: Run tape along the top edge or center so the graphic can fold back without losing position.
- Peel the liner gradually: Don't expose the whole adhesive side at once unless the graphic is tiny.
- Squeegee from the center out: Overlap passes and keep pressure consistent.
- Remove transfer tape slowly: Pull it back on itself, not straight upward.
Some sellers ship graphics pre-spaced on transfer tape, which helps keep multi-part designs aligned during application. That setup is especially useful for long words, multi-piece striping, and mirrored left-right kits.
For a visual walkthrough, this installation video is worth watching before you start:
Wet versus dry application
Both methods work, but they're not interchangeable on every product.
Dry application gives stronger initial tack and is usually better for smaller decals, lettering, and cast films designed for confident placement.
Wet application gives you a little slip for positioning large pieces, but too much fluid or poor squeegee work can trap moisture and delay bonding.
If you use a wet method, keep it controlled. You're aiming for positioning help, not soaking the panel.
Don't chase every tiny bubble in the first minute. Many small application marks settle, but trapped contamination and bad edges do not.
Care after installation
Fresh graphics need time to settle. During the initial cure period, avoid aggressive washing and don't blast the edges with high-pressure water.
Long term, maintenance is straightforward:
- Wash gently: Use mild soap and soft media.
- Watch the edges: If a corner starts to lift, fix it early before dirt gets underneath.
- Avoid abrasive compounds on the vinyl surface: They can dull finish and stress edges.
- Be careful with pressure washers: Keep distance and avoid directing pressure into seams.
If you want coating protection, the safe sequence is paint prep first, vinyl next, then compatible protection after the graphic has bonded properly.
Navigating Rules Realities and History
Performance graphics live in the actual world, not just on clean garage floors. That means style has to coexist with law, visibility, and track rules.
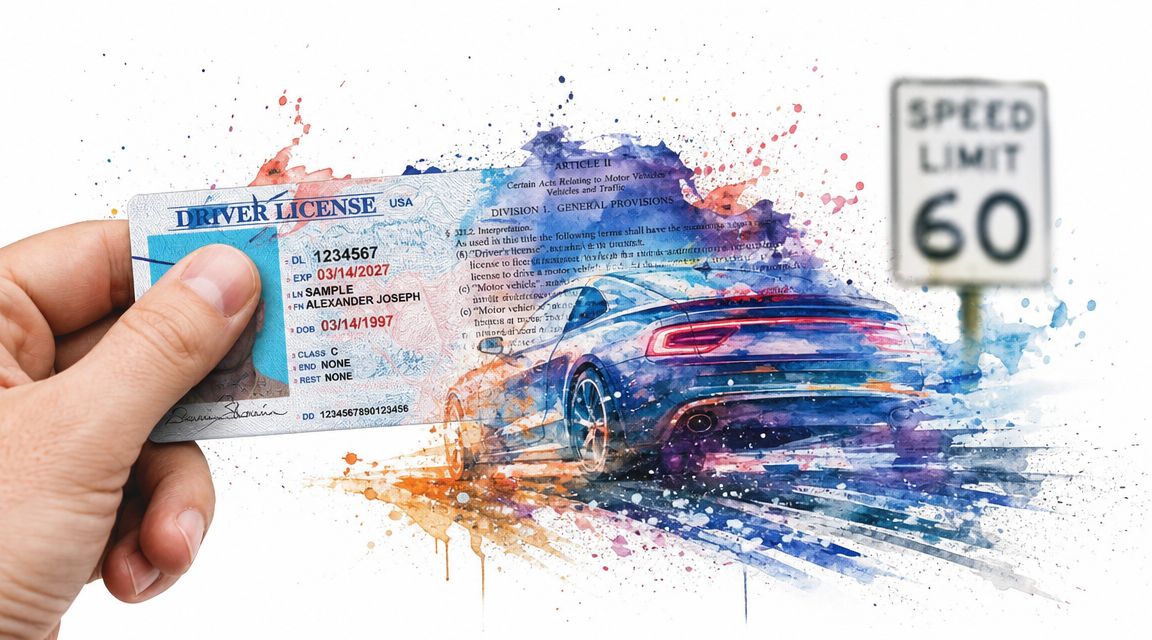
What to check before you apply anything
Window banners and windshield decals are the first place owners get themselves in trouble. Rules vary by state and by the exact location on the glass. The same is true for graphics that might obstruct lighting, cover required reflectors, or resemble official vehicles too closely.
There isn't one national rulebook for every vehicle marking issue. The practical answer is to check your state's motor vehicle guidance before installing anything on glass or near required safety equipment. If you've ever seen how much vehicle-use rules can differ state to state, even in adjacent categories like state e-bike regulations, you already know why that step matters.
Track-day use adds another layer. Some organizers want visible numbers on both sides. Some care about class letters or tow point markings. Others are relaxed until your graphics interfere with corner-worker visibility or windshield sight lines.
Why old-school cues still work
The reason stripes, hood accents, and aggressive side graphics still feel right on performance builds is cultural, not accidental. The visual language of modern performance graphics runs deep into the 1960s and 1970s muscle-car era, when manufacturers used long hoods, sharp lines, air scoops, and aggressive stripes to signal speed and power, as described in this brief history of car design.
That history explains why certain graphics feel “correct” even on modern cars. They borrow a vocabulary enthusiasts already associate with performance.
The longer lineage behind all of it
Performance car graphics also belong to a much older habit. Long before wraps and plotters, people were already using moving vehicles to carry identity and messaging. That basic idea never went away. It just got cleaner, tougher, and more precise.
A stripe on a modern hood isn't just decoration. It's part branding, part tradition, and part visual shorthand that says this vehicle is meant to stand apart.
Finding and Ordering Your Perfect Graphics
By the time you're ready to buy, the decision should be narrower than most catalogs make it seem. You're not shopping every style. You're matching a specific graphic to a specific car, panel, and use case.
Order with a checklist, not a vibe
Before you click buy, confirm these points:
- Style fit: Does the graphic match the car's shape and the look you want to live with?
- Panel fit: Are you ordering for hood, glass, fender, rocker, or full side placement?
- Material fit: Does the product use film suited for automotive contours and outdoor use?
- Install format: Is it pre-spaced and transfer-taped if the design needs precise alignment?
- Finish choice: Matte, satin, or gloss can change the whole feel of the build.
That process matters because vehicle graphics have a long lineage. The concept goes back to the late 19th century, when businesses hand-painted names and logos on horse-drawn carts, a foundation that later evolved into modern engineered vinyl systems for cars and motorsports, according to this history of vehicle graphics.
What a practical ordering experience looks like
A useful store setup lets you browse by body area, theme, or vehicle style instead of forcing guesswork. It should also make size, color, and orientation clear before checkout. If you're buying more than one element, value matters too. Bundles, threshold shipping offers, and multi-item discounts make sense because many builds need matching left-right pieces or secondary accents, not just one standalone decal.
This is also the point where product range matters. Some owners want muscle-era stripes. Others want JDM-style windshield text, military tributes, custom lettering, or truck graphics. The right supplier doesn't need to push one aesthetic. It needs to offer enough range that you can build a look that fits your vehicle.
If you're ready to move from ideas to actual vinyl, Custom Sticker Shop is one practical place to start. The catalog covers car, truck, Jeep, military, family, and custom-text graphics, and the products are made with professional-grade Oracal vinyl. Orders are pre-spaced and transfer-taped for easier installation, with free U.S. shipping on orders over $25 and a Buy 2 Get 1 Free offer that's useful when you're ordering matching pieces or building a multi-graphic setup.