
You're probably standing behind your truck right now, looking at that tailgate and thinking one of two things. Either it's the perfect spot for a graphic, or you've already seen enough bad installs to worry about bubbles, crooked placement, and vinyl that turns into a peeling mess six months later.
That concern is justified. Tailgates aren't simple flat billboards. They've got stamped letters, backup cameras, recessed handles, trim breaks, curved edges, factory emblems, and paint that you don't want to damage when it's time to remove the decal. That's where most generic advice falls short.
A tailgate graphic can look factory-clean when the material is right, the fit is measured correctly, and the install is done with patience. It can also look homemade in the worst way if even one of those steps gets rushed. The details matter more on a tailgate than people expect.
Choosing the Perfect Tailgate Decal for Your Truck
A truck owner usually notices the same problem at the same moment. They find a design they like, order it fast, then realize their tailgate has raised letters, a backup camera, a recessed handle, or trim lines that a generic decal never accounted for. That is why the right choice starts with fit and film, not artwork.
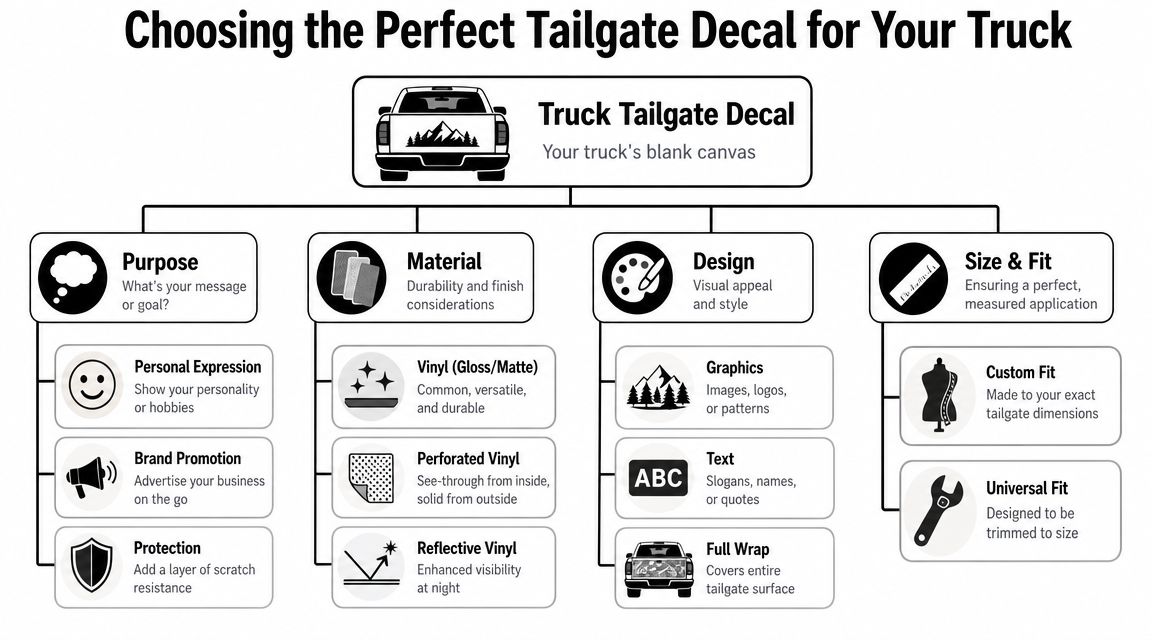
Start with the panel, not the picture
Tailgates are tougher than they look. Even a panel that seems flat can have a slight curve, stamped sections, factory lettering, or tight edges that put stress on the vinyl after installation. In our shop, those details decide the material before we ever approve a design.
For tailgates with shape or obstacles, cast vinyl is usually the safer pick because it conforms better and stays stable longer on contoured vehicle surfaces, as explained in this 3M guide to cast and calendered films. Calendared film costs less, and on a simple flat panel it can do the job. On a tailgate with embossed letters or cutouts, it is more likely to lift at edges, bridge over recesses, or show tension later.
That trade-off matters.
A decal that has to fit a Ford, Chevy, Ram, GMC, or Toyota tailgate with factory features needs room for those features in the layout. If the design crosses over raised lettering or runs too close to a camera bezel, installation gets harder and long-term hold gets worse. Buyers who want a clean result should look for model-aware sizing or order a custom truck decal layout built around the actual tailgate instead of forcing a universal rectangle to work.
Pick a finish that matches the truck
Finish changes the look more than many buyers expect. Gloss usually blends better with factory paint and clearcoat. Matte fits trucks with blackout trim, satin accessories, or a lower-shine build.
Here is the practical breakdown:
| Finish | Usually looks best on | What to watch for |
|---|---|---|
| Gloss | Factory paint, brighter colors, polished trucks | Reflections can make fine details harder to read |
| Matte | Blacked-out builds, subdued styling, off-road looks | Can look flat if the surrounding paint is already weathered |
The goal is simple. The decal should look like it belongs on the truck, not like it was added as an afterthought.
Match the design to the job
The best-looking tailgate graphics are usually the easiest to read. Bold shapes, solid color contrast, and clean typography hold up better from a distance than small details that get lost around handles, badges, and stamped metal.
Three design directions work especially well on tailgates:
- Identity graphics for flags, outdoor themes, service pride, or personal interests
- Business branding with readable lettering and a logo that stays clear at a stoplight
- Accent graphics that frame the tailgate or highlight factory body lines without covering everything
Full coverage is not always the smart choice. Leaving some paint visible often gives the decal a cleaner, more factory-fit look, especially on tailgates with large embossed letters.
One more point that buyers rarely ask early enough is removal. A good tailgate decal should install cleanly now and come off cleanly years later with heat and patience, without pulling clearcoat or leaving baked-on adhesive. That starts with choosing quality film and the correct fit from day one.
How to Measure Your Tailgate for a Flawless Decal Fit
“Fits most trucks” is usually another way of saying “you might be trimming around problems after it arrives.” Tailgates vary too much for blind ordering. The usable area on one truck can be very different from another, even when the overall width looks similar.
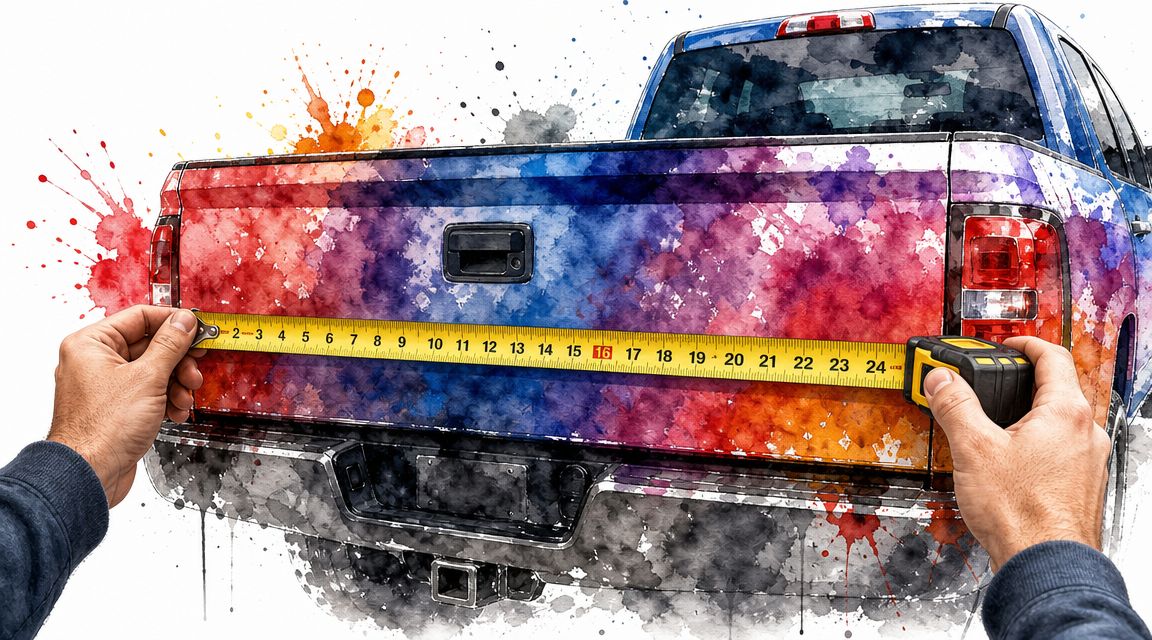
Measure the usable face, not the whole tailgate
Buyers care about a very specific question. Will the decal fit around the handle recess, backup camera, trim cutouts, and embossed letters on their truck? That concern is real, and many retail listings stay too generic instead of explaining compatibility by truck body style, as discussed in this tailgate fitment note for pickup decals.
Grab painter's tape, a soft tape measure, and your phone for photos. Then map the panel in this order:
- Measure the maximum width of the flat section you want to cover.
- Measure the maximum height from top break to lower body line or trim interruption.
- Mark the centerline with tape.
- Measure every obstacle from that centerline outward.
- Photograph the tailgate straight-on so a designer can see handle shape, lettering, emblems, and camera location.
Check the trouble spots first
Some tailgates fool people because the center looks open, but the edges roll away fast. Others have giant stamped letters that turn a nice rectangle into a complicated fit job.
Use this quick checklist before ordering:
- Handle pocket: Measure width and depth of the recess, not just the handle itself.
- Backup camera: Check whether the lens sits above, inside, or below the handle trim.
- Embossed lettering: Decide whether the decal will bridge across letters, sit between them, or be cut around them.
- Badges and emblems: Don't assume they're centered from the factory.
- Top cap and lower lip: Plastic caps and sharp bends change where vinyl can sit cleanly.
A straight measurement isn't enough. Tailgate fit depends on shape, not just size.
A truck with large stamped branding often needs a different approach than a smooth tailgate. Sometimes a full panel graphic works. Sometimes separate sections around factory lettering give a much cleaner result. If you want to compare how a fixed-size design lands on a real pickup format, a product example like this Lady Liberty tailgate decal format helps show how proportions matter.
The shop habit that saves reorders
Lay painter's tape on the tailgate to outline the graphic at full size before you buy. That mockup shows three things fast. Whether the art looks too small, whether it crowds the handle area, and whether the lower body line will cut through the design in an awkward place.
That five-minute tape outline catches sizing mistakes better than product photos ever will.
Pro Tips for a Bubble-Free Truck Decal Installation
You get one shot at first contact. Once a large tailgate decal grabs dusty paint, wax residue, or the edge of a stamped letter in the wrong spot, bubbles and wrinkles start fast. The cleanest installs come from slowing down before the backing paper comes off, especially on trucks with embossed branding, recessed handles, and camera cutouts that can pull the vinyl off line.

The process itself is straightforward. Surface prep, dry positioning, controlled squeegee work, and patience around contours. 3M's vehicle graphic installation guidance also stresses thorough cleaning, firm overlapping squeegee strokes, and careful application over compound shapes and recessed areas in its vehicle wrap and graphic installation recommendations.
Start with a surface that actually holds vinyl
Tailgates hide contamination better than doors and fenders. Dust packs into the top cap seam, polish builds up around the handle, and road film sticks near the lower edge. If any of that stays on the panel, the adhesive bonds to the contamination instead of the paint.
Use a simple prep order:
- Wash the panel with plain soap and water to remove dirt and road film.
- Wipe with isopropyl alcohol using a clean lint-free towel.
- Dry the seams and edges completely before the decal gets near the truck.
- Run your fingertips across the paint to catch specks and residue your eyes miss.
If the truck was just detailed, clean it again. Spray wax and silicone detailers are regular troublemakers in our shop.
Dry-fit the decal before you commit
A big tailgate graphic should never be freehanded into place. Tape it on the truck first, step back, and check the sight lines off the body itself. Tailgates are rarely as square as they look, and stamped letters can make a level decal appear crooked if the art is sitting too high or too low.
The hinge method is still the safest way to install. Set the graphic where you want it, tape a hinge across the top or down the center, peel the liner a little at a time, and keep control of the laydown. That matters even more on trucks with factory embossing or camera housings, because one rushed drop can shift the whole decal before you have a chance to correct it.
A visual walkthrough helps if you've never done one. This install video shows the rhythm you want before the decal touches the panel.
Squeegee pressure matters more than speed
New installers usually go too fast and too light. The vinyl needs firm, overlapping passes so the air has a clear path out. Start near the center of the section you're laying down and work outward in short strokes. Keep the felt edge or application edge flat. Don't jab at the film with the corner of the squeegee.
Here's what gives the cleanest result:
- Short overlapping strokes
- Consistent pressure
- A slow pull on the backing paper
- One section at a time instead of dropping the whole sheet
If a small bubble shows up right after installation, don't panic. Tiny air pockets in quality cast or calendered films often settle better if you leave them alone for a bit instead of peeling back half the decal and stretching it.
Handle embossed letters and cutouts in stages
Generic install advice usually stops short of covering complex scenarios. A smooth tailgate is easy. A tailgate with RAM lettering, a recessed latch, and a backup camera asks for more control.
Work the flat areas first. Then use the squeegee or your thumb wrapped in a soft towel to press the vinyl gradually into the recess or around the lettering. Don't force the film deep all at once. Let it relax, then continue. On some trucks, a little heat helps the vinyl conform, but too much heat makes it soft and easy to distort, so keep it mild and controlled.
If your truck has broad stamped branding, a model-specific graphic can save a lot of trimming and alignment headaches. A layout built for that shape, such as this Dodge Ram muscle tailgate decal sticker, gives you a better starting point than trying to make a generic rectangle behave on a contoured panel.
One practical option for pre-spaced automotive graphics is Custom Sticker Shop, which produces transfer-taped Oracal vinyl decals for vehicle use. That kind of format helps keep spacing consistent during application when you're working across a wide tailgate panel.
The other question smart buyers ask is what happens years later. Good installation helps with removal too. Vinyl that goes onto clean paint, without trapped grit and without being overstretched into every corner, is far less likely to fight you when it eventually comes off.
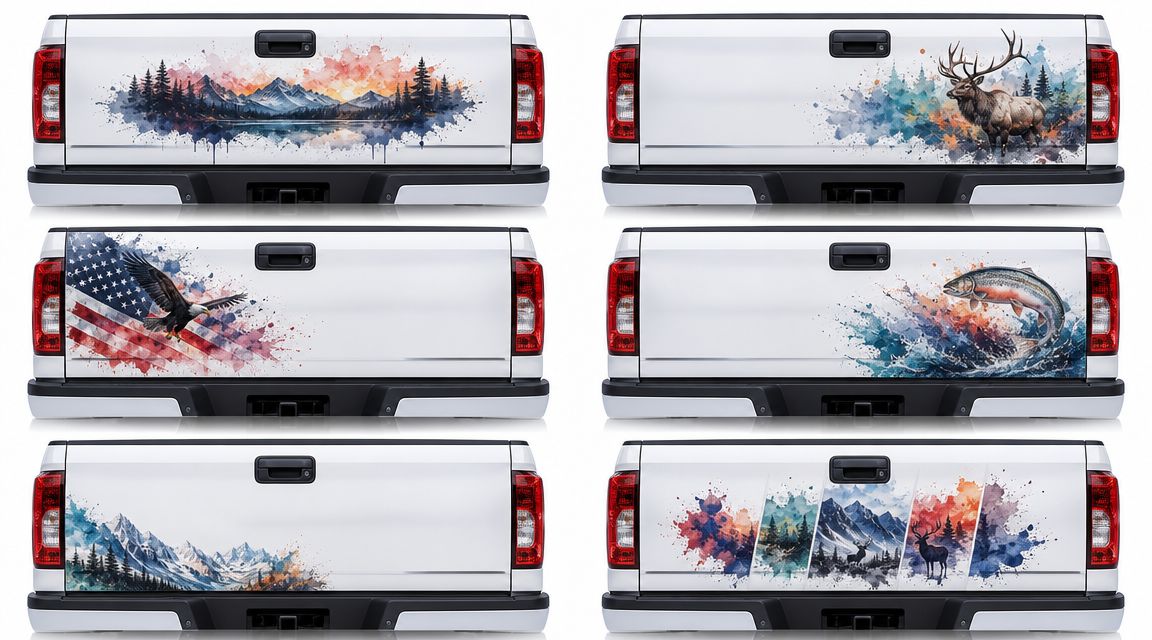
Creative Styling and Placement Ideas for Tailgate Graphics
Some decals look right only when they're centered. Others come alive when they're pushed off-center and allowed to work with the truck's lines instead of against them. Placement changes the personality of the whole rear end.
Clean and restrained
A single line of text across the upper third of the tailgate can look almost factory. This works especially well on trucks with busy bumpers, hitch setups, or strong body lines lower on the panel. The graphic stays readable without fighting the hardware below it.
Military tribute decals, custom names, unit references, and short slogans often work best in this zone. You keep the latch area visually clear and avoid crowding the bottom edge.
Bold and graphic
Full-width artwork has a completely different effect. Wildlife scenes, flags, skulls, mountain silhouettes, and performance-themed graphics turn the tailgate into the focal point. These look strongest when the rest of the truck is visually simple.
A Ram owner might lean into broad shoulder lines with a muscular, wide graphic like this Ram tailgate decal style. On a truck with large stamped branding, the art can either frame those letters or use them as part of the composition.
Lower placement feels heavier and more aggressive. Upper placement feels cleaner and more understated.
Use the truck's features as design anchors
The best-looking installs usually line up with something factory. That might be the center of the latch, the top body crease, or the spacing between embossed letters.
A few combinations that work well:
- Centered emblem-style graphics when the tailgate is smooth and symmetrical.
- Wide horizontal scenes on trucks with broad, uninterrupted panels.
- Offset graphics when the handle and camera dominate the center.
- Lettering inserts or framed layouts when factory stamping already provides structure.
The mistake is treating every tailgate like a blank rectangle. It isn't. The truck already gives you a grid. Good placement uses it.
How to Care For and Safely Remove Your Tailgate Decal
Most owners don't worry about removal until the day they're trading in the truck, ending a lease, or replacing an old graphic that has baked in the sun for years. That's when panic sets in. They want the decal gone, but they don't want to lift paint, scar the clearcoat, or leave behind a gummy outline.
That concern is common. Buyers regularly ask whether they can remove a tailgate decal later without damaging paint or leaving residue, especially when they lease vehicles or care about resale, and better guidance should account for vinyl age, paint condition, and climate, as noted in this discussion of decal removal concerns.
Everyday care that helps later
How you wash the decal affects how it ages and how it comes off later. Dirt around the edges acts like sandpaper. Aggressive washing can start small edge lift that turns into bigger failure over time.
Use these habits:
- Wash with normal car soap: Harsh solvents create unnecessary risk.
- Wipe with the edge, not against it: That lowers the chance of catching a corner.
- Be careful with pressure washers: Don't aim high-pressure spray directly into decal edges.
- Inspect after washes: Catching a lifted point early is easier than repairing a torn section.
Safe removal method
Removal should feel controlled, not violent. Start with a clean tailgate. Warm a small section with a hairdryer or carefully with a heat gun on a gentle setting. You want the adhesive softened, not the panel overheated.
Then peel slowly at a low angle. If the vinyl resists, add more heat and keep moving. Don't jerk it upward. That puts more stress on the paint.
Here's the practical sequence:
- Warm one corner or edge.
- Lift with a fingernail or plastic edge, not a metal blade.
- Peel slowly while continuing light heat ahead of the pull.
- Remove leftover adhesive with a paint-safe adhesive remover.
- Wash and inspect the panel after everything is off.
Older vinyl usually removes harder than newer vinyl, especially if the truck has spent years in strong sun.
When removal gets tricky
Three things change the job. Age of the vinyl, condition of the paint, and climate exposure. An older decal on weathered paint needs more patience than a newer one on well-kept factory finish.
If the truck has repaint work, test a small area first. If the vinyl is brittle and breaks into pieces, slow down and work in smaller sections with heat. The goal isn't speed. The goal is getting the graphic off without turning a cosmetic project into a paint project.
Safety, Legality, and Final Checks for Your Tailgate Decal
A good-looking install still has to pass one final test. It can't interfere with the truck's safety equipment or visibility. Tailgate decals for trucks should work with the vehicle, not cover the parts other drivers need to see.
There's a useful safety baseline from the commercial side of the vehicle world. Under FMVSS No. 108, commercial trailers use retroreflective tape on the rear as part of a larger visibility framework, which helped establish a practical standard for rear-end conspicuity and for materials that support safety rather than compromise it, as outlined in this overview of truck and trailer safety decals.
Final inspection before you call it done
Stand back and check the truck in daylight, shade, and with the brake lights on. A decal shouldn't crowd or obscure any critical feature.
Run through this list:
- License plate stays fully visible
- Taillights and brake lights stay unobstructed
- Backup camera view stays clear
- Handle works without catching the vinyl
- No corners are lifting at edges or recesses
If you tow regularly, it also helps to review broader rear-visibility standards. A practical resource on understanding trailer lighting rules adds useful context for anyone who wants truck graphics and rear safety details to make sense together.
What a finished job should look like
The decal should sit where it belongs, read clearly from a distance, and look intentional up close. No trapped dirt under the film. No crooked relationship to the body lines. No design choices that block function.
That's the standard worth chasing. Measure the usable space. Choose film that can handle the panel. Install it with discipline. Remove it later with patience if your plans change.
If you want a truck graphic that's made for vehicle use and easy to order in a style that fits your build, take a look at Custom Sticker Shop. They offer truck-ready vinyl decals in a wide range of themes, including military tributes, custom text, and automotive graphics, with transfer-taped layouts that help with clean application.