
When you see a crisp logo on a work van or a custom tribute on the back of a Jeep, you're looking at a vinyl decal. At its simplest, it's the process of turning a digital design into a durable, adhesive graphic that can personalize almost any smooth surface.
Think of it as a high-tech, super-durable sticker built to last for years, not weeks. Unlike paper stickers that fade and peel, a quality vinyl decal is made to stand up to sun, rain, and snow, making it the perfect choice for vehicles and outdoor use.
What Is Vinyl Decal Printing
At its heart, vinyl decal printing is all about taking a design from a computer screen and making it a physical reality. It's the technology behind the bold company names on work trucks, the intricate graphics on off-road vehicles, and the custom text you see on a car's rear windshield.
This isn’t just a niche hobby; it’s a massive part of the specialty printing world. The global market for vinyl decals was valued at around $5.2 billion in 2026 and is expected to climb to nearly $7 billion by 2033. That growth shows just how much people want to personalize their world.
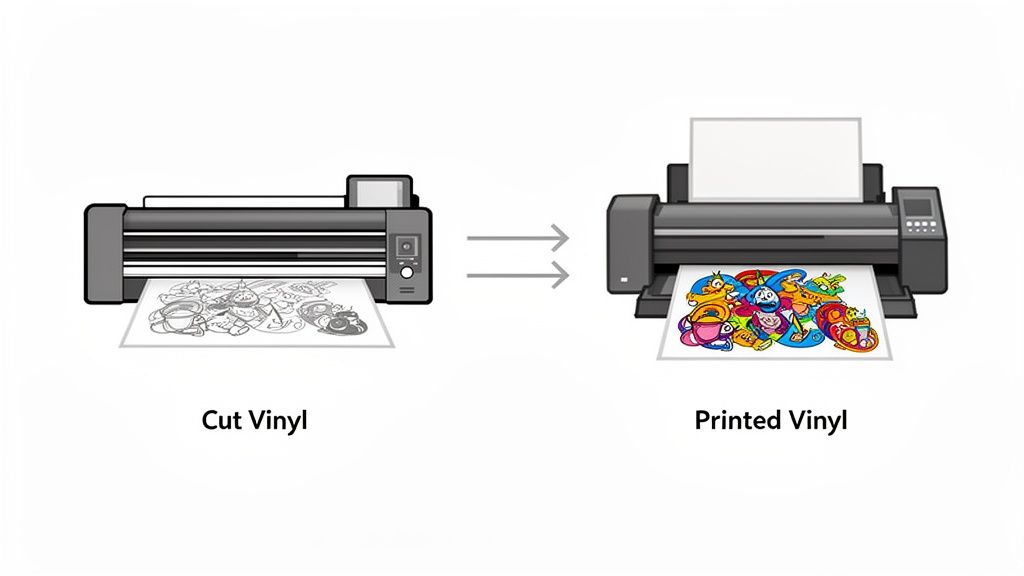
Cut Vinyl vs Printed Vinyl
The world of vinyl decals really boils down to two main production methods. Getting a handle on the difference is the first step to choosing the right product for your project.
Cut Vinyl Decals: The best way to think about this is like using a very precise stencil. A computer-guided blade, called a plotter, carves your design directly out of a solid-colored roll of vinyl. This method is perfect for single-color graphics like lettering, logos, and silhouettes. Because there's no background—just the letters or shapes themselves—you get a clean, "painted-on" look. Our custom text window decal sticker is a classic example of this style.
Printed Vinyl Decals: Now, think of a full-color poster. Printed decals are what you need for complex designs with multiple colors, gradients, or even photographs. We use a large-format printer with durable eco-solvent inks to print the image directly onto a sheet of white vinyl. The machine then contour-cuts the design to its specific shape. This is the only way to get a decal that looks like a photo or has intricate color blends.
To make it even clearer, here’s a quick side-by-side comparison.
Cut Vinyl vs Printed Vinyl At A Glance
| Feature | Cut Vinyl Decals | Printed Vinyl Decals |
|---|---|---|
| Best For | Single-color text, logos, silhouettes | Full-color photos, gradients, complex images |
| Appearance | Clean, "painted-on" look with no background | Full, solid image like a traditional sticker |
| Durability | Extremely durable (7+ years); color is part of the material | Very durable (5-7 years); protected by a laminate |
| Complexity | Limited to simpler shapes and one color per layer | Can reproduce any image, no matter how complex |
| Cost | Generally more cost-effective for simple designs | Can be more expensive due to ink and lamination |
Ultimately, both paths start with a digital file and end with a tough physical decal. But one method carves shapes from pre-colored material, while the other applies ink to a blank vinyl canvas. This difference is what determines the final look, cost, and best use for your project.
Choosing the Right Vinyl for Lasting Decals
The secret to a decal that survives years of sun, rain, and car washes isn’t the design—it’s the material. When you’re looking at vinyl decal printing, choosing the right vinyl is the single most important decision you'll make. It’s what determines how long your graphic will last and how good it will look a few years down the road.
Not all vinyl is created equal. Think of it like a paper plate versus a ceramic one. Both hold food, but one is made for a single use, while the other is built to last for years. The same logic applies to the vinyl used for car and truck decals.
The Gold Standard: Oracal Vinyl
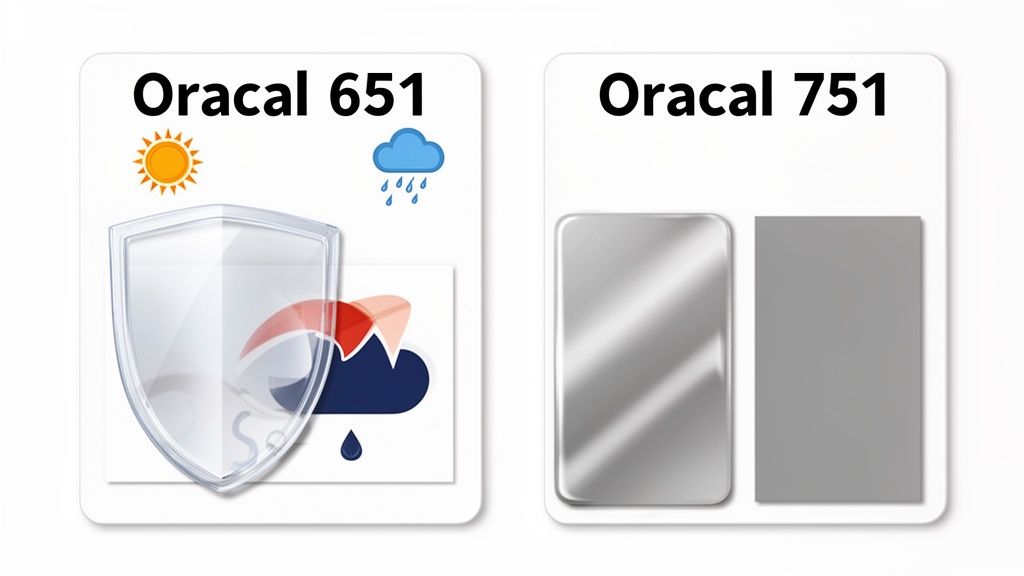
For any graphic you plan to put on a vehicle, you have to insist on professional-grade vinyl. Brands like Oracal have become the benchmark in our industry for one simple reason: they deliver proven durability and performance. You’ll often see product numbers like Oracal 651 and 751, and each one has a specific job.
Oracal 651 (Intermediate Calendered Vinyl): This is our workhorse material for flat surfaces and simple curves. It’s a fantastic choice for window decals and most body graphics, offering a brilliant gloss finish and a 6-year outdoor durability rating.
Oracal 751 (High-Performance Cast Vinyl): When a decal needs to wrap around more complex curves, like on a sporty car or a custom windshield banner, this cast vinyl is the superior option. It’s thinner and more flexible, boasting an even longer 7+ year outdoor lifespan, making it perfect for premium, long-term applications.
Those multi-year ratings aren't just marketing fluff. They represent the manufacturer's guarantee against significant fading, cracking, or peeling under normal weather conditions. This is exactly why we build our decals with these materials. If you're interested in the nitty-gritty of sticker materials, this guide to perfect DIY stickers is a great resource for understanding how material choice impacts longevity across the board.
Protecting Your Investment: Laminates and Finishes
For full-color printed decals, there’s an extra layer of protection that is absolutely critical: lamination.
Think of it as a screen protector for your decal. This clear vinyl overlay is applied right on top of the printed graphic, and it serves two vital functions.
First, it provides a crucial shield against UV rays, which are the number one cause of ink fading. Second, it protects the decal from minor scratches, scuffs, and chemicals from car washes, which dramatically extends its life and keeps the colors vibrant.
The laminate also determines the final look. You can choose a glossy finish, which makes colors pop with a reflective shine, or a matte finish for a more modern, non-reflective appearance that cuts down on glare.
Ultimately, picking a quality vinyl and the right finish is what ensures your custom decal is an investment that looks great for years, not just months. To see how these high-quality materials come to life, check out our Chevy Corvette vinyl windshield banners, which are made using these exact durable options.
Inspiring Ways to Use Custom Vinyl Decals
Once you get a handle on what vinyl decals can do, you start seeing possibilities everywhere. Your vehicle isn't just a way to get from A to B; it's a canvas. It’s a place to show off your passions, honor your service, or just have a little fun with your family’s personality. Custom decals are simply the best tool for telling that story.
This isn't just a small trend, either. Personalization is the single biggest reason the global vinyl sticker market is expected to jump from $3.7 billion in 2025 to a massive $5.8 billion by 2033. That growth comes from people like you who want to make their gear uniquely their own.
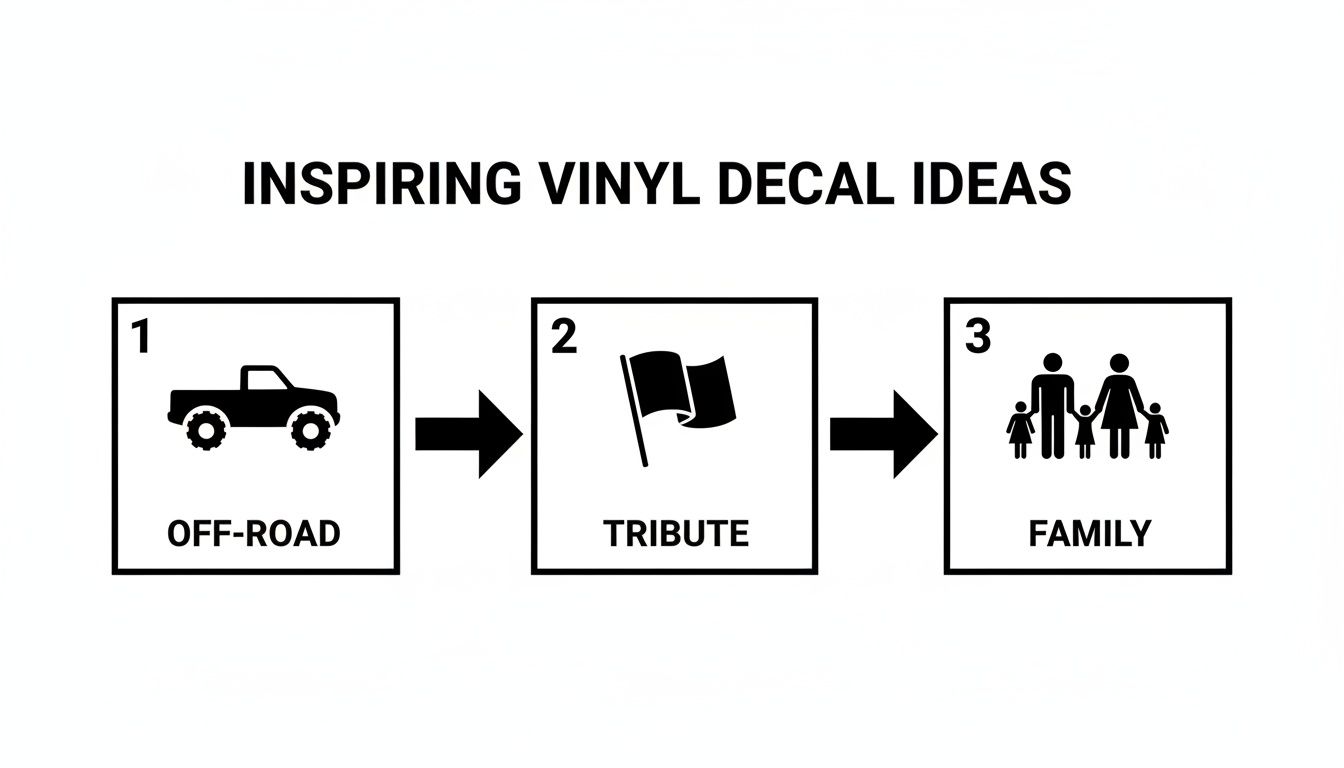
For the Off-Road Adventurer
Anyone who owns a Jeep or a truck knows their rig is a statement piece. Custom vinyl graphics are a huge part of that identity. From bold, distressed flags on the hood to rugged mountain silhouettes running down the side, these designs are a clear signal that you live for adventure.
- Hood Graphics: You can make a serious impact with a blackout decal or even a custom topographic map of your favorite area.
- Side Body Decals: Add some character with stripes, mud-splatter graphics, or logos from your favorite trails and brands.
- Window Accents: Perfect for showing your off-road club affiliation or a witty phrase that sums up the spirit of exploration.
Custom vinyl is one of the most popular ways to customize your vehicle, but if you're looking for more inspiration, there are tons of great ideas out there for building your ultimate ride.
Tributes and Personal Statements
Decals also offer a powerful, respectful way to honor what truly matters. They can turn a simple piece of glass into a display that’s packed with meaning.
A well-placed decal can serve as a constant tribute to military service, a memorial for a loved one, or a proud declaration of faith. It's a quiet but powerful way to carry your story with you on every journey.
Some of the most common applications we see include:
- Military Tributes: Display your branch, unit, or a memorial graphic to honor service and sacrifice with the accuracy it deserves.
- Family Decals: The classic stick-figure family has come a long way. Now you can get them with custom names, hobbies, and even your pets included.
- Hunting and Fishing: Show off your passion with detailed silhouettes of deer, fish, or waterfowl that look sharp and clean.
- Business Promotion: You can even turn your vehicle into a low-key mobile billboard. A clean, professional QR code decal is a simple way to point potential customers right to your website.
A Step-By-Step Guide To Flawless Decal Installation
Getting your new decal onto your car or truck might seem a little intimidating, but trust us—achieving that perfect, bubble-free finish is a lot easier than you’d think. The whole secret is just patience and following a good process.
We’ll walk you through the exact same method the pros use. By taking your time and following these simple steps, you'll get a clean application that looks like it came straight from a custom shop and will last for years.
Stage 1: Prepare The Surface
This is the most important step, and you can't skip it. The golden rule of applying any vinyl decal is that the surface must be perfectly clean. Any bit of dust, grime, wax, or oil will stop the adhesive from getting a solid grip, which leads to ugly bubbles and peeling edges down the road.
First, give the area a good wash with soap and water, then dry it completely with a clean, lint-free cloth. For the final, critical wipe-down, use isopropyl (rubbing) alcohol on a new cloth. Let it air dry. The alcohol cuts through any invisible residue that soap and water might leave behind, giving the vinyl a perfectly prepped surface to bond to.
Whether you're applying a rugged off-road graphic, a patriotic tribute, or a fun family stick-figure set, a clean start is what makes the final result look sharp and professional.
Stage 2: Position With The Hinge Method
Okay, the surface is prepped and ready. Now it’s time to get your decal perfectly placed. Resist the temptation to just peel the whole thing off and try to eyeball it—that’s a recipe for crooked placement and wrinkles, especially with larger graphics.
Instead, use the hinge method. Lay the decal (still on its backing paper) exactly where you want it. Take a strip of masking tape and run it across the middle of the decal, taping it firmly to the vehicle. This piece of tape acts as a hinge, locking your decal in the perfect spot.
This simple trick is what professionals rely on to guarantee perfect alignment every single time. It lets you work with just one half of the decal at a time, which dramatically cuts down the risk of mistakes.
Stage 3: Apply The Decal
With the decal hinged in place, pick up one side and peel the paper backing away from the vinyl until you get to your tape hinge. Grab a pair of scissors and carefully cut off that loose piece of backing paper.
Now, hold the edge of the decal and slowly lay it down onto the surface, working from the center hinge outwards. Use a squeegee (or a credit card wrapped in a soft cloth) to apply firm, overlapping strokes. This pressure activates the adhesive and methodically pushes out any trapped air.
Once that first half is down, you can remove the masking tape hinge. Lift the other side of the decal, peel off the rest of the backing paper, and repeat the process. Squeegee from the middle out to the edges until the whole graphic is smoothly applied.
Stage 4: Remove The Transfer Tape
This is the best part. After you’ve squeegeed the entire decal, give it a few minutes to let the adhesive really set up and bond with the surface.
Then, start at a corner and slowly peel the clear transfer tape back at a sharp 180-degree angle. The key is to pull it back flat against itself, not straight up and away from the vehicle. If you see any part of the vinyl decal lifting up with the tape, just lay that section back down, give it another firm squeegee, and then continue peeling.
Once the tape is off, you’re done! You’re left with a clean, professional-looking decal that’s ready to show off.
Even with the best preparation, things can sometimes go sideways. Here’s a quick guide to fixing the most common issues you might run into.
Installation Troubleshooting Common Issues
| Problem | Cause | Solution |
|---|---|---|
| Bubbles under the vinyl | Trapped air or dust on the surface during application. | For small bubbles, prick with a fine needle and smooth down. For large bubbles caused by dust, you may need to carefully lift and re-apply, but this is risky. A clean surface is the best prevention. |
| Decal won't stick | Surface was not properly cleaned (wax/oil residue) or the temperature is too cold (below 50°F). | Clean the area again with isopropyl alcohol and wait for a warmer day. You can also gently use a hairdryer to warm the surface and the vinyl adhesive before applying. |
| Vinyl lifts with transfer tape | Adhesive hasn't bonded to the surface yet, or you're pulling the tape off too fast/at the wrong angle. | Press the vinyl back down and squeegee firmly. Let it sit for a few more minutes. When peeling, go very slowly and pull the tape back at a sharp 180° angle, flat against the surface. |
| Wrinkles or creases | Decal was not applied smoothly from the center outwards. | Small wrinkles can sometimes be smoothed out with a squeegee. For large creases, you may have to live with it or order a new decal. The hinge method is your best defense against this. |
Don't let these potential problems worry you. By following the steps and working patiently, you can easily avoid them and get a flawless finish on your first try.
Caring for Your Vinyl Decal to Maximize Its Life
Your new decal is on and looking great. Now, let’s talk about how to keep it that way for years. Proper care isn’t a chore; it’s just a few simple habits that will protect your investment and keep the vinyl looking sharp.
The most important part of long-term care comes down to how you wash it. While our Oracal vinyl is incredibly tough, every decal has one potential weak spot: its edges.
Washing and Cleaning Your Decal
When washing your vehicle by hand, stick with a soft cloth or sponge and a standard car wash soap. Go over the decal gently and never scrub at it aggressively. The golden rule is to avoid doing anything that could catch an edge and start to lift it.
Critically, never aim a high-pressure washer directly at the edges of your decal. The force of that water is more than enough to get underneath the vinyl, breaking the adhesive bond and causing it to peel. Always keep the nozzle at a safe distance and spray at a wide angle, not directly at the seams.
Here are a few more pro tips for keeping your decal in top shape:
- Avoid Harsh Cleaners: Steer clear of abrasive chemicals, polishes, or anything that isn't a pH-neutral automotive soap.
- Be Careful in Winter: Never, ever use an ice scraper directly on the vinyl. It’s a surefire way to gouge, tear, or completely ruin your decal.
- Go Touchless: If you use automatic car washes, a touchless wash is always the safest bet for any kind of vehicle graphic.
Safely Removing an Old Decal
When you’re ready for a new look, getting the old decal off is a straightforward job if you use the right technique. The secret is a little bit of gentle heat.
Grab a hairdryer and warm up a section of the vinyl for about 30-60 seconds. This softens both the material and the adhesive underneath.
Once it’s warm to the touch, you can use a plastic scraper or even just your fingernail to get a corner lifted. From there, slowly peel the vinyl back on itself at a low, sharp angle for the cleanest removal possible.
Frequently Asked Questions About Vinyl Decals
As you get ready to place your order, a few last-minute questions usually pop up. We get it. You want to make sure you’re making the right choice and know how to care for your new graphics.
Let's walk through the questions we hear most often, so you can order with total confidence.
One of the biggest concerns for first-time buyers is always the same: "Will this mess up my paint?" It's a great question, but with the right materials, it's one you don't have to worry about.
The bottom line is that a professional-grade decal, when applied and removed correctly, is completely safe for factory paint. In fact, it acts as a protective shield, guarding the paint underneath from minor scuffs and sun damage.
Another common question is about day-to-day life with a decal, especially when it comes to keeping your vehicle clean. You can absolutely take your car through a wash, but a little patience and common sense go a long way.
Common Questions Answered
Will a decal damage my car's paint?
No. We only use professional-grade vinyl like Oracal. When it's time to remove it, a little gentle heat from a hairdryer is all you need to peel it off without harming your factory paint.Can I go through a car wash?
Yes, but give the adhesive 48-72 hours to fully cure after you first apply the decal. Once that's done, touchless car washes are your best bet. If you use a pressure washer, just avoid blasting the edges of the decal directly—that force can cause it to lift over time.What’s the difference between a decal and a sticker?
People often use these terms for the same thing, but in the professional world, there's a key difference. A decal is a design that is cut out from a solid-colored sheet of vinyl and then applied with transfer tape. Once you peel the tape away, only the graphic remains for a clean, "painted-on" look. A sticker is typically an image printed onto a piece of vinyl that has its own white or clear background, much like a label.
Ready to create a look that’s uniquely yours? At Custom Sticker Shop, we use only the best materials to bring your vision to life, ensuring your decal is durable, vibrant, and built to last.
Explore our massive collection of designs and find the perfect graphic for your ride at Custom Sticker Shop.