
Think of a vinyl custom decal not as a simple sticker, but as a durable, precision-cut graphic that becomes a part of your vehicle. It’s a true investment in personalization, delivering a clean, painted-on look that those cheap, flimsy stickers from a gas station or online marketplace could never achieve.

What Sets Vinyl Custom Decals Apart
When most people hear the word "decal" or "sticker," they imagine something that peels, fades, or cracks after just a few months of sun and rain. That’s where the comparison stops. A true vinyl custom decal is an entirely different animal, engineered from the ground up for performance, style, and longevity.
Unlike a standard sticker that just sits on top of your vehicle’s surface, a quality vinyl decal is designed to integrate with it. This all comes down to two key factors: the material it’s made from and the way it’s manufactured.
To understand the difference, let’s quickly compare a professional vinyl decal to the kind of sticker you might find in a gumball machine.
Vinyl Decals vs Standard Stickers at a Glance
| Feature | Vinyl Custom Decals | Standard Stickers |
|---|---|---|
| Material | Professional-grade PVC vinyl (like Oracal) | Paper or cheap, thin plastic |
| Durability | Rated for 7+ years outdoors | Lasts a few months, maybe a year |
| Appearance | Clean, painted-on look (no background) | Flimsy, sits on the surface with a clear or white edge |
| Weather Resistance | Excellent (UV, rain, snow, salt) | Poor (fades, cracks, and peels quickly) |
| Manufacturing | Die-cut for precision | Mass-printed on sheets |
| Application | Comes with transfer tape for easy alignment | Peel and stick (often crooked) |
As you can see, the difference is night and day. One is built for a lasting impression, and the other is a temporary afterthought.
The Power of Professional-Grade Vinyl
The heart and soul of a great decal is the vinyl itself. Reputable shops, including ours, use materials from industry leaders like Oracal—the same stuff trusted by professional sign makers and vehicle wrappers. This isn't just any plastic; it’s a specialized polyvinyl chloride (PVC) film made specifically for harsh outdoor conditions.
- Weather Dominance: This material is engineered to shrug off UV radiation from the sun, which is what causes fading and keeps colors looking sharp. It stands up to rain, snow, road salt, and whatever else the highway throws at it.
- Serious Durability: We’re not talking about a few months of looking good. Professional-grade vinyl is rated for years of outdoor use—often up to 7 years or even more. It won’t get brittle or disintegrate after a few runs through the car wash.
- A Flawless Finish: Because the material is a solid color all the way through, there’s no white edge to get grimy or a clear background that will yellow and crack over time.
Focusing on quality materials is the first and most important step in separating a real decal from a cheap sticker. It’s the difference between a temporary accessory and a long-term upgrade for your ride. If you want to see the impact for yourself, a custom vinyl windshield banner is a great way to start.
A vinyl decal is to a paper sticker what a tailored suit is to a disposable poncho. One is designed for a perfect fit and lasting impression; the other is a temporary, flimsy cover.
Precision Cutting for a Painted-On Look
The second defining feature is how these decals are made. Our vinyl custom decals are die-cut, which means a computer-guided blade precisely cuts your design directly from a sheet of solid-colored vinyl. After the machine does its work, the excess vinyl around your letters or graphic is carefully weeded out by hand.
This process completely eliminates any background, leaving only the design elements. When you apply it to your vehicle, only the individual letters and shapes adhere to the surface. The result is an incredibly sharp, clean look that appears as if it were professionally painted right onto your car or truck.
It’s this commitment to quality—from the materials we source to the hands-on process—that defines our American-made promise. Every single decal gets this level of attention to ensure it looks great from the moment you apply it and for years to come.
How to Choose the Right Vinyl for Your Vehicle
A great design is only half the battle. The real secret to a decal that looks incredible for years isn't just the art—it's the material it’s made from. Picking the right vinyl is like choosing the right tires for your truck; what works for a daily driver won't hold up on a rig that lives off-road.
This choice is what determines whether your vinyl custom decals look professional, stand up to the weather, and ultimately, whether your investment was worth it.
While there are plenty of vinyl brands out there, the pros and serious enthusiasts all point to one name: Oracal. This isn't just a sheet of colored plastic. It’s a high-performance film, engineered for specific jobs and environments. Knowing the difference between their products is key to getting exactly what you need.
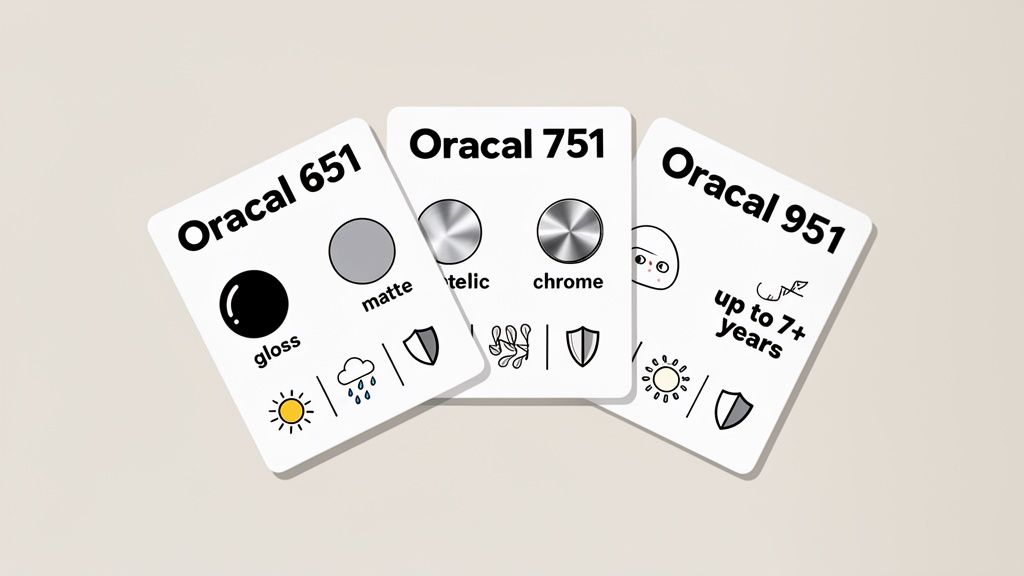
Oracal 651: The All-Around Workhorse
Think of Oracal 651 as the tough, reliable choice for about 90% of vehicle applications. It's a "calendered" vinyl, which is a fancy way of saying it's made using a process that delivers great durability at a solid price point. This perfect balance makes it the go-to for most jobs.
- Durability: Rated for up to 6 years of outdoor life. That means it’s built to take years of sun, rain, and car washes without fading, cracking, or peeling off.
- Adhesive: It uses a powerful, permanent adhesive that bonds tight to your vehicle's surface, so you don't have to worry about it lifting at highway speeds.
- Best For: Most custom text decals, window graphics, and logos on daily drivers, company trucks, and even show cars that see regular use.
For the vast majority of people personalizing their car, truck, or Jeep, Oracal 651 hits that sweet spot of longevity and value. It’s tough enough to last but won't break the bank.
Oracal 751 and 951: Premium Durability for Demanding Conditions
But what if your vehicle faces more extreme abuse? That's when you step up to a premium "cast" vinyl like Oracal 751 or 951. Unlike calendered vinyl, cast vinyl starts as a liquid poured into a sheet, which makes the final film thinner, more flexible, and incredibly durable.
This manufacturing difference makes cast vinyl the undisputed king for jobs that demand the absolute best performance and longest life. It’s more "conformable," so it wraps over complex curves on a vehicle's body with ease, putting less stress on the material itself.
Choosing between calendered and cast vinyl is like picking between a heavy-duty rain jacket and a high-performance GORE-TEX shell. Both keep you dry, but the premium option offers way better flexibility and durability for extreme environments.
Here’s how these high-performance options break down:
- Oracal 751: This is your first step into the premium world, offering an outdoor durability rating of up to 8 years. It's an excellent upgrade for fleet vehicles, boats, and any decal that needs to be applied over a tricky, curved surface.
- Oracal 951: As the top-of-the-line option, Oracal 951 boasts a massive outdoor rating of up to 10 years. Its ultra-thin, super-flexible nature makes it the only choice for the most demanding applications, like full vehicle wraps or graphics on riveted and corrugated trailer sides.
If you have an off-road rig that’s always covered in mud and baked by the sun, a work truck that lives outside 24/7, or you just flat-out want the best money can buy, investing in a cast vinyl ensures your decal will outlast everything else.
Finishes That Define Your Style
Beyond the vinyl grade itself, the finish you pick plays a huge part in the final look. The finish determines how the decal interacts with light and can completely change your vehicle's attitude.
- Gloss Finish: This is the most popular choice, and for good reason. Its shiny, reflective surface perfectly mimics the clear coat on your vehicle’s paint, creating a clean, factory-installed look. It’s vibrant and makes colors pop.
- Matte Finish: A matte finish has a flat, non-reflective look that creates a subtle, modern, and often aggressive style. It's a fantastic choice for blackout designs, anti-glare hood graphics, and anyone who wants a more understated vibe.
- Metallic and Specialty Finishes: For a truly custom statement, you can’t beat options like metallic, chrome, or carbon fiber. Metallic vinyl has tiny metal flakes mixed in that sparkle in the sun, while chrome offers a mirror-like shine that demands attention.
At the end of the day, the right vinyl comes down to your vehicle, your budget, and the look you're going for. By understanding the real-world differences between grades like Oracal 651 and 751, you can confidently choose a material that will make your vinyl custom decals look amazing and stand the test of time.
Understanding Die-Cut and Printed Decals
When you're looking for a custom decal, one of the first questions you'll run into is whether you need a die-cut or a printed one. It’s a common point of confusion, but they are completely different products that create wildly different results on your vehicle. Getting this choice right is the key to achieving that clean, professional look you’re after.
The Essence of a Die-Cut Decal
A die-cut decal is the gold standard for vehicle lettering and graphics, hands down. Think of it as a stencil, but in reverse. The design is precision-cut directly from a solid sheet of high-quality colored vinyl, and all the negative space—the background—is carefully removed by hand.
What you're left with is just the graphic or lettering itself. There’s no clear background, no white box around it, and no extra material. This gives you an incredibly sharp, integrated look that appears as if it were painted right onto your vehicle's surface.
The Magic of Transfer Tape and Pre-Spacing
The real beauty of a die-cut decal is how it arrives ready for you to install. Even if your design has tons of separate pieces or intricate letters, they are all perfectly aligned and held in place by a top layer of transfer tape. This is what we call being pre-spaced.
This means you don't have to painstakingly apply each letter or shape one by one. You get to apply the entire design as a single, flawless piece.
A die-cut decal with transfer tape is like having a professional sign painter in a box. It takes all the guesswork out of alignment and spacing, letting you apply a complex design with perfect results in one smooth motion.
Once you’ve applied the decal and smoothed it down, you simply peel away the transfer tape. Your perfectly placed design is left behind. This process is what ensures our vinyl custom decals deliver that crisp, professional finish every time. It’s what separates a true custom graphic from a basic sticker.
What Is a Printed Decal
In contrast, a printed decal is much more like a high-quality, traditional bumper sticker. Your design—which can be a full-color photograph or a complex image with gradients and shadows—is printed onto a sheet of white or clear vinyl. After printing, it's usually cut into a simple shape like a circle, square, or oval.
The key difference is that the design always lives on a background layer. Even with a "clear" vinyl background, you'll almost always see the faint outline of the sticker. Over time, that edge can collect dirt or even yellow, taking away from that clean look.
When to Choose Each Type
So, which one is right for you? It really comes down to your design and the final look you want to achieve.
A side-by-side comparison makes the choice pretty clear:
| Feature | Die-Cut Decal | Printed Decal |
|---|---|---|
| Appearance | Clean, painted-on look | Like a sticker with a background |
| Background | None (only the design remains) | Yes (white, clear, or a colored shape) |
| Best For | Bold logos, custom text, single-color graphics | Full-color photos, complex gradients |
| Durability | Excellent; solid vinyl color resists fading | Good; but ink can fade faster than vinyl |
| Installation | Easy with pre-spaced transfer tape | Simple peel-and-stick |
For the vast majority of vehicle graphics—like custom lettering for your windshield, a military emblem on your rear window, or a bold logo on your door—die-cut vinyl is the superior choice. It delivers the cleanest, most professional, and most durable result. Printed decals have their place for photographic images, but for that sharp, factory-finish look, nothing beats die-cut.
Designing and Sizing Your Perfect Custom Decal
Turning a killer idea into a flawless decal comes down to two things: a solid design and the right measurements. A powerful graphic is useless if it’s too small to see, and a perfectly sized decal won't matter if the design is a blurry mess.
Getting both right is the secret to making your vinyl custom decals look like they were professionally installed. This isn't about needing fancy design software. It’s about making a few smart choices with a tape measure in hand to make sure your decal fits perfectly and looks awesome.
Key Principles for Effective Decal Design
Great decal design is all about clarity and impact from a distance. A design that looks incredible on your bright computer screen can completely disappear on a tinted rear window. To make sure your decal pops, you need to think about contrast, simplicity, and whether you can actually read it.
Choose High-Contrast Colors: This is the most important choice you'll make. For dark paint or tinted windows, you want bold colors that stand out—think white, silver, yellow, or a bright red. On a white or silver vehicle, black, dark blue, or red decals create that sharp contrast you're looking for.
Simplify Your Logo or Graphic: Complex logos with super fine lines, tiny text, or subtle shading don't translate well to die-cut vinyl. Our cutters are precise, but they have physical limits. By removing the tiny details and thickening up the lines, you'll get a much cleaner cut and a decal that holds up better over time.
Select Bold, Clear Fonts: When you're creating a text decal, readability is everything. Stay away from thin, wispy, or overly decorative script fonts. They're a nightmare to read from a few feet away and can be too delicate to cut and weed properly. Stick with classic, bold fonts like block letters or clean san-serif styles to get your message across loud and clear.
How to Measure for a Perfect Fit
“Eyeballing it” is the fastest way to wind up with a decal that’s either comically small or way too big for the space. Take a few minutes to measure. Trust us, it’s worth it. All you need is a basic tape measure.
Identify Your Target Location: First, decide exactly where you want the decal to live. Is it going dead center on the rear window? On a side fender? Or maybe a banner across the top of the windshield?
Measure the Available Space: Use your tape measure to find the max width and height of the spot you picked out. A key tip here: don’t measure right to the edge. Leave a buffer of at least an inch or two on all sides so the decal doesn't look cramped.
Consider Obstructions: Take a good look at what's around the area. You need to account for anything that could get in the way—windshield wipers, door handles, body panel seams, or existing emblems. Make sure you measure the usable space inside these boundaries. For a rear window, for instance, measure the area safely below the path of the wiper blade.
Visualize with a Template (Optional): If you're still on the fence, grab a piece of paper and cut it to the dimensions you're thinking of. A little painter's tape will hold it in place on your vehicle, giving you a real-world preview of how it will look before you commit.
To help you get started, here are some of the most common sizes we see for popular locations on cars, trucks, and Jeeps.
Recommended Decal Sizing for Common Vehicle Locations
This table gives you a great starting point for figuring out what dimensions work best for different parts of your vehicle.
| Vehicle Location | Typical Size Range (Width x Height) | Best For |
|---|---|---|
| Front Windshield Top | 30"-40" x 3"-5" | Custom Text, Club Names, Brand Banners |
| Rear Window (Full) | 24"-36" x 8"-15" | Large Graphics, Business Info, Memorials |
| Small Side Window | 4"-10" x 4"-10" | Small Logos, Character Decals, Symbols |
| Truck Tailgate | 18"-30" x 4"-8" | Business Names, Custom Phrases, Logos |
| Jeep Hood Sides | 15"-25" x 2"-4" | Custom Model Names, Military Text |
These are just guidelines, of course, but they reflect what we've seen work best over thousands of orders.
By combining a smart, simple design with accurate measurements, you're setting yourself up for a perfect result. You'll be ready to create your own custom sticker and apply it with total confidence, knowing it's going to fit right and look exactly how you imagined.
How to Install Vinyl Decals for a Bubble-Free Finish
Putting on a vinyl decal might seem like a job for the pros, but with the right technique, it’s a surprisingly easy and satisfying project you can do yourself. The secret to that perfect, bubble-free finish isn't luck—it's all about a clean surface and a methodical approach.
We’ll walk you through the entire installation, from prepping the surface to that final, satisfying peel of the transfer tape. Follow these steps, and your vinyl custom decals will look like they were painted on, even if it’s your first time.
Step 1: Prepare Your Surface
This is the most critical step. A dirty, waxy, or oily surface is the number one reason decals fail to stick. Think of it like painting a wall—you wouldn't paint over dirt and expect it to hold, and vinyl is no different.
First, give the target area a thorough cleaning. For most surfaces like glass or factory paint, a simple 50/50 mix of isopropyl alcohol (rubbing alcohol) and water is perfect. Stay away from Windex or other ammonia-based cleaners; they leave behind residue that fights the decal’s adhesive.
A clean surface is non-negotiable. Even a tiny speck of dust, wax, or oil can create an air bubble or cause an edge to lift down the road. Taking five minutes to prep correctly can add years to your decal's life.
After wiping it down, make sure the surface is completely dry. A microfiber towel is your best friend here because it won’t leave any lint behind. Run your hand over the area—it should feel squeaky clean.
Step 2: Position and Hinge Your Decal
With a clean surface, it's time to get your placement just right. Don't peel anything yet! This is all about positioning before you commit. We use a professional trick called the "hinge method," and it’s a game-changer for perfect alignment.
- Temporary Placement: Carefully set the decal—with its backing paper and transfer tape still on—onto the surface. Grab a tape measure to make sure it's perfectly centered and level.
- Create the Hinge: Once you love the spot, run a strip of painter's or masking tape horizontally across the center of the decal. This tape acts as a hinge, locking your decal in that perfect position.
The hinge lets you apply one half of the decal at a time, giving you way more control and almost eliminating the risk of wrinkles or a crooked install. For big graphics, like a custom Jeep Wrangler hood decal, this method is absolutely essential.
Step 3: Apply the Decal
Your hinge is set, so you're ready for the main event. Pick a side, lift it up, and fold it back over the hinge. Now, carefully peel the waxy backing paper away from the clear transfer tape, stopping when you reach the hinge in the middle. The vinyl decal should stay put on the transfer tape.
Use scissors to cut away that loose piece of backing paper. Now, holding the edge of the transfer tape taut, slowly lay that half of the decal down onto the surface.
Using a squeegee (a credit card works in a pinch), apply firm, overlapping strokes starting from the center hinge and moving outward. This pushes all the trapped air out toward the edges. Once that first half is down, you can remove the hinge tape. Now just repeat the process for the other side: lift, peel, and squeegee from the center out.
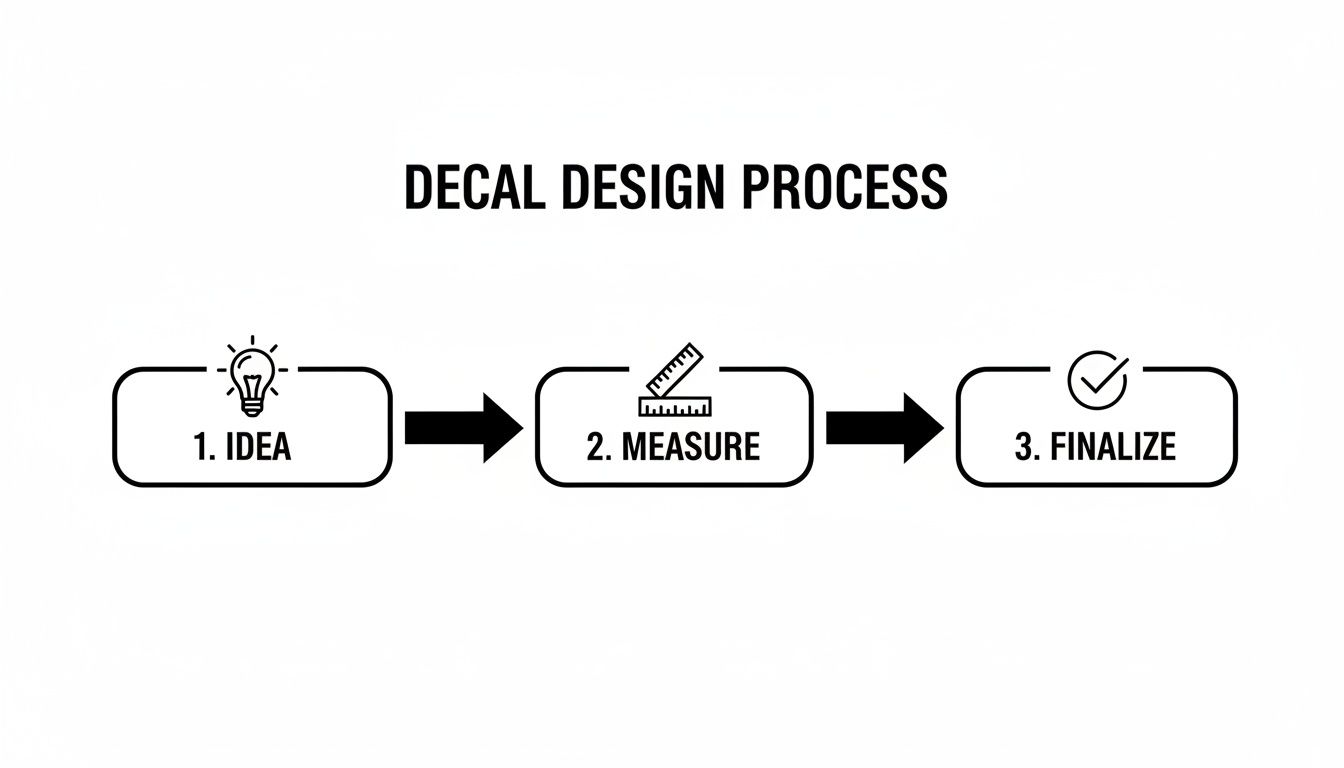
As you can see, a great installation starts long before you even touch the vehicle—it begins with a clear idea and precise measurements.
Step 4: Remove the Transfer Tape
This is the best part, but patience is key. Don't just rip the transfer tape off like a band-aid. Start at one corner and slowly peel it back at a sharp, 180-degree angle, pulling it back flat against itself.
Pulling at this low angle makes sure the vinyl decal stays stuck to the vehicle, not to the tape. If you see a small piece of the decal start to lift, don’t panic. Just lay the tape back down, press on that spot firmly with your finger or squeegee, and try peeling again.
Once the transfer tape is off, step back and admire your work! You're left with a perfectly applied, bubble-free decal. If you spot any tiny air bubbles, they will usually vanish on their own after a few hot days in the sun. For a stubborn one, you can prick it with a fine needle and gently press the air out with your finger.
Frequently Asked Questions About Vinyl Decals
Even after you’ve got a good idea of what goes into a great decal, it's completely normal to have a few last questions before pulling the trigger. It’s your ride, after all. You want to be sure you're getting something that doesn't just look awesome, but will actually hold up.
To help you get there, we’ve put together some straight answers to the most common questions we get about our vinyl custom decals. We’ll tackle the big ones: durability, paint safety, and what really separates a trustworthy shop from the rest.
How Long Do Vinyl Custom Decals Really Last on a Car?
The single biggest thing that determines a decal’s lifespan is the quality of the vinyl itself. A cheap, flimsy decal might look okay for a month or two, but it’ll start peeling, fading, and cracking after one tough summer. A professional-grade one can look brand new for years.
At Custom Sticker Shop, we only use high-performance Oracal vinyl, which is rated for up to 7 years of outdoor durability. This isn't just a random number—this material is engineered to fight off UV fading from the sun, stand up to road salt and rain, and handle brutal temperature swings without failing.
Of course, where you put it matters. A decal on a side window will almost always outlast one on a rear window that gets hit by a wiper blade every day. But with basic care—like not blasting the edges with a pressure washer—you can expect your decal to last for years, often as long as you own the vehicle.
Think of it this way: the vinyl quality is like the engine of your decal. A cheap, underpowered engine will break down quickly, but a well-built, premium one will run reliably for years under tough conditions.
Are Vinyl Decals Removable and Will They Damage My Paint?
Absolutely. One of the best things about a high-quality vinyl decal is that it’s designed to come off cleanly without damaging your vehicle's factory paint. The key phrase there is "high-quality."
When it's time for a change, the removal process is simple:
- Gently warm up the decal with a hairdryer or a heat gun on its lowest setting. This softens the adhesive and makes it much easier to peel.
- Slowly peel the decal off, starting from a corner. You want to pull it back at a low, sharp angle, almost flat against the surface.
- Clean up any residue left behind with a soft cloth and a bit of rubbing alcohol or a citrus-based adhesive remover.
The real danger comes from those cheap, no-name vinyls. Those materials get brittle over time, breaking into a million tiny pieces when you try to remove them, or they leave behind a stubborn, gluey mess that can seriously mess with your clear coat. By using premium Oracal vinyl, we make sure the adhesive is tough enough to last but formulated to release cleanly when you want it to.
What Makes a Good Choice for My Decals?
When you’re picking a decal provider, you’re not just buying a sticker—you're investing in quality and trusting them with your vehicle. There are a few things that set a reliable, expert shop apart from all the pop-up sellers.
As a veteran-friendly, family-run business, our reputation is built on a few core promises. First, everything we sell is made right here in the USA using only premium Oracal vinyl. We never, ever cut corners with cheaper, imported materials.
Second, we make installation as painless as possible. Every single one of our vinyl custom decals ships pre-spaced and covered with high-quality transfer tape. This takes all the guesswork out of lining up your design and ensures you get a clean, bubble-free look.
Finally, we believe in providing real value. We run an unlimited "Buy 2 Get 1 Free" deal across our entire site and give you free US shipping on any order over $25. With over a million decals delivered worldwide, we stand by our quality, our service, and our support for the community.
How Does the Ordering and Shipping Process Work?
We’ve worked hard to make the entire process as straightforward and secure as it gets. You can browse over 1,200 designs on our website or create your own custom text decal in just a few minutes.
Our checkout is 100% secure, and we accept all the major payment options, including PayPal, Venmo, Apple Pay, and every major credit card. You can place your order with total confidence, knowing your information is safe.
As soon as your order comes in, we get to work. We produce and ship every decal from our own shop right here in Topeka, Kansas. We package everything securely to prevent damage and ship with trusted carriers like USPS and UPS. Most customers in the US get their order within 5 to 8 business days, ready to go right on their ride.
Ready to find the perfect decal for your ride? At Custom Sticker Shop, we combine American-made quality with unbeatable value. Browse our massive collection or design your own today!