
Your Yamaha outboard is a beast—a symbol of raw power and unmatched reliability on the water. But let's be honest, its factory decals just can't keep up. After a few seasons of battling relentless sun and corrosive saltwater, those graphics start to fade, crack, and peel. It’s a real letdown, making an otherwise solid motor look tired and neglected.
Swapping out those worn-out graphics for a fresh set of high-quality outboard motor decals Yamaha kits isn't just about looks. It’s about restoring your engine's identity and protecting the value of your investment.
Why High-Quality Yamaha Decals Matter
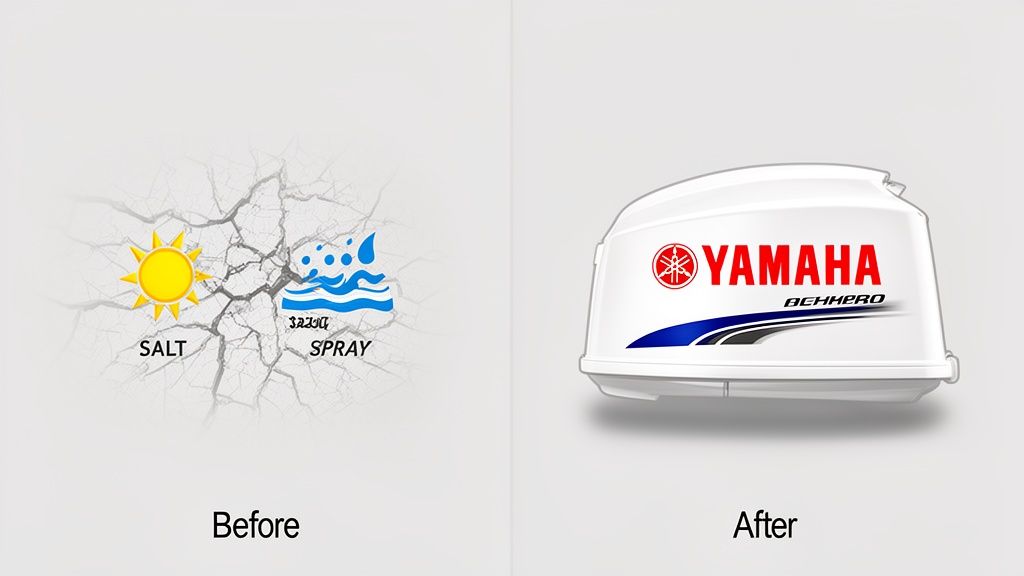
Think of your Yamaha's cowling as its face. When the decals are shot, it sends the wrong message. A potential buyer sees peeling graphics and immediately wonders what else has been neglected, even if the engine runs perfectly. That visual wear-and-tear can seriously hurt your boat's curb appeal and tank its resale value.
Yamaha is a giant in the outboard motor world, a market that’s expected to climb to USD 12.48 billion by 2031. With millions of these engines out there, keeping them looking sharp is a top priority for proud owners. Unfortunately, we see factory decals on boats in saltwater environments start to fail in as little as two to three years. This creates a huge need for aftermarket decals that are built to last.
The Aftermarket Advantage
This is where premium aftermarket decal kits really prove their worth. Unlike the standard stickers that come from the factory, these kits are engineered from the ground up to survive the harsh marine environment. They’re made from tougher, more resilient materials that stand up to the abuse we put our boats through.
Upgrading to a quality kit gives you a few major wins:
- Superior Durability: Our decals are made from professional-grade Oracal vinyl, rated for up to 7 years of outdoor use. They’ll take all the UV rays and saltwater you can throw at them without giving up.
- Enhanced Appearance: A new set of decals is like a facelift for your motor. It instantly brings back that crisp, factory-fresh look and makes the whole engine look brand new again.
- Increased Value: You’d be surprised how much of a difference it makes. A small investment in new graphics can easily add hundreds—or even thousands—of dollars back to your boat's resale price by showing buyers a well-maintained engine.
Factory Decals vs Premium Oracal Vinyl A Quick Comparison
See at a glance why upgrading to a premium custom decal kit is a smart investment for any serious Yamaha owner.
| Feature | Standard Factory Decals | Premium Oracal Vinyl Decals |
|---|---|---|
| Material | Basic, mass-produced vinyl | Professional-grade cast Oracal vinyl |
| Outdoor Lifespan | 2-3 years, especially in saltwater | Up to 7 years, even in harsh conditions |
| UV & Salt Resistance | Prone to fading, cracking, and peeling | Excellent resistance to UV rays and saltwater |
| Adhesive | Standard adhesive, can lift at edges | High-tack adhesive for a secure, lasting bond |
| Appearance | Looks good when new, but degrades quickly | Maintains a vibrant, paint-like finish for years |
| Value | Detracts from resale value as it ages | Boosts resale value and curb appeal |
As you can see, the choice is pretty clear. Factory decals are designed to look good on the showroom floor, but premium vinyl is built for the real world.
The reality is that replacing your outboard motor decals is one of the most cost-effective ways to boost your boat's value and your pride of ownership. It’s an easy weekend project that delivers a professional-looking finish.
By choosing high-grade, American-made vinyl, you're not just slapping on a sticker. You're installing a tough, protective layer that ensures your Yamaha looks every bit as powerful as it performs. And if you want to dial in your boat’s whole look, think about how a custom pontoon boat decal can tie everything together.
Choosing the Right Decal Kit for Your Yamaha
Picking out the perfect outboard motor decals Yamaha kit isn't about guesswork. It’s about getting a few key details right from the start to make sure your new graphics fit perfectly and look like they just rolled off the factory floor. The first, and most important, piece of the puzzle is knowing your engine.
Start by finding the identification plate on your outboard. This little sticker holds all the secrets. You'll usually find it on the port (left) side of the transom mounting bracket.
How to Decode Your Motor's ID Plate
That ID plate is your cheat sheet. It spells out the model name, horsepower, and a string of letters that define its features. For instance, a model name like "F150TLR" tells you it's a 150HP, 4-stroke (F), with power trim/tilt (T) and remote control (R).
Jot down these key identifiers before you order:
- Model Name: The complete code, like
F90LBorZ200TXR. - Horsepower (HP): The big number on the cowling—150, 200, 250.
- Manufacturing Date: On engines made after 2005, you'll see a clear "MFG DATE" stamp with the month and year. For pre-2005 motors, the last letter of the model code is often the key to the year.
If your ID plate is long gone or unreadable, don't panic. Yamaha usually stamps the serial number directly onto a "freeze plug" on the engine block. Armed with that number, a quick search for Yamaha outboard parts online can help you nail down the exact model and year. It’s a handy trick, especially when you're bringing an older motor back to life.
The biggest mistake we see is boaters ordering decals based on horsepower alone. A 2004 Yamaha 150HP and a 2018 Yamaha 150HP have completely different cowling shapes and decal designs. You have to verify the exact year and model for a perfect fit.
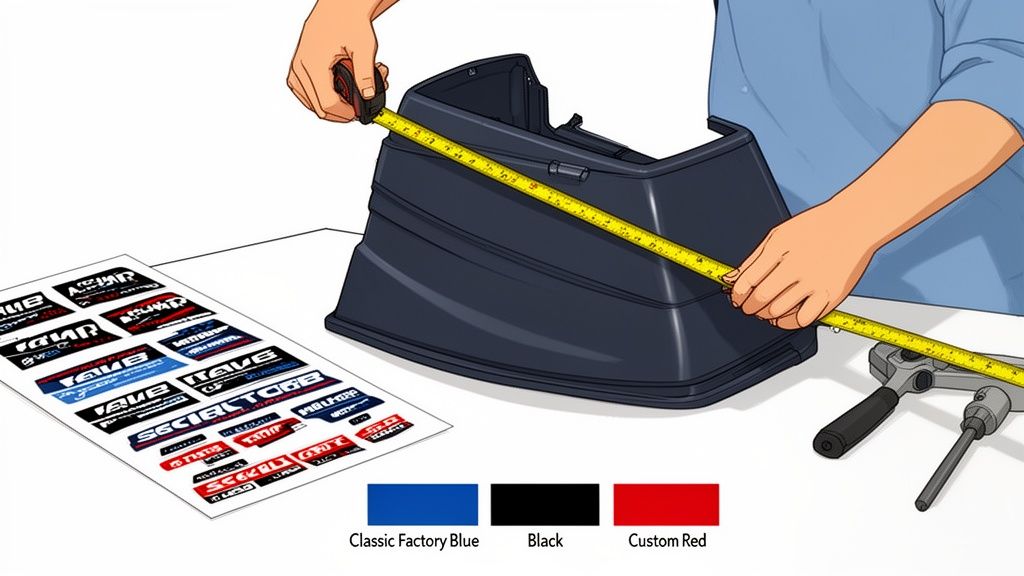
Measure Twice, Order Once
While the model year gets you 99% of the way there, a quick measurement is the final sanity check. Grab a tape measure and find the longest dimension of the main cowling area where the biggest decal will sit. Compare that number to the decal dimensions listed on our product pages.
This step takes less than a minute, but it can save you the headache of getting a kit that’s just a hair too big or too small for your motor.
Factory-Fresh or Custom-Cool?
Once the technical details are sorted, you get to the fun part: deciding on the look. You’ve basically got two paths you can take with your new Yamaha decals.
- OEM Replica: This is the classic choice for a clean restoration. If you love that original factory look, our replica kits are meticulously designed to match the OEM colors and dimensions for your specific model year. It’s the fastest way to make an old motor look brand new again.
- Custom Colors: Want to make a statement? You can match your decals to your boat's hull, trim, or even your tow rig. We offer a huge range of color options so you can dial in a unique look. If you want to get even more creative, you can explore options to make your own custom sticker for other parts of your boat or trailer.
Preparing Your Cowling for a Flawless Application
If you ask any professional installer what the secret to a perfect, bubble-free finish is, they won't talk about squeegee technique. They’ll tell you it’s all in the prep work. A perfectly clean surface is the only way to get a bond that lasts for years and makes your new outboard motor decals Yamaha kit look like it was painted on at the factory.
Rushing this part is the single biggest mistake we see, and it's the number one cause of lifting edges and ugly bubbles a few months down the road.
Before you can lay down your new graphics, you need a totally blank canvas. For most of us, that means getting rid of old, sun-baked decals that are cracked and peeling. It's a common fear, but you need to know how to safely remove existing decals without wrecking your cowling's paint job.
Safely Removing Old Decals
Patience is your best friend here. The entire goal is to soften the old vinyl and its adhesive without scorching the paint underneath. You only need a couple of basic tools to get started.
- A heat gun or a good hairdryer: Keep it on a low setting. You want to constantly move the heat over a section of the old decal, holding it about 4-6 inches away from the cowling. You'll literally see the vinyl get soft and start to lift at the edges.
- A plastic scraper or plastic razor blade: Never use metal. A metal blade will absolutely gouge your paint. A simple plastic tool gives you just enough leverage to get under the warm decal and peel it back without causing damage.
Work in small, manageable sections. Heat an area for just 20-30 seconds, then get a corner up with your plastic scraper and start peeling. If it feels like you're fighting it, just hit it with a little more heat. When you get the temperature just right, the decal will come off in big, satisfying pieces.
The All-Important Cleaning Phase
Once the old vinyl is gone, you're going to be left with a sticky, stubborn mess of old adhesive. This is where most people cut corners. A quick wipe-down isn't going to do it. You have to chemically strip away every last trace of that old glue, not to mention years of wax, grime, and oil.
For this critical step, you need a solid degreaser. Isopropyl alcohol (70% or higher) is cheap, easy to find, and works great. You could also grab a dedicated adhesive remover, but make sure you test it on a hidden spot first to be certain it won't react badly with your paint.
Soak a clean microfiber cloth with the alcohol and start scrubbing in small circles. You'll feel the adhesive break down and get gummy. Switch to a fresh part of the cloth to wipe the gunk away. Keep at it until the surface is completely smooth and makes that "squeaky clean" sound when you run a finger over it.
Here's a pro move: Right before you apply the new decal, give the entire area one final wipe-down with isopropyl alcohol. This zaps any last-minute dust or fingerprints, ensuring nothing gets between the new adhesive and the cowling. It’s the key to a perfect bond.
A Practical Guide to Installing Your Yamaha Decals
Alright, the hard part is over. You’ve done the prep work, and now you’ve got a perfectly clean, smooth cowling just waiting for its new graphics. It’s time to apply your outboard motor decals yamaha kit, and we’re going to do it the right way: with a wet application. This is the exact technique the pros use to get a perfect, bubble-free finish on big graphics.
Going with a wet install gives you a massive advantage. The water lets you slide the decal around to get the positioning just right, something that’s nearly impossible when the decal’s adhesive grabs the surface instantly. A little patience here goes a long way and pays off with a factory-fresh look that will last for years.
The Tools and The Technique
Before you even think about peeling off a decal, let's get your toolkit ready. You only need a few simple things to make this process go smoothly.
- Application Fluid: Grab a spray bottle, fill it with water, and add just a few drops of dish soap (Dawn works great). You're not making bubbles; you just want the water to be a little slippery.
- Masking Tape: This is your secret weapon for getting the alignment spot-on.
- A Felt-Tipped Squeegee: Don't use a hard plastic one—it can scratch your brand-new decal. A squeegee with a soft felt edge is what you need for this job.
- A Microfiber Towel: For cleaning up any extra water.
To nail the alignment, we’ll use the "hinge method." It's a total game-changer. Hold the decal up to the cowling and get it exactly where you want it. Once you're happy, take a long piece of masking tape and run it horizontally across the middle of the decal, sticking it firmly to the cowling on both sides. This tape acts like a hinge and locks in your vertical alignment.
Applying Your Yamaha Decal
Now for the main event. Pick one side of the decal and fold it back over the tape hinge. Carefully peel the backing paper away from the vinyl, stopping when you get to the tape. Go ahead and cut that loose piece of backing paper off.
Next, liberally spray both the sticky side of the decal and the cowling itself with your application fluid. Don't be shy here—the water is your safety net, preventing bubbles and giving you time to work.
Holding the edge of the decal taut, gently lay it down on the wet surface. Now, grab your felt-tipped squeegee. Start from the center hinge and push outwards, using firm, overlapping strokes to force the water out from underneath the decal.
This center-out technique is everything. It’s a systematic way to push all the water and any trapped air bubbles out to the edges, leaving behind a perfectly smooth decal. If you rush or just squeegee randomly, you’re going to trap bubbles.
Once that first half is done, you can remove the hinge tape. Fold back the other half of the decal, peel off the last bit of backing paper, and do it all again: spray everything down and squeegee from the center outward.
These decals are more than just some cosmetic flair; they’re a huge part of your motor’s identity. Getting it right can even bump up your boat's resale value by $500-$1,000. While Yamaha owners often need new decals after saltwater exposure fades them in as little as 18 months, other brands have shown just how powerful a sticker can be. Forum stories tell of how Mercury’s Pro XS line—which started as just "expensive stickers" on existing motors—saw the 225 Pro XS model jump to 90% of all their 225hp sales in six months, driven entirely by branding and perceived performance. You can get the full breakdown of Mercury vs. Yamaha branding and see how engine brands build their legacies.
This simple diagram shows just how critical that initial prep work is before you even think about applying a decal.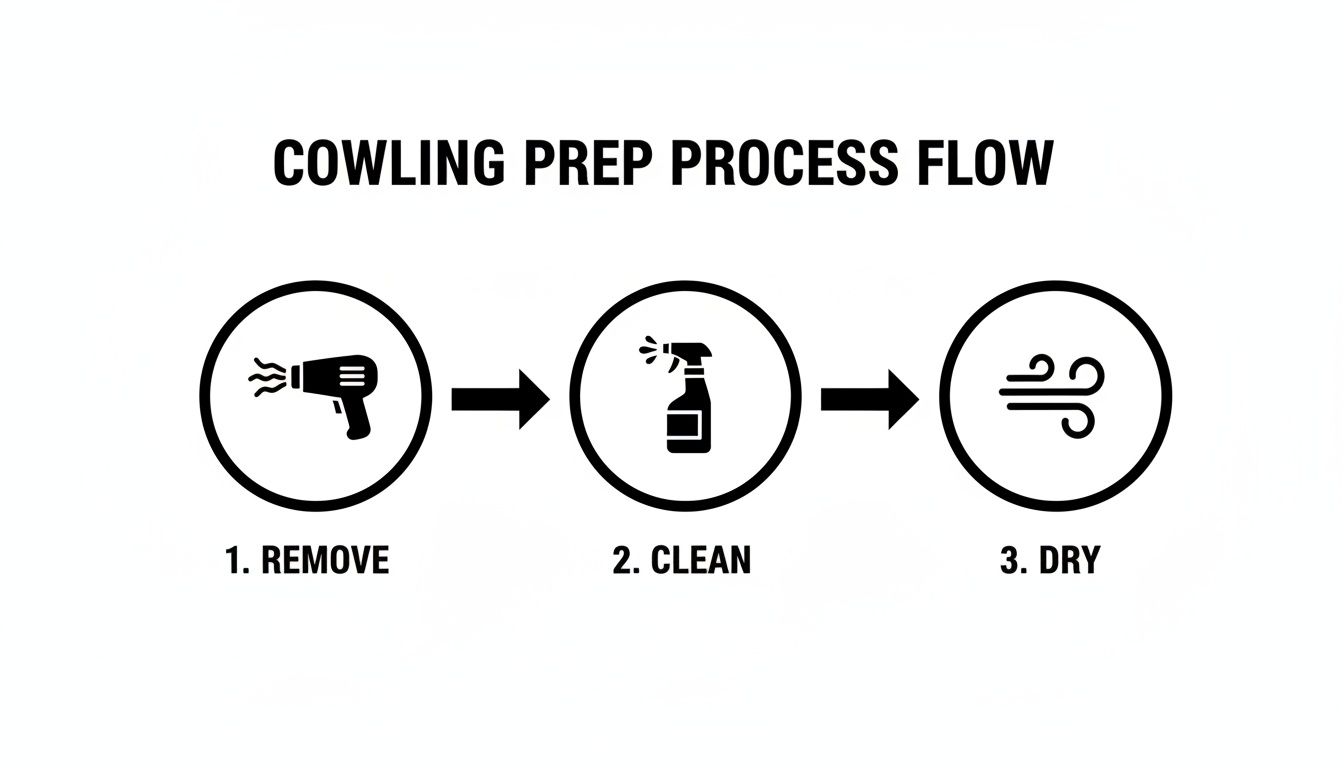
A great finish is built on these three steps: completely removing the old decals, cleaning the surface until it’s spotless, and making sure it's bone-dry.
The Final Step: Patience
Your decal is on and looks great, but you’re not done yet. The transfer tape is still on top. Do not peel it off right away. The decal’s adhesive needs time to bond with the cowling as the water underneath evaporates. Give it at least an hour, and maybe even longer if it's cool or humid outside.
When you're ready, start peeling the transfer tape back at a sharp 180-degree angle—pull it back flat against itself, not straight up. This sharp angle keeps the vinyl decal stuck to the cowling. If you see a corner of the decal start to lift up, just lay the tape back down, give it another firm press with your squeegee, and wait a bit longer. Take your time, and you'll be rewarded with a flawless, professional finish.
Protecting Your New Decals for the Long Haul
Alright, you've put in the work and your Yamaha cowling is looking factory-fresh. That feeling is tough to beat. Now, let's talk about how to keep those new outboard motor decals Yamaha graphics looking just as sharp for years of sun and spray.
Protecting your investment really just comes down to a few good habits. Your biggest opponents out on the water are harsh chemicals, high-pressure spray, and the relentless sun. Think of your decals like the clear coat on a car—they’re tough, but they need the right care to stay pristine and fight back against the marine environment.
Gentle Washing and Care Habits
How you wash your motor can make all the difference. Get too aggressive, and you can cause the edges of your new decals to lift or peel, undoing all that careful work you just did.
Here’s the right way to approach it:
- Back Off the Pressure Washer: Never, ever blast a pressure washer nozzle directly at the decal, especially around the edges. That high-pressure stream can easily get underneath the vinyl and rip it right off. Keep the nozzle a good 12-18 inches away and always use a fan spray, not a direct jet.
- Go with a Soft Touch: When you're washing, use a soft microfiber mitt and a good, pH-neutral boat soap. Avoid abrasive scrub brushes or rough sponges. They’ll put tiny scratches into the vinyl that will dull the finish over time.
- Rinse Clean: Once you're done soaping, give the motor a thorough rinse with fresh water. You want to get all that soap residue off, because if it's left to dry, it can actually attract more grime.
The best defense is a good offense. Don't wait until you see fading or peeling to start thinking about protection. A little care after each trip goes a long way in keeping your graphics looking vibrant.
The Power of UV and Wax Protection
There’s no escaping the sun, and its UV rays are the number one cause of faded, cracked, and brittle decals. The best way to fight back is to give your graphics a protective shield. This is probably the single most important thing you can do for their longevity.
Get yourself a quality marine wax or a dedicated UV protectant spray and apply it a couple of times a season. It creates an invisible barrier that not only makes water and grime slide right off but also blocks those harmful UV rays. It's literally sunscreen for your outboard.
While you're giving your boat some love, it's a great time to add other custom touches. A lot of our customers complete the look with something like a playful Nauti-Girl anchor decal on the transom or console.
Finally, just make it a habit to give your decals a quick once-over. After you wash the boat, run your eyes over them. Look for any edges that might be starting to lift. If you catch a tiny corner that’s peeling up, you can often just press it firmly back down before it becomes a real problem. Simple habits like these are what will keep your Yamaha looking its best, season after season.
Common Questions About Yamaha Outboard Decals
Even with a solid game plan, you're bound to run into a few specific questions when restoring your motor’s look. We get calls and emails about this stuff all the time, so we’ve put together the answers to the most common questions we hear from fellow boaters.
Getting these details right is the difference between a professional finish and a classic rookie mistake.
One of the first questions we always get is about taking a shortcut: can you just stick the new decals right over the old, cracked ones? We cannot stress this enough—do not do this. Applying a new sticker over a damaged surface is like putting a fresh coat of paint on a crumbling wall. It’s a recipe for failure.
The old, uneven graphics will create an ugly texture that shows right through the new decal. More importantly, the new adhesive won't get a clean grip on the cowling. This almost guarantees you'll be dealing with bubbles, lifted edges, and peeling graphics way sooner than you should. For a durable, factory-fresh look, you have to strip the old decals and every bit of their adhesive first.
Ideal Conditions And Curing Time
Another frequent question is about the perfect temperature for applying vinyl graphics. There's a definite sweet spot. You want to aim for an ambient temperature between 50°F and 90°F (10°C and 32°C). This is the magic window where the adhesive activates properly and the vinyl itself is pliable enough to work with.
What happens if you work outside that range?
- Too Cold: The adhesive gets stiff and just won't bond correctly to the cowling. It’ll seem like it's sticking, but the bond will be weak.
- Too Hot: The vinyl can stretch like a rubber band, throwing the whole design out of shape. Plus, your wet application fluid will evaporate almost instantly, robbing you of the time you need to slide the decal into its perfect spot.
A pro tip is to always work in a shaded, low-wind spot. This keeps the cowling's surface temperature stable and prevents dust and debris from ruining your hard work by getting stuck under the decal.
Patience after the installation is just as important as patience during it. It’s tempting to hit the water right away and show off your work, but you have to give that adhesive time to fully cure and create a permanent bond.
We recommend waiting at least 24-48 hours before launching your boat. This gives any last bit of moisture a chance to evaporate and allows the adhesive to reach its maximum strength. If you’re working in a cooler or more humid climate, playing it safe and extending that curing time to 72 hours is a smart move.
OEM Quality And Aftermarket Value
Finally, a lot of boaters ask if our decal kits are original equipment manufacturer (OEM) or aftermarket replicas. Our kits are high-quality aftermarket replicas, and we've spent years meticulously designing them to match the original factory specs in every way—size, color, and font.
We make them right here in the USA using professional-grade Oracal vinyl, which is rated for up to 7 years of brutal outdoor exposure. In our experience, this material often outlasts the standard OEM decals, giving you a restoration that’s built to withstand the sun, salt, and abuse of the marine environment for years to come.
Ready to give your Yamaha outboard the facelift it deserves? At Custom Sticker Shop, we offer premium, American-made decal kits that are built to last. Browse our selection and find the perfect match for your motor today! https://customstickershop.us