
Dragon decals for cars are one of the most powerful ways to personalize your ride, turning a standard vehicle into something that truly shows off your style. You can find everything from subtle Japanese dragons symbolizing wisdom to aggressive tribal designs that scream raw power. There’s a style that will match your car’s personality—and your own.
Why Dragon Decals Are More Than Just Stickers
Adding a dragon to your car is about way more than just decoration; it's a form of self-expression. Dragons have captured our imagination for centuries, showing up in legends all over the world as symbols of strength, freedom, wisdom, and protection. When you put one of these mythical beasts on your car, you’re tapping into that ancient, powerful energy.
This isn't just a niche hobby, either. It’s a huge part of a booming industry. The global car decal market was valued at $2,589.4 million in 2021 and is on track to hit $3,345 million by the end of 2025. Mythical themes are a major driver of this growth, helping owners forge a real emotional connection with their vehicles.
Redefining Your Vehicle's Personality
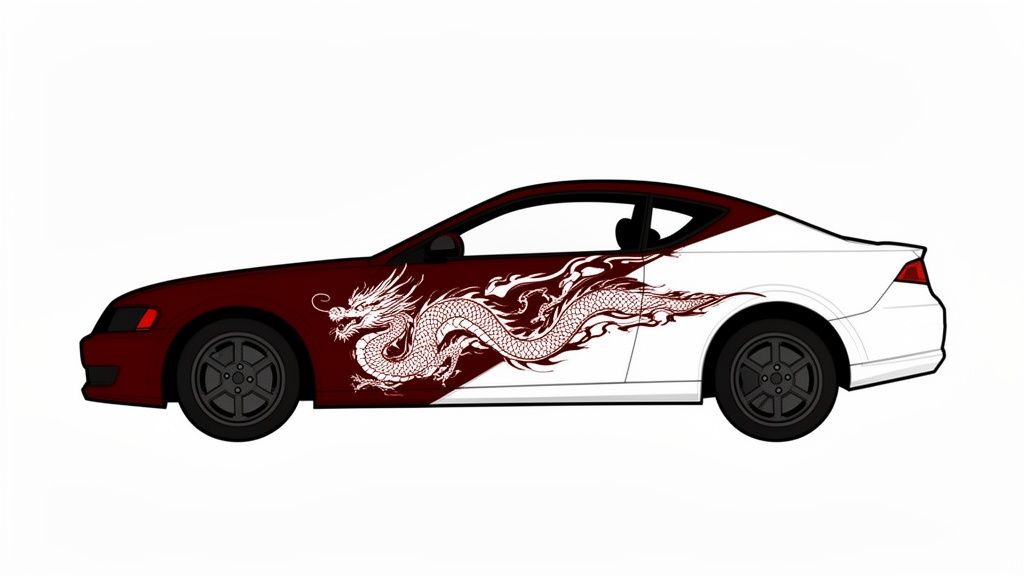
A well-chosen dragon decal can completely redefine the personality of any car, truck, or SUV. The right design doesn't just sit on the paint; it becomes part of the vehicle's character, flowing with its lines.
- For the Performance Tuner: Think about an elegant, flowing Japanese-style dragon. It can perfectly accentuate the sleek, aerodynamic lines of a sports coupe or a JDM classic, suggesting agility and precision.
- For the Rugged Off-Roader: A bold, aggressive tribal dragon decal looks right at home on a lifted Jeep or a heavy-duty truck. It just screams raw power and untamed spirit.
- For the Daily Driver: Even a family sedan or a commuter car can get a touch of magic. A smaller, more playful design like a Toothless dragon peeking window decal is a great way to show off a fun side without going over the top.
A simple vinyl graphic can express so much individuality and passion, turning a standard vehicle into a unique piece of rolling art. It’s your chance to tell a story without saying a word.
This guide will walk you through the entire process, from picking the perfect design to applying it like a pro. By the end, you'll see how to join a growing community of enthusiasts who use dragon decals for cars to make their rides truly their own. The goal is to move beyond just a sticker and create something that really reflects who you are.
How to Choose the Perfect Dragon Decal
Picking the right dragon decal for your car is where the real fun begins. This is your chance to give your vehicle a personality—a look that’s all yours. But with so many styles, it's easy to get lost. Let's walk through how to choose the perfect beast for your ride.
First, think about the story you want your car to tell. A dragon isn't just a cool graphic; it's a powerful symbol, and different styles carry entirely different meanings. Choosing the right one instantly sets the tone for your vehicle.
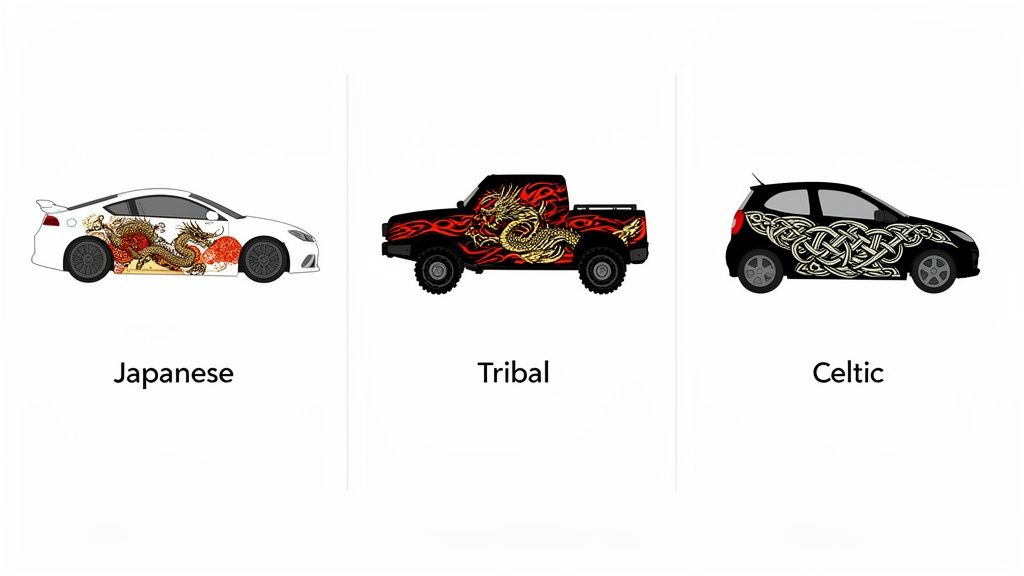
A sleek, winding Asian dragon, for example, often represents wisdom, good fortune, and power. It’s a timeless choice that looks incredible on modern, flowing car bodies. On the flip side, a sharp, aggressive tribal dragon screams raw strength and primal energy—a natural fit for a rugged truck or a mean-looking muscle car.
Matching Style to Vehicle and Vibe
The best dragon decals for cars work with a vehicle's lines, not against them. A sprawling, intricate design might look incredible stretched down the side of a van, but it will just look cramped and busy on a small coupe’s fender.
Here’s a quick rundown of popular styles to help you narrow it down.
Thinking about which style fits your car's personality can make the decision a lot easier. We put together this table to help you match a dragon's aesthetic to your specific vehicle type and where you might want to place it.
Comparing Dragon Decal Styles and Best Vehicle Fits
| Dragon Style | Aesthetic & Symbolism | Best For Vehicle Types | Popular Placements |
|---|---|---|---|
| Japanese/Chinese | Wisdom, good fortune, power, motion | Sports cars, JDM tuners, luxury sedans | Side panels, doors, rear quarter panels |
| Tribal | Power, aggression, primal energy | Trucks, Jeeps, off-road vehicles, muscle cars | Doors, hood, rear window |
| Celtic | Heritage, eternity, interconnectedness | Classic cars, European models, wagons | Rear window, fender, quarter panel |
| Fantasy/Western | Dominance, raw power, rebellion | High-performance cars, powerful trucks | Hood, tailgate, large side panels |
This table is a great starting point, but don't be afraid to break the rules. The most important thing is that you love the final look.
Pro Tip: Don't just pick a design you like; visualize it on your specific vehicle. A massive fantasy dragon that looks epic on a Ford F-150 might completely overwhelm a Honda Civic. Context is everything.
Getting Technical With Vinyl and Finish
Once you've settled on a style, it’s time to talk materials. The quality of your vinyl is the single biggest factor in how good your decal looks and, more importantly, how long it will last.
The industry gold standard for automotive graphics is professional-grade cast vinyl, like Oracal 651 or 751. These aren't your average craft-store stickers. Oracal 651, for instance, is rated for up to 6-7 years of outdoor durability. It’s engineered to take a beating from the sun, rain, and snow without cracking, fading, or peeling off.
The finish you choose also makes a huge difference.
- Gloss: This is your classic, shiny finish. It’s a great choice if you want the decal to blend in with your car's factory paint job for a clean, almost painted-on look.
- Matte: A matte finish absorbs light, creating a modern, "stealth" effect with zero glare. It’s perfect for creating contrast—a matte black dragon on a gloss black car looks incredibly high-end.
- Metallic: If you want your decal to pop, go with metallic. It has a fine flake that sparkles in the sun, adding depth and dimension that looks like a custom paint job.
Think about the effect you want. A gloss red dragon on a white truck gives you that sharp, head-turning contrast. But a matte black dragon on that same truck offers a more subtle, custom-painted vibe.
Sizing Your Dragon Perfectly
The last piece of the puzzle is getting the size just right. This is where a lot of people go wrong, either choosing a decal that’s too big and looks awkward or one that’s too small and gets lost.
The solution is simple: measure, measure, measure.
Grab a tape measure and figure out the absolute maximum space you have in your chosen spot—whether it's the hood, side door, or rear window. Then, use painter's tape to mark a rough outline of the decal's dimensions directly on your car.
This simple trick lets you step back and see how the size really looks from different angles. It’s the best way to make sure the decal fits the panel perfectly without looking stuffed in or too tiny to make an impact.
If you want to dive deeper into sizing and design, check out our guide on how to make your own custom car decals for more ideas on creating the perfect look from scratch.
Planning Your Decal Placement for Maximum Impact
You've picked the perfect dragon design, but where you stick it is just as important as the art itself. The right spot can make a decal look like a custom, integrated part of your car, while the wrong one can just look… stuck on.
Before you even think about peeling off that backing paper, let’s get strategic. Think of your vehicle's body panels as a canvas. A great placement works with the car's natural lines and curves, creating a sense of motion that makes your ride look more dynamic, even when it's standing still.
Mocking Up Your Design with Painter's Tape
If you remember only one thing from this guide, make it this: never commit without a mockup. Seriously. This is the pro tip that separates a perfect install from a regrettable one.
Grab a roll of blue painter’s tape—the low-tack kind. With the backing paper still on, gently tape your decal right onto the spot you're considering. Use just a few small pieces to hold it in place.
Now, step way back. Walk across the street. Look at it from a low angle, then a high one. Does it flow? Is it balanced? This simple test takes five minutes but can save you from the permanent headache of a crooked or awkwardly placed decal.
The goal is to make the decal look like it belongs there. Painter's tape lets you experiment with different angles and positions until you find that one spot that just clicks with your car's design.
Finding High-Impact Placement Locations
Some spots on a vehicle just naturally draw the eye and provide a killer canvas for dragon decals for cars. Let's talk about the most popular and effective places to make a statement.
Popular Decal Locations:
- The Hood: A classic for a reason. A dragon on the hood makes a bold, aggressive statement right up front. It's the first thing people see, instantly setting a powerful tone.
- Side Panels and Doors: This is where you can tell a story. A long, flowing dragon stretching from the front fender all the way to the rear quarter panel creates an incredible sense of movement. It makes the car look faster even at a red light.
- Rear Window: Perfect for intricate or symmetrical designs. A dragon guarding your six on the rear glass is both intimidating and visually striking. Just be sure to double-check local laws about rear window obstruction first.
Creative Ideas to Get You Started
Don't just think about slapping the decal on a panel. The real magic happens when you make it interact with the car’s features.
For instance, have the dragon’s head peek out from behind a wheel well, like it's emerging from the car itself. Or, position a winding design so its tail appears to wrap around the edge of a spoiler or fender. These little creative touches add a layer of personality that a simple, flat application just can't match.
If you’re thinking about a larger piece and need inspiration for scale and flow, check out how big graphics like these body-side mountain graphics cover a vehicle.
Safety and Legal Considerations
Your awesome new look still has to be safe and legal. Before you lock in that final placement, run through this quick checklist.
Safety Checklist:
- Driver Visibility: Make sure the decal doesn't block your view out of any window—front, side, or rear. Your sightlines are non-negotiable.
- Sensor and Camera Blockage: Modern cars are loaded with sensors. Parking sensors, blind-spot monitors, and backup cameras are often hidden in bumpers, grilles, and mirrors. Slapping vinyl over them will cause them to malfunction.
- Lights and Reflectors: Never, ever cover headlights, taillights, turn signals, or those legally required side reflectors.
Taking a moment for these practical checks ensures your new dragon decal is a source of pride, not problems.
A Flawless Application without Bubbles
You’ve done the planning and measuring. Now it’s time to get that dragon onto your car. This is where the rubber meets the road, and I’m going to walk you through the wet application method. This is the secret to a professional, bubble-free finish, even if you’ve never touched a decal before.
It’s the same technique the pros use, but what’s great is how forgiving it is for first-timers. The idea is to use a special fluid that lets you slide the decal into the perfect spot before it sticks for good. Forget the anxiety of a one-shot dry install; this is how you get it right.
Surface Prep: Don't Skip This Step
Before you do anything else, you have to get the surface perfectly clean. I can't stress this enough. A single speck of dust, wax, or oil will ruin the adhesion and lead to bubbles or peeling down the road. You can’t cut corners here.
Your best friend for this job is isopropyl alcohol (rubbing alcohol), ideally a 70% solution or higher. Don't grab window cleaner—many have ammonia or other chemicals that leave a film behind. Just wet a clean microfiber cloth with alcohol and wipe down the entire area where your decal is going.
Do it twice. The first pass gets the obvious grime, and the second pass nabs any stubborn contaminants. Let it air dry completely, which usually only takes a minute or two.
Mixing Your Application Fluid
Next up is your application fluid. This simple mix is what lets the decal "float" on the surface, giving you time to position it perfectly without the adhesive grabbing instantly.
Here's the recipe—it's incredibly simple:
- Grab a clean spray bottle.
- Fill it with plain tap water.
- Add just two or three drops of mild dish soap (like original blue Dawn) for every 16 ounces of water.
That’s it. Don’t get carried away with the soap; too much will mess with the decal's adhesive and prevent it from sticking properly. Give the bottle a gentle shake to mix it. You should barely see any suds.
This simple soap-and-water mix is your most important tool for a bubble-free installation. It breaks the water's surface tension, letting you squeegee out every last drop from under the decal for a perfectly smooth finish.
Applying and Positioning Your Dragon Decal
With a clean car and your fluid ready, it's time for the main event. Start by laying your decal face down on a clean, flat surface. Carefully peel the paper backing away from the transfer tape, exposing the sticky side of the vinyl.
Try not to let the sticky side touch anything or fold back on itself. If you're working with a big decal, an extra pair of hands makes this part a whole lot easier.
Once the backing is off, generously spray both the decal’s adhesive side and the spot on your car with your application fluid. Don't be shy; you want both surfaces good and wet. This ensures you have plenty of time to slide it around.
Now, carefully carry the wet decal over to your car and lay it on the prepped surface. Thanks to the fluid, it won't stick right away. You can gently slide it around, adjust the angle, and nudge it into the exact position you marked out with your painter's tape.
This flowchart breaks down the critical pre-application planning, reminding you to mock up the placement, check all angles, and ensure safety before you even start.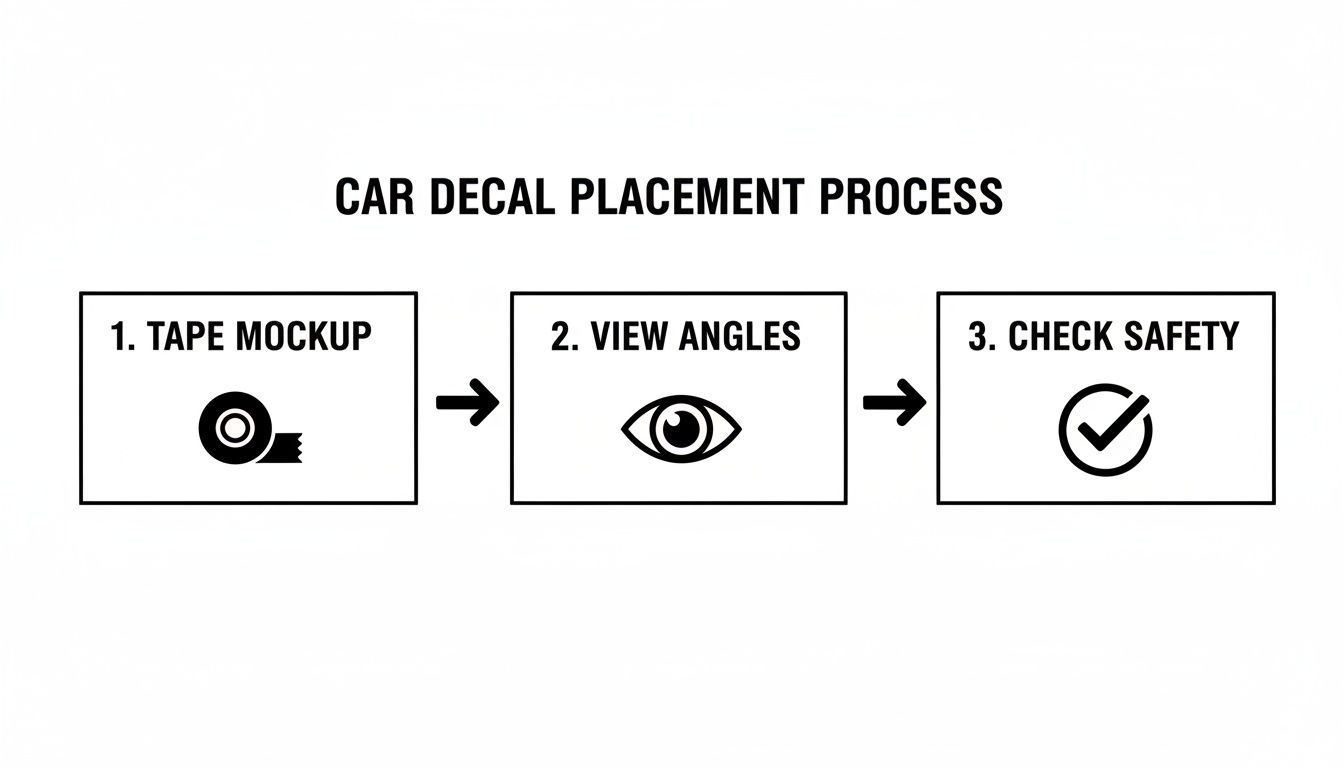
These three steps—mockup, viewing, and safety checks—are the foundation for an installation that looks intentional and professional.
Squeegee Technique for a Perfect Finish
Once you're happy with the placement, it's time to lock it in. The squeegee pushes the water and air out from beneath the vinyl, allowing the adhesive to finally make contact with the paint. Your technique here is everything.
Using a felt-tipped squeegee to avoid scratches, start right in the center of the decal. Apply firm, even pressure and push outwards toward the nearest edge. I always tell people to think of it like a sunburst pattern—always from the center out.
Squeegee Best Practices:
- Start in the Middle: Every stroke should begin in the center of the decal.
- Overlap Your Strokes: Overlap each pass by about 50%. This ensures you don't leave any trapped water behind.
- Work Outwards: Always push the fluid and air bubbles toward the closest edge. Never squeegee from an edge inward.
- Be Thorough: Go over the whole decal a few times, getting a little firmer with the pressure on each pass.
Pay close attention to the intricate parts of your dragon decals for cars, like the tips of wings or claws. Give them an extra press to make sure they're fully seated.
The Hardest Part: Patience
After you've squeegeed everything, you have to wait. This is often the toughest step for people, but it is absolutely critical. You need to give the adhesive time to grab the surface as the last bit of moisture evaporates.
How long you wait really depends on the weather.
- On a hot, sunny day: You might only need 30-60 minutes.
- On a cool, overcast day: Be prepared to wait several hours.
To see if it’s ready, gently lift one tiny corner of the transfer tape. If the vinyl decal stays flat on the car, you're good to go. If it tries to lift up with the tape, lay it back down, give that spot another press with the squeegee, and give it more time.
When it's ready, peel the transfer tape off slowly. Pull it back on itself at a sharp 180-degree angle—don't pull it straight up and away from the car. That sharp angle is key to keeping the vinyl stuck to the vehicle. If a small piece of the decal does lift, just lay the tape back down, press on it firmly with your finger, and try peeling again.
Once the tape is off, your dragon is officially installed. Try to avoid washing the car or putting any stress on the decal for at least 48-72 hours. This gives the adhesive time to fully cure and create a permanent bond.
Troubleshooting Common Decal Issues
Okay, you’ve applied your decal, stepped back to admire your work, and… ugh. An air bubble. Or maybe an edge that’s lifting just a tiny bit. Don't panic. These little hiccups happen, even to seasoned installers, and nearly every issue has a surprisingly simple fix.
Before you even think about peeling it off and starting over, let’s walk through how to handle the most common problems. We’ll also cover how to properly care for your decal so your dragon looks fierce for years to come.
Dealing with Trapped Air Bubbles
You followed the instructions to a T, but a few small air bubbles are staring back at you. This is, without a doubt, the most common issue people run into. The good news? The fix is incredibly easy. Whatever you do, don't try to peel the decal back up; you’ll stretch the vinyl and make things much worse.
Instead, we’ll use the pin-and-heat trick.
- Find a very fine needle or the tip of a sharp hobby knife.
- Gently prick a tiny, almost invisible hole right on the edge of the bubble.
- Using your finger or the soft edge of your squeegee, gently push the trapped air out through that tiny hole. The vinyl will lay down perfectly flat.
If you’re dealing with a slightly larger or more stubborn bubble, a little heat helps. After you make the pinprick, give the area a quick blast with a hairdryer on its lowest setting. The warmth makes the vinyl more flexible, helping it settle down as you press the air out. The hole will be so small it’s virtually invisible once you're done.
Pro Tip: Never, ever use an open flame like a lighter. A hairdryer gives you gentle, even heat that won’t damage the vinyl or your vehicle’s paint.
Fixing Wrinkles and Lifts
Sometimes a small crease shows up as you squeegee, or an edge just doesn't seem to want to stick down perfectly. This usually happens if the surface wasn't 100% clean or if the transfer tape was yanked off a little too aggressively.
If an edge is lifting, the first move is to clean under it. Dip a cotton swab in 70% isopropyl alcohol and carefully wipe both the car’s surface and the sticky side of the vinyl. Let it air dry for a moment, then press the decal down with firm pressure for about 30 seconds.
For a wrinkle, heat is your best friend.
- Gently warm the wrinkled spot with a hairdryer.
- Once the vinyl softens, use your thumb to smooth the wrinkle out, starting from its base and working your way out.
- Go slow and use steady, even pressure. You’ll feel the vinyl relax and conform right back to the surface.
This technique works especially well for detailed dragon decals for cars, where fine points like claws, horns, or tail tips are more prone to lifting if not applied with care.
If Your Decal Won’t Stick At All
What if the entire decal is fighting you and refusing to adhere? This is a frustrating one, but it almost always comes down to two culprits: temperature or surface prep.
Vinyl adhesive is finicky and needs a specific temperature range to create a solid bond—ideally between 50°F and 90°F (10°C and 32°C). If it's too cold, the adhesive becomes rigid and won't stick. Too hot, and it gets gummy and weak. If temperature is the problem, you’ll have to move your car into a garage or wait for a better day.
If the temperature is right, the problem is almost guaranteed to be the surface. Any lingering wax, polish, ceramic coating, or even residue from a cleaning spray will create a barrier the adhesive can't penetrate. At this point, you'll need to remove the decal, give the area another thorough cleaning with isopropyl alcohol, and begin the application again from scratch.
Long-Term Care and Maintenance
Your job isn't quite done once the decal is on. A little bit of smart maintenance is all it takes to keep a high-quality vinyl dragon decal looking sharp for years of outdoor life.
Washing Your Decaled Car
- Wait: Don't even think about washing your car for at least 72 hours after application. The adhesive needs this time to fully cure and create a permanent bond.
- Hand Wash: Hand washing will always be the gentlest and safest option. Use a soft car wash mitt and your normal automotive soap.
- Pressure Washers: If you have to use a pressure washer, keep the nozzle at least 12-18 inches away from the decal. Most importantly, never aim the spray directly at the edges of the vinyl—a high-pressure blast can easily get underneath and cause it to peel right off.
- Automatic Washes: Touchless car washes are generally safe. Try to avoid the old-school car washes with aggressive spinning brushes, as they can catch on a decal's edge and cause it to lift over time.
Follow these simple troubleshooting and care tips, and your dragon decal will stay stuck, look great, and survive whatever the road throws at it.
Your Dragon Decal Questions, Answered
It's smart to have a few questions before you commit to a new look for your ride. We get it. Here are straightforward answers to the questions we hear most often about dragon decals, based on our years of experience helping customers get it right the first time.
Are Dragon Car Decals Permanent? How Hard Are They to Remove?
One of the best parts about using high-quality vinyl is that it’s built for the long haul but isn't a permanent change. A professionally made decal from premium vinyl, like the Oracal we use, can last up to seven years outdoors. It’s designed to handle sun, rain, and whatever else the road throws at it without a problem.
When you’re ready for a new design or decide to sell your car, removal is simple. Just gently warm the vinyl with a hairdryer. This softens the automotive-grade adhesive, letting you get a fingernail under an edge and peel it off slowly. Most of the time, it comes off in one clean piece.
If any sticky residue is left behind, a little isopropyl alcohol on a soft cloth or an automotive-safe adhesive remover will take it right off. The process is completely safe for your car's factory paint, making decals a totally stress-free way to customize your vehicle.
Will a Vinyl Decal Damage My Car's Paint or Window?
Nope. A premium vinyl decal won't do any harm to your vehicle's factory paint or glass. The adhesives we use are specifically engineered to be tough enough to last for years but gentle enough to be removed cleanly.
In fact, the vinyl often acts as a thin shield, protecting the paint underneath from light sun fading and minor surface scuffs. The only time you need to be careful is if your car has a cheap aftermarket paint job or was recently painted and hasn't had time to fully cure. For any standard factory finish, you can apply and remove dragon decals for cars with total confidence.
Can I Run My Car Through an Automatic Car Wash?
Yes, but with a little caution, especially right after installation. Once you apply the decal, you absolutely need to wait at least one week. This gives the adhesive time to fully cure and create a solid bond with the surface.
After that first week, you're good to go.
- Touchless Car Washes: These are your best bet. They use high-pressure water and soaps, so there are no abrasive brushes that could catch a decal’s edge.
- Brush Car Washes: They're generally safe, but over time, the big spinning brushes can snag a sharp edge and cause it to lift or peel. It's a small risk, but it's there.
- Hand Washing: This will always be the gentlest and safest method for your decal.
If you use a pressure washer, just be sure to aim the spray away from the edges of the decal. A little care goes a long way in making sure your dragon looks fierce for years to come.
What Should a Good Quality Dragon Decal Cost?
The price for a dragon decal can swing quite a bit depending on a few things: its size, how complex the design is, and—most importantly—the quality of the vinyl.
You can usually find smaller, simpler designs for a window or fender starting around $8 to $15. For the bigger, more intricate graphics that cover a whole hood or the side of a car, the price naturally goes up, often ranging from $30 to $100 or more.
When you're shopping, always put quality first. Look for decals made from brand-name vinyl like Oracal. Paying a little more upfront is a tiny price for a decal that lasts longer, has richer color, and is way easier to apply without any bubbles. Think of it as an investment in a look you'll love.
Ready to unleash your car's inner beast? At Custom Sticker Shop, we offer hundreds of American-made, premium vinyl dragon decals designed to last. With our Buy 2 Get 1 Free offer and free shipping on orders over $25, getting a head-turning look has never been easier. Find your perfect dragon and start your transformation at https://customstickershop.us.