
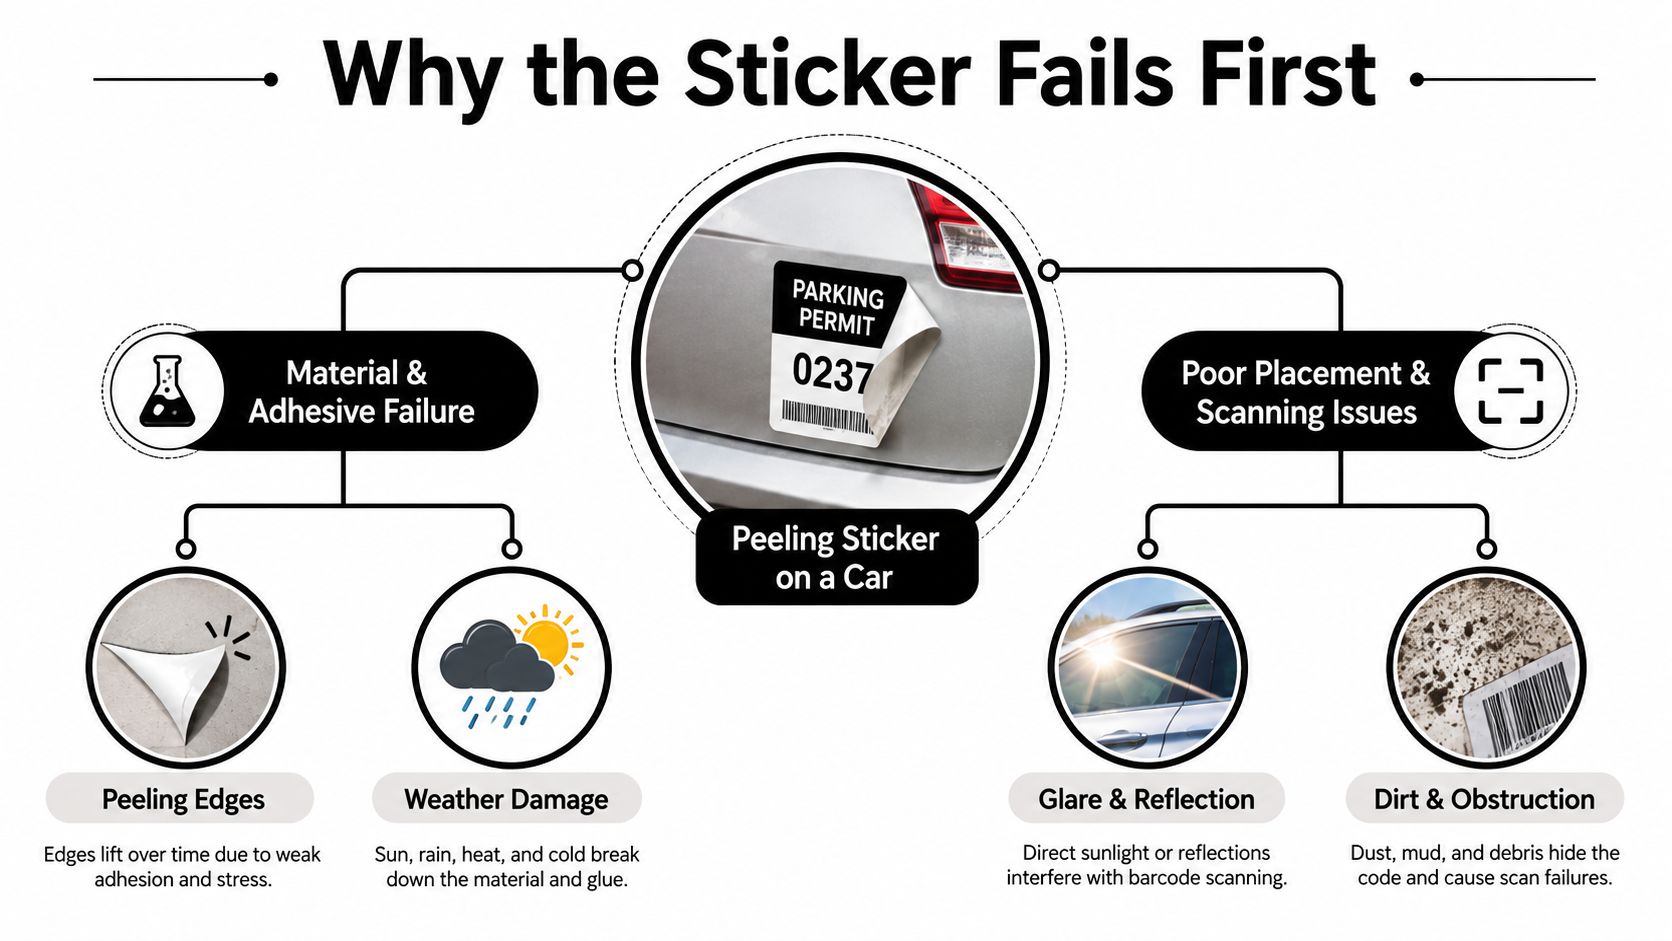
You order a custom QR code sticker for a vehicle, product, or event display expecting a simple scan-and-go solution. Then the vehicle sticker starts lifting at the edges, the product label wrinkles across a seam, or guests hold their phones close to the code and get nothing. The artwork looked right on screen, but the label wasn't built for its surface or viewing conditions.
Custom QR code stickers are a complete label system, not just a generated square. The QR symbol, print resolution, face stock, protective layer, adhesive, application surface, placement, lighting, and scan distance all affect performance. A code can remain visually intact while glare, dirt, edge lift, or adhesive failure makes it practically useless.
QR codes were invented in 1994 by Denso Wave, a Toyota-group company in Japan, to address a manufacturing problem involving barcodes that carried too little data and had to be scanned one at a time. Denso Wave released the specification openly, helping the format spread into packaging, signage, logistics, and retail (Denso Wave's history of QR codes). Today, QR codes connect physical surfaces to digital destinations at global scale. A 2026 industry report estimates that 44.6% of internet users aged 16 to 64 scan at least one QR code monthly, with about 11 billion scans each day worldwide and 2.2 billion active users (global QR code adoption reporting).
Why the Sticker Matters More Than the Code
A customer once asked for a QR sticker for a fleet vehicle and supplied a clean black-and-white file. The code scanned perfectly on a monitor, so the design seemed finished. Only after discussing the installation location did the important questions appear: Would it sit on a curved panel? Would people scan it from a nearby sidewalk or from another vehicle? Would the surface collect road film, fuel residue, or wash chemicals?
Those details change the specification. A sticker on a dry indoor counter has a forgiving job. A decal on a truck door has to tolerate movement, cleaning, changing temperatures, reflected light, and repeated handling. A label on packaging may cross folds, curves, and seams before anyone points a phone at it.
Practical rule: Choose the sticker construction from the surface and scanning conditions, not from the artwork alone.
A generic QR generator handles the symbol. It doesn't tell you whether the quiet zone survived the trim, whether the printed modules are sharp at final size, or whether the adhesive suits glass, painted metal, textured plastic, or a curved container. It also can't predict how a glossy finish will behave under direct sun or retail lighting.
The full system has several failure points:
- The code: The destination must work, load quickly, and remain appropriate for the audience.
- The print: Fine modules need crisp edges and enough resolution at the final size.
- The face stock: Vinyl, polyester, and polycarbonate behave differently under abrasion and bending.
- The protective layer: Lamination can protect the print, but it can also introduce glare if the finish is poorly matched.
- The adhesive: Edge lift often starts with an adhesive and surface mismatch, not with the QR artwork.
- The installation: Dust, moisture, wax, and cold surfaces reduce adhesion from the first day.
For hospitality teams, placement and guest intent deserve the same attention as materials. A practical resource on top hospitality QR practices is useful when the sticker leads to menus, check-in information, service requests, or guest feedback. By the end of the production process, you should know where the label will live, how people will approach it, what can damage it, and how you'll identify a failed scan before customers do.
Building the QR Code Behind the Sticker
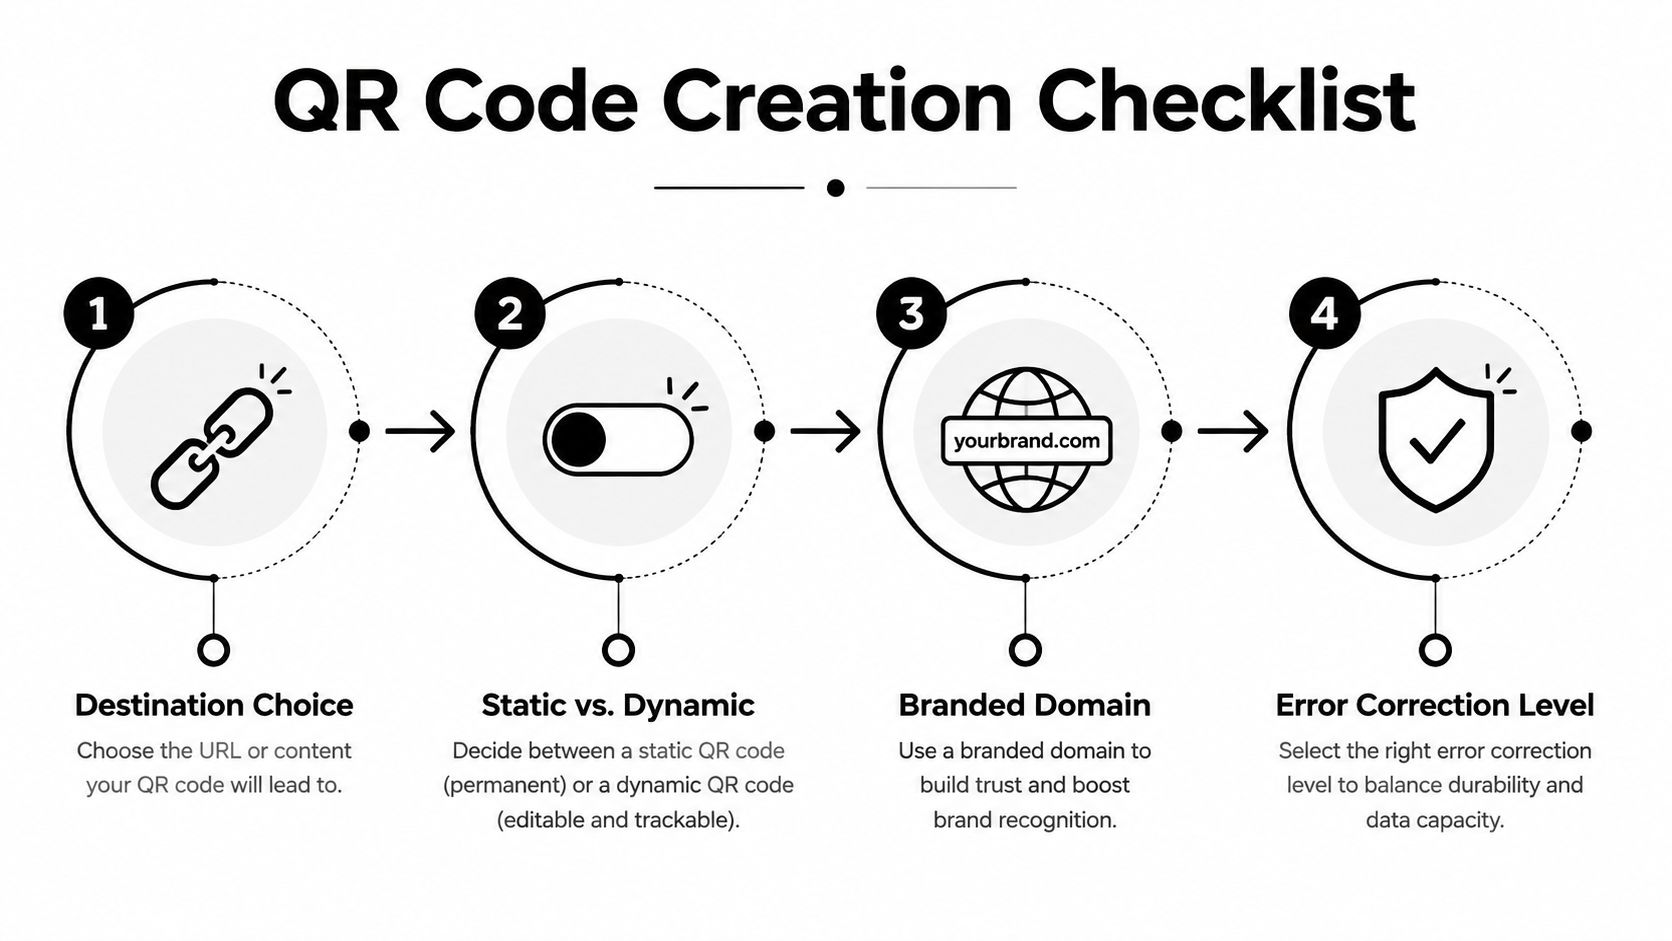
Start with the destination, not the graphic. Open the exact page on a phone and check that it works without requiring an awkward login, an unavailable app, or a desktop-only layout. A QR code can scan flawlessly and still disappoint users if the linked page is slow, confusing, or no longer relevant.
Choose the link structure first
A static QR code stores the destination directly in the symbol. It's straightforward, but changing the destination later usually means replacing the printed sticker. A dynamic QR code points through a redirect, allowing the destination and measurement settings to change without reprinting the physical label. That flexibility can matter for seasonal campaigns, product instructions, event schedules, or rotating promotions.
A short URL or branded domain usually produces a less crowded symbol than a long address filled with tracking parameters. Fewer encoded characters generally make the grid easier to reproduce cleanly, especially when the sticker has to remain compact. Keep campaign tracking on the redirect or landing-page setup rather than forcing an unnecessarily long address into the artwork.
Set error correction with the use case in mind
Error correction gives a QR code a way to remain readable when part of the symbol is damaged or obscured. More correction can help a sticker tolerate wear, but it can also create a denser pattern that demands better size and printing. For stickers expected to experience modest scuffing, 15 to 25 percent error correction is commonly treated as a practical middle ground. It isn't a substitute for contrast, adequate size, or a suitable material.
Before a designer places the code into the layout, run a basic reliability check:
- Open the destination on one phone.
- Scan the generated code with that phone.
- Scan it with a second phone or camera app.
- Turn off any assumption that the final environment will be as clean as a desk. Test the printed or accurately sized proof at the intended viewing distance.
That quick check catches broken redirects, mistyped URLs, and codes that were exported incorrectly. Save the final approved QR asset separately from the design file so nobody accidentally replaces it with a compressed screenshot during revisions.
Design Rules That Decide Whether It Scans
A QR sticker succeeds when the camera can isolate its pattern quickly. Give the code enough clear space, contrast, size, and edge definition, then test the whole label architecture around it. Decorative elements, copy, and background treatments all compete for the same visual attention.
Protect the quiet zone
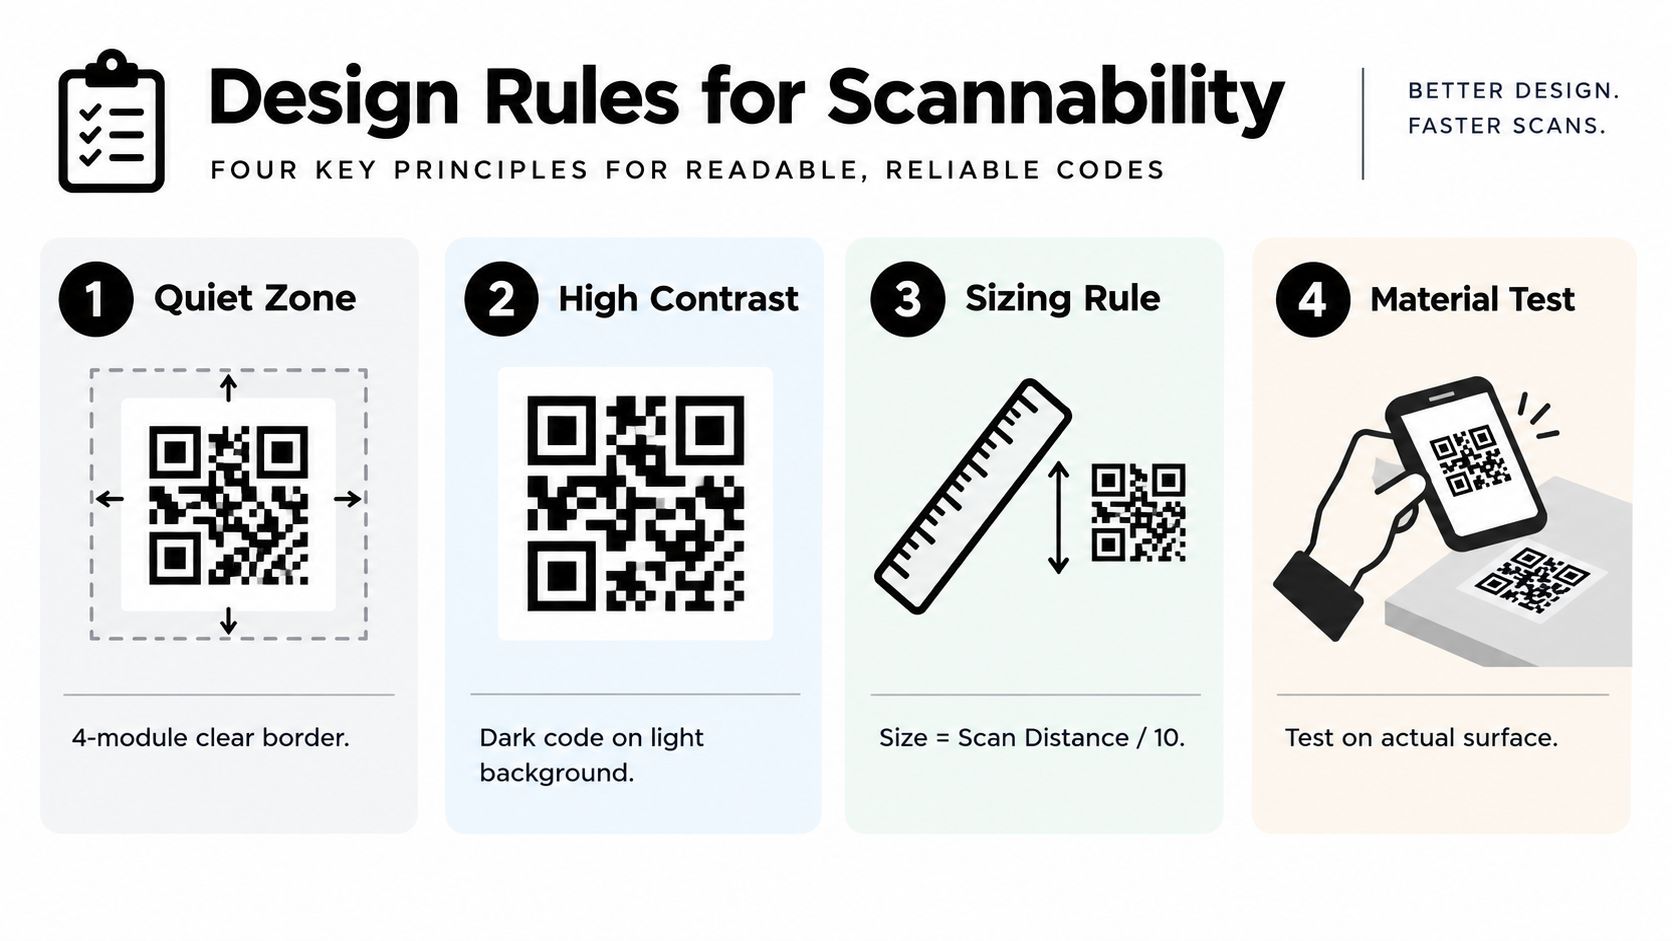
Leave a quiet zone of at least four modules on every side. A module is one small square in the QR grid, so the required border scales with the code. Keep text, trim lines, decorative frames, and background patterns outside that border. A tight crop may save space in a proof, yet it removes the separation that helps a camera locate the symbol.
Dark modules on a light background remain the dependable choice. For dark, colorful, textured, or busy surrounding artwork, place the QR code on a solid light backing plate. Extend the plate around the complete quiet zone, rather than stopping it at the central squares.
Size for the actual distance
A commonly used sizing rule is scan distance divided by 10. A code intended to scan from 50 centimeters should be about 5 centimeters wide (print sizing and quiet-zone guidance). Use that result as a starting point. Lighting, camera quality, surface angle, and user movement can all call for a larger symbol.
Codes below 2 centimeters by 2 centimeters can fail frequently in practical conditions. One print checklist reports failed attempts of 40 to 60% in indirect light for codes smaller than that, with failure rates above 70% at 1.5 centimeters by 1.5 centimeters in low light on a modern phone (QR print size and scan-failure guidance). Those figures are a warning against shrinking the code to make room for extra copy.
Keep branding subordinate
A centered logo can make the sticker feel branded, but it must remain modest. Preserve the finder squares and quiet zone, then test the finished design at its real printed size. If scanning becomes temperamental, remove the logo before adding more decoration.
Use 300 DPI or higher at final size to keep printed module edges crisp. Vector artwork is preferable when available. Check the design through a real phone camera, including at the expected viewing distance and angle, rather than relying on enlarged screen magnification.
A short visual demonstration can show why resizing or printing changes scan performance:
For artwork preparation, review the custom design sticker options and keep the QR isolated from decorative elements until its scan performance has been approved. Test the complete printed sample because the phone scans the finished surface, including any laminate finish.
Choosing Materials That Match the Surface
The right face material depends on what the sticker will encounter. Standard vinyl is a sensible choice for many indoor applications and ordinary vehicle decals, particularly when the surface is smooth and the exposure is moderate. A protective laminate can shield the printed face, but the laminate doesn't repair poor surface preparation or make a weak adhesive suitable for every substrate.
Use a recommendation ladder
For indoor labels and routine vehicle use, start with a quality vinyl construction and a finish appropriate to the lighting. Matte surfaces can reduce reflections around the code, while gloss may suit a design where shine is part of the appearance. Either way, test the complete printed sample, because the phone sees the finished surface, not the unlaminated artwork.
For premium outdoor use, consider vinyl with a protective layer and an adhesive selected for the actual substrate. The weak point may be an exposed edge, a coating that wears through, or a surface contaminated by wax and road grime. A sticker can look acceptable from a distance while the edges have already begun lifting.
For industrial, fuel-exposed, abrasive, or washdown environments, hard-laminated polyester or polycarbonate with an industrial adhesive may outperform a generic vinyl-only construction. Guidance on durable QR code asset tags is helpful when labels must identify equipment rather than serve as short-lived promotional graphics.
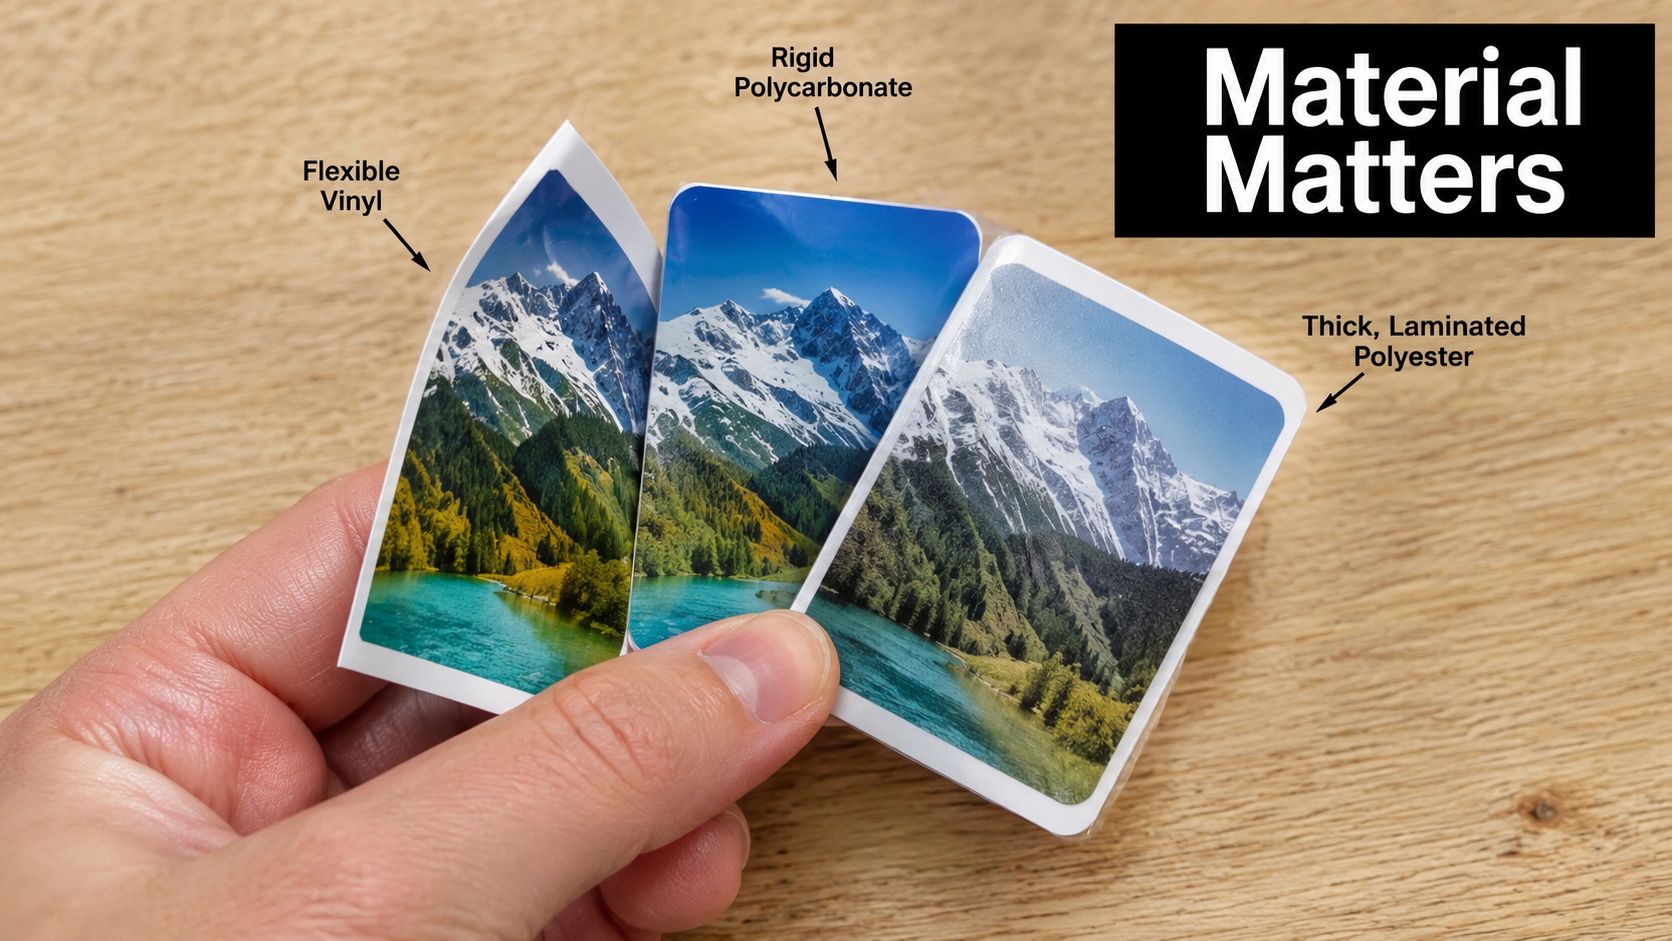
The key mindset shift is simple: the QR code has no independent lifespan. The label system includes the face stock, ink, laminate, adhesive, and application surface. If any one of those fails, the scan experience fails with it.
Curves deserve special caution. A code stretched around a tight radius may distort in the camera's view, while seams and textured surfaces can interrupt the grid. Even a bottle, tumbler, or equipment housing can become a poor QR location if the user can't hold a phone square to the code. For a curved consumer item, compare the construction with the intended surface before ordering, including options such as custom tumbler decal stickers.
Production Specs Your Print Shop Will Thank You For
A QR sticker can look perfect on screen and still fail at the press if the file leaves production decisions unclear. Supply the code at its final intended size, keep the modules sharp, and avoid enlarging a small raster image inside a larger layout. 300 DPI or higher at final size remains a practical target for crisp module edges, as outlined in QR print checklist guidance.
Prepare the artwork
Use a vector PDF, SVG, AI, or another vector-capable format for the QR whenever possible. Vector paths scale cleanly without fuzzy square edges. High-resolution PNG artwork can support surrounding graphics, but repeated compression, resizing, and screenshots can soften the code.
Give the cut path its own layer or file. For a custom contour, provide a clear dieline and keep the QR, quiet zone, text, and logos away from the trim. A rounded rectangle needs enough margin to prevent the cutter from crowding the quiet zone or clipping a background plate.
| Spec | Recommended Value | Why It Matters |
|---|---|---|
| Resolution | 300 DPI or higher at final size | Keeps module edges sharp in print |
| QR format | Vector PDF, SVG, or AI when available | Prevents scaling artifacts |
| Bleed | Typically 0.125 inches or 3 mm | Gives the cutter room beyond the finished edge |
| Safe zone | Keep text, logos, and the QR quiet zone away from trim | Reduces clipping and visual interference |
| Color mode | Confirm CMYK expectations with the printer | Helps the proof match the production process |
| Cut file | Separate dieline or cut path | Tells the shop where the sticker should be shaped |
| Finish | State matte, gloss, or laminate requirements | Controls glare and protects the printed face |
Your order notes should identify the substrate, finish, cut type, dimensions, and dieline requirements. Name the application surface too, whether it is glass, painted metal, plastic, packaging, or another material. The shop can then catch a construction mismatch before production rather than after labels have been applied.
Include the intended scan conditions in the brief. A code may pass a digital proof but struggle once gloss, dark color, tight sizing, or surrounding artwork reduces contrast. Ask for a proof showing final dimensions, then inspect it at actual size instead of relying only on a zoomed-in screen view.
If adhesive performance affects the job, this UK guide to adhesive labels helps distinguish label construction from simple printed decoration. Confirm the finish, cut tolerance, and application surface before approving the file. That short check prevents a technically correct QR from becoming a costly production rework.
Ordering With the Right Quantities and Timelines
A small test batch is often more valuable than a large first order. Use it to check the code on the actual surface, at the actual distance, under the lighting people will encounter. This can reveal glare, curvature, dirt exposure, or adhesive problems before those issues affect every label in the rollout.
Quantity affects more than the unit price. Volume breaks can change the economics, but a larger order also increases the cost of discovering a design mistake late. Include a few extra labels for application testing, replacement, and surfaces that prove harder to install than expected.
Before approving production, ask the print shop to confirm:
- Proofing: Will you receive a digital proof, physical proof, or both?
- Production timing: How long is required after artwork approval?
- Shipping: Which carrier and service will be used, and when does transit begin?
- Installation supplies: Are transfer tape, a squeegee, or cleaning materials included?
- Reorders: Can the approved artwork be reused without rebuilding the file?
Event dates deserve special care. Build time for proof review, corrections, production, transit, and an installation test. A shipping estimate isn't the same as a delivery guarantee, so request the shop's current schedule before you promise stickers to a client or launch a campaign.
For vehicle applications, you can compare the production approach with custom car decal options, particularly when the QR code must share space with vehicle graphics. The objective isn't merely to receive a package. It's to have an approved, scannable label in hand early enough to test and install it properly.
Installing, Testing, and Measuring Real-World Performance
Installation determines whether a well-built sticker gets a fair chance. Clean the surface thoroughly, remove wax and grease, let it dry completely, and apply at a suitable room temperature. A dusty panel or damp container can create edge lift before the adhesive has formed a proper bond.
For larger decals, a hinge method helps control placement. Hold the sticker in position, secure one side, then use a squeegee to press from the anchored edge outward. Apply firm, even pressure, pay attention to the perimeter, and seal vulnerable edges when the material and surface allow it. Keep water and harsh cleaning away until the adhesive has had time to settle according to the manufacturer's instructions.
Test the installed code with more than one phone. Scan from the distance people will use, approach at different angles, and repeat the test in the lighting where the sticker will live. Check a vehicle outdoors, a product label near its display lighting, or an event sign with the expected crowd and viewing path. A durable sticker placed behind glare, on a dirty surface, or where users can't stand squarely may still produce weak engagement.
Placement and intent can outweigh material quality. Industry guidance reports that high-intent event environments can reach roughly 15 to 35% engagement, while passive posters or print advertisements are often around 1 to 5%, and retail signage commonly falls around 3 to 8% (QR scan-rate benchmarks by context). Those figures are context benchmarks, not guarantees for a particular campaign. They reinforce the practical point that a sticker's location and call to action matter as much as its construction.
Track scans through a measurable destination, watch for drop-offs, and inspect labels during routine maintenance. Replace a sticker when scan reliability begins to decline, not after customers report failure. That turns custom QR code stickers from a one-time print purchase into a repeatable process of testing, measuring, and improving the physical experience.
Custom Sticker Shop can produce QR-code-specific decals alongside vinyl graphics for vehicles and other smooth surfaces, giving you an option to evaluate within the broader label system described here. Visit Custom Sticker Shop with your final QR artwork, intended surface, and installation conditions ready, and request a specification that matches how the sticker will be used.