
Custom Chevy decals are far more than just stickers. They are high-performance, precision-cut vinyl graphics made to completely transform the look of your truck, car, or SUV. They give you a durable and powerful way to put your own stamp on your vehicle, whether you're driving a brand-new truck or a classic muscle car.
Why Custom Chevy Decals Are More Than Just Stickers
Think of your Chevrolet as a blank canvas. Sure, it rolls off the factory line with its own style, but the personal touches are what really make it yours. This is where custom Chevy decals come into play—they’re the final brushstroke that defines your vehicle’s personality and makes it stand out from the crowd.
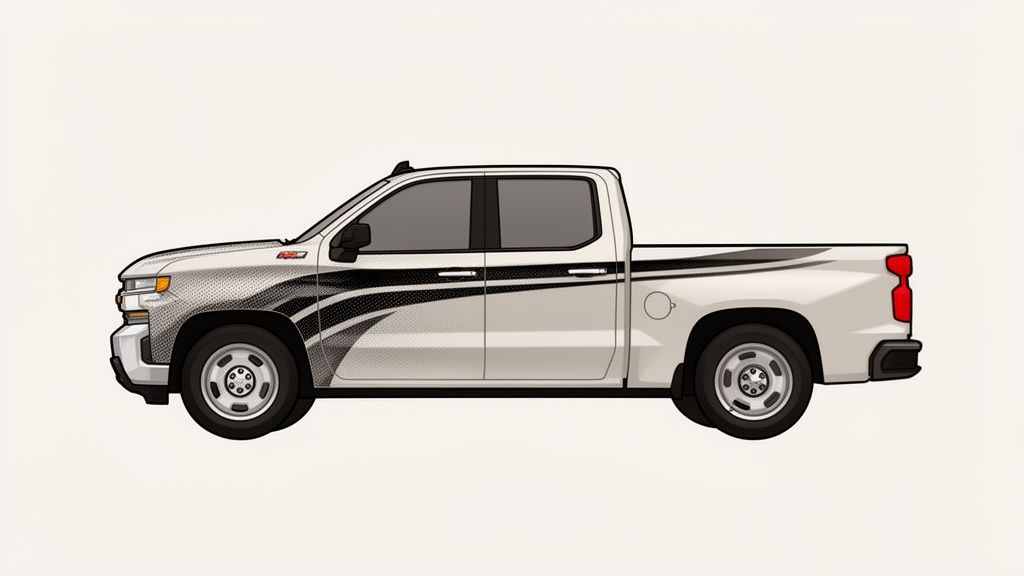
These aren't the cheap, paper-based stickers you had as a kid. Today’s automotive decals are tough, high-performance graphics cut from professional-grade vinyl. This material is made to stand up to brutal weather, harsh UV rays, and the abuse of daily driving, keeping your design looking sharp for years to come.
A Tradition of Personal Expression
The need to make a Chevy your own is baked right into car culture. From the first days of hot-rodding to the modern truck scene, owners have always found ways to make a statement. Custom graphics have become the go-to choice for a few key reasons:
- Accessibility: Decals deliver a major visual upgrade without the massive cost or permanent commitment of a custom paint job.
- Versatility: The design options are virtually unlimited. You can go for something subtle like a bowtie overlay or get a full-body graphic that turns heads everywhere you go.
- Identity: They're the perfect way to show off your pride, honor your military service, represent a hobby, or just add a bit of personal flair.
A well-chosen decal does more than just decorate a vehicle; it tells a story. It communicates something about who you are—your passions, your history, or your sense of humor—without you having to say a word.
This kind of personalization turns a mass-produced vehicle into a true one-of-a-kind. Whether you’re behind the wheel of a rugged Silverado, a sporty Camaro, or a family-hauling Tahoe, a decal connects you with a whole community of owners who are just as passionate about their Chevrolets as you are.
While custom Chevy decals are an awesome way to show your pride, they're just one piece of the puzzle. You can explore a whole world of custom Chevy accessories and products to truly make your mark. This guide will walk you through everything you need to know, from picking the right materials to getting a flawless installation.
Tracing the Legacy of the Chevy Bowtie
Before we even talk about custom decals, we have to talk about the symbol that started it all: the Chevy bowtie. It’s more than just a logo. For generations of owners, that bowtie has been a badge of honor and the starting point for making a truck or car truly their own.
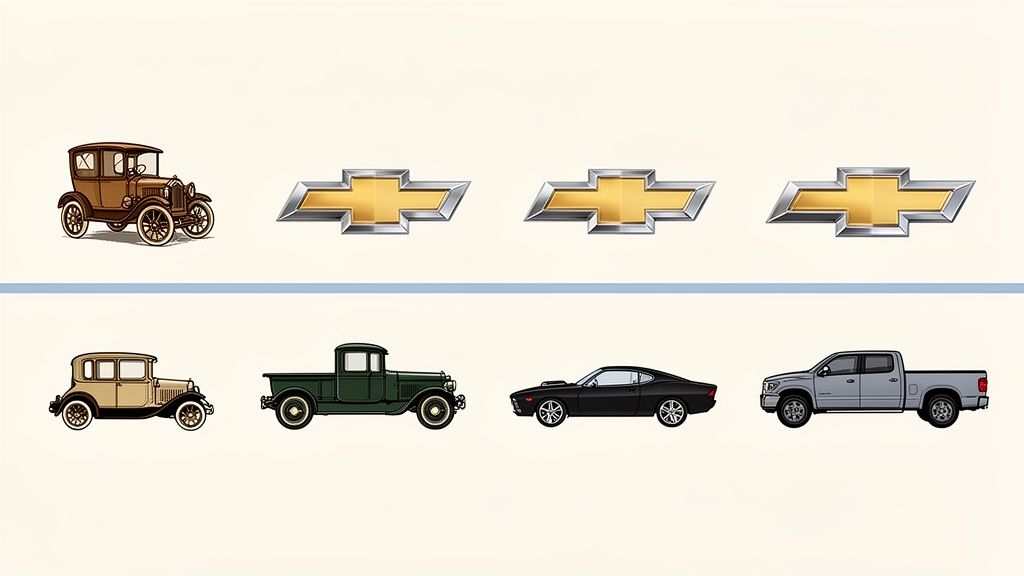
The story goes back to 1913, when Chevrolet co-founder William C. Durant first introduced the emblem. A year later, it made its debut on the front of the 1914 H-2 Royal Mail and H-4 Baby Grand models. That simple shape, originally with a gold outline and fields of soft white and blue, quickly became a mark of pride.
The Birth of Customization
As Chevy’s popularity exploded, so did the owner’s desire to stand out. By the 1920s and 30s, the bowtie had shifted to the classic gold-and-blue look that so many people recognize. Almost immediately, owners started finding ways to add their own flair with aftermarket decals, turning factory grilles into personal statements. This was really the beginning of the whole custom decal scene.
The Chevrolet bowtie isn't just a corporate logo; it's a cultural symbol. Its evolution reflects over a century of automotive innovation and the unwavering loyalty of its community. Each decal applied today is a nod to this rich history.
The numbers behind that loyalty are staggering. The bowtie has been worn by an incredible 215 million Chevrolet vehicles around the world. That’s a testament to the connection people feel with the brand. You can actually see the full evolution of this iconic bowtie and how it’s changed over the past century.
From Military Tributes to Modern Graphics
The tradition of personalization got a huge boost after World War II. GIs returning home were used to customizing their jeeps, planes, and equipment. They brought that mindset with them, slapping military insignias and custom markings onto their workhorse Chevy pickups. They created some of the very first tribute vehicles, a practice that directly inspired the thousands of military-themed Chevy decals we see today.
That legacy lives on in every decal you see on the road, whether it’s a simple bowtie overlay or a full-blown custom graphic. When you put a decal on your Chevy, you’re not just sticking something on your truck—you’re taking part in a tradition that’s over 100 years old. It’s a way to connect with the past while making a statement that’s all you.
You can see a direct line from those early days to the decals we make now. For example, a simple Chevy bowtie classic window decal does the exact same thing those first aftermarket stickers did: it proudly shows off your loyalty and personal style. Every decal is just another chapter in a long story of pride, identity, and making something your own.
Choosing the Right Decal Material for Durability
When you invest in a custom decal for your Chevy, you're not just buying a cool design; you're buying its future on your vehicle. The lifespan of your graphic depends almost entirely on the material it's made from. It's a lot like choosing tires—sure, you can get a cheap set, but you can’t expect them to handle years of rough roads and bad weather.
A decal’s biggest enemies are the same things your Chevy’s paint job fights every day: sunlight, extreme temperatures, and moisture. A low-quality vinyl will surrender to the elements fast, leaving you with a cracked, faded, or peeling mess that looks worse than having no decal at all. That’s why we need to talk about the difference between vinyl types—it’s the key to getting a decal you’ll be happy with for years, not just a few months.
Calendared vs. Cast Vinyl: The Core Difference
At the heart of the decal world are two main players: calendared vinyl and cast vinyl. They might look the same on the roll, but how they’re made creates a massive gap in performance, especially on a vehicle.
Calendared Vinyl: This is your "economy" choice. Think of it like rolling out pizza dough. A heated plastic mixture is squeezed and stretched through big rollers to make it thin. This process builds stress into the material, which means it always wants to shrink back to its original shape. That shrinkage is what causes peeling and cracking over time.
Cast Vinyl: This is the premium, professional-grade option. It starts as a liquid that’s poured onto a super smooth surface and baked in an oven. This process creates a relaxed, stable film that's thinner, much more durable, and conforms beautifully to curves and contours without fighting back.
For a temporary sign on a flat window that’s out of the sun, calendared vinyl might get the job done. But for any graphic that’s going on the body of a Chevy—especially one that lives outside—cast vinyl is the only real choice for longevity.
A decal's "outdoor rating" is its promise of performance. A 7-year rating, which is standard for premium cast vinyl like Oracal, means the material is engineered to resist UV fading, cracking from cold, and peeling after years of sun, rain, and car washes. Cheaper vinyls might only be rated for a year or two before they fail.
Demystifying Vinyl Ratings and Brands
Not all cast vinyl is created equal, which is where brand reputation comes in. You’ll hear pros talk about Oracal constantly, and for good reason. Their products, particularly the high-performance cast vinyl series, set the standard for quality and durability in the vehicle graphics industry.
When you see a custom decal advertised with a multi-year outdoor rating, that’s a commitment backed by serious material science. To help you choose wisely, here's a quick breakdown of what you're getting.
Vinyl Decal Material Comparison
This table breaks down the key differences to help you see why we always recommend premium vinyl for any serious vehicle application.
| Feature | Economy/Calendared Vinyl | Premium/Cast Vinyl (e.g., Oracal) |
|---|---|---|
| Durability | 1-3 years outdoors | 7+ years outdoors |
| Shrinkage | High (pulls back from edges) | Very Low (dimensionally stable) |
| Conformability | Stiff; poor on curves | Excellent; ideal for vehicle contours |
| Color Fade | Fades relatively quickly under UV | Highly resistant to sun and fading |
| Best Use | Short-term, flat indoor signs | Long-term vehicle graphics and wraps |
At the end of the day, investing in a premium cast vinyl from a trusted brand means your decal will keep its sharp lines and vibrant color for years. It’s the difference between a decal that looks painted on and one that looks like a cheap sticker after the first hot summer.
If you’re putting a graphic somewhere prominent, like a vinyl windshield banner for a Corvette, the material is everything. Always, always prioritize premium cast vinyl.
A Sizing and Placement Guide for Popular Chevy Models
Choosing the perfect custom decal is one thing. Figuring out exactly where to put it—and at what size—is where the real magic happens. We get this question all the time: "Will this actually fit and look good on my truck?" It's a great question, because getting the proportions right is the secret to a high-impact, professional look.
A decal that’s too small will get lost on a big rig, looking like an afterthought. Go too big, and you risk overwhelming your truck's natural body lines. This guide is here to take the guesswork out of the equation, giving you real, model-specific advice so your decal looks like it was meant to be there.
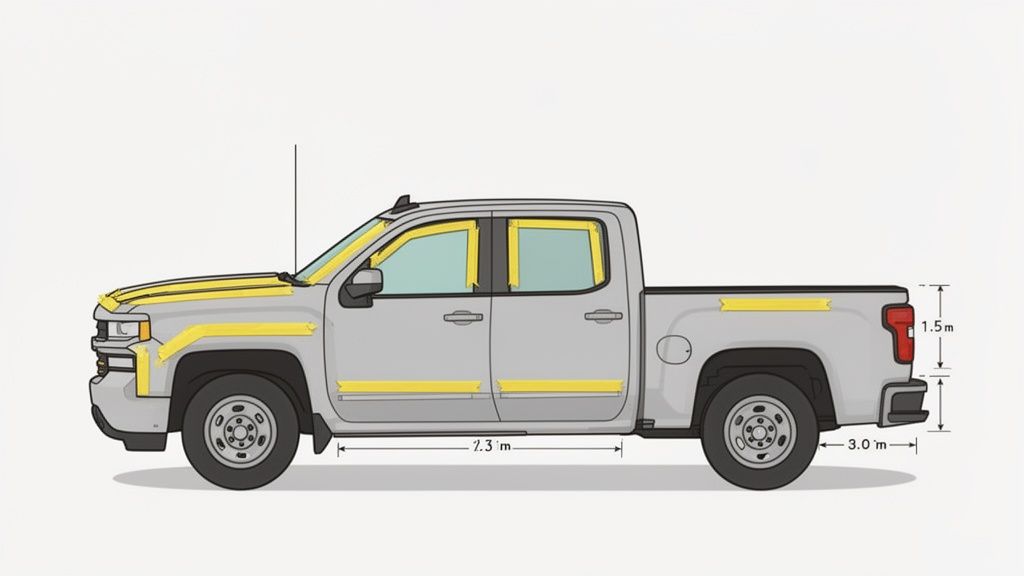
No matter what you drive, the first step is always the same: measure, measure, measure. Never, ever order a decal based on a guess. Get yourself a tape measure and a roll of painter's tape to see how it will look in the real world.
- Step 1: Pick your spot. Are you thinking lower door panel, hood, or maybe the tailgate?
- Step 2: Measure the maximum height and width available in that space. Give yourself a little buffer room.
- Step 3: Use painter's tape to create a simple outline of the decal's dimensions right on your truck. This is your visual mockup.
- Step 4: Now, step back 15-20 feet. Look at your tape outline from a few different angles. Does it feel balanced? Is it centered just right? This five-minute test is your best defense against buyer's remorse.
This simple process is your best friend. It lets you see exactly how your custom decal will look before you even click "order."
Sizing for the Chevy Silverado
The Silverado is a beast, plain and simple. It gives you a massive canvas to work with, and its broad, flat body panels are just begging for large graphics that make a statement. The goal here is to match the scale of the truck itself.
Popular Placements and Sizes:
- Rocker Panel Stripes: These graphics run along the bottom of the doors, right between the wheel wells. A height of 4 to 8 inches is the sweet spot, running the full length of the cabin.
- Hood Graphics: Whether you’re going for a central spear or a pair of offset stripes, the Silverado's hood can easily handle graphics up to 22 inches wide.
- Tailgate Decals: That prime real estate below the handle is a classic spot. A decal around 20 to 30 inches wide and 4 to 6 inches tall fills the space perfectly without looking crammed.
- Rear Window: You've got a lot of glass to work with. A large decal can span up to 36 inches wide across the upper portion of the rear window.
Sizing for the Chevy Colorado
The Colorado is leaner and more athletic than its big brother, with more angles and dynamic lines. The best decals for this truck are the ones that complement its contours instead of fighting them.
Think of decal placement as an extension of your truck's existing design. On a Colorado, the most successful graphics are often the ones that highlight the aggressive fender flares or follow the sharp crease running down the doors.
A "hockey stick" style graphic, for example, looks fantastic, starting on the fender and sweeping back onto the door. When it comes to windshield banners, keep in mind the Colorado's screen is a bit more curved and compact. For some specific tips on this placement, check out our guide for choosing a Chevy Colorado windshield decal sticker.
Popular Placements and Sizes:
- Bedside Graphics: The area on the truck bed behind the rear wheel is a classic spot. To fill that space effectively, aim for a graphic around 30 inches wide and 10-15 inches tall.
- Hood Spears: Offset hood stripes are a great look on the Colorado's narrower hood. A width of 3 to 5 inches for each stripe is perfectly proportional.
Sizing for the Tahoe and Camaro
One is a family-hauling SUV and the other is a pure muscle car, but both vehicles look their best when decals are used to accentuate their unique shapes.
- Chevy Tahoe: Those big rear quarter windows are the perfect home for decals up to 12 inches wide. Rocker panel graphics also work well to break up the vehicle’s height and add some custom flair.
- Chevy Camaro: The Camaro is all about sleek, aggressive motion. You can't go wrong with timeless choices like thin racing stripes (2-3 inches wide) or hood spears that trace the contours of the hood vents. Fender hash marks are another iconic option, typically measuring about 3 inches wide by 12 inches long.
By pairing your creative vision with a few careful measurements, you can confidently pick a custom decal that elevates your Chevy's style from stock to stunning.
How to Install Your Chevy Decal for a Flawless Finish
Getting a professional, bubble-free finish on your custom Chevy decals is way easier than you might think. The secret isn't some special skill you have to be born with; it's all about patience and having a solid process. Think of it like putting a screen protector on a new phone—a little prep work makes all the difference in getting that perfect, straight-from-the-factory look.
Thankfully, modern decals are made for easy DIY jobs. Most of what we ship comes pre-spaced on a single sheet of transfer tape. This is a huge help, as it means you won’t be fumbling to line up individual letters or parts of a graphic. The tape holds everything exactly where it needs to be, letting you apply the whole design in one clean go.
But before you even think about peeling that backing paper, let’s talk about the single most important step: surface prep. Your truck's paint might look clean, but it's covered in microscopic oils, waxes, and road grime that will absolutely ruin the decal's ability to bond.
Preparing Your Surface for Perfect Adhesion
First, give the area a good wash with regular car soap and water, then rinse it off completely. Once the surface is bone dry, it's time to degrease. This is where simple rubbing alcohol becomes your best friend.
Grab a clean, lint-free microfiber cloth and wipe down the entire application area with a 50/50 mix of isopropyl alcohol and water. This simple move strips away any leftover wax or oils, giving the vinyl a perfectly clean surface to grab onto. Let it air-dry for a minute or two.
Pro Tip: Never, ever use Windex or other ammonia-based glass cleaners to prep your paint. They leave behind residues that will cause the decal's adhesive to fail, leading to peeling and lifting down the road. Stick with isopropyl alcohol. It's what the pros use.
The Hinge Method: Foolproof Placement Every Time
With a pristine surface, you're ready to position your decal. The "hinge method" is the go-to technique for professional installers because it guarantees perfect alignment and takes all the stress out of the process. No more trying to eyeball it while holding a sticky sheet of vinyl.
Here’s how it works, step-by-step:
- Position the Decal: With the backing paper still on, place the decal on your truck. Bust out a tape measure to make sure it's perfectly level and centered exactly where you want it.
- Create the Hinge: Happy with the spot? Run a long piece of painter's tape right across the middle of the decal, letting it stick to the truck's paint on both sides. This tape is now your hinge.
- Apply the First Half: Lift one side of the decal and peel the backing paper off, stopping at your tape hinge. Use scissors to cut away the loose piece of backing.
- Squeegee It Down: Holding the decal taut and away from the surface, use a squeegee (or a credit card) to slowly and firmly press it onto the vehicle. Start from the center hinge and work your way out, using firm, overlapping strokes to force out any air.
- Apply the Second Half: Now, carefully remove the painter's tape you used as a hinge. Lift the other side of the decal and peel away the rest of the backing paper.
- Finish the Job: Repeat the squeegee process, starting from the center where you left off and working toward the outer edge. Once it's all down, go over the entire decal one last time with firm pressure to lock it in.
- Remove the Transfer Tape: This is the big reveal. Slowly peel the clear or paper transfer tape off, pulling it back on itself at a sharp angle (almost 180 degrees). If any part of the vinyl lifts with the tape, just lay it back down, press it firmly with your squeegee again, and then continue peeling.
Fixing Common Installation Hiccups
Even when you're careful, you might see a couple of small issues. Don't panic—they are almost always an easy fix.
- Trapped Air Bubbles: Small bubbles are normal. Whatever you do, don't try to peel the decal back up. Just take a very fine needle or the tip of a sharp craft knife and poke a tiny hole in the center of the bubble. Use your finger to press the trapped air out through the pinhole. It'll disappear.
- Wrinkles or Creases: If you end up with a small wrinkle, a little bit of heat is your solution. Use a hairdryer on a low setting to gently warm the vinyl. This makes it pliable enough for you to smooth the wrinkle out with your finger.
After your decal is installed, let it be. Give the adhesive at least 24-48 hours to fully cure before you wash your truck. This waiting period is crucial for the adhesive to form a permanent bond, ensuring your new custom Chevy decal looks incredible for years to come.
Finding a Decal Design That Tells Your Story
The right custom Chevy decal does more than just look good—it turns your vehicle into a part of your story. It’s about finding that perfect graphic that says who you are without you having to say a word.
Whether you're personalizing a daily driver or branding a hard-working truck, a custom decal makes it unmistakably yours. Let's dig into some of the most popular design paths Chevy owners take to express what matters most.
Honoring Service With Military and Tribute Decals
For veterans, active-duty personnel, and their families, a truck isn't just a truck—it's a canvas for pride and respect. Military tribute decals are one of the most powerful ways to personalize a vehicle, and we see it every single day.
These aren't just generic logos. We're talking specific unit insignias, memorial phrases for fallen brothers and sisters, or patriotic symbols honoring a branch of service. Placing an Army, Navy, Air Force, Marine Corps, or Coast Guard decal on the back glass of a Silverado is a quiet, powerful salute to everyone who understands that service.
Capturing the Spirit of Adventure and Off-Road Life
If your Chevy Colorado or Silverado sees more dirt than pavement, adventure-themed graphics are the only way to go. These designs tap right into the rugged, mud-and-gears spirit of the 4×4 and off-road community.
Think mountain range silhouettes stretched across a tailgate, aggressive mud-splatter graphics down the side, or sharp claw-mark decals on a fender. They just fit the tough, capable feel of a Chevy truck. It’s a clear signal that this rig is built for exploring, not just commuting. It's a modern take on the custom vinyl scene from the 70s muscle car era, where owners were all about making their machines stand out.
No matter what design you pick, a clean install is what makes it look professional. It really boils down to three simple stages.
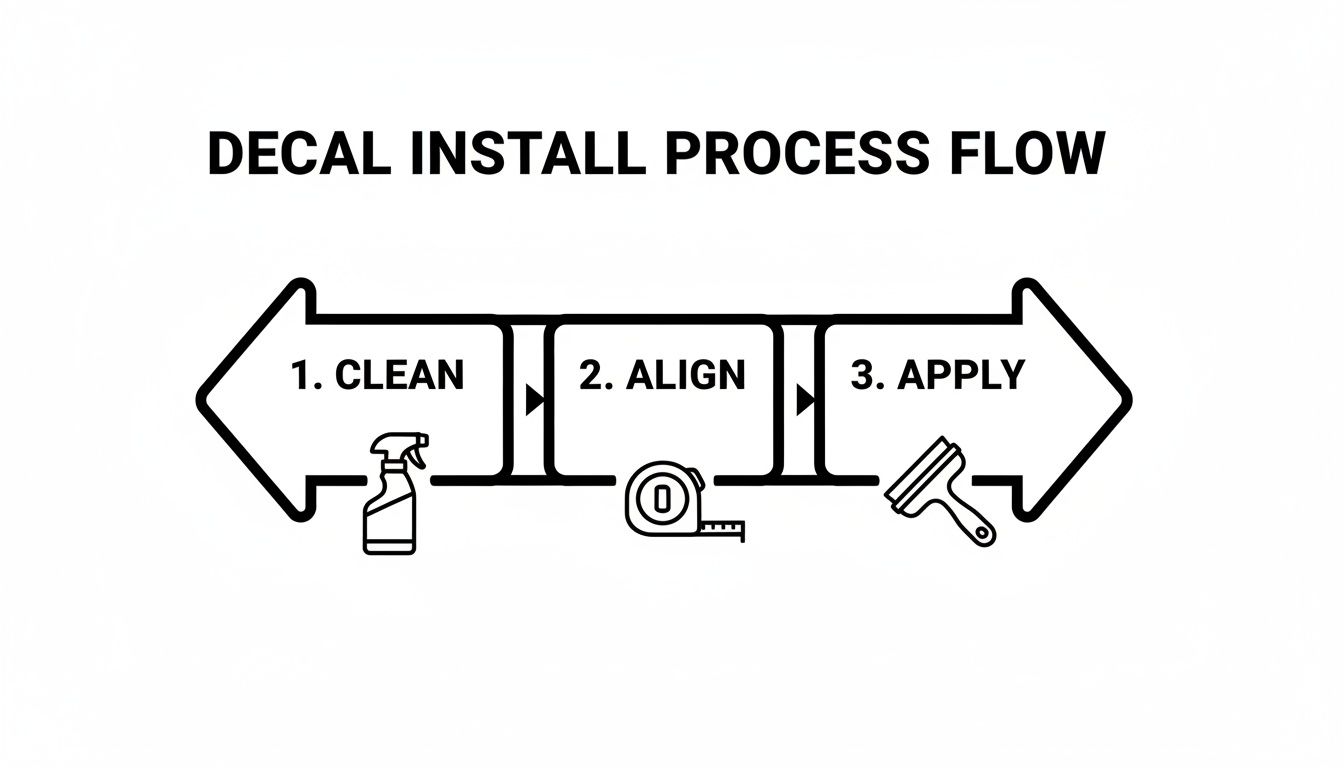
This process—Clean, Align, Apply—is the key. Following these steps ensures your design looks like it came from the factory.
From Hobbies to Family: The Ultimate Personalization
Your passions shouldn't be left in the garage. Niche hobby decals are a fantastic way to show what you're into and connect with other people who share that interest.
- Hunting and Fishing: Camo-patterned bowties, deer skull graphics, and decals of bass or other game fish are huge with outdoorsmen.
- Family and Pets: Stick-figure families are a classic for a reason. You can often personalize them with names and even add the family dog or cat, giving a warm touch to any Tahoe or Suburban.
- Custom Text: Nothing is more personal than your own words. Use it for a company name, a memorial for a loved one, a favorite quote, or an inside joke. This makes your vehicle truly one-of-a-kind.
The best decal is one that feels like you. Whether it's a subtle nod to a hobby or a bold tribute to your military service, the whole point is to make your vehicle a true extension of who you are.
Veteran-friendly shops know this, with some offering over 295 military tribute designs and 165+ family and pet options. It makes it easy for anyone to find their perfect match. To see how deep this customization trend goes, you can explore the evolution of Chevy's iconic logo. With so many choices out there, you're bound to find a design that turns your Chevy into a landmark on wheels.
Common Questions About Custom Chevy Decals
Even after you've found the perfect design, a few practical questions almost always come up. We get it. You want to be completely confident before putting anything on your truck or car.
Let's walk through some of the most common questions we hear from fellow Chevy owners.
Will Automatic Car Washes Damage My Decal?
This is a big one, and the straightforward answer is no. A high-quality decal that’s been installed correctly will hold up just fine in most automatic car washes.
We use premium cast vinyl—the same tough stuff used for full vehicle wraps. It’s built to handle sun, rain, and snow, so it can definitely handle soap, water jets, and soft-touch brushes.
That said, a little common sense goes a long way:
- Give it Time to Cure: Hold off on that first wash for at least 48-72 hours after installation. This gives the adhesive time to fully and permanently bond to your Chevy's paint.
- Touchless is Always a Good Idea: While it's not a requirement, touchless car washes are the gentlest option for any vehicle's finish, and that includes your new decal.
- Watch the Edges: If you're at a self-serve wash, avoid aiming the high-pressure wand directly at the edges of the decal. A direct blast at close range is one of the few things that can cause an edge to lift.
Can I Remove the Decal Later?
Absolutely. That’s one of the best parts about using high-quality vinyl. They are completely removable and won't harm your factory paint.
Think of a decal as a semi-permanent accessory. It’s tough enough to look great for years but comes off cleanly when you're ready for a new look or it's time to sell your vehicle. This gives you all the freedom of a custom look without the commitment of a permanent paint job.
Taking it off is simple. Just gently warm the vinyl with a hairdryer or a heat gun on its lowest setting. This softens up the adhesive, letting you slowly peel the decal back. If any sticky residue is left behind, a citrus-based cleaner or a dedicated adhesive remover will take it right off.
Are Windshield Decals Legal?
This is where it gets tricky, because the laws for windshield decals change from state to state, and sometimes even by county. Every jurisdiction has rules to make sure nothing on the front windshield blocks the driver’s view.
As a general rule, small decals tucked into the lower corners of the windshield are usually okay. For windshield banners—the long strips that run along the top—they are typically restricted to the area above the AS-1 line. That's a small mark on most windshields that shows the upper limit for tinting.
Before you apply any large graphics to your front or side windows, do a quick check of your local traffic laws. It’s the best way to make sure your custom look is fully compliant.
Ready to create a look that's all your own? At Custom Sticker Shop, we make it easy to find or design the perfect graphic for your ride. Explore our huge collection of American-made custom Chevy decals today!