
Center cap decals are one of the simplest, highest-impact DIY upgrades you can make to your vehicle. These tough vinyl stickers are an affordable and easy way to ditch the generic factory logos for a custom design that actually reflects your style. It’s a small detail that turns an overlooked part of your wheel into a real statement piece.
The Easiest Way to Upgrade Your Wheels
Let's be honest, staring at the same factory-standard wheels day after day can get boring. Your vehicle is an extension of who you are, but those plain, branded center caps don't say much. This is where a small, simple change can make a massive difference.
Custom center cap decals are one of the most effective and budget-friendly ways to inject personality into your ride. They close the gap between a stock look and a truly custom vehicle, delivering a high-impact visual upgrade without the cost or hassle of buying a whole new set of wheels.
From Factory Standard to Personal Statement
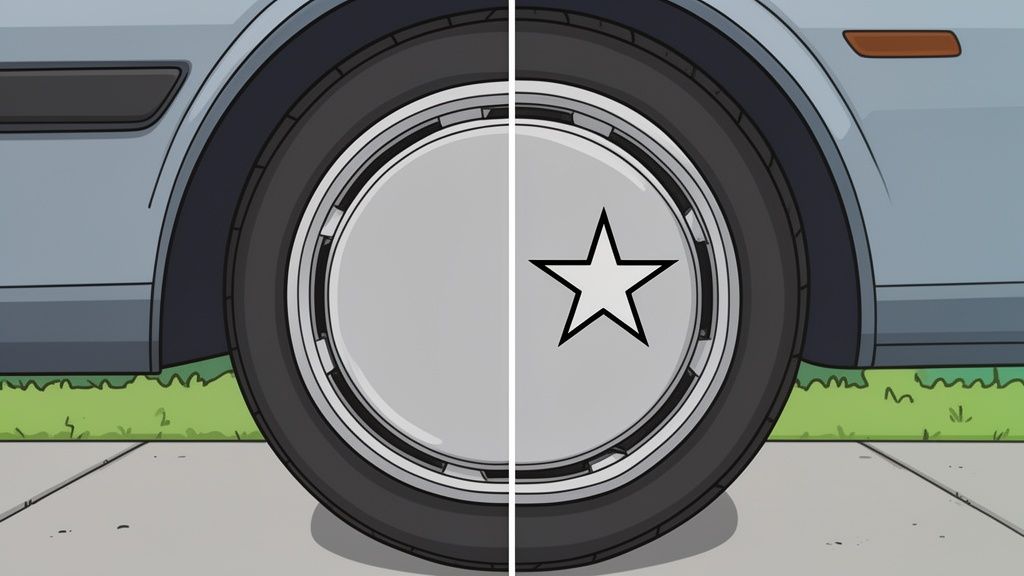
Think of it as a subtle but powerful transformation. Your wheels are one of the most defining features of your car or truck, and the center cap is the focal point. By changing just that small detail, you can completely shift the entire vibe of your vehicle.
This gives you a chance to put your own stamp on your ride. You see real-world examples of this on the road every day:
- Off-Road Enthusiasts: A Jeep owner might swap out the standard logo for a design that reps their favorite trail or off-road club.
- Military Pride: Veterans and active-duty service members can proudly display their branch insignia, turning their vehicle into a tribute to their service.
- Family and Fun: Parents often add custom monograms or even family stick figures for a personal, lighthearted touch on their daily driver.
Key Takeaway: Center cap decals aren't just stickers; they're an accessible way to express yourself. They let you move beyond the manufacturer's branding and put your own signature on your vehicle.
A Professional Finish From Your Driveway
The best part? You don't need a professional shop or a box of specialized tools to get a flawless look. The whole process is designed for the everyday car enthusiast. Our American-made decals are crafted from durable, professional-grade Oracal vinyl—the same material trusted by sign shops for its 7-year outdoor rating.
This means your new custom look will stand up to sun, rain, and countless car washes. If you're looking for ideas on brand-inspired designs, you might want to check out our guide on emblem stickers like the Forgiato 'F' logo. Whether you're a seasoned modifier or a total beginner, you can get a clean, bubble-free application right at home. This guide will walk you through every step.
How to Choose the Right Decals for Your Wheels
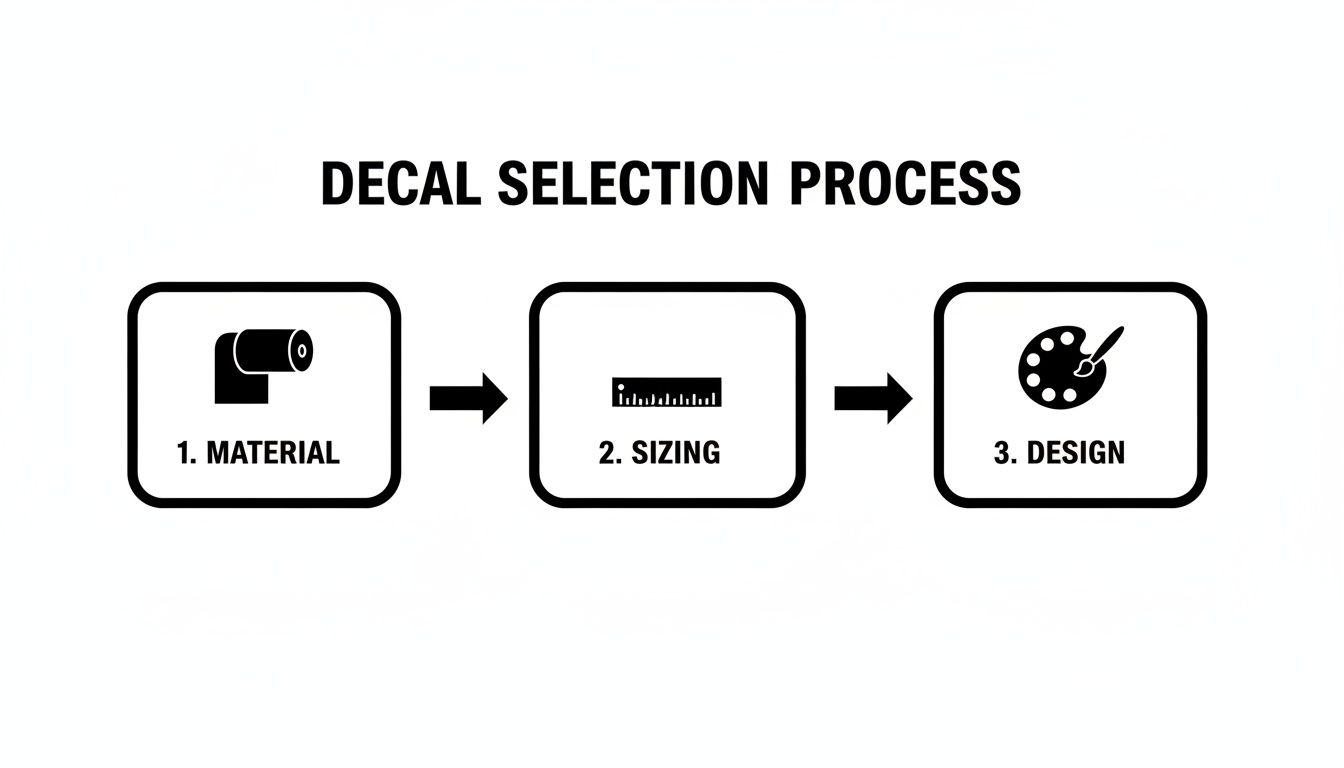
Picking the perfect decals for your wheel center caps isn't just about looks—it’s about getting a custom touch that lasts. When you get it right, the result is a seamless, professional-grade upgrade. Let's walk through what really matters, focusing on material, sizing, and design to make sure your wheels stand out for all the right reasons.
The first, and most critical, choice you'll make is the material. Your wheels are in a constant battle with the elements, from blistering sun and road salt to the harsh chemicals of a car wash. This is exactly why we use premium Oracal vinyl for all our decals. It’s a professional-grade material with an impressive 7-year outdoor rating for a reason. Cheaper vinyls will fade, crack, and peel off in a matter of months, but Oracal is engineered to go the distance.
Comparing Center Cap Decal Materials
When selecting decals, the type of vinyl makes a huge difference in how they look and how long they last. Here’s a quick comparison to help you understand why we stick with the best.
| Material Type | Best For | Outdoor Durability | Key Feature |
|---|---|---|---|
| Premium Cast Vinyl (e.g., Oracal) | Vehicle Wraps, Decals | 5-9+ Years | Conforms to curves, resists shrinking, excellent color stability. |
| Calendered Vinyl | Short-term signs, indoor use | 1-5 Years | Thicker and less conformable; prone to shrinking and cracking. |
| Printed Hobby Vinyl | Craft projects, temporary use | Less than 1 Year | Fades quickly and lacks the adhesive strength for automotive use. |
Ultimately, for a part of your vehicle that takes as much abuse as a wheel, settling for anything less than a premium cast vinyl like Oracal is just asking for trouble down the road.
Getting the Perfect Fit Every Time
Nothing screams "aftermarket" like a decal that's too big or too small. A precise fit is the secret to making your decals look like they came straight from the factory. The good news is that measuring is simple, though the method changes slightly depending on your center cap's shape.
For Flat Center Caps: Grab a ruler or tape measure and find the diameter of the recessed, flat area where the new decal will sit. Measure straight across from edge to edge. For the best accuracy, take your measurement in millimeters.
For Domed or Curved Center Caps: A stiff ruler won't work here. You need a flexible sewing tape measure. Lay it directly over the face of the cap, following the curve from one side to the other to get an accurate surface measurement.
Pro Tip: Always measure twice before you place an order. It’s a simple, two-minute step that saves you the headache of getting a decal that’s off by a few millimeters. A perfect fit makes all the difference.
Bringing Your Design Vision to Life
This is where you get to make your wheels your own. Forget being stuck with boring automaker logos. The possibilities are virtually endless, whether you want something clean and subtle or a design that’s loud and proud.
For example, we see Jeep owners choosing from over 240 unique graphics to match their rig's personality, while JDM fans might go for a classic tuner-inspired logo. You can even design something completely from scratch with custom text, like a family name or a significant date. If you have a specific vision, you can make your own fully custom car decals and we’ll produce them for you.
This push for personalization isn't just a niche trend; it's a huge part of modern car culture. In fact, the global automotive wheel center cap market was valued at around $2.5 billion in 2025, with a huge chunk of that growth driven by enthusiasts seeking custom aftermarket options. People want their vehicles to reflect who they are, and custom touches are one of the best ways to do it.
A Guide to Flawless, Bubble-Free Installation
Getting that perfectly smooth, painted-on look isn’t magic. It’s all about the prep work and having the right technique. This is where your new decals go from being a sticker to a seamless part of your wheel's design.
Let's walk through the exact process we use to get a bubble-free finish every time. It boils down to three phases: getting the surface ready, nailing the alignment, and finishing the job like a pro.
Preparing the Surface for Perfect Adhesion
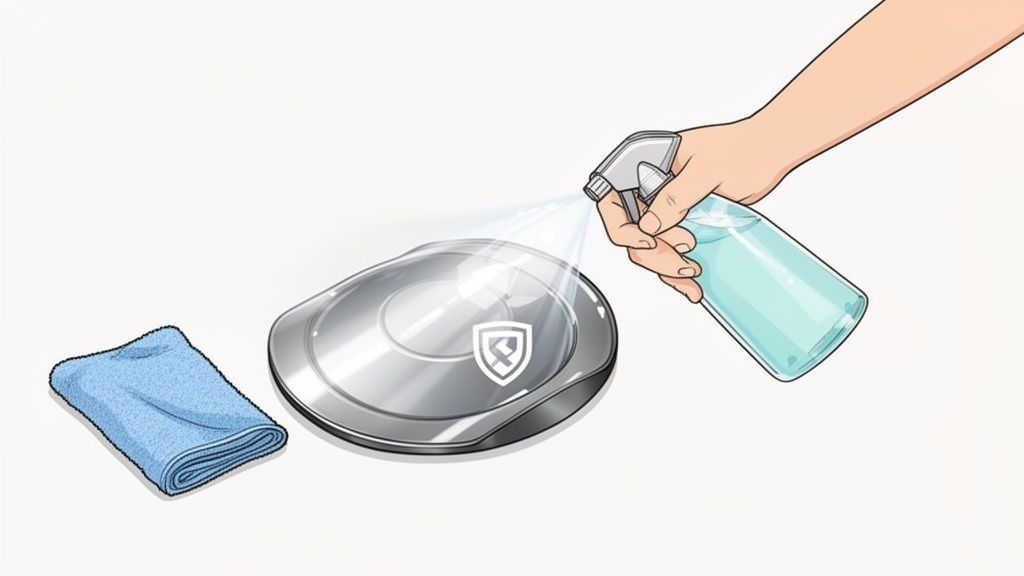
This is the most critical step, and you can't cut corners here. Think of it like this: you wouldn’t put a new coat of paint on a dirty, greasy wall. Any leftover wax, road grime, or detailer spray on your center cap will kill the decal's ability to bond, leading to bubbles and peeling.
All you need is a clean microfiber cloth and some isopropyl alcohol (rubbing alcohol). Give the face of the center cap a thorough wipe-down, paying special attention to any recessed areas where dirt loves to hide.
Crucial Tip: Do not use glass cleaner, all-purpose cleaners, or quick detailer sprays for this. They almost always leave behind silicones or other residues that are the number one enemy of decal adhesive. Stick with isopropyl alcohol only for that final, pre-application wipe.
This level of care starts even before you have the decal in hand—it begins with choosing the right material, size, and design for your specific wheels.
Getting these three things right from the start sets you up for a much smoother installation and a result you’ll be proud of.
The Hinge Method for Perfect Alignment
With a clean, dry surface, you're ready for application. The biggest hurdle for most people is getting the decal perfectly centered on the first try. That’s why we always use the hinge method—it’s a foolproof technique straight from the professional sign installer’s playbook.
Here’s how you do it:
Position the Decal: Without peeling anything off yet, place the decal (with its backing paper and transfer tape intact) onto the center cap. Nudge it around until the positioning is exactly where you want it.
Create the "Hinge": Take a piece of painter's tape and run it vertically across the middle of the decal, sticking it to the cap itself on the top and bottom. This tape now acts as a hinge, holding your perfect alignment in place.
Apply the First Half: Lift one side of the decal up, like opening a book. Peel the backing paper away from that side until you reach your tape hinge in the middle. Carefully snip that loose piece of backing paper off.
Now, hold the edge of the decal taut and, using a squeegee or a credit card, start pressing it down. Begin right at the tape hinge and work your way outward with firm, overlapping strokes. This pushes all the air out from the center, which is the whole secret to preventing bubbles.
Finishing the Job Like a Pro
Once the first half is down, you can peel off the painter's tape hinge. Now lift the other side of the decal, pull away the remaining backing paper, and squeegee it down using the same exact motion—from the center outward.
Go over the entire decal one more time with your squeegee, applying good, firm pressure to make sure the adhesive has bonded everywhere, especially around the outer edge.
Finally, it's time for the big reveal. Carefully peel the transfer tape off. The trick is to pull it back slowly at a sharp 180-degree angle, folding it back over itself. This motion ensures the decal stays put on the center cap.
If you spot a tiny bubble, don't sweat it. You can usually just work it to the edge with your finger. For a really stubborn one, a tiny prick with a pin will let the air escape, and the hole will be completely invisible.
Protecting Your Decals for Long-Term Durability
Alright, your new decals are on and your wheels look incredible. The hard part is over. Now, let’s talk about how to keep them looking that way for years to come.
With a little smart care, the high-quality Oracal vinyl we use will hold up for its entire lifespan. It’s all about creating a tough barrier against the elements and knowing the right way to wash your ride. Follow these tips, and you’ll have total peace of mind showing off your custom look.
Adding an Extra Layer of Protection
While our decals are built to be tough, sealing them is a great way to extend their life even further. Think of it as an extra shield against the things that age decals prematurely: UV rays, road salt, brake dust, and moisture.
Here are two of the most effective methods we recommend:
Ceramic Coating: This is the top-shelf choice for serious protection. A quality, consumer-grade ceramic spray applied over the decal creates a slick, hydrophobic surface. Dirt and water slide right off, which makes cleaning your wheels a whole lot easier.
Spray Clear Coat: For a more permanent solution, you can use a light application of automotive-grade clear coat. Make sure you grab a product that’s rated as safe for vinyl. The key is to apply it in very thin, even layers to prevent any chemical reactions. If you're unsure, always test it on a scrap piece of vinyl first.
Key Insight: Sealing isn't mandatory, but it's a simple step that gives you a huge boost in durability. Applying a ceramic coating just once or twice a year makes all the difference in preserving the color and finish of your center cap decals.
Safe Washing and Maintenance Habits
How you wash your car plays a massive role in how long your decals last. Get too aggressive, and you can easily lift the edges of the vinyl or scratch the surface.
The number one rule is simple: avoid aiming a high-pressure washer directly at the edges of your decals. That intense blast of water can get underneath the vinyl and cause it to peel up over time. Always keep the nozzle a safe distance away and use a wide, sweeping motion.
Also, pay close attention to the chemicals you’re using. Many heavy-duty wheel cleaners are loaded with harsh acids or solvents that can eat away at the vinyl and its adhesive. For general cleaning, your best bet is always a pH-neutral car soap.
This growing interest in customization and quality care is something we see across the industry. In fact, the market for automotive wheel center caps is projected to see steady growth, with a compound annual growth rate of 4-6% through 2031. This trend is heavily driven by the classic car restoration community and a strong desire for vehicle personalization—you can read more about it in the full market research report.
How to Safely Remove and Replace Old Decals
Ready for a new look? Or maybe you’re prepping your car for a sale. One of the best parts about using high-quality vinyl for your center caps is that the customization is never permanent. Swapping out old decals for a fresh design is a simple job you can tackle right in your driveway without worrying about damaging your wheels.
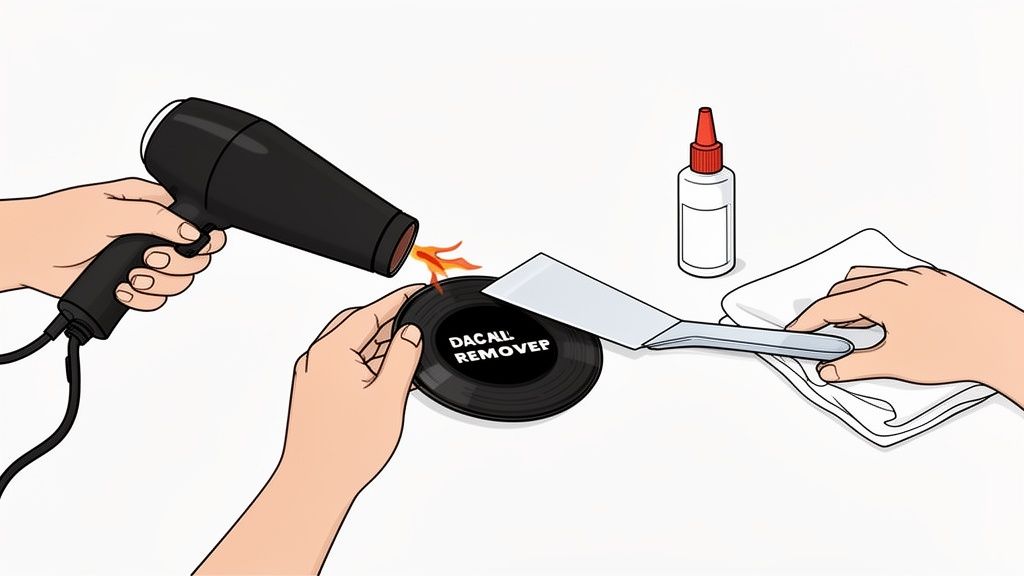
The whole trick is to soften the adhesive so the decal peels off cleanly. Your best friend for this task is a standard hairdryer. Just hold it a few inches from the decal on a medium heat setting for 30 to 60 seconds, making sure to move it around and warm the entire surface evenly.
Peeling and Cleaning
Once the old vinyl feels warm to the touch, it’s ready to come off. You’ll want a tool that won’t scratch the plastic or metal finish of your center cap. We’ve found a plastic razor blade or even a sturdy guitar pick works perfectly for this.
Gently work the edge of your tool under a corner of the decal and carefully lift it up. As soon as you have enough of a flap to grab with your fingers, you can peel the rest of it off. The key is to pull slowly and at a sharp, low angle.
After the decal is off, you’ll probably see some sticky adhesive residue left behind. That’s completely normal. Whatever you do, don't try to scrape it off dry—you’ll risk marring the surface of the cap.
To get the cap perfectly clean, just grab a microfiber cloth and a mild solvent. A product like Goo Gone is made for this, but a little isopropyl alcohol on the cloth works just as well. Gently rub the residue in a circular motion until it’s all gone.
This straightforward process means you're free to update your style whenever the mood strikes. You could try out a completely different look, like our Lincoln emblem stickers, without any long-term commitment. After a final wipe-down, your center caps are spotless and ready for their next set of decals.
Frequently Asked Questions About Center Cap Decals
Got questions? You're not alone. We talk to car and truck owners every day, and a few common questions always come up. Here are the straight answers you need to get your project done right.
Will These Decals Fit Any Center Cap?
Almost, but the surface texture is what really matters. Our center cap decals are designed to bond perfectly with smooth, non-porous surfaces. Think painted plastic, smooth metal, or factory-finished caps.
If your center caps are rough, heavily textured, or have existing damage like peeling or deep scratches, you’re not going to get that clean, permanent adhesion you’re looking for. A smooth, clean surface is the secret to getting a decal that looks like it came from the factory.
Can My Decals Handle an Automatic Car Wash?
Absolutely. We make our decals from high-quality Oracal outdoor vinyl, which is the same tough stuff used for professional vehicle wraps and commercial graphics. It's specifically engineered to handle sun, rain, and whatever detergents the local car wash throws at it.
Pro Tip: While the decals are tough, you can help them last even longer by not aiming a high-pressure spray wand directly at the edges. A direct, concentrated blast can work its way under the edge over time and cause it to lift.
What if I Want a Completely Custom Design?
You've come to the right place. For simple customizations, like adding your own text, you can often just use the built-in options right on the product page to make it your own.
But if you’ve got something more specific in mind—maybe a custom logo for your business or a unique graphic you don’t see in our collection—just reach out to our customer service team. We’ll work with you one-on-one to nail down the design and get you the exact look you're picturing for your ride.
At Custom Sticker Shop, we're all about helping you personalize your vehicle with top-quality, American-made decals that are built to last. Explore our full collection today and find the perfect upgrade for your wheels.