
Decals for a horse trailer are much more than just stickers; they're custom-cut vinyl graphics used to add personality, branding, or critical safety information to your trailer. These graphics can be anything from simple lettering and silhouettes to full-color logos, turning a standard aluminum box into a statement piece that stands out at events and on the highway.
Giving Your Trailer a Unique Identity
Imagine pulling into a show or rodeo, your trailer perfectly reflecting your style and professionalism. A well-designed graphic is a powerful way to express your personality, brand your farm, or even improve safety on the road. It transforms your trailer from a simple hauler into something that’s uniquely yours.
This guide is your complete roadmap to getting that ideal look. We'll walk through everything from the foundational materials to the finishing touches, so you can feel confident in your choices.
More Than Just Decoration
Think of your trailer as a moving billboard. Every trip you take—whether it's to a show, a trail ride, or the vet—is a chance to showcase your identity. High-quality decals for horse trailer applications are a smart investment for any equestrian, serving several key purposes.
Here’s what they can do for you:
- Personal Expression: Show off your favorite discipline, breed, or a design that just fits your style. From elegant dressage silhouettes to bold barrel racing graphics, the options are endless.
- Professional Branding: If you run a stable, train horses, or breed, custom decals with your farm name and logo are essential marketing tools. They create a consistent, memorable brand image that builds recognition and trust on sight.
- Enhanced Safety: Reflective decals are a game-changer for safety. They dramatically increase your trailer's visibility at night and in bad weather, helping protect you, your horses, and other drivers.
- Theft Deterrence: A uniquely marked trailer is a far less appealing target for thieves than a generic, unmarked one. Custom graphics make your property instantly identifiable and much harder to sell off quietly.
Your horse trailer is a major investment that safeguards your most precious cargo. Customizing it with durable, well-placed decals not only protects that investment but also proudly represents your passion for the equestrian world.
What You'll Learn in This Guide
We're going to cover the whole process, step by step. We'll start by breaking down the different types of vinyl materials out there, helping you understand why quality really matters for longevity. From there, we’ll dive into design and sizing, with practical tips for measuring your trailer and choosing graphics that make a real impact.
You'll also get a step-by-step installation guide to help you get a flawless, bubble-free finish. Finally, we'll cover essential maintenance to keep your decals looking sharp for years and touch on important safety and legal considerations. By the end, you'll have everything you need to transform your trailer with confidence.
Getting to Know Your Vinyl Decal Options
When it comes to decals for a horse trailer, not all vinyl is created equal. Think of it like choosing the right feed for your horse—the quality of the ingredients directly impacts performance and longevity. Picking the right material from the get-go ensures your graphics can handle highway speeds, blazing sun, and whatever else the weather throws at them for years to come.
The world of vinyl really boils down to two main players: calendared and cast. They might look the same at first, but how they’re made creates a night-and-day difference in how they'll hold up on your trailer.
Calendared Vinyl: The Budget-Friendly Option
Calendared vinyl is made by pushing a semi-liquid vinyl mixture through heated rollers, flattening it out like dough. This process is quick and cheap, making it a go-to for short-term, flat-surface jobs like indoor signs or temporary sale banners.
But that rolling process builds stress into the material. The vinyl always “remembers” its original state and wants to shrink back. This means it’s way more likely to crack, shrink, and peel over time, especially when it’s battling the elements. On a horse trailer that flexes and vibrates down the road, this type of vinyl is set up to fail.
Cast Vinyl: The Premium Choice for Durability
Cast vinyl, on the other hand, is made with a lot more finesse. A liquid vinyl mix is poured onto a super-smooth casting sheet and baked in an oven, kind of like pouring pancake batter and letting it settle on its own. This creates a thin, flexible film with almost no built-in tension.
Because it isn’t forced into shape, cast vinyl is incredibly durable and forgiving. It can stretch over rivets, curves, and corrugated panels without trying to pull away. This stability makes it the undisputed champion for vehicle graphics, offering a lifespan of 7 years or more. For any serious horse trailer owner, cast vinyl is the only choice that makes sense for the long haul.
Key Takeaway: While you might save a few bucks upfront with calendared vinyl, premium cast vinyl is the smarter investment. Its ability to fight off shrinking, fading, and peeling means your trailer will look sharp and professional for years.
We've put together a simple table to help you see the differences at a glance.
Vinyl Decal Material Comparison
| Feature | Calendared Vinyl (Economy Grade) | Cast Vinyl (Premium Grade) |
|---|---|---|
| Manufacturing | Rolled & stretched under pressure | Poured as a liquid, stress-free |
| Durability | 2-3 years outdoors; prone to shrinking | 7+ years outdoors; highly stable |
| Conformability | Stiff; best for flat surfaces only | Highly flexible; great for curves & rivets |
| Thickness | Thicker, but less durable | Thinner, but much stronger |
| Cost | Lower initial cost | Higher initial cost, better long-term value |
| Best For | Temporary signs, indoor use | Vehicle wraps, horse trailers, long-term graphics |
As you can see, for a moving asset like a horse trailer, cast vinyl is built to last.
Exploring Different Decal Styles
Beyond the raw material, decals come in a few different styles, each with its own look and purpose. Knowing your options helps you match the decal to the job you want it to do.
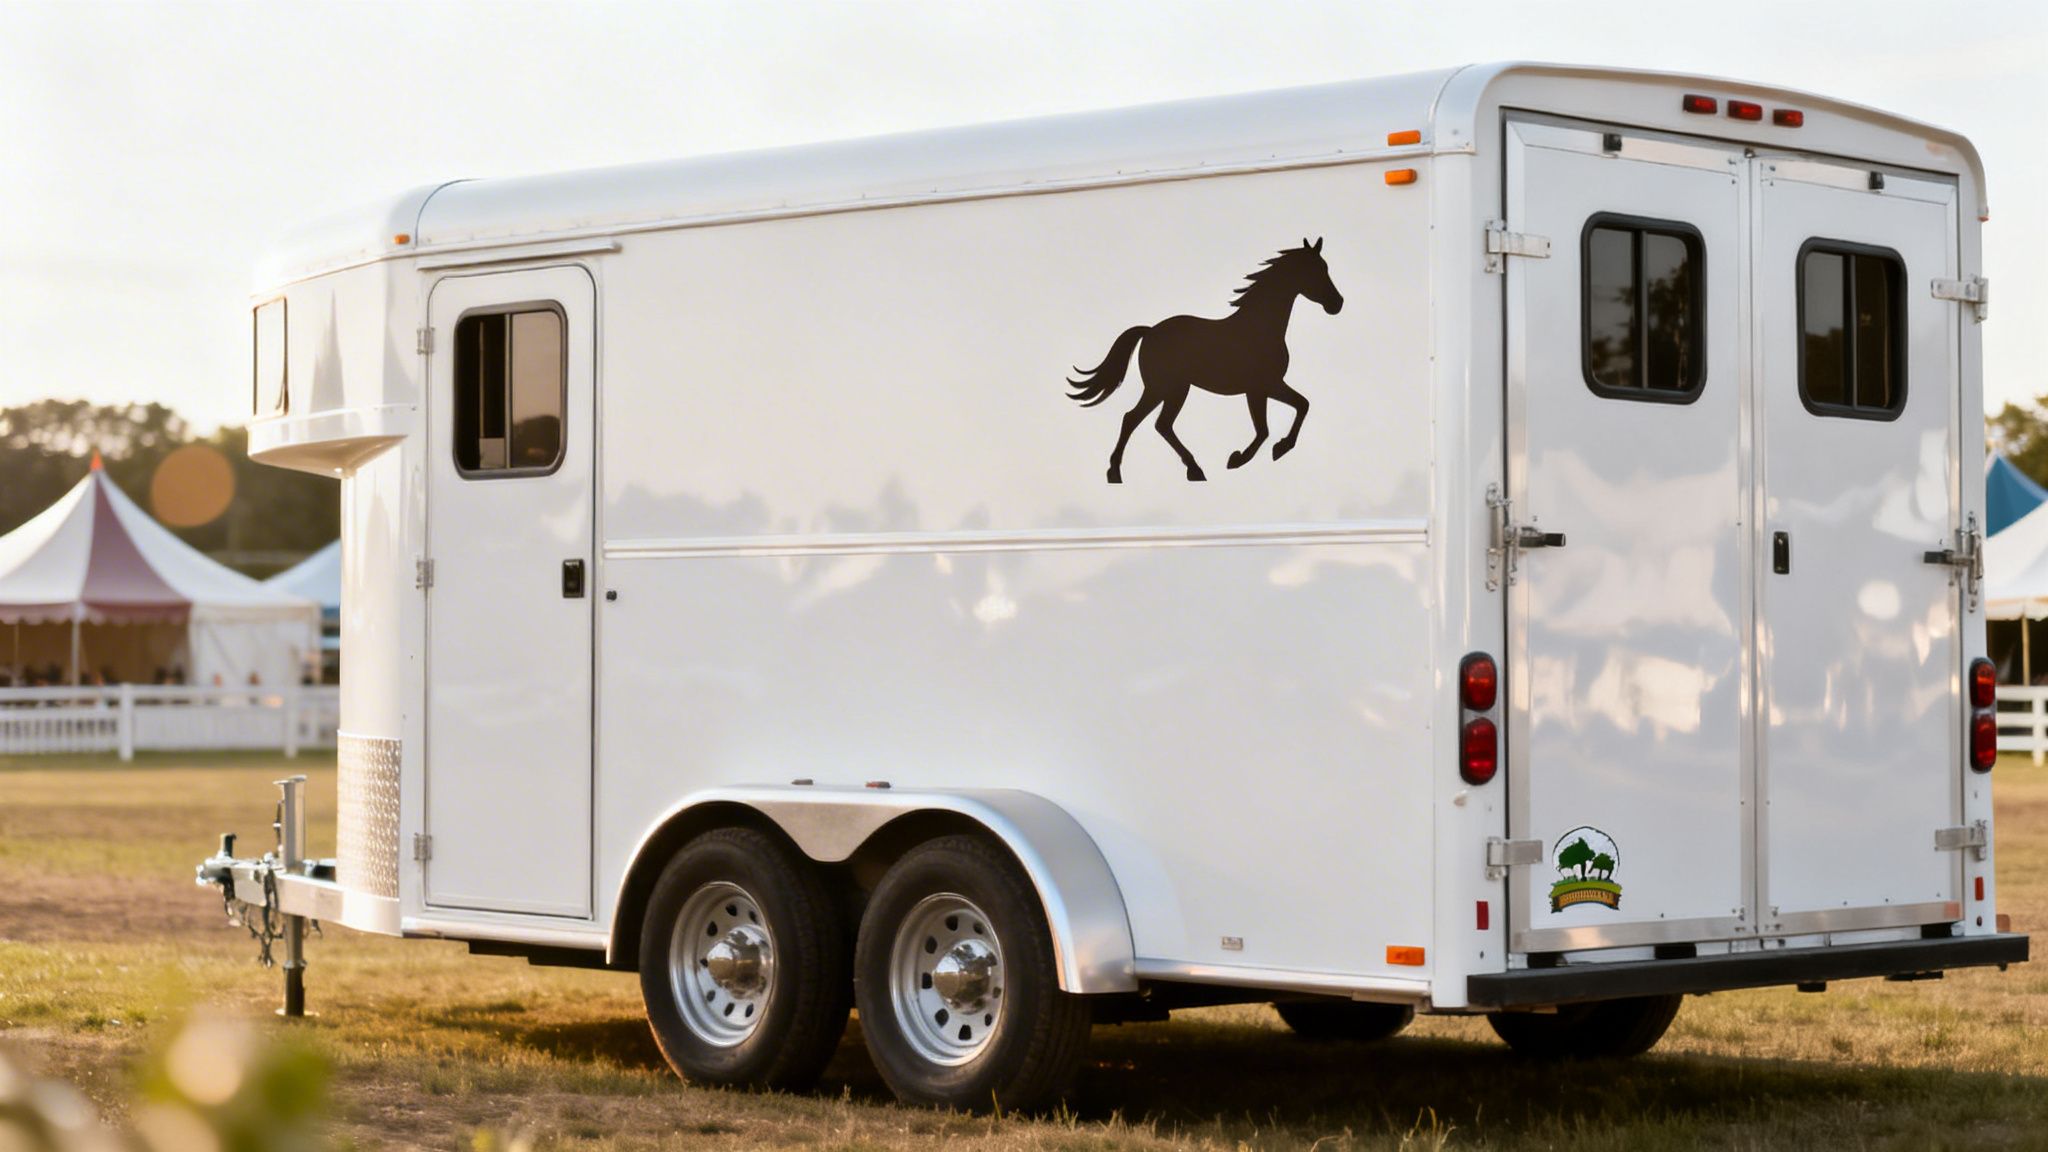
- Die-Cut Decals: These are single-color graphics cut precisely from a sheet of vinyl—no background, just the design itself. This gives you a clean, "painted-on" look that's perfect for your farm name, contact info, or elegant horse silhouettes.
- Printed Graphics: Got a full-color logo, a photograph, or a design with gradients? Printed graphics are your answer. They're printed onto white or clear vinyl and then laminated to protect them from UV rays and scratches. This style gives you total creative freedom.
- Reflective Decals: Safety is everything when you're hauling precious cargo. Reflective decals are a must-have upgrade. They're made with tiny glass beads that bounce light directly back to its source, making your trailer pop to other drivers in the dark.
The global horse trailer market has seen huge growth, thanks to a boom in equestrian sports. In this expanding market, owners are customizing their trailers to stand out and improve safety. Reflective decals, from cutting horse designs to simple safety stripes, have become an essential tool for reducing accident risks at night.
For a deeper dive into materials and design, a good guide to custom sticker printing is an invaluable resource. You can also get inspired by browsing a wide variety of horse life decal sticker options to see what’s possible for your own trailer.
Choosing the Perfect Design and Size
This is where the fun really begins. Nailing down the right design and getting your measurements perfect are the two steps that turn your trailer from just a piece of equipment into something that truly represents you. It's all about creating a look that’s both eye-catching and fits the unique lines of your trailer.
First things first: what story do you want your trailer to tell? Are you running a professional breeding operation, showing off your passion for a specific discipline, or just adding a personal touch? Each of these goals calls for a completely different design.
Finding Your Design Inspiration
Your graphics should be a direct reflection of your identity in the equestrian world. Think about what you want them to accomplish, and let that guide your creative choices. Most horse trailer decals fall into a few common themes.
- Farm and Brand Logos: For any professional, this is a must-have. A clean, bold logo with your farm name and phone number is a mobile marketing tool that works for you every time you hit the road.
- Discipline Silhouettes: An elegant dressage horse, a powerful jumper, or a gritty cutting horse are fantastic ways to show your passion. These designs create an instant connection with others in your community.
- Personalized Text and Monograms: Simple and classic. Your name, your horse’s name, or a meaningful quote can add a sophisticated touch without being overwhelming.
- Full-Color Graphics: If you have a vibrant, multi-color logo or want to use a photograph, printed graphics open up a world of possibilities for a truly custom look.
Always consider how your design will look from a distance. A super detailed graphic might look great up close but turn into a confusing blob on the highway. More often than not, simple, high-contrast designs make the biggest impact.
Measuring for a Perfect Fit
Good measurements are the foundation of a professional-looking job. It’s just like tailoring a suit—a quarter-inch off can be the difference between looking sharp and looking sloppy. Never guess. Always grab a tape measure.
Start by finding the clean, flat areas where a decal could actually go. Measure the height and width of these spots, but be sure to leave at least a one- to two-inch buffer around all the edges. That little bit of negative space is key; it frames the decal and keeps it from looking crammed in there.
Always measure twice and order once. Take photos of your trailer with the measuring tape still in place so you can reference them later. This one simple habit can save you from a costly mistake and make sure your new decal fits exactly as you envisioned.
Don't forget to account for any obstacles on the surface. Things like windows, vents, seams, and door handles will interrupt your design. You need to measure the open space between these elements, not just the size of the whole panel. If you have corrugated or ribbed siding, only measure the flat, raised surfaces, since that’s the only place the decal will stick.
Strategic Placement for Maximum Impact
Where you put your decal is just as important as the design itself. Different spots on the trailer serve different purposes and offer different levels of visibility. I like to think in terms of "good, better, and best" placement to help prioritize key information.
Here’s a quick breakdown of the prime real estate on your trailer:
- Rear Doors (Best): This is your most valuable spot, hands down. It’s seen by every single person behind you in traffic, making it the perfect place for your farm logo, website, and phone number.
- Side Panels (Better): Those big, open spaces on the sides are your main billboard. They're ideal for larger, more artistic graphics like horse silhouettes or your farm name in huge letters. This is what people will see when you're parked at an event.
- Gooseneck Area (Good): The area over the gooseneck is great for secondary info or a smaller version of your logo. It’s a subtle but very professional touch.
With more people than ever involved in equestrian sports, the demand for horse trailers—and custom decals—has shot up. Bumper pull trailers, which make up about 55% of the market, are a huge hit with individual owners looking to add decals for branding and safety. You can explore all sorts of personalized options, like a custom horse head with name sticker, and see just how easy it is to create a unique look.
A Step-by-Step Guide to Flawless Installation
Worried about applying the decals yourself? Don't be. Getting that professional, bubble-free finish is a lot easier than you might think. We'll break down the entire process into simple, manageable steps that anyone can follow.
With the right prep work and a little patience, you can install your decals for horse trailer confidently. You'll save some money and get the satisfaction of a job well done.
Gather Your Essential Tools
You don't need a professional workshop to get great results. In fact, you probably have most of these tools in your garage already. Having everything ready to go beforehand is the key to a smooth, stress-free installation.
Here’s your pre-installation checklist:
- Cleaning Solution: A simple 50/50 mix of isopropyl (rubbing) alcohol and water is perfect. Stay away from any cleaners with wax or silicone, like a lot of car wash soaps.
- Lint-Free Cloths: Microfiber towels are your best friend here. You'll need them for cleaning and drying without leaving any fuzz behind.
- Squeegee: This plastic applicator is your most important tool for a smooth, bubble-free job. Many decal sellers will even include one with your order.
- Measuring Tape: Absolutely essential for making sure your placement is perfectly level and centered.
- Masking Tape: You'll use this to create a "hinge," which is the secret weapon for perfect alignment.
- Spray Bottle: For applying that cleaning solution evenly across the surface.
Got your tools? Great. You're ready to prep the surface, which is honestly the most important step of the whole process.
Prepare the Surface for a Perfect Bond
Think of your trailer's surface like a painter's canvas. You wouldn't start a masterpiece on a dirty canvas, and the same principle applies here. The goal is to create a completely clean slate for the decal's adhesive to grab onto.
First, wash the area with regular soap and water to get rid of any heavy dirt or mud, then rinse it clean. Once it's completely dry, it's time for the final, most critical cleaning step. Spray your 50/50 alcohol-water mix generously where the decal will go. Wipe it down firmly with a clean, lint-free cloth, and then immediately wipe it dry with another clean cloth. The alcohol strips away any invisible oils or wax residues that can ruin the bond.
Temperature is a huge factor, too. The sweet spot for applying vinyl is between 50°F and 90°F (10°C and 32°C). If it's too cold, the adhesive won't activate right. If it's too hot, it can get overly sticky and become a nightmare to handle.
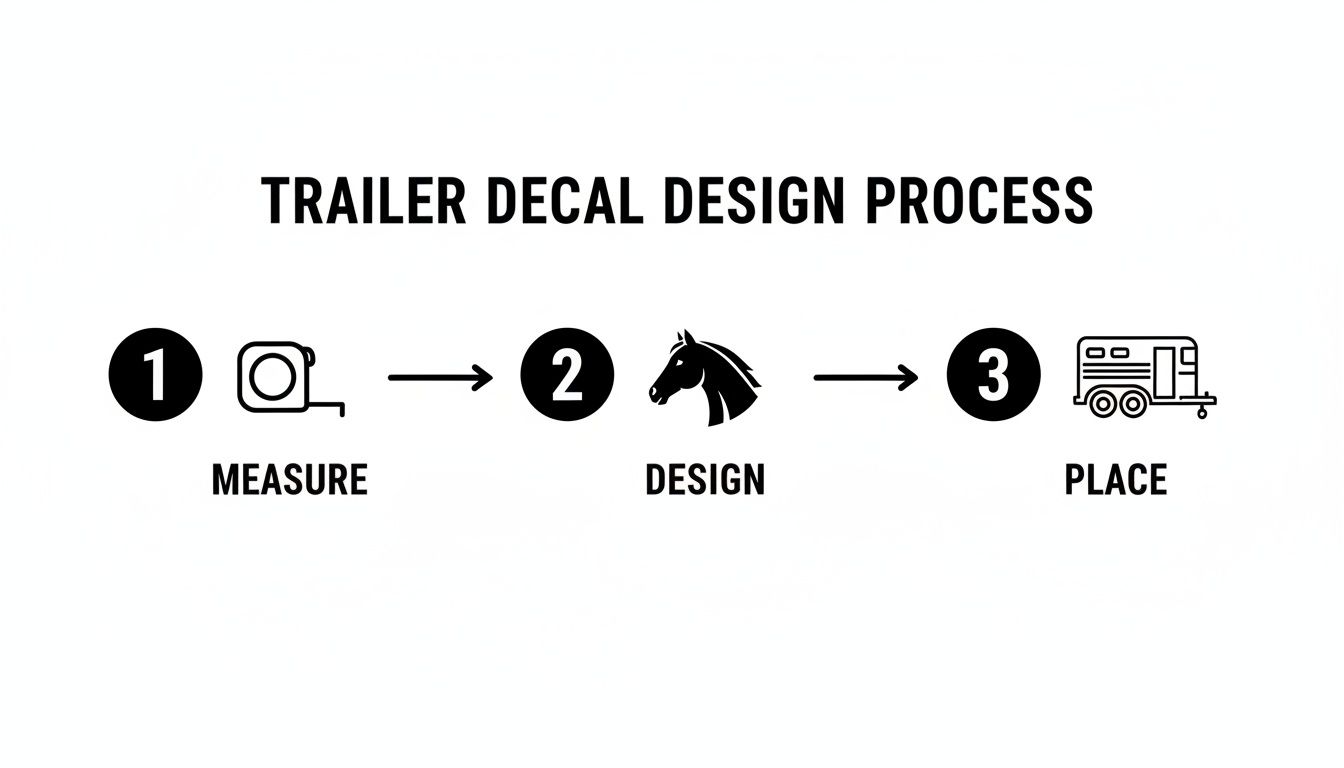
This simple flow shows how everything comes together—proper measurement and design are the foundation for that perfect final placement.
Master the Hinge Method for Alignment
The "hinge method" is a pro trick that completely removes the guesswork from lining things up. It’s the best way to handle bigger graphics and prevents that awful feeling of stepping back to see a crooked decal.
Here’s how it works:
- Position the Decal: With the paper backing still on, place your decal exactly where you want it. Use your measuring tape to get it perfectly level and centered.
- Create the Hinge: Once you love the placement, run a long piece of masking tape right down the center, sticking it to both the decal and the trailer. This tape is your hinge, locking your alignment in place.
- Apply One Side: Pick a side, any side. Lift that half of the decal and fold it back over the hinge. Now, carefully peel the paper backing away from the vinyl, stopping when you get to the tape. Grab some scissors and cut that exposed backing paper off.
- Squeegee It Down: Holding the decal's edge away from the trailer, start applying the vinyl with your squeegee. Begin right next to your tape hinge and work your way outwards using firm, overlapping strokes. This forces all the air out from underneath.
- Repeat on the Other Side: Now you can gently remove the masking tape hinge. Lift the other half of the decal, peel off the rest of the paper backing, and squeegee it down just like you did the first side, working from the center out.
- Remove the Transfer Tape: The whole decal is on! Go over it one last time with the squeegee to make sure it has a good, solid bond. Finally, slowly peel the top layer of transfer tape off. The trick is to pull it back against itself at a sharp 180-degree angle. If any vinyl starts to lift, just lay the tape back down, squeegee that spot again, and then continue peeling.
While applying decals to a trailer and films to a window differ, the core principles of surface preparation and bubble-free application are very similar. For more great insights into applying films smoothly, it's worth reviewing a guide on flawless film installation techniques.
Your new horse trailer decals look sharp, and with just a little routine care, they’ll stay that way for years. It's not complicated or time-consuming—just a few smart habits will protect your investment and keep the vinyl's color vibrant and the adhesive locked down tight.
Think of your new graphics like the finish on a high-end saddle. You wouldn't hit it with a pressure washer or scrub it with harsh chemicals. The same gentle approach works best here, making sure your decals can handle sun, rain, and countless miles on the road.
Proper Washing Techniques
Washing your trailer is the most common maintenance you'll do, and getting it right is the secret to decal longevity. The goal is simple: get the dirt off without hammering the vinyl or lifting its edges, which is where peeling almost always starts.
When it's time for a cleaning, just remember these rules of thumb:
- Hand Wash if You Can: A soft sponge or cloth with a mild, non-abrasive soap (like a gentle car wash solution) is your best friend. This method gives you total control and avoids putting any stress on the graphics.
- Be Careful with Pressure Washers: If you have to use one, switch to a wide-angle spray tip and make sure you keep the nozzle at least 18-24 inches away from the decal. Never, ever aim the spray directly at the edges of the graphic—that force is a surefire way to lift the vinyl and start the peeling process.
- Rinse It All Off: After washing, give the trailer a complete rinse with clean water. You want to get all the soap residue off, as it can dull the decal’s finish over time.
Just like a horse's coat, your trailer's graphics benefit from a gentle but thorough cleaning. Harsh methods cause damage right away, but a patient, careful approach keeps them looking great season after season.
Protecting Your Graphics from the Elements
The sun’s ultraviolet (UV) rays are the number one enemy of any outdoor graphic. Over the years, they cause colors to fade and vinyl to get brittle. While we use professional-grade cast vinyl with built-in UV inhibitors, a few extra steps will go a long way.
Whenever you can, park your trailer in a shaded spot or under a cover. It sounds simple, but reducing direct sun exposure is the single most effective way to prevent long-term fading and breakdown.
For an extra layer of defense, you can apply a high-quality automotive wax (make sure it's one rated safe for vinyl) once or twice a year. This adds UV protection and has the added benefit of making the surface slicker and easier to clean.
Safely Removing Old or Damaged Decals
Eventually, you might want to update your look or replace a graphic that's seen better days. Taking old decals off your horse trailer has to be done carefully to avoid scratching the paint or aluminum underneath.
Follow these steps for a clean, damage-free removal:
- Add a Little Heat: Grab a hairdryer or a heat gun on its lowest setting and warm up the surface of the decal. This softens the adhesive and makes it much easier to peel off. Keep the heat source moving so you don't overheat one spot.
- Peel Slowly and Low: Once it's warm, use a plastic scraper or even just your fingernail to lift a corner. Peel it back slowly at a sharp, 180-degree angle, keeping the vinyl low against the trailer’s surface as you pull.
- Clean Up the Sticky Stuff: After the vinyl is gone, you'll probably have some sticky residue left behind. A good adhesive remover like Goo Gone or just some isopropyl alcohol on a soft cloth will dissolve it safely without hurting your paint.
Safety and Legal Considerations for Trailer Graphics
It's easy to get caught up in the fun of designing custom graphics for your horse trailer, but don't forget the rules of the road. Making sure your design is both safe and street-legal is just as critical as picking the right colors. Smart placement isn't just about avoiding a ticket—it's about boosting your visibility and protecting you, your precious cargo, and everyone else on the highway.
Think of it this way: a well-planned design blends your personal style with the non-negotiable safety features every trailer needs.
Enhancing Visibility with Reflective Decals
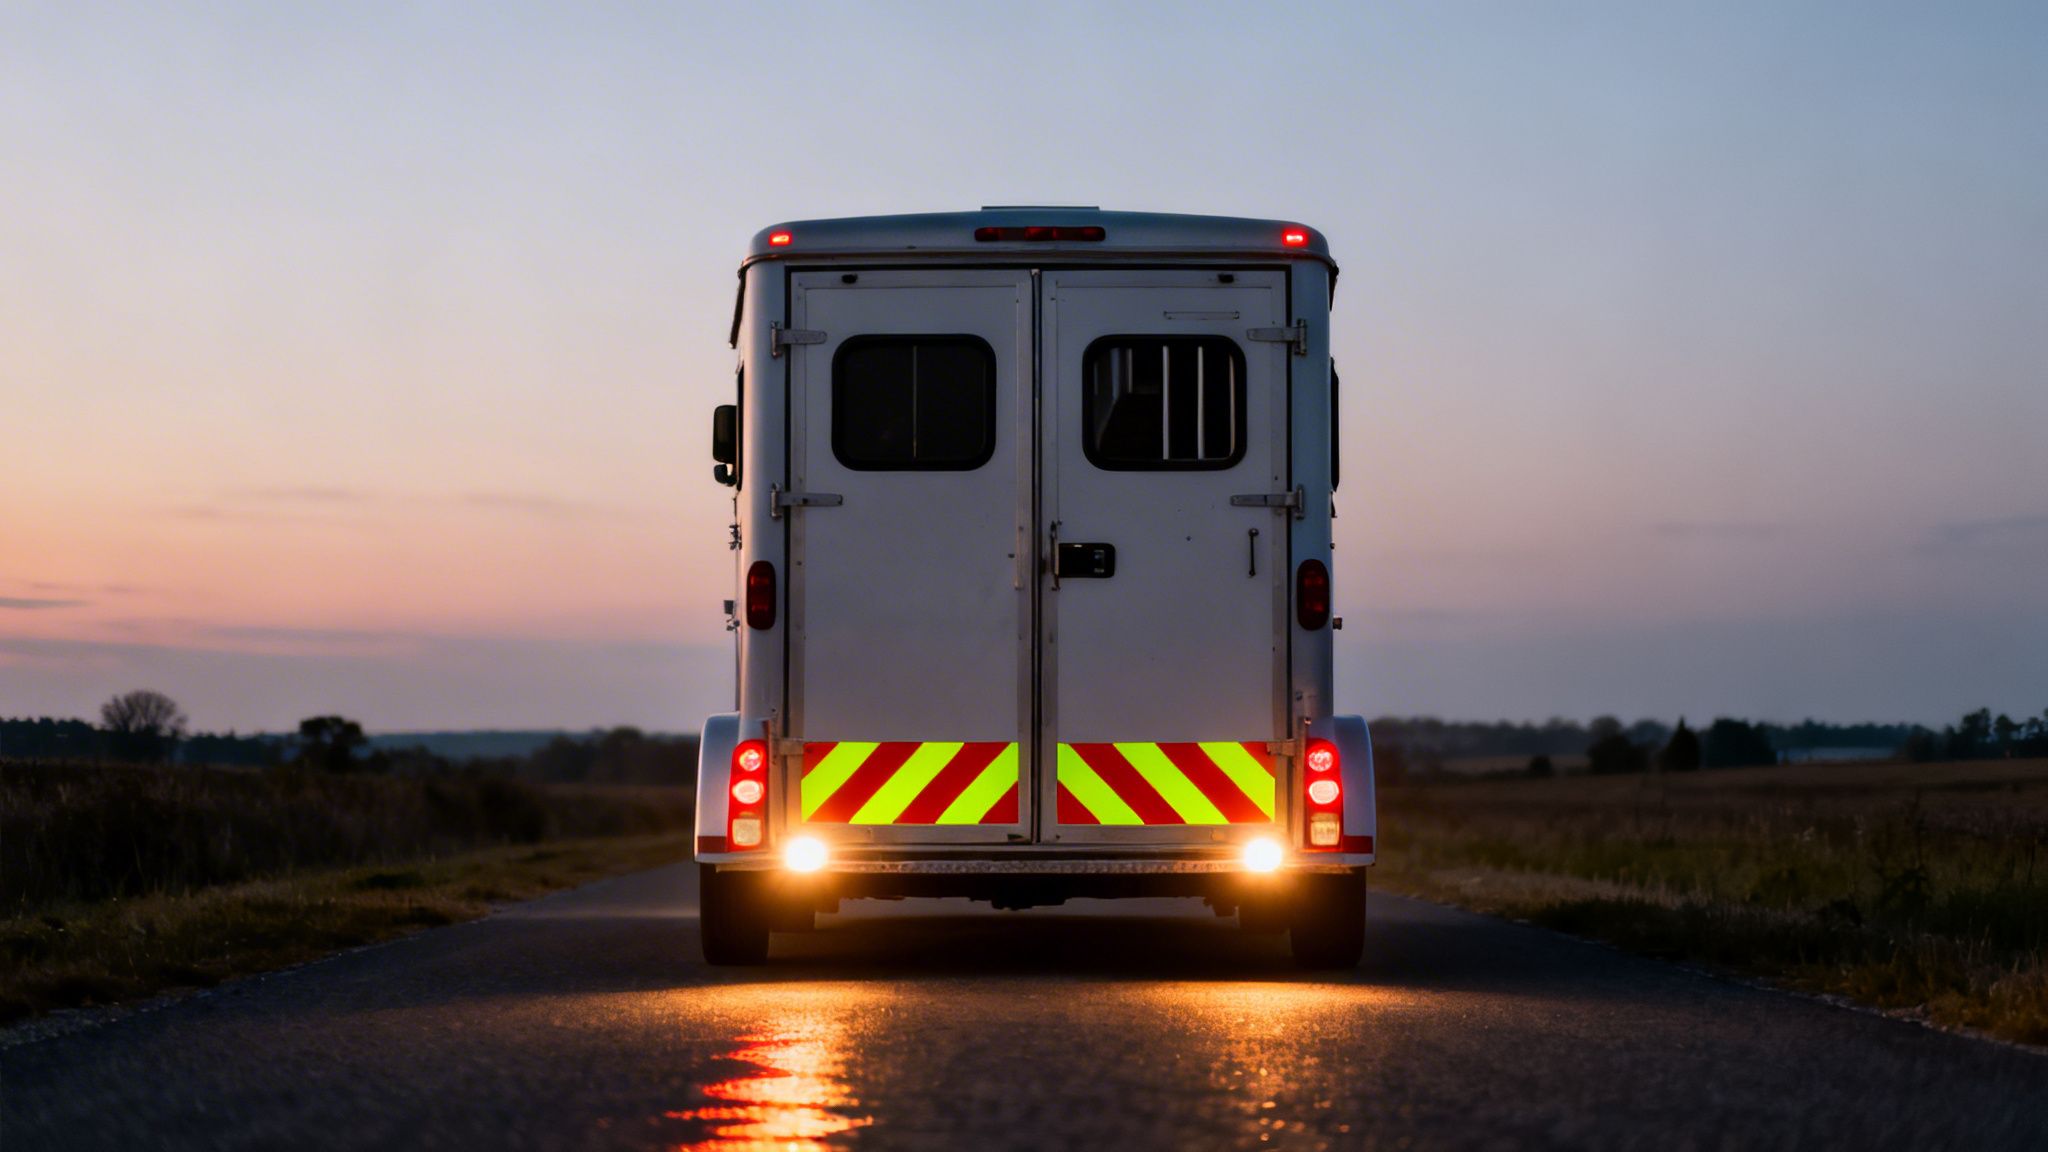
Hauling at dawn, dusk, or in bad weather is part of life for equestrians. In those low-light conditions, your trailer has to be seen. While factory reflectors do their job, adding strategically placed reflective decals for horse trailer safety can make a world of difference.
These decals aren't just shiny stickers. They contain thousands of tiny glass beads that act like mirrors, catching the headlights of other cars and bouncing the light right back at the driver. Your trailer instantly lights up, making it impossible to miss. Many states even have specific laws about "conspicuity tape" for trailers over a certain size, and custom reflective decals are a great way to meet or exceed those standards.
Here are a few high-impact spots to place them:
- Rear Ramp and Doors: Outlining the edges with reflective strips or adding a reflective version of your logo makes your trailer’s profile crystal clear to anyone coming up from behind.
- Side Panels: A simple reflective strip running along the bottom length of the trailer helps other drivers gauge its full size, especially when you're changing lanes.
- Gooseneck and Fenders: These areas are easy to overlook but are crucial for being seen at intersections when someone is approaching from the side.
The rise of safety regulations has transformed the horse trailer market. In the U.S., where over 400,000 trailers are registered, owners increasingly add reflective decals to improve safety during night hauls, helping to reduce visibility-related accidents.
Avoiding Obstructions and Ensuring Compliance
Your creative vision has a few boundaries set by the law. It's a simple rule, but one that's surprisingly easy to forget: your decals must never cover essential lights, plates, or information. This is a common mistake that can get you pulled over or cause you to fail a vehicle inspection.
Before you peel and stick, take a minute to locate all the critical areas on your trailer:
- Brake lights, taillights, and turn signals
- License plates and registration stickers
- Required DOT numbers or weight information
- The manufacturer’s VIN plate
A good rule of thumb is to leave at least a few inches of clear space around all of these items. Also, be careful with windows. While a small decal is usually fine, anything that blocks your line of sight through the tow vehicle is a definite no-go. A simple, well-placed graphic like a "Best Friend in Trailer, Don't Tailgate" decal can boost safety without causing any obstructions.
One last thought—your graphics can do double duty as a theft deterrent. A thief is far more likely to target a plain, unmarked trailer than one with a unique and professional-looking farm logo. It just makes your rig too recognizable. Your investment becomes not just stylish, but a little more secure, too.
Your Top Questions About Trailer Decals Answered
Even after covering the basics, you probably have a few more specific questions floating around. That’s perfectly normal. Here are the most common ones we get from fellow horse owners, with straight-to-the-point answers to help you feel completely confident in your choices.
How Long Will a Decal Actually Last on My Horse Trailer?
This really comes down to the quality of the vinyl you choose and how much sun it gets. A professional-grade cast vinyl—which is the only type you should consider for a vehicle—is rated for up to 7 years of outdoor life. It’s engineered to handle sun, rain, and everything the road throws at it.
On the other hand, that cheaper calendared vinyl you might see online could start cracking, shrinking, or peeling away in just 1-3 years. To get the most out of any decal, always wash your trailer gently and never aim a pressure washer directly at the decal's edges.
Can I Put a Decal Over the Rivets on My Trailer?
You sure can, but it takes the right material and a little bit of finesse. This is where a flexible, high-quality cast vinyl is worth its weight in gold. It's specifically designed to stretch and conform to weird surfaces like rivet heads and corrugated panels.
The trick is to apply the decal, then gently warm the area over the rivet with a hairdryer or a heat gun on its lowest setting. Use a soft applicator or even your finger to carefully press the vinyl down and around the rivet. That touch of heat makes the vinyl pliable, helping it mold perfectly for a secure bond that looks like it was painted on.
Think of reflective decals as an essential piece of safety equipment, not just a cosmetic choice. For a small extra cost, you're buying peace of mind and protection for you and your animals every time you haul in the dark.
Are Reflective Decals Really Worth the Extra Money?
Absolutely, one hundred percent. When you're talking about decals for a horse trailer, reflective vinyl dramatically boosts your visibility after the sun goes down. It works by bouncing light directly back to the source, so your trailer lights up like a Christmas tree in another driver’s headlights.
This simple upgrade massively reduces the risk of getting rear-ended, especially on those early morning or late-night trips to a show. Considering the precious cargo you’re hauling, the safety factor alone makes them one of the smartest investments you can make for your trailer.
How Do I Order a Custom Decal with My Farm's Logo?
It’s usually a pretty simple process. First, you'll need your logo in a high-resolution digital file. For the best possible result, a vector file format (like .ai, .eps, or .svg) is the gold standard because it can be scaled to any size without getting blurry or pixelated.
From there, you just upload that file to the sticker shop's website and tell them the size, color, and type of vinyl you want. Any good company will send you a digital proof to review and approve before they start production. This gives you a final chance to make sure it looks exactly how you pictured it.
Ready to give your trailer a look that truly stands out? Custom Sticker Shop makes professional-grade Oracal vinyl decals right here in the USA, built to last for years on the road. With hundreds of designs and a simple custom ordering process, you can get the exact graphic you need. Check out our collection at https://customstickershop.us and take advantage of our Buy 2 Get 1 Free offer today.