
Your horse trailer is more than just a piece of equipment; it’s a rolling billboard for your equestrian life. Whether you’re hauling to a local show or trekking across the country, custom decals turn that plain metal box into a statement about your passion. With durable, American-made vinyl graphics, you can add anything from a farm logo to a silhouette of your favorite horse, giving your rig a professional look without the steep cost of a custom paint job.
Giving Your Trailer a Unique Equestrian Identity

Think of your trailer as an extension of your identity in the horse world. The way it looks says something about you, your brand, or your simple love for the sport. Instead of blending in with a sea of anonymous trailers, high-quality horse trailer decals let you stand out and tell your story.
They’re not just for looks, though. Custom graphics serve a real purpose, combining style with smart, practical function.
More Than Just Decoration
For so many of us, that trailer is practically a second home on wheels. Personalizing it creates a sense of pride and a deeper connection. Here’s what a good decal can do for you:
- Brand Representation: If you run a stable, training facility, or breeding program, a well-designed decal with your farm name and logo is one of the best marketing tools you can have. Every trip to the vet, feed store, or show becomes an opportunity to get your name out there.
- Personal Expression: Show off your discipline! Whether you’re into dressage, barrel racing, or just hitting the trails, you can find graphics that reflect what you love to do.
- Enhanced Identification: Ever tried to find your rig in a massive, crowded showground parking lot? A distinctive decal makes it instantly recognizable, saving you time and frustration.
The equestrian community is more invested than ever, and it shows. The global horse trailer market was recently valued at around USD 1.2 billion and continues to grow, with North America leading the way. That reflects a community that cares deeply about every aspect of their passion—right down to the appearance of their equipment.
A thoughtfully chosen decal does more than just decorate; it transforms your trailer into a rolling billboard for your equestrian journey, communicating professionalism and passion to everyone you pass on the highway.
Ultimately, these graphics are an easy and affordable way to make your mark. If you’re looking for more ideas, you might get some inspiration from our guide to unique ideas for personalized vehicle decals. They offer a simple, durable, and stylish solution for any horse owner ready to stand out.
Choosing the Right Vinyl Material and Finish

Not all vinyl is created equal, and this is one of the most critical decisions you’ll make. Your trailer lives a tough life on the road—facing harsh sun, driving rain, road salt, and endless dirt. The vinyl you pick determines whether your horse trailer decals look sharp for years or start peeling after one season.
You’ll generally come across two main types of vinyl: calendared and cast. Calendared vinyl is cheaper, but it’s thicker, less flexible, and tends to shrink over time. That shrinkage is what leads to ugly cracking and peeling at the edges.
Understanding Vinyl Types
For a horse trailer constantly exposed to the elements, cast vinyl is the only way to go. It’s made using a liquid casting process that creates a much thinner, more durable, and more conformable film. This means it can stretch over rivets, curves, and corrugated panels without trying to shrink back, giving you that smooth, paint-like finish that lasts.
That’s why we, and most professionals, stick to materials like Oracal 7-year outdoor vinyl. It’s the industry standard for a reason. This type of cast vinyl is engineered to resist fading from brutal UV rays and hold up in extreme weather, so you don’t have to worry about your investment on long hauls.
This demand for durable, stylish customization is a huge part of the $1.41 billion global horse trailer market. It’s the same trend seen across the automotive world, where nearly 70% of vehicle owners add graphics for branding or just plain personalization. With bumper pull trailers making up 55% of the market, they provide the perfect canvas for these lasting designs. You can see more on these trends over at dataintelo.com.
Selecting the Perfect Finish
Once you’ve settled on a quality cast vinyl, the next step is choosing a finish. This is what really defines the final look and feel of your decal. Each option has its own vibe and functional perks.
To help you decide, here’s a quick breakdown of the most common finishes we work with.
Vinyl Finish Comparison for Horse Trailers
| Finish Type | Best For | Key Benefit | Consideration |
|---|---|---|---|
| Glossy | Farm logos, intricate graphics, vibrant colors | High-shine, paint-like look that makes colors pop | Can show glare in direct sunlight |
| Matte | Text-heavy designs, modern or subtle graphics | Sophisticated, no-glare appearance | Can be harder to clean than glossy finishes |
| Reflective | Safety markings, logos on rear/side panels | High visibility in low-light conditions | Higher cost, limited color options |
| Glitter | Eye-catching accents, name decals, show trailers | Adds sparkle and dimension, unique look | Can be distracting for complex designs |
Ultimately, the best choice depends on what you’re trying to achieve—a bold statement, a subtle brand, or an extra layer of safety.
Here’s a little more on the most popular choices:
-
Glossy Finish: This is the crowd favorite for a reason. Its high-shine surface looks like a custom paint job and makes colors incredibly vibrant. It’s perfect for farm logos or detailed designs that need to grab attention from across the showgrounds.
-
Matte Finish: If you’re going for a more modern, understated look, matte is a fantastic choice. It absorbs light instead of reflecting it, killing glare and giving your trailer a sophisticated, almost velvety texture. It works great for clean, text-based decals or contemporary graphics.
-
Reflective Finish: Safety is everything, especially when you’re hauling precious cargo at dawn or dusk. Reflective vinyl looks pretty normal during the day but lights up like a Christmas tree when headlights hit it at night, making your trailer impossible to miss.
Your choice of finish is about more than just style—it’s about function. A glossy finish maximizes visual impact, while a reflective finish boosts safety, ensuring your rig is seen in low-light conditions.
Choosing the right finish can completely change how your decal performs, much like how the benefits of vinyl window decal stickers go way beyond simple decoration. When you combine a top-tier cast vinyl with the perfect finish, you get horse trailer decals that are both beautiful and built to last.
Getting Your Design and Placement Just Right
A killer design can still miss the mark if you don’t stick it in the right spot. When it comes to horse trailer decals, where you put them is every bit as important as what they look like. The real goal is to create a clean, professional look that gets noticed for the right reasons.
The best designs always start with a clear idea. First, ask yourself what you want your trailer to say. Is it a rolling billboard for your training business? A tribute to your heart horse? Or just a reflection of your own personal style?
Finding Your Design Inspiration
You’re not alone in wanting to personalize your rig—it’s a huge part of the equestrian lifestyle. In the U.S., which holds a massive 42% market share of the global horse trailer industry with over 400,000 registered trailers, the drive to customize is stronger than ever. This demand has fueled an explosion of design options, with some shops offering over 1,200 choices for everything from military tributes to family stick figures. Personalization has never been easier. You can dig into the latest market trends over at marketgrowthreports.com.
Some of the most popular themes we see are:
- Ranch and Farm Logos: This is the go-to for professionals. A sharp, clean logo on the side of your trailer is a powerful marketing tool that builds your brand everywhere you haul.
- Horse Silhouettes: A true classic. You can find breed-specific silhouettes—like a powerful Quarter Horse or an elegant Arabian—or even action shots from disciplines like barrel racing or show jumping.
- Custom Text Decals: Simple, but incredibly effective. This is a practical and stylish way to display your farm’s name, your horse’s show name, or your contact info.
- Patriotic or Themed Graphics: From American flags to intricate floral patterns, these larger graphics can cover a big chunk of the trailer for a bold, head-turning statement.
Where to Stick It: Strategic Placement for a Pro Look
Once you’ve landed on a design, it’s time to think of your trailer as a blank canvas. Every section offers a different opportunity to communicate something. The key is to avoid cramming everything into one spot and instead create a balanced, thoughtful layout.
My Favorite Pro Tip: Before you even think about peeling off that backing paper, print your design, cut it out, and use painter’s tape to test it on your trailer. Step way back. Look at it from different angles. This simple trick lets you see the true scale and placement, and it has saved countless people from making a costly mistake.
Think about these high-impact zones for your horse trailer decals:
- The Main Side Panels: This is your prime real estate. It’s the perfect spot for large ranch logos, sweeping horse silhouettes, or full graphic wraps that tell a story.
- Rear Doors or Ramp: This is what every driver behind you will be staring at in traffic. It’s the ideal place for your website, phone number, or social media handles. A simple “Caution: Horses” decal here is also a smart safety move.
- The Gooseneck or Nose: Don’t neglect the front of your rig! A smaller version of your logo or a subtle graphic on the gooseneck adds that professional finishing touch that looks great when you’re parked at a show.
- Fenders and Windows: These smaller spots are perfect for accent decals. A small breed logo on a fender or your initials tucked into the corner of a window can be the detail that ties the whole look together.
When you pair a design that means something with placement that makes sense, you’re not just decorating a trailer—you’re creating a statement piece that truly represents who you are as an equestrian.
How to Achieve a Flawless Decal Application
Putting a large vinyl decal on your horse trailer can feel a bit intimidating, like a job that’s best left to the pros. But honestly, with a little patience and the right approach, you can get a perfect, bubble-free finish all on your own. There’s no secret trick—it’s all about methodical prep work and a steady hand.
The single most important part of the entire process is preparing the surface. A clean trailer is non-negotiable if you want that decal to stick and stay stuck. Before you even think about peeling off the backing paper, make sure the surface is spotless. For a truly professional result, you’ll want to decontaminate your vehicle’s paint to ensure the best possible adhesion.
After washing and drying, the final step is a quick wipe-down with isopropyl rubbing alcohol on a clean microfiber cloth. This little detail removes any leftover wax, grease, or residue that could sabotage your decal’s grip. Seriously, don’t skip this. It’s the difference between a decal that lasts for seven years and one that starts peeling in seven months.
This simple workflow breaks down the key stages: designing your decal, visualizing where it’ll go, and then applying it with care.
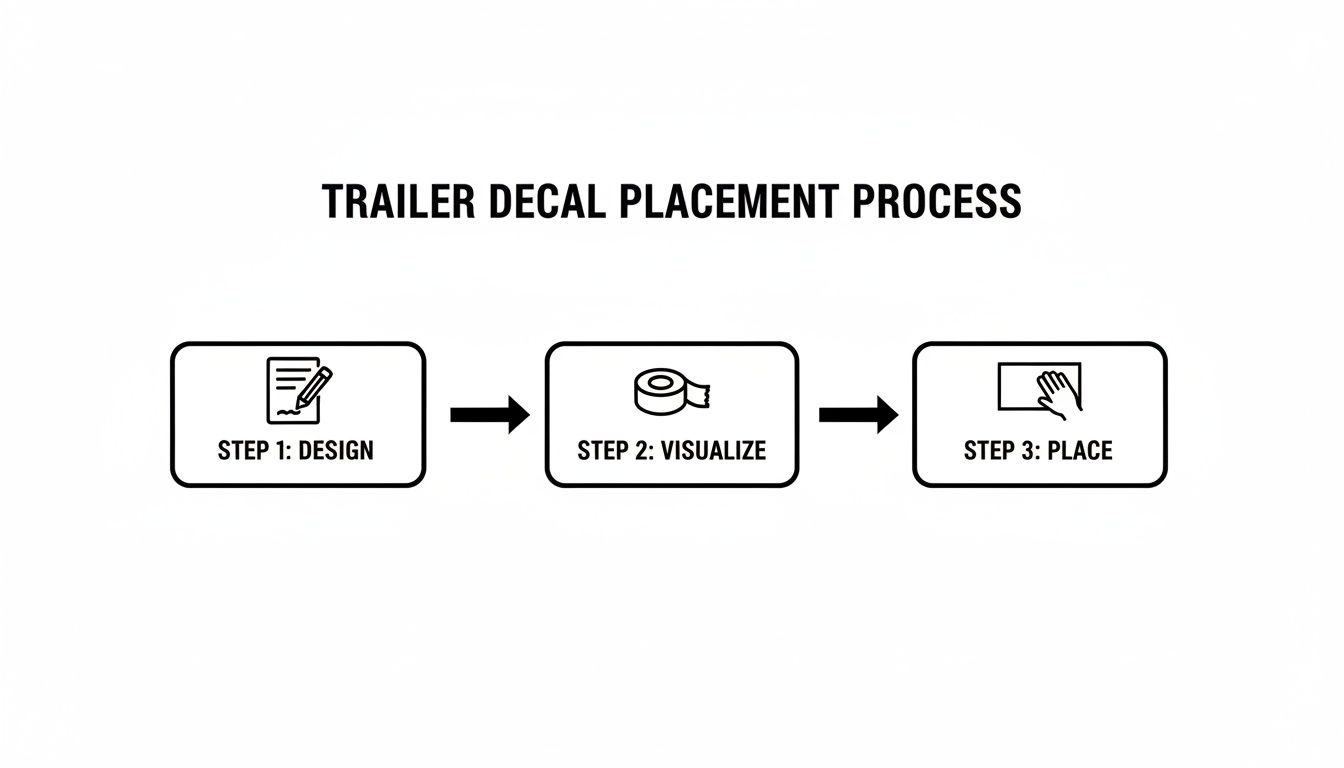
Following these steps in order is the best way to avoid mistakes and make sure the final result looks as good in real life as it did in your head.
The Two Best Application Methods
When it comes to horse trailer decals, you’ve got two main installation methods. The one you choose really just depends on the size of your graphic. The good news is that most professional decals come pre-spaced on transfer tape, which holds all the letters and design elements in perfect alignment for you.
The Dry Hinge Method (For Smaller Decals)
This technique is perfect for smaller graphics like logos, text, or individual horse silhouettes. It’s quick, clean, and gives you a lot of control.
- With the backing paper still on, position your decal exactly where you want it. Use a strip of painter’s tape to create a horizontal “hinge” right across the middle.
- Flip the top half of the decal up and over the hinge. Now, carefully peel the backing paper down until you reach the tape.
- Cut away that exposed piece of backing paper.
- Grab your squeegee and apply the top half of the decal to the trailer, working from the center hinge outwards in smooth strokes.
- Remove the painter’s tape hinge and do the exact same thing for the bottom half.
Pro Tip: A felt-edge squeegee is your best friend here. The soft edge glides over the vinyl and transfer tape without scratching the graphic, which is especially important if you chose a glossy finish.
The Wet Application Method (For Larger Graphics)
For those big, sprawling decals, the wet method is an absolute game-changer. It gives you the wiggle room to slide the graphic around until it’s perfectly placed.
- Make Your Solution: In a spray bottle, mix a few drops of mild dish soap (like Dawn) with water.
- Mist Everything: Lightly spray both the trailer surface and the sticky side of the decal after you remove the backing paper.
- Slide It Into Place: The soapy water creates a temporary barrier, letting you slide the decal around to get the alignment just right. No pressure to get it perfect on the first try.
- Squeegee Firmly: Once it’s where you want it, use your squeegee to push the water and any air bubbles out from under the vinyl. Start in the center and work your way to the edges with firm, overlapping strokes.
Give the decal at least 24 hours to cure before you even think about touching the transfer tape. Once it’s cured, peel the tape off slowly at a sharp angle. For a more detailed walkthrough, check out this great step-by-step guide on installing vinyl decals that covers these same principles in more detail.
Keeping Your Decals and Trailer Road-Ready
Once your new horse trailer decals are on and looking sharp, the mission shifts from installation to preservation. A little routine care, along with an awareness of basic road safety rules, will keep your investment looking great for years to come.
The single biggest threat to your decal’s lifespan? Improper washing. High-pressure washers are fantastic for blasting off caked-on mud, but they can be a total disaster for vinyl graphics. That intense spray can easily get under the decal’s edge, causing it to lift, peel, or bubble up.
Gentle Cleaning for Long-Lasting Graphics
The best way to wash your trailer is the old-fashioned way: by hand. Grab a soft sponge or a microfiber cloth and some mild automotive soap.
When it’s time to rinse, just use a standard garden hose without a high-pressure nozzle. This approach is more than enough to get your rig sparkling clean while keeping your decals securely bonded to the surface.
If you want to take your trailer’s appearance to the next level, regular detailing is key. For a deeper dive, check out these professional vehicle detailing tips to keep your whole setup in show-ready condition.
Navigating Legal and Safety Requirements
Your custom graphics should make your trailer look better, not create a safety hazard. Both state and federal laws are very clear that certain parts of your trailer must remain completely unobstructed for safety and legal compliance. It’s critical to plan your decal placement with these rules in mind.
There are a few key areas you absolutely must keep clear:
- Lights and Reflectors: Every single brake light, turn signal, clearance light, and safety reflector needs to be 100% visible. Covering them in any way is illegal and incredibly dangerous.
- Windows: Your decals should never block the driver’s view or cover any windows needed for safe trailering.
- License Plates: The plate area must be totally free of any graphics or frames that could obscure the numbers, letters, or state information.
For commercial haulers, this is non-negotiable. The placement of your Department of Transportation (DOT) numbers is strictly regulated. They must be clearly visible from at least 50 feet away and be in a color that contrasts with your trailer. Always plan your design around these numbers, never over them.
By following these simple maintenance and safety guidelines, you’re not just protecting your decals—you’re ensuring every trip you take is a safe one. A well-maintained trailer reflects a responsible owner, and that includes keeping your graphics clean and your rig compliant.
Common Questions About Horse Trailer Decals
When it comes to dressing up your rig, a few questions always seem to pop up. Getting straight answers is key to feeling good about your investment, from picking the right vinyl to knowing you can get it off cleanly down the road.
Let’s dive into the practical details we hear about most often—durability, removal, application, and the legal stuff you can’t ignore.
How Long Will My Horse Trailer Decals Last?
The lifespan of your decals really comes down to two things: the quality of the vinyl and how much sun it gets. We exclusively use professional-grade outdoor vinyl like Oracal, which is rated for up to 7 years. This isn’t your average craft-store sticker; it’s engineered to fight off UV fading and stand up to whatever the weather throws at it.
Want to get the most life out of them? Easy. Avoid blasting the decal edges with a pressure washer and stick to a gentle wash with a soft cloth. If you can, storing your trailer under a cover or indoors will make a huge difference in keeping the graphics vibrant for years to come.
Can I Remove Decals Without Damaging the Paint?
Yes, absolutely. A premium vinyl decal is designed to come off clean without wrecking the paint underneath, but you have to do it right. The secret is patience and a bit of gentle heat.
Grab a hairdryer on a low setting and gently warm up the decal. This softens the adhesive and makes it much more cooperative. Once it’s warm, start peeling it back at a sharp angle—think about pulling it back on itself, not straight up and away from the trailer.
If you have any sticky stuff left over, a citrus-based adhesive remover and a microfiber cloth will take care of it. Whatever you do, don’t even think about using razor blades or metal scrapers on a painted surface. That’s a surefire way to cause damage.
A little heat and a slow, steady hand are all you need for a clean removal. Rushing the process or using the wrong tools is where people run into trouble.
What Is the Best Way to Apply Large Decals Without Bubbles?
For big graphics, the “wet application” method is your best friend. It’s a game-changer for DIY installers because it gives you a forgiving, repositionable surface that makes a bubble-free finish way easier to achieve.
Here’s how it works:
- Mix up a solution: Just a few drops of dish soap in a spray bottle of water is all you need.
- Mist everything down: Lightly spray both the spot on the trailer where the decal is going and the sticky side of the decal after you peel the backing off.
- Slide it into place: That soapy water lets you slide the graphic around until it’s positioned perfectly. It won’t grab instantly, giving you time to get it right.
- Squeegee from the middle: Once it’s where you want it, use a squeegee to push the water and air out from the center to the edges.
Now for the hard part: let it dry completely for at least 24 hours before you even think about peeling off the clear transfer tape on top. This lets the adhesive fully bond to the trailer surface.
Are There Legal Requirements for Decal Placement?
You bet. This is a huge safety and compliance issue you can’t overlook. Your decals cannot, under any circumstances, cover up required safety features. That means staying clear of all brake lights, turn signals, clearance lights, license plates, and any mandated reflectors.
If you’re hauling commercially, you also need to make sure your Department of Transportation (DOT) numbers are clearly visible from 50 feet away and meet specific size and placement rules. It’s always smart to double-check your state’s vehicle code to make sure your custom graphics are fully compliant before you start applying them.
Ready to create a look that’s all your own? Custom Sticker Shop offers thousands of American-made, durable vinyl decals perfect for any horse trailer. Explore our designs and enjoy our Buy 2 Get 1 Free offer at https://customstickershop.us.