How to Successfully Apply Car Stickers

Since accessorizing your car is the new “car trend,” car owners make sure they are going above and beyond to choose the best. Apart from getting their car painted a funky color, car owners are now choosing car stickers. These car stickers are available in many different styles, designs, and sizes so all car owners can choose the car sticker that is ideal for their vehicle.
However, it is important to know that no matter what car sticker you choose, if you are not applying it properly, it will not look good. Therefore, knowing the tips on successfully apply car stickers is the best resort!
Tip 1 – Clean the surface before applying
Everyone must know the right way to apply a car sticker. The area that the car sticker needs to be applied must be thoroughly cleaned. The reason why it is so important is that applying it to a dirty surface will cause it to pick up the dirt and it will lose its ability to stick. This is why cleaning the area properly before applying this sticker is so important.
For effective cleaning, you can use water, rubbing alcohol, or liquid soap. Any glass cleaning products should be avoided because they leave residue, which will cause the car sticker to adhere.
Tip 2 – Decide where you want to apply it
Before applying a car sticker, you must know exactly where you want to apply it. There are different options to choose from like the windows, bumper, interior, or on any other exterior surface that would give your car an impressive look. Some people also put car stickers on the tires so the car can look better.
Since choosing where to apply car stickers is such a crucial decision, you must make sure you are choosing the right place. Before directly applying it onto your car, position it, and stick it onto your car with tape. This way you will be able to look at it from a step back and you will be able to determine if it looks good or not. If not, reposition it and step back again. When you have decided the final area, you can apply it.
Tip 3 – Carefully peel away the backing film from the sticker
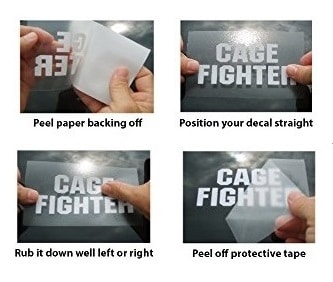
You must make sure you are carefully removing the back paper from your car sticker. While doing this, you must not touch the back because it can leave dirt imprints.
Tip 4 – The graphic needs to be positioned precisely
You need to start by putting one side of the car sticker down and gently smooth it to the other side until the entire sticker is on the car. You must make sure the entire backing is not removed in the beginning. Instead, what you should do is take away 1/3 of the backing and start applying the opened area. Then, as you are applying it on your car, keep pulling the backing away slowly.
Tip 5 – Trim the sides and remove bubbles
Once you have applied the car sticker, feel free to trim the sides if need be. If there are any visible bubbles in the car sticker, you must make sure you are squeezing them so they are punctured.
To get the best-customized car stickers for your car, head over to Custom Car Stickers. You will be able to purchase ready made stickers or customized ones, depending on what you prefer!
