
You're usually looking for a measuring tape sticker when one hand is already busy.
Maybe you're marking spacing on a workbench, checking a drawer opening, laying out hardware on a trailer, or trying to measure across a bumper curve without fighting a floppy tape and a pencil at the same time. That's where these decals stop being a novelty and start acting like a real shop tool. A good measuring tape sticker gives you a fixed reference exactly where you need it, so you're not pulling a tape over and over for the same job.
In our line of work, the difference between a sticker that's helpful and one that becomes annoying comes down to application. If it goes on crooked, gets stretched during install, or traps contamination under the adhesive, it won't read right and it won't stay put. The good news is that most failures are preventable with a careful setup and a few professional habits.
What Are Measuring Tape Stickers and Why You Need One
A measuring tape sticker is an adhesive-backed ruler that turns a surface into a permanent measuring reference. Put one on a bench edge, saw fence, drawer bank, boat deck, truck bed organizer, or inside a van build, and you've got a visible scale right where the work happens.
For a lot of shop and DIY tasks, that fixed reference is the whole point. Product guidance for adhesive-back rulers notes that a peel-and-stick ruler can be more practical than a handheld tape because it gives you a fixed point for distance, angle, and position, cutting down on repeated measuring, though it's still not a substitute for a verified measuring tool when exact dimensions matter, as noted by MISUMI's adhesive scale plate category.

Where they earn their keep
The simplest example is a workbench. If you cut trim, vinyl, wiring loom, tubing, or wrap material all day, a bench-edge ruler saves time because the scale is always in the same place. On vehicles, they're handy for temporary layout references on interior panels, storage systems, and fabrication areas where a standard tape measure keeps slipping.
They also pair well with traditional tools. If you still need a long-span reference for big layouts, something like Pro-grade Milwaukee tools from Value Tools Co makes sense to keep around while the sticker handles repeat checks in the short range.
A measuring sticker works best as your permanent extra hand, not as a replacement for every other measuring tool in the shop.
Better than a novelty decal
A lot of people first think of ruler decals as decorative. In practice, the useful versions are the ones installed for workflow. A bench edge becomes a measuring station. A drawer front becomes a quick reference line. A vehicle panel becomes easier to mark consistently when you have a visible datum nearby.
If you're ordering a custom decal for a specific layout zone, a make your own custom sticker option can help when a standard off-the-shelf format doesn't match the exact space you're trying to use.
How to Choose the Right Measuring Tape Sticker
Picking the right measuring tape sticker isn't about finding the prettiest scale. It's about matching the decal to the surface, the environment, and the way you'll read it.
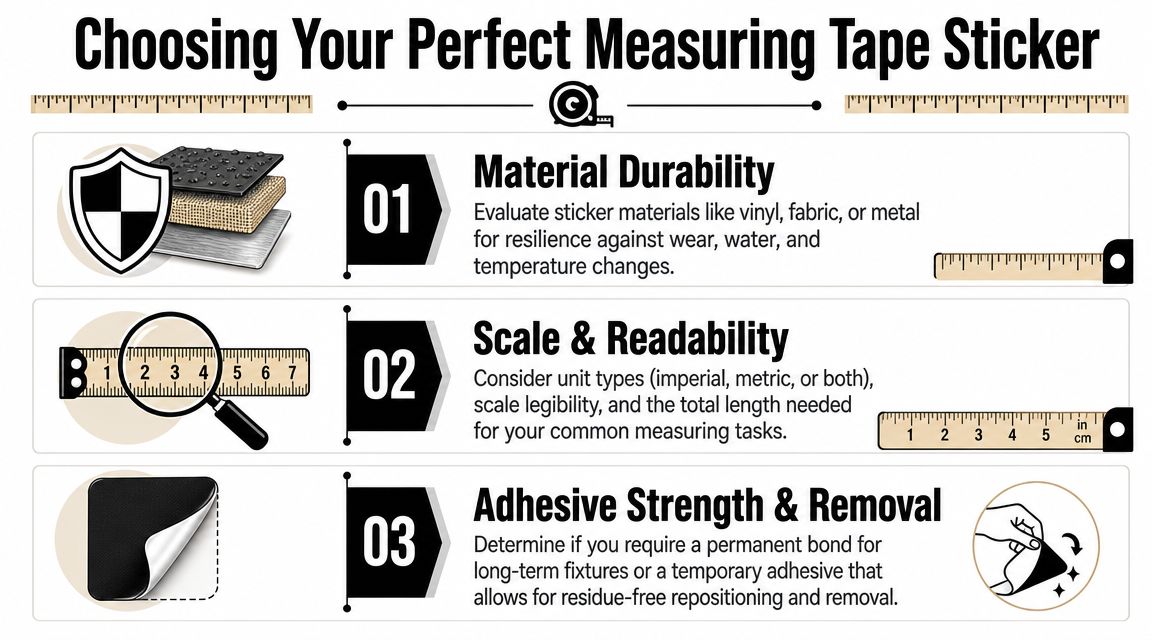
Start with material
For indoor drawers, sewing tables, or cabinet interiors, you can get away with lighter-duty material. For a truck, boat, garage bench, or outdoor fixture, the material matters a lot more. You want a film and print that can handle handling, cleaning, moisture, and regular abrasion.
A measuring decal on a horizontal work surface gets rubbed, wiped, and bumped. One on a vehicle interior may see heat swings and plastic texture. One on a boat or outdoor station has a tougher life. If the seller can't tell you what the face film and adhesive are meant to handle, that's a warning sign.
Match length to the task
Sticker length should follow the work, not the other way around. If you mostly measure short parts at a bench, a compact ruler is often more usable than a long one that extends past the clean, flat part of the substrate. For larger stations, use the most common measuring range as your guide.
A 2025 estimate put the global tape measure market at USD 1,655.4 million, with the 5m to 10m segment holding a projected 47.8% revenue share, which suggests that mid-length measuring tasks dominate typical use cases according to Future Market Insights on the tape measure market. In plain terms, typical users aren't measuring tiny jewelry parts or huge industrial spans all day. They're working in the middle range, and that's a smart benchmark for sticker planning on benches, truck builds, and shop fixtures.
Readability beats decoration
A measuring scale has one job. You should be able to read it quickly, from the angle where you stand.
Look for these traits:
- High contrast numbers that don't disappear against the surface color
- Clear tick spacing so common marks don't blur together
- The right unit system for your work, whether that's imperial, metric, or both
- A useful zero point based on installation, especially if you're indexing from a centerline or edge
Here's a quick comparison:
| Use case | Best marking style | Main concern |
|---|---|---|
| Workbench edge | Bold, high-contrast ruler | Glare and abrasion |
| Vehicle interior panel | Compact scale with clear numerals | Curves and sightlines |
| Drawer or cabinet reference | Narrow format with simple ticks | Limited mounting area |
| Fabrication table | Longer scale with easy checkpoints | Alignment over distance |
If you're ordering a decal for a narrow panel or a limited strip of space, seeing how text and sizing behave on a slim format helps. A 9-inch wide custom text window decal example is useful for understanding how readable graphics need to be when space gets tight.
Preparing Your Surface for a Flawless Application
Most sticker failures start before the backing paper comes off.
People blame adhesive when the problem is wax, silicone, skin oil, sawdust, polish residue, or cleaner left on the surface. In a decal shop, prep is what separates a sticker that looks painted on from one that starts lifting at the corners the first time it gets warm.
Clean means more than “looks clean”
A surface can look spotless and still be a bad bond surface. Bench edges collect fine dust and oil. Vehicle panels often carry dressing, wax, or interior protectant. Boat and garage surfaces may have salt, compound residue, or general grime worked into the texture.
If you've recently corrected paint or polished a panel, make sure the surface is free of leftover residue before applying anything. If that's part of your workflow, this heavy cut compound guide gives useful context on how aggressive polishing products fit into surface work and why cleanup afterward matters.
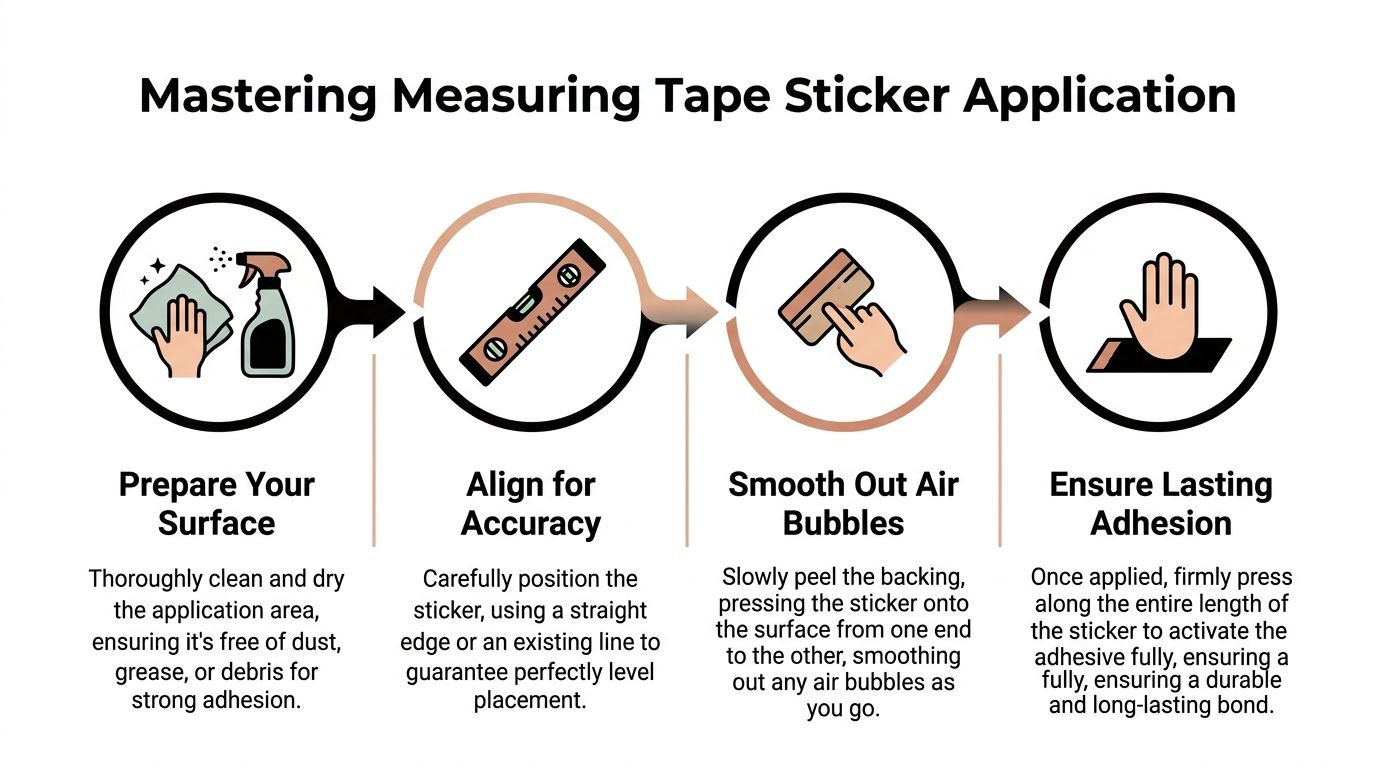
The prep sequence that actually works
Patent literature on tape-related adhesive construction points to a process built around proper substrate prep, adhesive contact, pressure, and drying. The practical translation is simple. Clean the surface well, dry it fully, apply the sticker with firm pressure, then let it settle before hard use. The same source also describes how poor prep and trapped air or moisture lead to bond problems, which is why the order matters in real installations.
Use this shop-floor routine:
- Wash first: Remove dirt and loose contamination with soap and water.
- Dry completely: Don't trap moisture under the film.
- Final wipe: Use a proper degreasing wipe suited to the surface so oils and residue are gone.
- Check texture: Highly textured plastic and damaged paint are poor candidates for precision ruler decals.
Practical rule: If you wouldn't paint over the surface as-is, don't apply a measuring sticker to it as-is.
Bad prep causes fake “accuracy” problems
This is the part people miss. A contaminated surface doesn't just create peel risk. It can also create reading issues later. If an edge curls, if a section lifts, or if the film bridges over contamination, the scale may still look fine at first glance but won't sit consistently against the substrate.
That's why surface prep isn't cosmetic. It's the foundation for both durability and usable accuracy.
The Professional's Guide to Placement and Application
Application is where a measuring tape sticker becomes either a reliable reference or a permanent irritation. The biggest mistakes are easy to spot in the shop: the installer stretches the vinyl while trying to “help” it line up, presses one end first and chases bubbles all the way down, or eyeballs alignment on a surface that needed a hard datum line.
Set the line before you touch the adhesive
Before peeling anything, establish where zero belongs and what edge the decal must follow. On a workbench, that might be the front edge. On a drawer bank, it may be the top reveal. On a vehicle panel, it should be a real body line, trim edge, or taped guide, not guesswork.
Masking tape makes a dependable hinge. Position the sticker, verify the scale orientation, and tape it in place so it can't drift while you start the application. This matters even more on longer decals because small angular errors become visible fast.
For visual placement habits on automotive graphics, a BMW motorsport windshield banner decal example is a good reminder that long graphics always depend on alignment to a fixed edge, not on eyeballing the center.
Apply from the center outward
Once the hinge is set, peel back a manageable section of liner instead of exposing the whole decal at once. Tack the middle first, then work outward with a squeegee or firm roller. That center-out method pushes air to the edges instead of trapping it in a long tunnel.
Don't pull on the vinyl while you're smoothing. That's the mistake that ruins ruler decals. A stretched graphic may look straight during install and read wrong later after the film relaxes.
A short visual helps if you've never used this style of hinge-and-squeegee method:
Read it like a measuring tool, not like a sticker
Professional tape habits matter here. Guidance on tape use recommends looking straight down to avoid parallax, using the burn an inch method when a hook can't be seated, and maintaining accuracy to 1/32 inch over a 6-foot span for commercial-grade work according to Wilker Do's tape measure tips. Applied to stickers, that means two things: align from a direct angle during installation, and verify the scale at several checkpoints instead of trusting one end-to-end glance.
Sight straight down when you install and when you read. An oblique view can make a good decal look wrong.
Curves need restraint
Curved surfaces are where people get into trouble. A mild curve can work if the decal is narrow and the reading area stays visible from a square angle. Tight compound curves are a poor place for any measuring reference you expect to trust.
For slight curves:
- Use shorter sections instead of one long uninterrupted strip
- Anchor to a known datum such as a trim edge or taped line
- Work slowly with firm pressure so the film conforms without stretching
- Verify at multiple marks with a known rule or tape after install
If the surface fights you, don't force the decal. Measuring tools need stable geometry. A badly chosen mounting location will always cause more trouble than a careful installer can fix.
Maintenance and Creative Use Case Ideas
Once the sticker is down properly, keeping it useful is mostly about protecting readability. Dirt doesn't usually ruin a measuring decal. Aggressive scrubbing, harsh chemicals, and constant edge abuse do.
A good ruler decal should stay readable under normal shop use, but outdoor and automotive setups need more thought. Product guidance for this category points out that durability depends on materials and inks that resist UV exposure, abrasion, and solvents, and buyers should verify weather-resistance details because sellers don't always explain how markings will hold up over time, as noted on this measuring tape sticker product listing.
Cleaning without causing edge lift
The safest habit is gentle cleaning with a soft cloth. Wipe along the length of the decal instead of catching the edge with a rag and pulling across it. If the sticker lives on a bench, clear grit before wiping so you're not grinding debris into the print.
A few habits help:
- Use mild cleaners: Avoid harsh solvents unless the material is specifically rated for them.
- Wipe with the grain of the decal: Work parallel to the edge, not against it.
- Check corners now and then: Catching a lifting tip early is easier than fixing a curled section later.
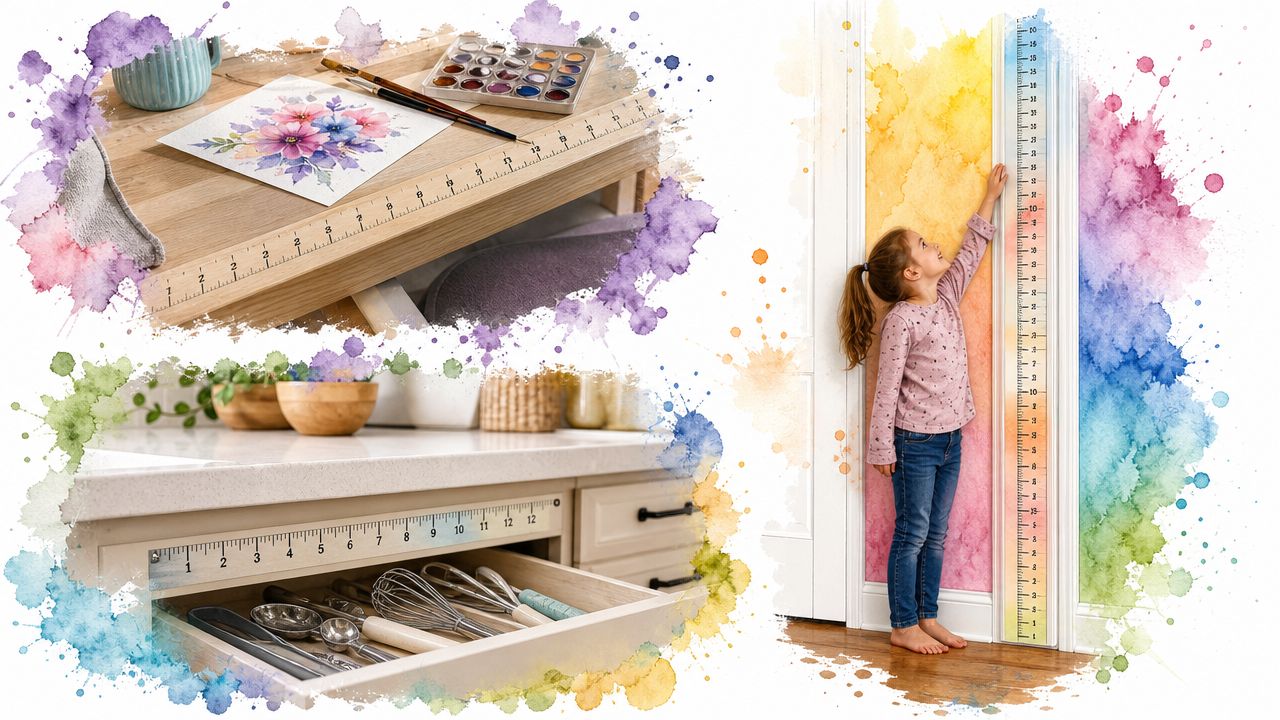
Good places to use them
The most useful installs are the ones that remove repeated setup from a job. A ruler on a miter station fence, sewing table, or parts shelf saves time because the reference stays put. On boats and kayaks, people like them for quick fish checks or gear layout. In a kid's room, the same idea becomes a height chart on a door frame.
Here are a few smart placements:
- Workbench front edge: Great for repeat cuts, hardware spacing, and material checks
- Kitchen or shop drawers: Helpful for organizing inserts and divider spacing
- Van and truck storage: Useful for gear layout, shelf spacing, and quick fit checks
- Craft and sewing stations: Handy for fabric, ribbon, paper, and trim work
The best use case is the one where you measure the same kind of thing in the same place over and over.
Helper reference versus calibrated tool
This is the trade-off worth keeping in mind. A measuring tape sticker shines as a fixed, visible reference. It speeds up layout, repeat work, and quick checks. But when the dimension has to be exact, especially on a curved or heavily used surface, verify with a known measuring tool before you cut, drill, or weld.
That mindset keeps the sticker useful for what it does best.
Troubleshooting Common Installation Issues
Even careful installs can need a small correction. Most problems look worse than they are.
If you see bubbles
Small air bubbles are usually fixable. Start by trying to press them outward with a squeegee or your thumb wrapped in a soft cloth. If the bubble is stubborn and isolated, a fine pinprick at the edge of the trapped air can let you press it flat.
If one section is crooked
A slight misalignment is easiest to fix early, before the adhesive has fully settled. Lift only the affected section, not the whole decal, and reapply with the surface supported and the line rechecked. Pulling too fast can stretch the film, which creates a new problem.
If an edge starts lifting
Patent guidance on adhesive bonding shows that failure usually comes from contamination, weak initial pressure, or insufficient settling time. It also points to the importance of firm roller pressure and cure time for stronger bond formation in this adhesive tape patent reference. In practical terms, if a corner lifts, clean what you can safely reach, press it down firmly, and burnish the area so the adhesive makes fuller contact.
Use this quick triage list:
- Bubble after install: Press outward first, puncture only if needed
- Wrinkle forming: Lift back to the wrinkle, then lay it down again with less tension
- Corner peel: Burnish firmly and reduce handling until it settles
- Whole strip fighting the surface: Recheck whether the substrate is too textured, dirty, or curved for the decal
Most installation trouble traces back to three root causes. Dirty surface, too much tension, or not enough pressure. Fix those, and measuring tape stickers become much more predictable.
If you want a decal that's built for clean installation and long-term outdoor use, take a look at Custom Sticker Shop. They make American-made vinyl decals and automotive graphics in Topeka, Kansas, using professional-grade Oracal vinyl rated for up to 7 years outdoors, with pre-spaced and transfer-taped designs that make application easier on cars, trucks, windows, and work surfaces.